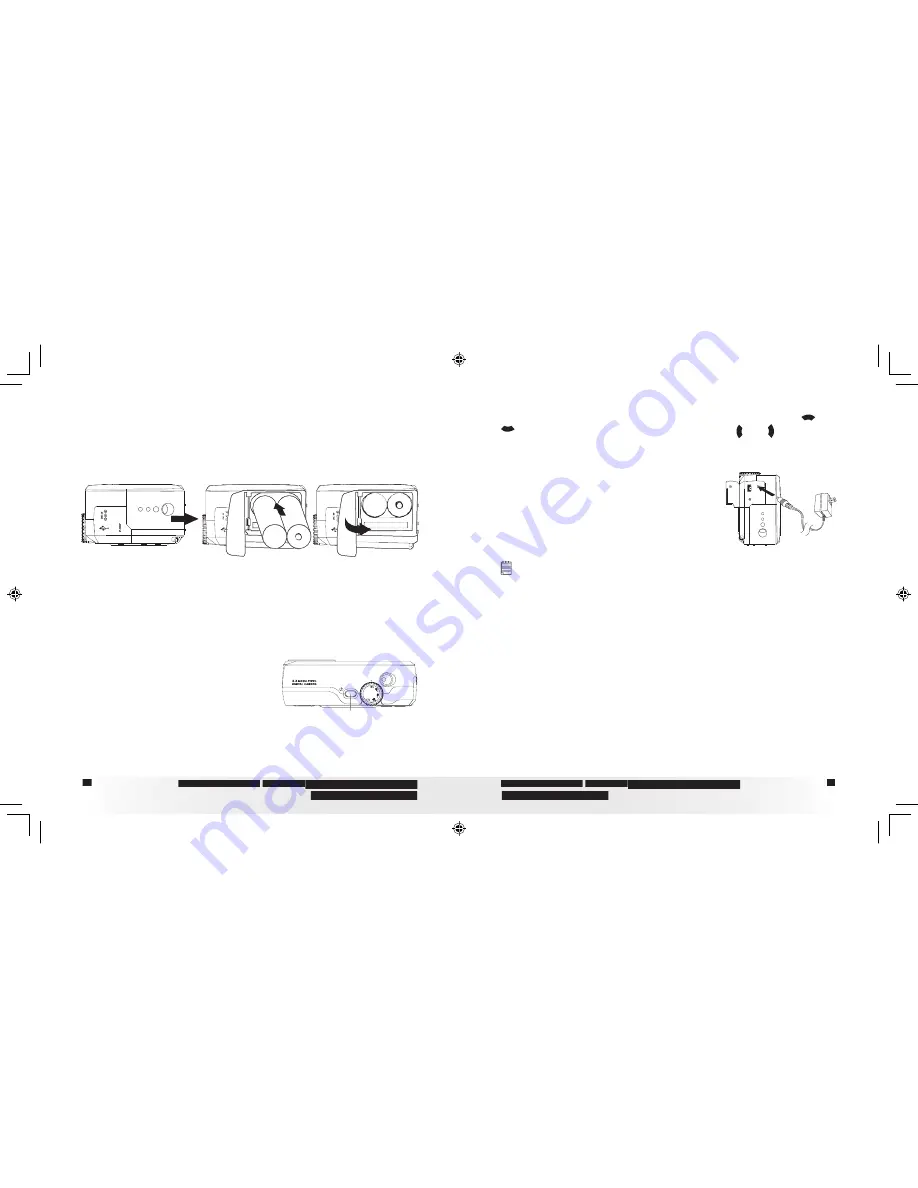
• Installing the Batteries
2 x AA batteries are supplied with the product.
1. Open the camera battery door by pushing it outwards as illustrated.
2. Insert the batteries as shown, ensuring you follow the +/- signs
correctly.
3. Close the battery door by pressing it downwards and then slide it
towards the camera to lock.
+
-
+
-
You can use both 2 X AA batteries and an AC adaptor (DC 3V, 1.5A,
center positive (not included) ) to supply power for the camera. We
highly recommend the user to use 1800mAh NiMH rechargeable or
Lithium AA batteries.
• Turning the Camera On and Off and Setting the Date and Time
Press and hold the Power button until the
green LED is fl ashing. It takes about three
seconds to turn on the camera. The zoom
lens will extend when you turn on the
camera under Auto/Manual/Video mode.
Press the Power button again to turn off
the camera, the zoom lens will retract.
Power button
The fi rst time the camera is turned on, it will directly enter the interface
for setting the Current Date and Time. Please refer to
Set the current date
and time
on page 14 for further detail.
• How to Navigate Menus
Use the 4-way control to select on-screen menu items. Press
and
to scroll up and down through menus. Press and to scroll left
and right.
• Connecting the AC Adaptor (not included)
Turn off the camera before connecting or
disconnecting the Adaptor. Connect the
adaptor as shown to power the camera
from a household power outlet. The camera
automatically switches over to AC adaptor
powered operation when AC adaptor is
connected.
IMPORTANT!
• Only use DC 3V output adaptor (See page 56).
• We recommend the user to use AC adaptor to power the camera whenever
connected to a computer.
PDC 3350 US UM .indd
2/18/03, 10:57 AM
10-11


