background image


28


DVD Playback (continued) 


Playback Operation 

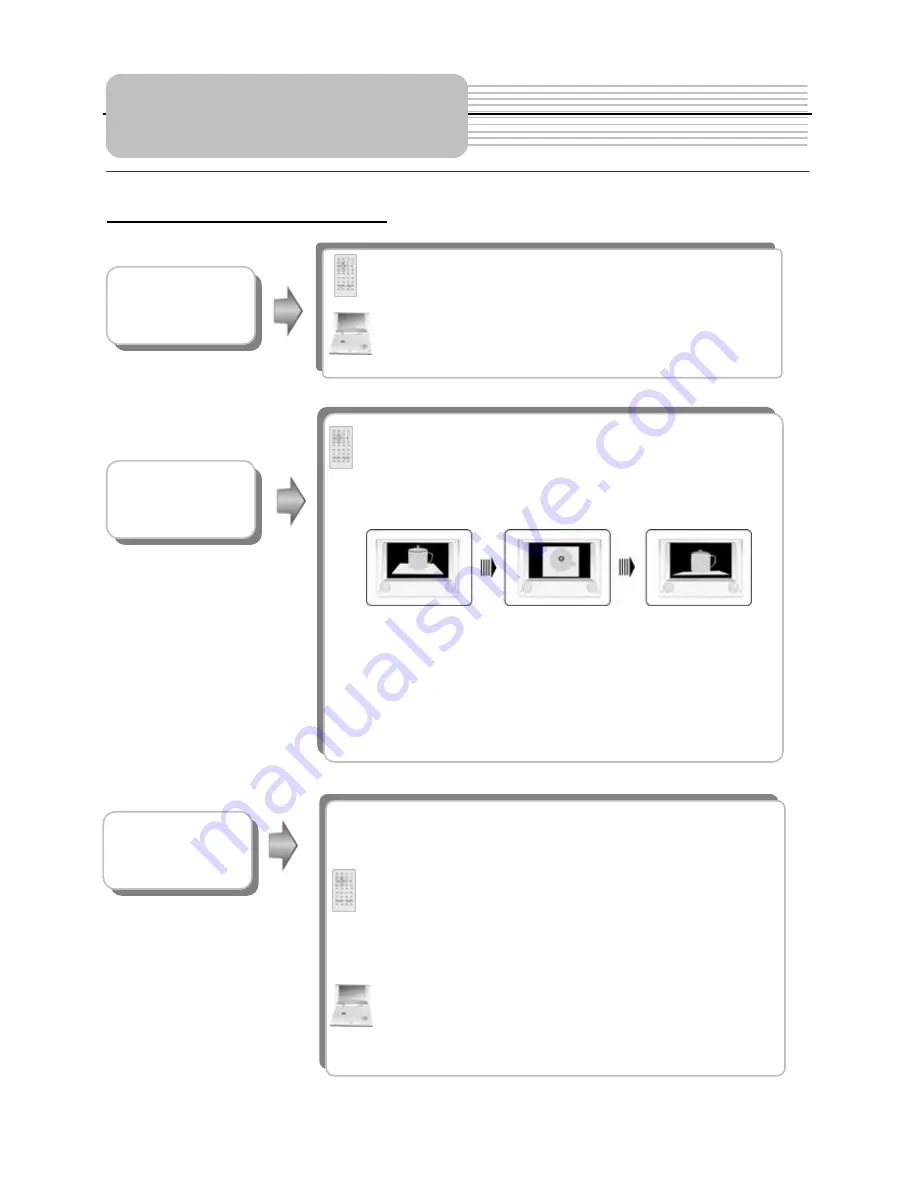
 Press ANGLE button to play the disc in multi-angle. 

Multi-angle means that a scene is shot from different 

angle so that audience can watch from any angle, like 

the drawings below: 


If there are multiple angles in a scene, you can use 

the ANGLE button to select the angle you like to 

enjoy. Press the ANGLE button repeatedly to view 

different angle. 

NOTE: This function is only available for the DVD disc 

that coded with multi-angle

.


ANGLE 
button 

SLOW 
button 

Press SLOW button to play the disc slow forward 

and slow rewind as following: s.f.1/2 – s.f.1/4 – 

s.f.1/8 – s.f.1/16 – s.r.1/2 - s.r.1/4 - s.r.1/8 - s.r.1/16 

(s.f.:slow forward, s.r.: slow rewind).Press PLAY or 

(on the front panel) to resume normal playback. 

TITLE 
button 

  In general, the content of a DVD disc can be divided 

into several titles, and also there are several menus in 

a title.   

Press TITLE button during playback. The title menu 

will appear on the screen. Press direction buttons 

 or press 0-9 number buttons to select the 

title or disc menu item you want to watch, then press 

ENTER button to confirm. 


Press TITLE button during playback. The title menu 

will appear on the screen. Press direction buttons 

 to select the title or disc menu item you 

want to watch, and then press ENT button to 

confirm. 

Summary of Contents for PDM-1035

Page 1: ...1 9 Portable DVD Player PDM 1035 Operation Manual 20050329 ...

Page 2: ...peration Prevent objects and liquid from contacting the player In order to avoid the risk of electric shock and fire caused by short circuits do not insert objects into the player and do not spill liquids on the player Do not place objects such as vases filled with liquids on the apparatus Do not use the product where it will get wet This could cause the product to start smoking or ignite or cause...

Page 3: ... of vision either in front or behind or in a place where it will interfere with the driver s ability to drive the car This may lead to traffic accidents and or injury Follow the instructions to connect the product to other electrical equipments To prevent damage to the unit be sure to follow the connection diagrams Do not connect the power connector to the unit until all other connections are comp...

Page 4: ...lightning storms Never operate the product during lightning storms as this could cause the product to malfunction Do not operate the product if there is visible damage to the product If damage occurs immediately stop using the product and contact the store from which you purchased your product Continuing to use the product in that condition could cause accidents fire or electrical shock The driver...

Page 5: ...t or work on the cords Do not place the cords near heating apparatus or put heavy objects on the cords Do not play discs in the wrong or damaged format For instance if you add the cda extension to a file that is not formatted as a CD file a loud noise may be heard through the speakers possibly damaging them and hurting your eardrums Do not swing from the product or pull it For instance if you add ...

Page 6: ... dry place avoid direct sunlight and moisture Caution Unplug the product when not used for a long period of time Copyright Protection This product incorporates copyright protection technology that is protected by U S patents and other intellectual property rights Use of this copyright protection technology must be authorized by Macrovision and is intended for home and other limited viewing uses on...

Page 7: ...Display language Compatibility Compatible with DVD CD and Picture CD disks Particular Performance Multi speed fast forward fast backward and slow forward slow backward Search by Time Search for a certain track of a disk by selected time Last Memory Playback Memorizes the stopped playback track and continues playing the disk from this spot when power is applied to the unit Special Functions Support...

Page 8: ...tery 1 Carrying Case 1 DC Adapter Car Adapter 1 Rechargeable Battery Pack 1 Operation Manual 1 Power Supply Cord with AC Adapter 1 Headphone 2 Audio Video Cable 1 NOTE Accessories and their parts numbers are subject to change without prior notice Accessories ...

Page 9: ...ls View of Main Unit Bottom Power Supply Preparation Rechargeable Battery Notes on Discs Playback Operation Remote Control Battery Installation for RC System Connections Accessories View of Main Unit 1 6 7 9 11 12 13 15 16 18 19 22 23 24 28 30 33 40 42 43 45 DVD Playback CD Playback Picture CD Playback System Setup ...

Page 10: ...rection button and button for search disc backward direction button and button for search disc forward 4 direction button and button for play the previous track direction button and button for play the next track 5 ENT button Press to access playback or confirm your selection View of Unit ...

Page 11: ...utton Press to open the disc tray cover 13 Remote Control Sensor 14 Power indicator Lights green when the player is on work turn red when the player is in standby mode 15 Charge indicator Lights red when the battery is charged turn green when the charge is over 16 A B Repeat button A B Press to play a certain selected segment repeatedly Press to adjust the value of brightness contrast and color 17...

Page 12: ... or audio source 4 VIDEO input output Jack For connecting to an external monitor or video source 5 AV IN DVD Switch Switch to AV IN to input the external AV source switch to DVD to playback the disc 6 DC 9 5V IN Jack For connecting to power supply including Car Adapter Left Side View 1 Headphone Jack When headphones are plugged into the unit the speakers will automatically turn off 2 POWER ON OFF ...

Page 13: ...electrical connection interface that enables the portable DVD to effectively serve as a desktop DVD It is integrated with connectors for peripheral devices to eliminate complicated connections and save valuable space around the unit With a Docking Station you can enjoy the expansion possibilities of desktop DVD with the portability of a portable DVD 2 Rechargeable Battery Contacts For connecting t...

Page 14: ...on again to exit from the information display 3 TITLE button Press to display title menu if it exits in the disc 4 Direction button Press to select different options 5 ENTER button Press to access playback or confirm your selection 6 SETUP button Press to enter the player s system setup 7 0 9 number buttons Press to select an option in the menu Remote Control ...

Page 15: ...ion buttons to move around the screen 14 REP button Press to repeat a chapter track title or the entire disc 15 MENU button Display the actual DVD Disc Menu on screen in play mode 16 PAUSE button Press to pause playback 17 STOP button Press to stop playback Then press the PLAY button to resume playback from the stopped spot Press this button twice to stop playback completely 18 PLAY button Press t...

Page 16: ...Type CR2025 3V Battery Life Approximately 1 year under normal use at room temperature Caution 1 Improper use of the battery may cause overheating and explosion or ignition which can result in an injury or a fire Battery leakage may damage the remote control 2 Do not expose the remote control unit to direct sunlight 3 Do not recharge disassemble deform or heat the battery 4 Do not put the battery i...

Page 17: ...serve the color coding when connecting audio and video cables Connecting to TV Audio Video connections Follow the drawings below to connect the DVD player to TV s Audio Video inputs with Audio Video cables Connecting to Amplifier Refer to your Audio equipment s manual before connection Follow the drawings below to connect the DVD player to AV amplifier System Connections ...

Page 18: ...CR etc After connecting switch the DVD AV IN to AV IN NOTE Noise may occur in speakers when there is an external audio signal input while playing a DVD disc Unplug the audio cord to clear the noise Connecting to Headphones Connect headphones to the headphone jack on each side of the unit When a headphone is connected the speakers will automatically turn off System Connections ...

Page 19: ... video software while driving a vehicle Place the unit in a proper position for viewing Detach battery pack when using the AC or car adapter as power source Disconnect the player from the Car Adapter when starting the vehicle Power Supply Preparation 1 Connect AC adapter to the right side of the DVD player in the jack marked DC 9 5V IN as shown on the right 2 Plug the two prong end of the power co...

Page 20: ...in fire or water Do not expose the battery to high temperatures or store in hot sunny places Maintain well ventilated conditions around the product to avoid overheating Don t put the product on a bed sofa or anything that may block ventilation to the product Do not short the battery terminals Do not open the battery Detach the battery after charging is complete When charging the battery pack the c...

Page 21: ...he battery pack with holes on the player and push the battery pack into the DVD player 4 The battery pack will click into place Charging the Battery Pack The battery pack must be attached to the DVD player to charge it using the supplied AC or car power adapter 1 Attach the battery pack to the DVD player as shown above 2 Plug the supplied AC Power Adapter into the player s power jack marked DC 9 5...

Page 22: ... consuming some power in STANDBY mode This will eventually discharge the battery Make sure the power is turned OFF and the AC or car adapter is disconnected before detaching the Battery Pack To detach the Battery Pack 1 Push the battery pack latch toward the rear of the player and slide the rechargeable battery from the main unit see drawings below 2 Store the rechargeable battery in a safe place ...

Page 23: ...cs Cleaning When loading or removing discs do not touch their playing surfaces Handle discs as shown in the right figure Fingerprints or stains on the disc may affect the quality of sound and picture To clean your discs use a soft clean cloth to wipe them If necessary moisten a soft cloth with diluted neutral detergent to remove heave dirt or fingerprints Do not wipe in a circular direction as the...

Page 24: ...n on the unit to open the disc tray cover put a disc in the disc tray with printed side facing up Close the disc cover See below 4 The player will search disc and play it automatically 5 Adjust the volume with the VOLUME control on the right panel to the desired level 6 To turn the player off switch the POWER ON OFF on the left panel to OFF Basic Operation Playback Operation Press MODE button to c...

Page 25: ...e segment that you want to play repeatedly Press once to select the beginning point A press again to select the ending point B and play the segment repeatedly Press A B button again to cancel the repeat segment This function is not available for JPEG discs PAUSE Press PAUSE button to pause during play and press it again to resume normal play Press button to pause during play and press it again to ...

Page 26: ...he title or disc menu item you wish to play and press ENTER button or ENT on the front panel to confirm Or press 0 9 buttons to select the item you prefer directly then press ENTER button or ENT button on the front panel to confirm NOTE In root menu press MENU again to resume the normal playback Menu function is only available for DVD discs buttons Press button once to go to the beginning of curre...

Page 27: ...on REP button Press REP button to repeat a Chapter Title or All in sequence Press GOTO button to select desired disc starting time track or title GOTO button Press buttons to move the yellow light bar to the item you prefer then press ENTER button or ENT button or on the front panel to confirm The corresponding item is highlighted just for Title Chapter Angle Tt Time Total Time Ch Time Chapter Tim...

Page 28: ...forward and slow rewind as following s f 1 2 s f 1 4 s f 1 8 s f 1 16 s r 1 2 s r 1 4 s r 1 8 s r 1 16 s f slow forward s r slow rewind Press PLAY or on the front panel to resume normal playback TITLE button In general the content of a DVD disc can be divided into several titles and also there are several menus in a title Press TITLE button during playback The title menu will appear on the screen ...

Page 29: ...ng then press PLAY button to resume normal playback from the place where STOP button is pressed Press it twice repeatedly to stop playback completely During playback press button once to stop playing then press button to resume normal playback from the place where button is pressed Press it twice repeatedly to stop playback completely buttons Press button to play fast forward Press it repeatedly t...

Page 30: ...ote refers to the playing track number N refers to the total track numbers of the disc INFO button AUDIO button Press AUDIO button to select desired sound effect Press it repeatedly the display will be as follows Mono Left Mono Right Mix Mono Stereo Keep pressing for about 2 seconds to remove display from screen Playback Operation ...

Page 31: ...n on both remote control and front panel to confirm your selection 4 Press button to return to last folder or directory Or move the yellow light bar to then press ENTER button on the remote control or button on both remote control and front panel to confirm buttons Press PREV button to go to the previous file Press NEXT button to go to the next file INFO button Press INFO button for detailed infor...

Page 32: ...e refers to repeat current file Repeat All refers to repeat all files of current folder according to original order Repeat Off refers to cancel repeat This function is only available under normal play mode it doesn t work under repeat status REP button During playback press GOTO button to select the desired file Press 0 9 buttons directly to select according to your preference Press ENTER button t...

Page 33: ...direction buttons to rotate the picture Press button to rotate the current picture clockwise Press button to rotate the current picture anti clockwise Press button to rotate the current picture flip horizontal Press button to rotate the current picture flip vertical Picture Rotate ...

Page 34: ... time during setting 3 Press or direction buttons on the front panel to select a sub menu to set up 4 Press or button on the front panel to select the item that you want to set up in the sub menu The items included in this sub menu are shown as the left 1 TV Display This item is used to set TV display mode Press or button to highlight this item Press ENTER or button to enter the setup of this item...

Page 35: ...Press to exit from this item System Setup 4 Screen Saver This item is used to turn the screen saver on or off Press or button to highlight this item Press ENTER or to enter the setup of this item The default setting of this item is on Press or button to choose on or off Press ENTER to confirm your selection Press to exit from this item 5 Last Memory This item is used to set last memory state Note ...

Page 36: ... Dolby The function of stereo is to output stereo signal Press or button to choose the proper one Press ENTER to confirm your selection Press to exit from this item The items included in this sub menu are shown as the left 1 Dual Mono This item is used to set the output mode of channel Press or button to highlight this item Press ENTER or to enter the setup of this item It includes stereo L Mono R...

Page 37: ...menu are shown as the left 1 Sharpness This item is used to adjust the sharpness of the Screen Press or button to highlight this item Press ENTER or to enter the setup of this item It included High Medium and Low Low by default Press or button to choose the proper one Press ENTER to confirm your selection Press to exit from this item 2 Brightness This item is used to adjust brightness level of the...

Page 38: ...tion The items included in this sub menu are Shown as the left Note This sub menu can only appears when there is no disc in the DVD drive 1 Audio This item is used to set the audio output language Press or button to highlight this item Press ENT or to enter the setup of this item The available languages are English French Spanish Chinese Japanese Korean Russian and Thai English by default Press or...

Page 39: ...ess to exit from this item 3 Disc Menu This item is used to set the language of subtitle Press or button to highlight this item Press ENTER or to enter the setup of this item The available languages are English French Spanish Chinese Japanese Korean Russian and Thai English by default Press or button to choose the preferred Language Press ENTER to confirm your selection Press to exit from this ite...

Page 40: ... is intended for viewing only from the rear seats Do not install or use this product in the front seat of a vehicle 3 To reduce the chance of injury in case of collision or a sudden stop Always keep the DVD player strapped securely inside its case while the vehicle is moving Always keep the DVD player Case securely attached inside the vehicle while the vehicle is moving Your DVD player can be secu...

Page 41: ...r part of the case C 5 Tighten up the straps until secured To suspend the DVD Player Case between 2 bucket seats Photo 3 1 Unzip the main compartment that holds the player locate the set of rings tucked inside the top edge of the case A 2 Locate the 2 straps with hooks on each end 3 Hook one end of each strap to the rings at the top of the case A 4 Wrap each strap around the headrest or seat hook ...

Page 42: ...t the left and right sides Title Chapter DVD DVDs are divided into some large sections titles or some small sections chapters Each section is numbered these numbers are called Title number or Chapter number Title 1 Title 2 Chapter1 Chapter 1 Chapter2 Track CD CDs are divided into some sections tracks Each section is numbered these numbers are called Track number Track 1 Track 2 Track 3 JPEG JPEG i...

Page 43: ...ive The disc may not be put in with the right way Put the disc in with the label side up The disc may be dirty or warped Clean or change the disc The player s region code may not as the same as the region code of DVD disc Make sure the player s region code is the same as the region code of DVD disc There may be water on the lens Remove the disc and keep the player being powered off for at least tw...

Page 44: ...correct video mode The system connection may be not correct Connect the system correctly The unit may be not in AV out mode Switch AV tab on the bottom of the unit to out Poor AV performance The disc may be dirty or warped Clean or change the disc The remote control does not work There may be some obstructions between the remote control and the player Remove the obstruction between the remote cont...

Page 45: ...amic Range 80dB 1kHz Audio Out Analog Audio Out Out level 1 5V 0 2 1 0 Load 10kΩ Video Out Video Out Out Level 1V p p 0 2 Load 75Ω Unbalanced Negative Power AC 100 240V 50 60Hz Power Consumption 25W Dimensions 268mmX191mmX31mm L W D Weight Approximate 1 23 kg Specifications Manufactured under license from Dolby Laboratories Dolby and the double D symbol are trademarks of Dolby Laboratories Confide...

Page 46: ...aroidelectronics com or in the US call 1 866 289 5168 in Canada call 1 866 301 7922 and in Mexico call 01 800 400 2443 Polaroid is a registered trademark of Polaroid Corporation of Waltham MA USA and licensed for use on the PDM 1035 to Petters Consumer Brands LLC ...

Reviews: