background image

2

Warnings and Precautions

Warnings and Precautions

To reduce the risk of fi re or electric shock, do not expose this equipment to rain or moisture.

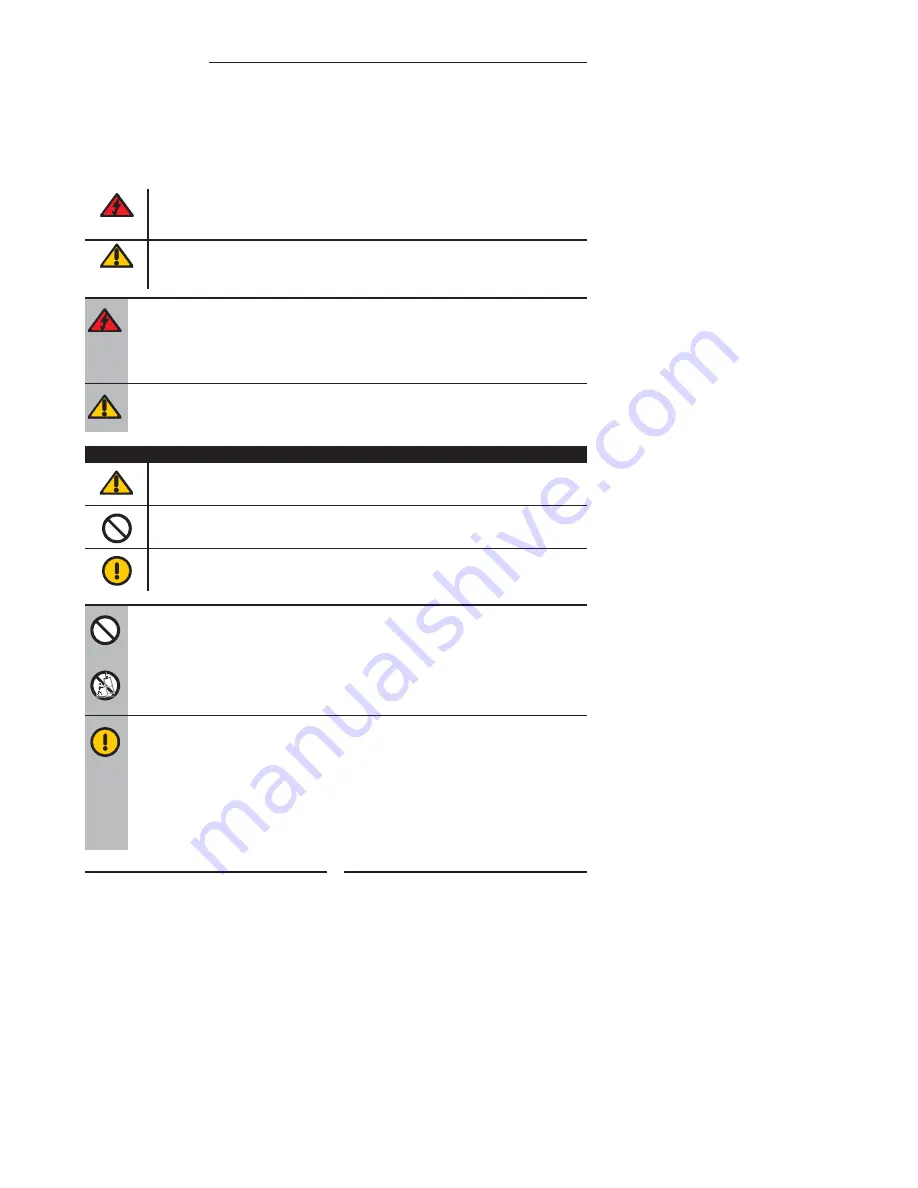
This symbol is intended to alert the user to avoid the risk of electric shock. 
This equipment must not be disassembled by anyone except qualifi ed service personnel.

This symbol is intended to alert the user to the presence of important operating and 
maintenance instructions in the literature accompanying the appliance.

  TO REDUCE THE RISK OF ELECTRIC SHOCK,

  DO NOT REMOVE COVER (OR BACK).

  NO USER-SERVICEABLE PARTS INSIDE.

  REFER SERVICING TO QUALIFIED SERVICE PERSONNEL.

Use of controls, adjustments or performance of procedures other than those specifi ed herein 
may result in hazardous radiation exposure.

CAUTION

Important Safety Instructions

To prevent any injuries, the following safety precautions should be observed in the installation, use, 
servicing and maintenance of this equipment.
Before operating this equipment, please read this manual completely, and keep it nearby for future 
reference.

WARNING

  Do not place the equipment on any uneven or unstable carts, stands, tables, shelves etc. 

The equipment may fall, causing serious injury to children or adults and serious damage 
to the equipment itself.

  Use only a cart or stand recommended by the manufacturer.  This equipment and 

recommended cart or stand should be handled with care. Quick stops, excessive force, 
and uneven surfaces may cause the equipment and cart/stand to overturn.

  Do not disable the 3-wire grounding type plug. The grounding pin on the 3-prong plug is 

an important feature. Removing the grounding pin will increase the risk of damaging the 
equipment.

  If you can not fi t the plug into the electrical outlet, contact an electrician to install a 

grounding outlet.

  Always operate this equipment from the type of power source indicated on the rear of the 

serial/model plate.

This symbol indicates caution points.

This symbol indicates actions that should not be done.

This symbol indicates actions that must be performed.

Summary of Contents for FLU-1911S

Page 1: ...19 48cm HD Ready LCD TV FLU 1911S 20060803 ...

Page 2: ...nce of this equipment Before operating this equipment please read this manual completely and keep it nearby for future reference WARNING Do not place the equipment on any uneven or unstable carts stands tables shelves etc The equipment may fall causing serious injury to children or adults and serious damage to the equipment itself Use only a cart or stand recommended by the manufacturer This equip...

Page 3: ...and removing the covers may expose you to dangerous voltage or other hazards and may void your warranty Refer service to qualified personnel Do not place or drop any other objects on top Do not insert anything into the ventilation holes of your equipment Inserting any metal or flammable objects may result to fire or electric shock Do not place the equipment on uneven or unstable carts stands table...

Page 4: ...na is connected follow the precautions below EXAMPLE OF OUTDOOR ANTENNA GROUNDING An outdoor antenna should not be located in any area where it could come in contact with overhead power lines or any other electric light or power circuits When installing an outdoor antenna system extreme caution should be taken to prevent contact with power lines Direct contact with power lines may be fatal and sho...

Page 5: ...9 Your Remote Control 11 Chapter 2 Installing the LCD TV Connecting a TV Cable or an Antenna 13 Connecting an AV Device with Component YPbPr YCbCr Connector 17 Connecting an AV Device with SCART Connector 18 Connecting a PC 19 Chapter 3 Using The Features Operating the Menu 20 Customizing the VIDEO Settings 21 Customizing the AUDIO Settings 23 Customizing the SETUP Settings 24 Troubleshooting 26 S...

Page 6: ...tions Multimedia Enhanced Speakers True multimedia sound without external speaker The LCD TV features two built in 3w stereo speakers integrated into the stylish design High Contrast Ratio Colors will appear vibrant and lifelike producing superior image quality Wide Viewing Angle The 16 10 1440x900 widescreen gives wider view angles You can view DVD films in native wide format for an enhanced mult...

Page 7: ...listed on your warranty card LCD TV Make sure all of the following contents are included Power Cord These items are all you need to set up and operate the LCD TV in its basic configuration Package Contents Remote Control AAA Batteries x 2 User Guide OK POWER EXIT MENU S MODE P MODE PC SLEEP P SIZE 1 2 3 4 5 6 7 8 9 JUMP 0 ENT VOL CH INFO INPUT Component Cable Quick Guide AUDIO Cable ...

Page 8: ...rt the 2 batteries supplied in remote control Connect to another external A V device refer to page17 18 Setting Your LCD TV Step1 Slide the back cover up to open the battery compartment of the remote control Do not use caustic cleaners porcelain stainless steel toilet or oven cleaner etc on the remote as it may suffer damage Step2 Insert two AAA size batteries Make sure to match the and ends of th...

Page 9: ...when in the OSD mode Your LCD TV LED The LED light indicates when the LCD TV is activated IR Infrared Receiver Turns the LCD TV on and into standby mode Front Left Side View and Controls CH Scans up and down through channels Selects menu item when in the OSD mode I INPUT Chooses from different input signal sources MENU Press once to display the OSD on screen display press again to turn the OSD off...

Page 10: ...uipment with component YPbPr YCbCr video and audio output jacks AC IN Connects to the AC power cord SCART IN Connects to a piece of AV equipment with a SCART socket The SCART interface offers multiple signals COMPOSITE RGB with audio input on external video equipment VGA PC AUDIO IN Connects the PC or other AV equipment with VGA and AUDIO output jacks UHF VHF IN Connects RF input from VHF UHF ante...

Page 11: ... mode P SIZE Selects from the following mode 16 9 4 3 in TV SCART COMPONENT mode 0 9 ENT Select and switch to a channel by using 0 9 buttons and ENT or wait three seconds after entering a channel JUMP Returns to previously selected channel INFO Pressing once displays a variety of information such as the current channel and the input source VOL Increases and decreases volume CH Change channel up an...

Page 12: ... OK selects individual menu items OK confirms option settings S MODE Selects sound effect POP Rock Live Custom P MODE Selects picture mode Normal Vivid Sports Nature Accesses the TELETEXT items or corresponding pages in TELETEXT mode Displays the main index in TELETEXT mode Reveals hidden information such as the answer to a quiz in TELETEXT mode Displays the top bottom or all of page to easily rea...

Page 13: ... white TV reception For this reason a good quality outdoor antenna is strongly recommended The following is a brief explanation of the type of connection that is provided with the various antenna systems 75 ohm coaxial cable round PAL type connector 300 ohm twin lead cable flat A 75 ohm system is generally a round cable not included with PAL type connector that can easily be attached to a terminal...

Page 14: ...axial cable UHF Antenna VHF Antenna Combiner not included A Combination VHF UHF antenna 300 ohm twin lead cable 75 ohm coaxial cable VHF UHF Antenna VHF UHF Antenna 300 75 ohm adapter not included B Separate VHF and or UHF antennas Use one of the following two diagrams when connecting an outdoor antenna ...

Page 15: ...s Setting the RF switch to position B allows viewing of all scrambled channels via the converter descrambler by using the converter channel keys A 75 ohm coaxial cable connector is built into the set for easy hookup When connecting the 75 ohm coaxial cable to the set connect the 75 ohm cable into the ANT terminal Some cable TV companies offer premium pay channels Since the signals of these premium...

Page 16: ...e to turn on the LCD TV Always disconnect the LCD TV from the main voltage when the LCD TV will not be used for a long period of time The button on the front panel is only used for switching the LCD TV into standby it does not disconnect the device from the main voltage To completely disconnect the main voltage please remove the power plug from the socket Press the INPUT button repeatedly on the r...

Page 17: ...io jacks to the LCD TV s audio input jacks Connect all AC power sources before turning on the power switch of the LCD TV or other connected equipment Press the button on the remote to turn on the LCD TV To view the A V device s with component input press the Input button on the remote to select COMPONENT PLAY STATION D VD PLAYER Not all A V device have the ability to connect to a TV Please check y...

Page 18: ...nal A V device s SCART socket to the SCART socket Connect all AC power sources before turning on the power switch of the LCD TV or other connected equipment Press the button on the remote to turn on the LCD TV To view the A V device s with component input press the Input button on the remote to select SCART D VD PLAYER The SCART socket offers a multi signal interface including C Video input RGB in...

Page 19: ...the LCD TV s VGA input jack Use an audio cable to connect the PC s audio output jacks to LCD TV s VGA audio input Connect all AC power sources before turning on the power switch of the LCD TV or other connected equipment Press the button on the remote to turn on the LCD TV To view the A V device s with component input press the Input button on the remote to select VGA VGA Cable AUDIO Cable PC ...

Page 20: ...ects Video Audio Setup Color Setup Sharpness Saturation Contrast Brightness PIC Mode Video Audio Setup SoundMode Mute Balance Treble Bass Volume SETUP MENU Allows you to set up a variety of features Language factory reset channel sleep timer Video Audio Setup Reset Sleep Timer Time Out Language Channel Use the buttons to select an option of the sub menu While in adjustment mode and use the buttons...

Page 21: ...tness of the picture Contrast Controls the difference between the brightest and darkest regions of the picture Saturation Controls the color intensity Sharpness Increase this setting to see crisp edges in the picture decrease it for soft edges Color Setup Adjusts color components independently to achieve a warm or cool effect Cool Warm User Customizing the VIDEO Settings Video Audio Setup Color Se...

Page 22: ...green and blue color component levels independently Warm Increases red tint Cool Increases blue tint VGA Press to dispaly the VGA selection List Auto setup Position Phase H Size Video Audio Setup Color Setup Sharpness Saturation Contrast Brightness PIC Mode VGA Phase Position VGA Auto Setup H Size Auto Setup Press to select Yes automatically adjust the display settings to optimize performance base...

Page 23: ... menu The AUDIO menu includes the following options Volume Controls the volume Bass Controls the relative intensity of lower pitched sounds Treble Controls the relative intensity of higher pitched sounds Balance Adjusts the relative volume of the speakers in a multiple speaker system Mute Allows you to mutes and restore your LCD TV sound Sound Effect Allows selection of an audio enhancement techni...

Page 24: ...ap Channel Name Fine Turn Add Erase Reset Customizing the SETUP Settings Reset Add Erase Fine Turn Channel Name Channel Swap Tv Setup Auto Search Auto Search Press to select Yes Auto Search automatically creates a list of receivable channels the list cannot be created if interrupted Tv Setup Select a TV system from the country Auto Pal SECAM Channel Swap Changes the TV station channel location Cha...

Page 25: ...ISH DEUTSCH FRANCAIS ESPANOL ITALIANO PORTUGUESE POLAND NETHERLAND Timer out Allows selection of the display time of the on screen menu 5 15 20 25 30 seconds or off Sleep Timer Allows selection of the time that elapses before the TV shuts off automatically Off 15 30 45 60 90 120 minutes Reset Restores factory settings ...

Page 26: ... Replace the batteries No picture no sound Check the interface cable between TV and antenna cable TV Press the button on the remote Press the INPUT button on the remote repeatedly to select the connected video sources Picture OK poor sound Sound may be muted Press the button on the remote Press the VOL button to increase the volume TROUBLESHOOTING Poor picture sound OK Check the interface cable be...

Page 27: ...8cm TFT LCD Brightness 400 Contrast Ratio 500 1 Max Resolution 1440x900 TV System PAL I BG DK SECAM LL Input Connector YPbPr AUDIO L R 1 VGA AUDIO L R 1 SCART 1 HEADPHONE 1 Power Source AC100 240V 50 60HZ 1 2A Power Consumption 42 W standby 3 W Dimension W X D X H 573 x 171 x 371 8 mm WEIGHT 12 3 LB ...

Page 28: ......

Reviews: