


Cardox Techical Manual
Page
17
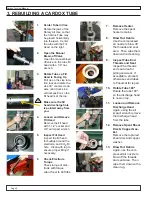
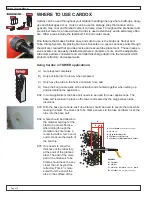
9.04 If a tube has failed to activate special care should be taken when dismounting the
heads. Use the air impact wrench to start loosening the fill head. DO NOT SPIN THE
HEAD LOOSE. Remove the wrench and try to loosen the fill head. If it is hard to turn
by hand note that there is still pressure inside the tube. STOP removing the fill head.
Turn the tube over and use the air impact wrench to loosen the discharge head.
Do not attempt to impact the discharge head off the tube. Use a hand wrench or a
screwdriver in the discharge openings and slowly unscrew the discharge head. While
doing this use a metal object as a hammer and tap on that end of the tube. Watch
the position of your face and be aware that you are going to eventually dislodge the
copper washer and the gas inside the tube will start escaping. When the gas starts
escaping stop un- screwing the discharge head and move from the tube until all the
gas escapes. When the pressure is gone continue to dismantle the tube. When this
fill head is removed inspect the inside to try to see what blocked the bleeder screw
opening. Reassemble the tube leaving out the heater. Fill it with CO2 and then open
the bleeder screw to verify that it can be emptied. If all the gas is properly relieved
the fill head is safe to use. If not return it to Pneumat Systems, Inc. for the proper
repairs.
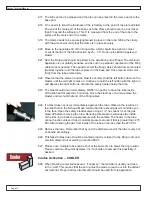
9.05 Make it a goal to place the tube for activation, activate it successfully, and remove the
tube in under 5 minutes in hot applications.
9.06 Be aware that the discharge head will be very hot when removed from the base port.
9.07 Never use electricians Ohmmeter or an unapproved multimeter for continuity checks.
Only use a blaster approved Ohmmeter.
9.08 Do not stand in line with the tube when rebuilding it.
9.09 Only hook the blaster to the firing cables at the time the tube is set and activation is
ready to be made.
9.10 Keep the blaster connection end of the firing cables shunted (shorted) together when
not in use.
9.11 Only use an approved blaster instrument for activation.
9.12 Never activate an unsecured tube. Secure in a base port or with a come-along.
9.13 Learn to follow all steps quickly and efficiently and misfires will be non-existent and
the system will function safely.
9.14 Every 2 years the Cardox tube, Activating Head and Discharge Head should be sent
back to Pneumat Systems, Inc. for a safety review. The exposure to heat stresses
the tubes over time. Pneumat Systems Inc. has an independent lab do all the metal-
lurgical tests. Pneumat Systems Inc. verifies that there is a proper fit of the compo
-
nents, and the approved tube is returned for use.
Summary of Contents for Cardox CO2
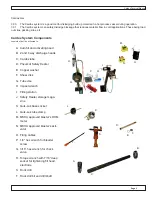
Page 1: ...A B C D 8 7 6 TECHNICAL MANUAL 110 Mohr Drive Mankato MN 56001 1 800 458 9446 www pneumat com ...
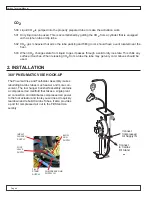
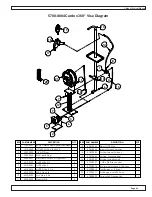
Page 22: ...Cardox Techical Manual Page 22 5780 0005 Cardox Fill Stand Assembly Parts List ...
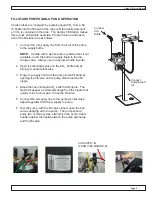
Page 25: ...Cardox Techical Manual Page 25 5730 0003 Auto Fill Activating Head w Eyebolt Parts List ...
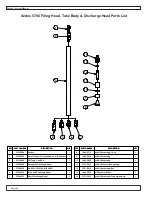
Page 27: ...Cardox Techical Manual Page 27 Series 3700 Firing Head Tube Body Discharge Head Parts List ...
Page 28: ...Cardox Techical Manual Page 28 Series 5700 Firing Head Tube Body Discharge Head Parts List ...


