Section 5. Maintenance and Troubleshooting
58
PX-750 Installation and Users Manual
Changing the PX-750A Front-Panel Color
By using the replacement bezel and disc tray face plate you can change
the PX-750A’s front-panel color in a few moments.
CAUTION
: Avoid creating static electricity. Be sure to wear a grounding
strap when performing this procedure.
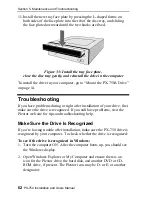
To install a different bezel and disc tray face plate:
1. If the PX-750A is already installed in a computer, turn the computer
power OFF and open the computer case.
2. If necessary, remove cables from the rear of the PX-750A and
remove the drive. (You may be able to gain access to the necessary
parts of the drive by sliding it forward without removing any cables.)
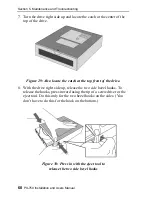
3. Use the emergency eject tool or a paper clip to open the tray drawer
as illustrated in Figure 25 above.
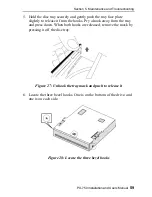
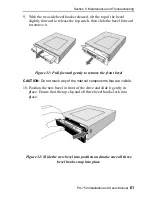
4. Turn the drive upside down (or work from the bottom) and locate the
two hooks at the bottom of the disc tray face plate. The hooks are
toward the left and right edges of the tray mask.
Figure 26: Locate the two disc tray face plate hooks

