26
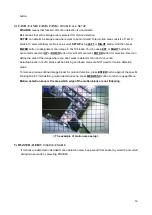
MOTION:
it can be captured during the time duration when you set in ARCHIVE TIME.
2) ARCHIVE TIME:
1 to 60 seconds and 30 Minute.
ARCHIVE TIME is a duration which you want to archive in MOTION type.
3) ARCHIVE INFO:
Insert USB memory drive in USB port of DVR front panel. And then enter ARCHIVING
menu. You can see
the information of USB Memory Drive displayed, such as USB memory drive manufacturer, total memory
size, available memory size.
4) ARCHIVE LOG:
NONE / ENTER
Select ENTER to ARCHIVE LOG through USB memory drive by using
LEFT
or
RIGHT
Button. Then press
ENTER
button. All log information including DVR power ON/ OFF, recording time, event time and so on can
be backup through USB Memory drive. After backup log file, user can check the backup log information
using WordPad in computer.
Playback archived video files
Use NetViewer utility to play archived images.
To playback archived image file in USB memory driver, First connect USB memory drive to PC, then execute
Netviewer program.
The procedure of playing archived files:
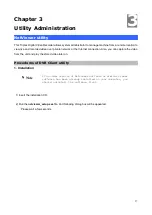
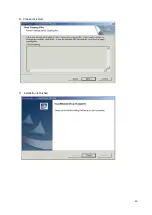
A) Install NetViewer utility and execute the utility after finishing installation.
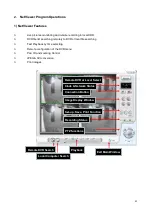
B) Double-click the icon to execute NetViewer utility. Main screen of NetViewer utility will be appeared. (refer
to the next page figure.)
C) Connect USB Memory drive to USB port of computer / notebook
D) Make sure NetViewer is in local searching mode by checking the DVR/LOCAL icon in the upper right site
of NetViewer screen.
D) Search archived files using searching icon of NetViewer utility. And locate the proper file path.
E) Playback the archived file.
ë
Note
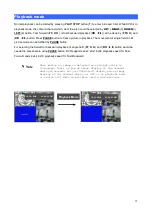
Archiving operation through USB Memory Drive can be executed
only in live mode or playback mode. All working functions
of DVR will stop while using archiving. EX: recording.
ë
Note
Don
’
t keep connecting USB Memory drive in USB port of DVR
after finishing DVR power up. And don
’
t plug out USB Memory
drive when it is in processing. Please plug out USB memory
drive after
“
ARCHIVING
”
LED turn off. When playback
pictures is archived, archived speed is followed by playback
speed.
Summary of Contents for DVR-450
Page 1: ...1 Triplex Digital Video Recorder DVR 450 User s manual...
Page 41: ...38 3 When the following dialog box appears click Next...
Page 43: ...40 6 Please click Next 7 Installation is finished...
Page 52: ...49 5 The saved file can be opened in any computer using any graph editing software...

