background image


31

z


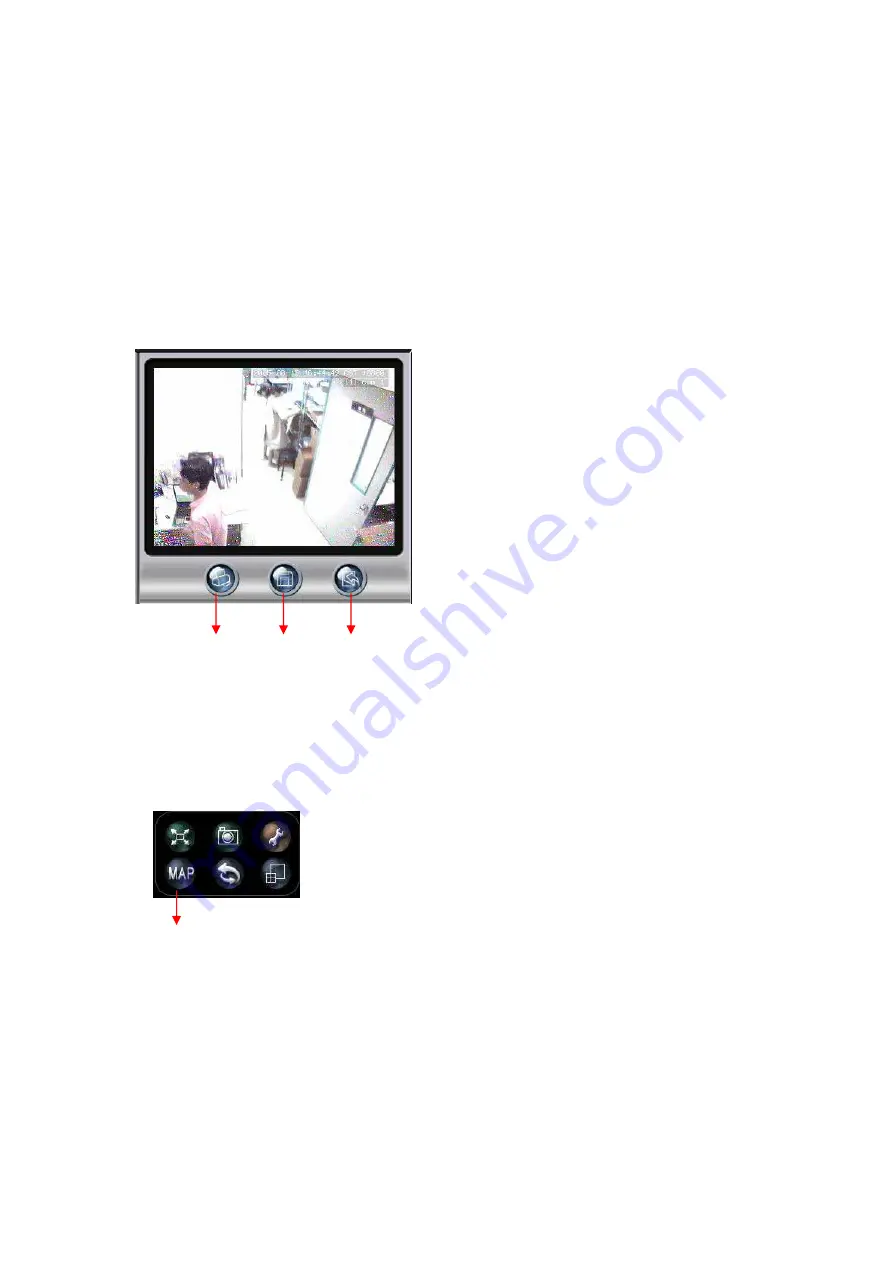
Snapshot 

This function can provide you to capture the image you want and you can 

Print

 the 

image or 

Save

 the image. 


z


Full screen 

Display in full screen. 


z


Zoom  

There are 4 kinds of Zooming mode, 100%, 200%, Wide mode and Fit to Window.   


Print 

Save 

Exit 


4-8 E-MAP 


EMAP 


Before you start to enable the EMAP function in DrView, you need to build up the 

EMaps in EMAP Editor. Click “ Start” on your Windows taskbar, select “ Programs” 

and then find the folder of “ CenterManager200”. In this folder, please click the 

“E-MAP Editor” to execute the editor and it will show the following dialog box.. 

Summary of Contents for DrView

Page 1: ...DVC Remote Utility DrVeiw User s Manual Ver 1 0 ...

Page 2: ...3 4 Import profile 6 3 5 Export Profile 6 3 6 Login 7 4 MAIN SCREEN 9 4 1 Main Screen 10 4 2 Display mode 12 4 3 Setup 15 4 4 Snapshot 26 4 5 Full Screen 27 4 6 Motion to Zoom 27 4 7 Playback 29 4 8 E MAP 31 4 9 Quick Select Tag 39 4 10 Log System Status Window 40 4 11 Central Backup 42 4 12 Use Local Playback 50 5 APPENDIX 53 5 1 Maintenance 53 5 2 FAE Support 53 ...

Page 3: ...ugh network located in different sites from one point of control Each DrView system can manage up to 64 sets of 16CH DVR You can monitor the DVR through network at any time You can also proceed to set up the remote system configuration With user friendly GUI administrator can monitor the DVRs very easily ...

Page 4: ...eForce4 are most optimal 1024 768 screen resolution RAM 256MB above Hard Disk 20 GB above Network Card 10 100Mbs Mouse PS 2 or USB compatible CD ROM General USB Interface 1 1 2 0 DirectX V7 0 above 2 1 Install DrView 1 Insert the installation CD 2 Then go to the directory E utility DrView suppose E is your CD ROM drive to run the Setup exe and follow the steps When finishing the setups it will sho...

Page 5: ...r Open User Profile First time to use DrView user has to create a new User Profile to save the configuration of DVRs You can create different Profiles for different configurations at the same time Next time when you start the DrView you don t need to create a new User Profile any more and you just open one of Profile you prefer 3 1 Create a New User Profile Click New on the Profile Manager it will...

Page 6: ...ated successfully the new profile icon will be shown on the Profile Manager screen as following Refer to 3 1 6 to enter the new profile Note z Profile name can t exceed 50 characters z Profile name only supports Chinese English words and does not support special marks z Password can t to exceed 30 characters z Password only support numbers English character ...

Page 7: ...r the Supervisor password Only supervision has the authority to delete the Profile 3 3 Edit Profile If you want to edit the Profile just select it and click the Edit The system will request you to enter the Supervisor password Only supervision has the authority to edit the Profile Therefore enter the Supervisor password ...

Page 8: ...ich you want to import the file you have exported before After importing file the imported file will be added in the Profile Manager screen as following 3 5 Export Profile If you want to back up the profile or execute DrView on another computer but use the same profile you can export the Profile Please choose the profile you want to export and click Export button ...

Page 9: ... save the bkp file which has just been exported and it will appear on the appointed address 3 6 Login The user can choose the created Profile enter the password and then start to login There are two kinds of password identification Supervisor and User password Each one has different authority in DrView The following is comparison tables of the authority ...

Page 10: ...8 Profile Manager New Delete Edit Import Export Login Sequencer Monitor Options Supervisor User Quick Select Tag Save Delete Rename Full Screen Snapshot Setup System Status Playback Supervisor User ...

Page 11: ... login the profile successfully the following monitoring window will appear Date Time Exit DVR List Preview Window Full Screen Snapshot Setup Playback Motion to Zoom E MAP Display Mode Quick Select Tag System status Sequencer ...

Page 12: ...en of this camera will be displayed in the Preview Window You can decide if you want to display this camera in the Spilt Window If yes just click this camera Drag and Drop it to any spilt window you want to display You can also Drag and Drop a group of cameras to the Left Spilt Window at one time When clicking the right button of mouse on one of the DVR in the DVR List it will show the following d...

Page 13: ...en display modes Full 250 225 200 175 150 125 100 75 50 Full Display Mode 4 1 2 Camera Options Click right button of mouse on any split window the screen will appear the following list for camera options The following table is the description for each function Function Description Execute Enable Enable to display the camera in the Spilt Window Disable Disable to display the camera n the Spilt Wind...

Page 14: ...to Focus Focus Far Zoom Out Zoom In Focus Near PTZ Speed When the user adjusts the PTZ control it will not only change camera image but also effect the recording result 4 2 Display mode There are 10 kinds of Split modes and 3 kinds of Sequencer modes in display mode These 10 kinds of Split modes are 4 splits 6 splits 8 splits 9 splits 10 splits 13 splits 16 splits 25 splits 36 splits and 64 splits...

Page 15: ...amera is disconnected the sequencer will skip over it to the next connected camera channel When you select 4 channel sequencer mode the Main screen will change to 4 split display mode The 1st Spilt Window will display Cam 1 to Cam 16 sequentially the 2nd Split Window will display Cam 17 to Cam 32 sequentially the 3rd Split will display Cam 33 to Cam 48 sequentially and the 4th Split will display C...

Page 16: ... 16 camera it will proceed sequencer to play s from camera 1 to camera 64 with the red arrow order the other groups will proceed in the same wa If you want to exit the sequencer mode you can press ESC or click to end the sequencer mode If the system can connect 4 monitors at the same time it can export the images to TV wall by utilizing 4 channel or 64 channel sequencer mode The main screen will b...

Page 17: ...n you can see the following Setup menu 4 3 1 DVR Setup 4 3 1 1 DVR Configuration Click DVR Setup button to set up the remote DVRs which you want to monitor in DrView when you login the system at the first time Then it will show the following screen ...

Page 18: ...hing adding new DVRs it will show the selected DVR information including connected cameras and DVR configuration when you point one of the DVR in the DVR list Besides you can adjust network speed based on real speed status just click 56k 128k 256k 512k 768k 1M for adjustment on the ComboBox If you use company s or school s LAN we suggest you can choose 1M for quick display For ADSL Cable Modem and...

Page 19: ...o delete monitoring the remote DVR Just select the remote DVR you want to delete on the DVR List and then click button z Refresh remote DVR If you modified DVR configuration and want to save the latest setup you can use Refresh function Select the DVR you want to refresh in the DVR List and modify the DVR configuration on the right side of System Setup screen then click button to complete the acti...

Page 20: ...ck Setup icon to have the remote DVR and camera configuration DVR advance setting When you click setup icon it will show the following screen You can have the Camera configuration Create or Edit User account DI DO setup Alarm Notice System setting and Network status Please refer to DVR User Manual to have detail setup for each items After you finish the remote setup click button and press button t...

Page 21: ...of Alias name to set up Alias name for camera DI and DO After you key in alias name for each camera DI and DO click Apply to save the names which you have set up Set up Alias Name Setup Alias name for Camera DI DO Key in Alias Name for each camera ...

Page 22: ...Motion Detect 9 Enabled 9 Motion to Zoom z Alarm Popup Support 9 Motion 9 No Signal 9 Capture Fail 9 Ext Message Support When there is a motion or no signal or capture fail event occurring you can enable Popup message to remind Administrator there are events occurring You can define Popup message by yourself in Ext Message column for ex contact information address etc z Alarm Audio Support 9 Motio...

Page 23: ...ts occurring You can define the music you want to play when the event occurs Go to the Environment Setup Please refer to the 4 3 2 DrView Environment Setup and click Alarm Audio to set up the music you want to play for different event You also can set up the Alarm Mode The alarms configuration are applied for All event from DVR or Current monitor camera ...

Page 24: ...event to Log so that Administrator can look up any time DI DO Event configuration z Alarm Popup Support 9 Enabled Ext Message Support z Save to Log 9 Enabled When there is DI or DO event occurring you can enable the Alarm Popup message and define the Popup message ...

Page 25: ...23 4 3 1 4 Sequencer You can set up the display duration for individual camera ...

Page 26: ... is DrView system automatically checks the DVR health status and save these health information in the database which can provide external application for usage Go to the Environment Setup Please refer to the 4 3 2 DrView Environment Setup and click Health Check to set up the Disabled health check or the frequency of Health check If you select DrView system automatically checks the DVR health statu...

Page 27: ...25 4 3 2 DrView Environment Setup When you click the setup icon you can see the following Setup menu Click DrView Environment Setup to proceed DrView Environment Setup ...

Page 28: ...e of the motion channel will be marked with the color you set up here 9 64 Channel Sequencer In the 64 Channel Sequencer mode the frame will be marked with the color you set up here z Alarm Popup Enable or disable alarm popup function Note 64 Channel Sequencer mode just can be activated when DrView system is installed VGA card with TV wall function 4 4 Snapshot Snapshot When clicking the left butt...

Page 29: ...ight button of the mouse on the snapshot icon you can capture the single split window which you select 4 5 Full Screen Full Screen Click the Full Screen icon you can enlarge any monitor to full screen If you want to go back to main monitor screen please press the Space to get back 4 6 Motion to Zoom Motion to Zoom If you turn on the Motion Detect Refer to 4 1 2 Camera Option and click Motion ...

Page 30: ...here is 2nd motion happening it will replace 1st motion which was zoomed in Motion Zooming Area Then 1st motion will be put on the 1st split window As this rule if there is 3rd motion happening 3rd motion will be zoomed in Motion zooming Area the 2nd motion will be put on 2nd Spilt Window As this result when the 14th motion happens the 13rd motion will be put on 1st Split Window and repeat this ru...

Page 31: ...eo please click the playback button The screen will show the following screen and you can select the camera DVR you want to review on the right of screen 4 7 1 Playback Control When you want to playback the selected camera you can click the following playback control panel ...

Page 32: ... min Jump to next 1 minute Pause Pause the playback Stop Stop the playback Pause Rewind Play Next 1 min Stop Forward Previous 1 min 4 7 2 Download Display Download Full Screen Zoom Snapshot z Download You can download the selected video you want to save by clicking the Download icon and it will show the following screen Click Save to start to backup or click Exit to escape the download mode Save E...

Page 33: ...Zooming mode 100 200 Wide mode and Fit to Window Print Save Exit 4 8 E MAP EMAP Before you start to enable the EMAP function in DrView you need to build up the EMaps in EMAP Editor Click Start on your Windows taskbar select Programs and then find the folder of CenterManager200 In this folder please click the E MAP Editor to execute the editor and it will show the following dialog box ...

Page 34: ... use EMAP function in DrView manager You just click EMAP icon in the DrView main menu 4 8 1 EMAP Editor When you successfully open the EMAP Editor you can start to build your EMAP EMAP Editor provides the functions that enable user to set up the locations of Cameras in the E Map to help the administrator to have the connection between camera and Map The MAP supports hierarchy structure and can let...

Page 35: ...EMAP z EMAP Format 9 Map should support JPEG or BMP format 9 The size of map should not exceed 1024 768 z Create EMAP Step 1 Load Add EMAP Click Add icon to load MAP into the E MAP Editor and it will show the following dialog box Click Load icon and it will show the following dialog box Select the MAP you want to Load and click open ...

Page 36: ...34 You can see the MAP in the Preview Window Enter the MAP Name and click OK Then you can see the MAP loaded into the EMAP Editor and the MAP name in the MAP List ...

Page 37: ...this camera will be marked in a Red Frame to show the Selected status Then click PTZ camera icon and the selected camera will be changed to PTZ camera You can delete the camera in the MAP by clicking the Delete icon PTZ Camera Camera Direction PTZ Camera DO DI Note z The Camera DI and DO icons shown in gray color mean that the camera DI and DO haven t been set up z The Camera DI and DO icons shown...

Page 38: ...me shown on the MAP list To build the connection between two MAPs just Drag and Drop the MAP Link icon to the location of Major MAP and it will show the following dialog box Click the Detail MAP you want to link and click OK Then the MAP Link is completed You can build more MapLinks in the Major MAP as the above method However You can t build the MAP Link if only one map exits or the following dia...

Page 39: ...re to save the settings by clicking the Save in the file in the left upper corner of Window and click Exit to escape the EMAP Editor If you want to delete the MAP click the Delete icon However you need to delete all of the cameras in this MAP before you can delete this MAP ...

Page 40: ...en you finish building or editing an EMAP you need to login to the DrView again to reload the new EMAP in the DrView Click the EMAP icon in the DrView to activate the EMAP function in the DrView and then you can see the following screen Link Information Preview Window EMAP MAP List ...

Page 41: ...n the MAP Link it will jump to the linked MAP The Map List window will be hidden when there is only one map in EMAP profile There will be a M signal shown on the camera when the motion happens If camera is no signal NS signal will be shown on the camera M Signal 4 9 Quick Select Tag User can define the configuration of Quick Select Tag from the ten options It means that the selected split windows ...

Page 42: ...can use the selected option whenever you initialize the DrView and Auto Login 4 9 2 Delete Quick Select Tag If you want to remove the unnecessary selected options please select the Quick Tag you want to delete on the combobox and press to delete the Tag 4 9 3 Rename Quick Select Tag You can click Rename icon to rename the name of Qick Select Tag 4 10 Log System Status Window You can see the DVR st...

Page 43: ...how each connecting log z Log Search Search the event log You can query the events according to time event type time camera and DVR Set up Event type Time Camera and DVR and click Go to list all of the event logs which are within the conditions you set up Select one of the event log and click Playback to playback the video of this log which you query directly Select the log and click playback ...

Page 44: ...nterManager200 In this folder please click the Central Backup to execute backup program and it will show the following dialog box z Log in Please select the DrView User Profile which you want to execute the backup Because only administrator has the authority to back up DVR files please open the User Profile by entering administrator s password to login to the Central Backup 4 11 2 Set up Backup Sc...

Page 45: ...ackup schedule and click Modify schedule in the left bottom of window Then it will show the following window z DVR File List You can click each camera and it will span all of the recorded files of each camera and show them by date z Backup Camera Select the cameras you want to back up z Schedule Task List Backup information DVR List DVR Backup status Modify Schedule ...

Page 46: ...t the backup task z Options Bandwidth Limit Set up the limit of the total bandwidth and the maximum number of download files at the same time z Options Alarm You can set up the HDD remaining size When the size of HDD is smaller than this size the system will send an alarm audio to warn the administrator z Options Recycling You can set up the HDD reaming size When the size of HDD is smaller than th...

Page 47: ...orded as CRC Error 4 Recycle The files are successfully backuped but these files are overwritten Recycle because the size of HDD is not enough Then this file will be recorded as Recycle After finishing the Files check and finding unhealthy files Lost Not Found CRC Error the system will show the following dialog box User can decide to download these unhealthy files again or ignore these files If us...

Page 48: ...tus including backup settings total backup files backup size and remain sizes as the following picture z Camera Backup status Double click the DVR in the DVR list and it will list all of the cameras connected to this DVR Click the camera and you can see the backup statistics of this camera as the following picture ...

Page 49: ...f Schedule Status you can see six types of file backup status 1 Complete Complete the downloading file 2 Incomplete File download is not completed 3 Not Found File can t be found in DVR 4 Deleted Complete the file downloaded but file has been deleted by user 5 GC File is downloaded but overwritten due to HDD recycling 6 Wait File is not downloaded z The state of DVR Backup task In the bottom of wi...

Page 50: ...sk 6 Error There is an error during the downloading files Please check logs After fixing the error please restart this task 7 Disk Full Disk is full and can t execute backup 8 Disk Error There is an unknown error happening in the disk Please check the disk 9 Empty There is no file to be downloaded in the arranging schedule In the Network Statistic mode it will show the current network flow as foll...

Page 51: ...ger then total bandwidth all of the tasks will share the total bandwidth according to the proportion z If not all of the task bandwidth are set as No Limit total bandwidth will assign to the tasks which are already set in advance according to the proportion and then the rest of bandwidths are assigned to the tasks set as No Limit Others z Backup log files are saved in the directory of DrView and n...

Page 52: ...t Program Central Manager 200 folder z Click the on the left down of the screen to open the video file and it will show the playing options as following Playback Pause Stop and go back the beginning of the film z AVI Format Export This function provides you to transform the download files from CX3 format to AVI format 9 Open a download file 9 In the Tools bar select Convert to AVI and then select ...

Page 53: ...51 9 Select the transforming format Here we choose Microsoft MPEG 4 Video Codec 9 Select transforming parameters and it will influence the file s quality and size ...

Page 54: ...52 9 Enter OK and then it will show the transforming status ...

Page 55: ...equent vibration environment 9 Operate the system under the conditions of stable and high voltage If possible the system should be equipped with UPS Uninterruptible Power Supply 5 2 FAE Support Any questions please contact your supplier for your service You also can visit our website www planet com tw for more information Thank you ...

Reviews: