LX1250TI User Manual 9
Package Overview
The following items are shipped with the display:
Monitor
Quick Start Guide
NOTE:
No cables ship with the monitor. Cables are purchased separately
.
Installation
Before Installing
Keep the following in mind while installing the monitor.
• The monitor should be visible to the driver only if it is used for navigation, system control or vehicle
information. If the monitor will be used for other purposes, it should be installed in such a way that it
will only operate while the vehicle is not moving (such as when the parking brake is in use). Review all
applicable state and local laws and regulations to make sure the monitor is used properly and safely.
• The installed monitor must not interfere with the driver’s vision.
Installing the LX1250TI monitor consists of three steps:
1.
Testing Touch Screen functionality with application software - see page 26.
2.
Securely routing the interface cable
3.
Mounting the monitor using one of the mounting options available on the back of the display
enclosure. - see page 31.
4.
Connecting the monitor to the computer and power source - see page 17
Note: The touch sensor is factory tested & calibrated, however different computing environments may
require the touch screen to be recalibrated. Windows & Linux tools can be downloaded at:
For Windows Support:
http://www.irtouch.com/shtml/20091124180041.shtml
For Linux Support:
http://www.irtouch.com/shtml/2009129110904.shtml
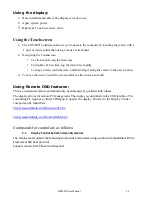
No standard On Screen Display (OSD) buttons are available to the user: All ‘standard’ OSD
functionality can be controlled via the remote interface.
The user controls are limited to Bac/- & Remote Power buttons.
The All-in-One power button: A power button located on the front of the display functions as a
pass though to turn on and off a remote computer. It functions very similar to a laptop
computer docking station power button. The button is a Normally Open, Single Pull Single
Throw Switch. It is not designed for current carrying switching.
When there is no video detected, the monitor will go into standby mode. The LED will remain in
Amber state in Standby Mode.
No Base, mounting brackets, or stand is shipped with this device. It is a monitor head only.
Summary of Contents for LX1250TI
Page 1: ......
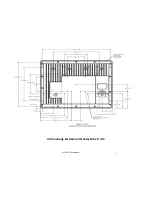
Page 7: ...LX1250TI User Manual 7 All mounting strain relief holes M4 x 8 mm ...
Page 12: ...LX1250TI User Manual 12 ...
Page 14: ...LX1250TI User Manual 14 ...
Page 15: ...LX1250TI User Manual 15 ...
Page 16: ...LX1250TI User Manual 16 ...
Page 17: ...LX1250TI User Manual 17 ...
Page 18: ...LX1250TI User Manual 18 ...
Page 19: ...LX1250TI User Manual 19 ...
Page 20: ...LX1250TI User Manual 20 ...
Page 21: ...LX1250TI User Manual 21 ...
Page 22: ...LX1250TI User Manual 22 ...
Page 23: ...LX1250TI User Manual 23 Troubleshooting the Monitor ...


