40
3. Installation guide
3.1 Installation site
1.
Unpack the appliance carefully. Dispose of the packaging as described in chapter
waste management.
2.
The accessories of your appliance can be protected from damage due to
transportation (adhesive tapes etc.). Remove such tapes very carefully. Remove
remains of such tapes with a damp cloth using lukewarm water and a mild
detergent (see also chapter
CLEANING AND MAINTENANCE
). Never remove any
components of the back of the appliance!
3.
Install the appliance in a suitable position with an adequate distance from sources
of heat and cold.
4.
Check that the appliance and the power cord are not damaged.
5.
Install the appliance in a dry and well-ventilated place.
6.
Protect the appliance from direct sunlight.
7.
The doors must open completely and without hindrance.
8.
Install the appliance on a level, dry and solid floor. Check the correct installation
with a bubble level.
9.
Connect the appliance to the mains properly.
10.
The nameplate is situated inside the appliance or at the back.
3.2 Installation
¾
Depending on delivery, there are 2 different ways of installation. Carry out the
installation relevant to your mounting-accessories (either A or B).
¾
The dimensions of the appliance are registered in chap.
TECHNICAL DATA
.
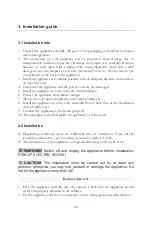
WARNING!
Switch off and unplug the appliance before installation.
RISK OF ELECTRIC SHOCK!
CAUTION!
The installation must be carried out by at least two
persons; otherwise you may hurt yourself or damage the appliance. Do
not tilt the appliance more than 45
0
.
I
NSTALLATION
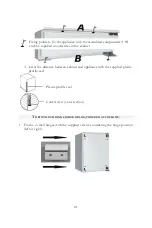
A
1.
Push the appliance carefully into the cabinet. Check that the appliance stands
safely and properly adjusted in the cabinet.
2.
Fix the appliance with the 4 woodscrews on the fixing-points described below.
Summary of Contents for KS 120.4A+ EB
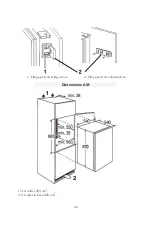
Page 13: ...13 1 Scharnierteil an Kühlschranktür 2 Scharnierteil an Schranktür ...
Page 14: ...14 Abmessungen A B 1 Luftaustritt 200 cm2 2 Lufteintritt im Sockel 200 cm2 ...
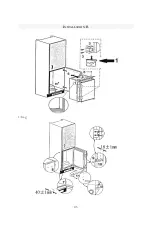
Page 43: ...43 INSTALLATION B 1 bag ...
Page 73: ...73 MONTAGE B 1 Sachet d emballage ...
Page 104: ...104 1 Scharnier deel op koelkastdeur 2 Scharnier deel op de kastdeur ...

