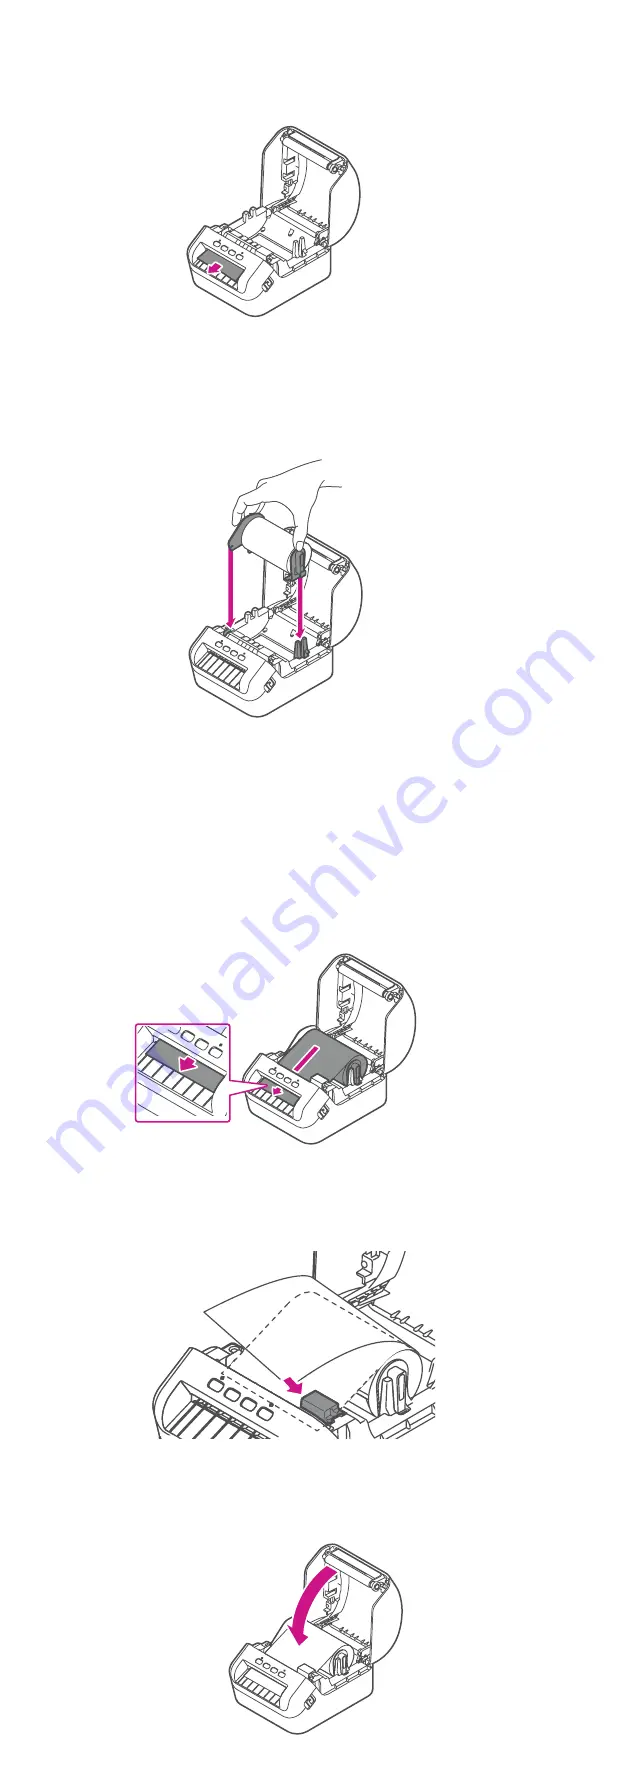
3. Place the DK roll into the guide.
Make sure the roll is inserted firmly in the guide and the
stabilizer slides into the notch in the printer
4. Thread the DK roll through the printer.
Align the edge of the DK roll with the upright edge of the
output slot.
Check that the DK roll is threaded straight.
Push the first label through the output slot unit the end
comes out of the slot as shown.
If experiencing trouble loading the label roll, try
inserting from the side making sure the label is under
the sensor.
5. Close the cover.
2. Remove the protective sheet from the output slot.


