background image

- 28 -

GB


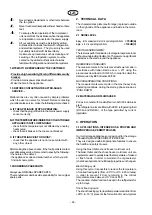
fig. 5

fig. 6

fig. 7

fig.9

fig. 8

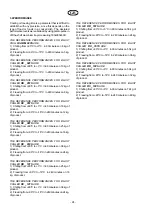
4.9.2 Chilling cycle +3°C Soft or Hard and freezing -18°C Soft or Hard with standard or multi-point shaft

Chilling/freezing phase

fig. 10

4.6 Defrosting

To 3°C Soft press key 

, for 

+3°C

 Hard also press key 

To select -18°C Soft cycle blast chiller press key

, for 

-18°C

 Hard also press key 

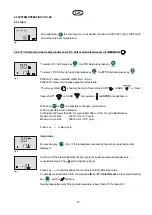
DISPLAY1 shows total blast chiller time,  (Fig. 5)
DISPLAY2  shows cold storage appliance temperature,

 The time symbols  

, showing the kind of blast chiller SOFT 

 or HARD

 or  blast

freezer SOFT   

  or  HARD

 temperature    and 

STOP 

are switched on.

By pressing key 

 cycle blast chiller/blast freezer phase control is established through the

core probe. DISPLAY1 (fig.6 ) shows the temperature indicated by the probe.

To start the selected cycle press  

, the blast chiller symbol 

 lights up. (fig.7).

At the end of the cycle blast chiller, the system automatically shifts into conservation mode,

symbol 

  lights up (fig. 8) and DISPLAY2 shows the cold storage appliance temperature.

If core temperature is not reached within the established time, the TIME OUT alarm is activated.

The blast chiller phase proceeds, but symbol 

 is in blink mode.

The AL5 symbol blinks on DISPLAY1. (fig. 9).
The alarm stops automatically when the system shifts to conservation mode.

Press key 

 at any time during the cycle blast chiller to display the time since the start of the

cycle.

In conservation, press key

 to display blast chiller duration.

Press key 

  to end this phase, the machinery shifts to Stand-by mode.

To simplify probe extraction from the product (

after a -18°C blast freezer

), press probe heating

key 

, symbol 

 is switched on.

Heating takes place only if the probe temperature is lower than -5°C for about 30’’.

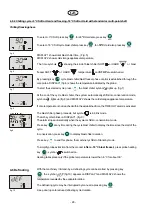
With the machinery in Stand-by, a defrosting cycle can be started  by pressing key

, the  symbol 

 (fig.10)  appears on DISPLAY 1and DISPLAY 2 shows the

temperature revealed by the evaporator probe.

The defrosting cycle may be interrupted by manual re-pressing key 

.

 Keep door open to reduce defrosting cycle duration.

Summary of Contents for RCM 121

Page 1: ...CONGELATORE GB USE AND MAINTENANCE MANUAL BLAST CHILLER SHOCK FREEZER D BETRIEBS UND WARTUNGSHANDBUCH SCHNELLABKUEHLER SCHOCKFROSTER Mod ABM023 RCR041 RCM041 RDR RDM RCR RCM051 RCR RCM081 RCR RCM012 RDR RDM RCR RCM121 RDR RDM RCR RCM161 RDR RDM RCR RCM122 S Series RCR 081 S ...

Page 2: ...I Pag 3 GB Pag 21 D Seite 39 ...

Page 3: ...Prima di effettuare qualsiasi operazione di pulizia o di manutenzione disinserire l apparecchiatura dalla rete di alimentazione elettrica 1 Portare l interruttore generale nella posizione OFF 2 Togliere la spina Munirsi di guanti per effettuare la manutenzione sul vano motore o sull unità evaporatrice posta all inter no dell apparecchiatura INDICE Pag CAP 1 NORME E AVVERTENZE GENERALI 3 1 1 Collau...

Page 4: ...R L ORDINAZIONERICAMBI Si raccomanda l impiego di RICAMBI ORIGINALI Il costruttore declina ogni responsabilità per l impiego di ricambi non originali Non inserire cacciaviti od altro tra le protezioni pro tezioni ventilatori evaporatori ecc Non avvicinarsi alle parti elettriche con mani bagna te oppure scalzi Per una buona funzionalità del gruppo compressore ed evaporatore non ostruire mai le appo...

Page 5: ...TO USI CONSENTITI Le nostre apparecchiature frigorifere sono macchine agroalimentari Regolamento CE n 1935 2004 destinate al trattamento dei prodotti alimentari Sono progettate con gli opportuni accorgimenti al fine di garantire la sicurezza e la salute dell utilizzatore Impiego dell abbattitore congelatore L abbattitore congelatore è un apparecchiatura che abbassa rapidamente la temperatura dei c...

Page 6: ...ER L ABBATTITORE ABM023S SONO 1 Raffreddamento da 90 C a 3 C in 90 minuti di 8 kg di prodotto 2 Congelamento da 90 C a 18 C in 240 minuti di 5 kg di prodotto LE PRESTAZIONI DI RIFERIMENTO PER L ABBATTITORE RC _041S SONO 1 Raffreddamento da 90 C a 3 C in 90 minuti di 10 kg di prodotto 2 Congelamento da 90 C a 18 C in 240 minuti di 7 kg di prodotto LE PRESTAZIONI DI RIFERIMENTO PER L ABBATTITORE RD ...

Page 7: ...OUP TASTO DEFROST TASTO RISCALDAMENTO SONDA SPILLONE 4 3 2 Descrizione del DISPLAY 4 3 1 Descrizione del LCD RDR_ _ _ S RCR_ _ _ S RDM_ _ _ S RCM_ _ _ S DISPLAY 1 Visualizzazione della temperatura dello Spillone o del Tempo DISPLAY 2 Visualizzazione della temperatura della camera DISPLAY 3 Visualizzazione della fase di abbattimento CICLO 3 C CICLO 18 C Fase 1 30 min Fase 1 80 min Fase 2 30 min Fas...

Page 8: ...o in corso Simbolo Fase Conservazione in corso Simbolo Macchina in Stop 4 4 Descrizione specifica dei tasti del pannello Accensione scheda elettronica Avvio Arresto di un ciclo di abbattimento Selezione ciclo HARD di abbattimento 3 C o di congelamento 18 C Selezione abbattimento 3 C Selezione congelamento 18 C Selezione sonda spillone Decremento valori Incrementovalori Avvio sbrinamento con la pre...

Page 9: ...emperatura e STOP Con i tasti o è possibile modificare la durata del ciclo N B E possibile impostatre una durata sia maggiore che minore di 90 per ciclo di abbattimento o 240 per ciclo di congelamento Limite massimo 120 min per il ciclo 3 C Limite massimo 300 min per il ciclo 18 C Premere il tasto per avviare il ciclo Sonda spillone Premendo il tasto Fig 3 si visualizza temporaneamente la temperat...

Page 10: ...IME OUT La fase di abbattimento continua ma il simbolo lampeggia Sul DISPLAY1 lampeggia la scritta AL5 fig 9 L allarme rientra automaticamente al passaggio in conservazione Premendo in qualsiasi momento durante il ciclo di abbattimento il tasto si visualizza il tempo trascorso dal suo inizio In conservazione premendo il tasto si visualizza la durata dell abbattimento eseguito Questa fase termina p...

Page 11: ...07 SetPoint cella FASE3 in abbattimento 3 C Soft 0 C 60 C 100 C S08 SetPoint cuore FASE3 in abbattimento 3 C Soft 3 C 60 C 100 C S09 SetPoint tempo FASE3 in abbattimento 3 C Soft 30min 0min 900min S10 SetPoint cella in conservazione 3 C 2 C 60 C 100 C S11 SetPoint cella FASE1 in abbattimento 3 C Hard 20 C 60 C 100 C S12 SetPoint cuore FASE1 in abbattimento 3 C Hard 22 C 60 C 100 C S13 SetPoint tem...

Page 12: ...Point Descrizione Default min MAX 4 9 Orologio solo con stampante optional Con la macchina spenta da Tasto è possibile accedere alla modifica Orologio tenendo premuti contemporaneamente per cinque secondi il Tasto e il Tasto Sul DISPLAY1 viene visualizzato il valore dell anno Sul DISPLAY2 viene visualizzato la scritta yy Con i tasti e è possibile modificare il valore dell anno fig 11 1 Con il Tast...

Page 13: ... C 10 C P02 Soglia allarme alta temperatura in conservazione positiva 7 C 0 C 50 C relativa al Set CONS P03 Soglia allarme bassa temperatura in conservazione positiva 0 C 10 C 0 C P04 Soglia allarme alta temperatura in conservazione negativa 6 C 0 C 50 C relativa al Set CONS P05 Soglia allarme bassa temperatura in conservazione negativa 10 C 50 C 0 C relativa al Set CONS P06 Ritardo allarme temper...

Page 14: ...ura tra Cella e Cuore nel test 5 C 0 10 C inserimento spillone P39 P40 Indirizzo dello strumento 1 1 147 P41 Gestione della Seriale 0 non utilizzata 1 0 2 1 Stampa 2 ModBus P42 BaudRate 0 2400 1 4800 2 9600 3 19 200 2 0 3 P43 Parity 0 no parity 1 odd 2 even 2 0 2 P44 Tempodicampionamento 10min 1 min 60min P50 Esegue uno sbrinamento all inizio dell abbattimento 0 0 1 0 No 1 Si P51 Temperatura di fi...

Page 15: ...mpeggia la scritta di allarme fig 17 Il buzzer suona per un minuto P17 al massimo ma può essere tacitato premendo un tasto quando la temperatura sale diP01 Csoprala soglia di allarme l allarme rientra automaticamente 4 11 3 Allarme Porta Aperta Dopo due minuti di porta aperta a ciclo avviato di abb cong il compressore si ferma e sulDISPLAY1 lampeggia la scritta di fig 18 4 11 4 Allarme Pressostato...

Page 16: ...li sbrinamenti terminano a tempo Sonda Cella Misura la temperatura della Cella dell abbattitore e viene visualizzata sul DISPLAY2 4 11 7 Allarme Sonda Cella Un guasto della sonda provoca un Allarme della Sonda Cella e si attiva Il buzzer optional e sul display lampeggia la scritta di errore fig 22 Il buzzer se presente suona per un minuto P17 al massimo ma può essere tacltato premendo un tasto Con...

Page 17: ...ro pregiudicarne il regolare funzionamento Anche le zone sottostanti e adiacenti l apparecchiatura devono essere giornalmente pulite sempre con acqua e sapone e non con detersivi tossici o a base di cloro Pulizia e manutenzione generale Per un costante rendimento dell apparecchiatura è bene compiere le operazioni di pulizia e manutenzioni generali Per quanto riguarda la pulizia del gruppo frigorif...

Page 18: ...ante che possono essere recuperati e riutilizzati e che i componenti del frigorifero sono rifiuti speciali assimilabili agli urbani LE OPERAZIONI DI SMONTAGGIO DEVONO COMUNQUE ESSERE ESEGUITE DA PERSONALE QUALIFICATO A CAUSA DEL BARICENTRO NON COINCIDENTE CON IL CENTRO GEOMETRICO DELL APPARECCHIATURA FARE ATTENZIONE ALL INCLINAZIONE DURANTE GLI SPOSTAMENTI 7 2DESCRIZIONIDELLEOPERAZIONIDIPIAZZAMENT...

Page 19: ... sovraccarichi o cortocircuiti il collegamento alla linea elettrica va fatto tramite un interruttore magnetotermico differenziale ad alta sensibilità 30 mA a ripristino manuale di adeguata potenza Per il dimensionamento del dispositivo di protezione va tenuto conto di Imax e 2 3 In corrente nominale Icc corrente di corto circuito 4500A 7 4REINSTALLAZIONE Per una eventuale reinstallazione procedere...

Page 20: ... 20 I ...

Page 21: ...ifically provided high sensitivity 30 mA differential security breaker Before any cleaning or servicing always disconnect the appliance from the mains power supply 1 Turn the master switch to OFF 2 Remove the plug Always wear gloves for servicing work on the condenser unit since it may be at HIGHTEMPERATURE CONTENTS Page CHAP 1 GENERAL INSTRUCTIONS AND PRECAUTIONS 21 1 1 Testing and warranty 1 2 F...

Page 22: ...and 65 C The coocked chilled food can be kept in the refrigerator for up to 5 days Shock freezing cycle The shock freezing cycle rapid temperature reduction from 90 C to 18 C prevents the formation of macro crystals Never insert screwdrivers or other items between the fan grilles Never touch electrical parts with wet hands or bare feet To ensure efficient operation of the compressor unit neverbloc...

Page 23: ...e fan which offers no risk since it is protected by a grille screwed in place before removing this grille disconnect the appliance from the power supply RISKS DUE TO EXTREME TEMPERATURES Warning stickers marked high temperature are applied near to zones where high temperatures may occur Before removing trolleys or pans at the end of the freezing cycle always put on gloves since the temperature is ...

Page 24: ... 2 Freezing from 90 C to 18 C in 240 minutes on 16 kg ofproduct THE REFERENCE PERFORMANCES FOR BLAST CHILLER RC _ 012S ARE 1 Chilling from 90 C to 3 C in 90 minutes on 36 kg of product 2 Freezing from 90 C to 18 C in 240 minutes on 24 kg ofproduct THE REFERENCE PERFORMANCES FOR BLAST CHILLER RD _ 121S ARE 1 Chilling from 90 C to 3 C in 90 minutes on 25 kg of product 2 Freezing from 90 C to 18 C in...

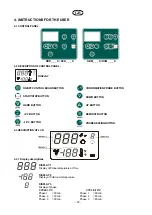
Page 25: ... BUTTON CONFIRMATION PROBE BUTTON DOWN BUTTON UP BUTTON DEFROST BUTTON PROBE HEATING BUTTON DISPLAY 1 Display of Probe temperature or Time DISPLAY 2 Display of Cold room temperature DISPLAY 3 Display of phase RDR_ _ _ S RCR_ _ _ S RDM_ _ _ S RCM_ _ _ S CYCLE 3 C CYCLE 18 C Phase 1 30 min Phase 1 80 min Phase 2 30 min Phase 2 80 min Phase 3 30 min Phase 3 80 min 4 3 1 Display descriptions ...

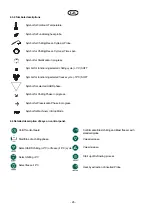
Page 26: ...n of inserted Probe SymbolforColdroomTemperature Symbol for Functioning heat probe Symbol for Chilling Freeze Cycle per Probe Symbol for Chilling Freeze Cycle per Time span Symbol for Sterilization in progress Symbol for functioning selected chilling cycle 3 C SOFT Symbol for functioning selected freeze cycle 18 C SOFT Symbol for selected HARD phase Symbol for Chilling Phase in progress Symbol for...

Page 27: ...erature and STOP are switched on With keys or it is possible to change cycle duration N B It is possible to set a duration both higher and lower than 90 for cycle blast chiller or 240 for cycle blast freezer Maximum time limit 120 min for 3 C cycle Maximum time limit 300 min for 18 C cycle Press key to start cycle Core probe By pressing key Fig 3 the temperature revealed by the core probe is tempo...

Page 28: ...ymbol lights up fig 8 and DISPLAY2 shows the cold storage appliance temperature If core temperature is not reached within the established time the TIME OUT alarm is activated The blast chiller phase proceeds but symbol is in blink mode The AL5 symbol blinks on DISPLAY1 fig 9 The alarm stops automatically when the system shifts to conservation mode Press key at any time during the cycle blast chill...

Page 29: ... 3 C 90min 0min 900min S21 Room SetPoint PHASE1 18 C Soft 10 C 60 C 100 C S22 Core SetPoint PHASE1 18 C Soft 3 C 60 C 100 C S23 Time SetPoint PHASE1 18 C Soft 80min 0min 900min S24 Room SetPoint PHASE2 18 C Soft 40 C 60 C 100 C S25 Core SetPoint PHASE2 18 C Soft 18 C 60 C 100 C S26 Time SetPoint PHASE2 18 C Soft 80min 0min 900min S27 Room SetPoint PHASE3 18 C Soft 40 C 60 C 100 C S28 Core SetPoint...

Page 30: ...8 C 240min 0min 900min SetPoint Description Default min MAX fig 11 fig 12 fig 13 fig 14 fig 15 DISPLAY1 shows the year value DISPLAY2 shows the yy symbol Press key and to change the year values fig 11 1 Press key to confirm the inserted value This is followed by a display of the month fig 12 day fig 13 hour fig 14 minutes fig 15 4 9 Time only with printer optional After switching the machinery off...

Page 31: ... relating Set CONS P03 Alarm value for low temperature in chilling conservation 0 C 10 C 0 C P04 Alarm treshhold for high temperature in freezing conservation 6 C 0 C 50 C relating Set CONS P05 Alarm treshhold for low temperature in freezing conservation 10 C 50 C 10 C relating Set CONS P06 Temperaturealarmdelayfromconservationstartordefrostingprocess 60min 0min 300min P07 Temperature alarm delay ...

Page 32: ... monitoring system 1 1 147 P41 Serial connection 0 not used 1 0 2 1 Printer 2 ModBus P42 BaudRate 0 2400 1 4800 2 9600 2 0 2 P43 Parity 0 no parity 1 odd 2 even 2 0 2 P44 Time interval between 2 following prints 10min 1 min 60min P50 Carrying out defrosting at chilling freezing cycle 0 0 1 0 No 1 Yes P51 Final temperature at the end of the defrosting process 8 C 10 C 30 C P52 Max duration of the d...

Page 33: ...buzzer rings for a minute P17 at the most but can be silenced by pressing a key when the temperature rises by P01 C above the alarm threshold the alarm stops automatically 4 11 3 Door open alarm If the door is open for over two minutes with a chilling freezing cycle in progress the compressor will shut down and Display1 will show the flashing message as in fig 18 4 11 4 Pressure switch alarm When ...

Page 34: ...Probe Measures the temperature of the cold room where the chilling process is taking place and the temperature is shown on DISPLAY2 4 11 7 Cold Room Probe Alarm Probe failure activates both the Cold Room Probe Alarm and a buzzer An error message in blink mode appears on the display fig 22 The buzzer if present rings for one minute P17 at the most but can be silenced by pressing any key In case of ...

Page 35: ...ir operation The zones under and around the appliance must also be cleaned every day again using soap and water and not toxic or chlorine based detergents CLEANING AND GENERAL SERVICING The cleaning and general servicing procedures must be carried out to obtain constant high performance from the appliance The refrigeration unit must be cleand by skilled staff Replace the condenser filter periodica...

Page 36: ...s from the top and detaching the glued side flap Never cut the board with sharp blades which might damage the steel Remove the various protective materials Put the appliance on the floor and move it with suitable tools WHEN HANDLING NEVER PUSH OR DRAG THE APPLIANCE AS IT MIGHT TIP UP OR SOME PARTS SUCH AS THE FEET MIGHT BE DAMAGED NEVER TILT THE APPLIANCE AWAY FROM THE DOOR SIDE After positioning ...

Page 37: ...der Imax 2 3 In ratedcurrent Icc short circuit current 4500A 7 4 REINSTALLATION In case of reinstallation proceed as follows 1 Switch off the main switch 2 Disconnect the plug from the power supply socket and rewind the cable 3 Remove all foods from the refrigerator and clean the inside and the accessories thoroughly 4 Repackage the appliance taking care to fit the polystyrene guards in their orig...

Page 38: ... 38 ...

Page 39: ...rengen optischen elektrischen und funktionellen Tests unterzogen GARANTIE Unsere Garantieverpflichtung für die von uns hergestellten Geräte und Teile hat eine Dauer von 1 Jahr ab Rechnungsdatum und besteht aus der kostenlosen Lieferung der zu ersetzenden Teile die nach unserem unanfechtbaren Urteil als fehlerhaft erklärt werden Der Hersteller ist bereit eventuelle Mängel und Störungen zu beseitige...

Page 40: ...mperaturbereich zwischen 10 C und 65 C bleibt Das gekochte und schnellabgekühlte Nahrungsmittel kann bis zu 5 Tagen im Kühlschrank aufbewahrt werden ACHTUNG Zur Wartung des Kondensatoraggregats und oderderKondensverdampfungswanne Schutzhandschuhe anziehen da HOHE TEMPERATUREN bestehen können ACHTUNG Keine Schraubenzieher oder anderes zwischen den Schutz des Ventilators geben ACHTUNG Sich nicht mit...

Page 41: ...2 Monate Konservierungsverfahren Am Ende jedes Schnellabkühlungs oder Schnellgefrierverfahrens führt das Gerät einen Konservierungszyklus durch in dem das Gerät wie ein normaler Kühler funktioniert die Dauer dieses Zyklus kann vom Benutzer nach Belieben eingestellt werden RISIKOS DURCH HÖCHSTTEMPERATUREN In der Nähe von Zonen mit Gefahr von hohen Temperaturen wurden selbstklebende Etiketten mit de...

Page 42: ...1S 1 Kühlvermögen von 90 C auf 3 C in 90 Min 36 kg 2 Gefriervermögen von 90 C auf 18 C in 240 Min 24 kg KÜHLAUTOMAT RD_ 161S 1 Kühlvermögen von 90 C auf 3 C in 90 Min 36 kg 2 Gefriervermögen von 90 C auf 18 C in 240 Min 24 kg KÜHLAUTOMAT RC_ 161S 1 Kühlvermögen von 90 C auf 3 C in 90 Min 55 kg 2 Gefriervermögen von 90 C auf 18 C in 240 Min 36 kg KÜHLAUTOMAT RD_ 122S 1 Kühlvermögen von 90 C auf 3 C...

Page 43: ...er Phase TASTEPLATINEEINSCHALTEN TASTE START STOPP TASTE HARD TASTE 3 C SOFT TASTE 18 C SOFT TASTE BESTÄTIGUNG FÜHLER TASTE STEIGERUNG DATEN TASTE MINDERUNG DATEN TASTE DEFROST TASTE FÜHLERERWÄRMUNG 4 3 Beschreibung des DISPLAYS und der Symbole RDR_ _ _ S RCR_ _ _ S RDM_ _ _ S RCM_ _ _ S ZYKLUS 3 C ZYKLUS 18 C Phasig 1 30 min Phasig 1 80 min Phasig 2 30 min Phasig 2 80 min Phasig 3 30 min Phasig 3...

Page 44: ...chockkühlphase läuft Symbol für Konservierphase läuft Symbol für Gerät gestoppt 4 4 Spezifische Beschreibung der Tasten des Bedienfeld Einschalten der elektronischen Steuerplatine Start Stopp eines Schockkühlzyklus Schockkühlen 3 C Soft Gefrieren 18 C Soft Schockkühlzyklus HARD 3 C oder Gefrierzyklus 18 C Bestätigung Schockkühlzyklus die kühlt und sprengt Gefriermaschine mit übliche fühler Minderu...

Page 45: ... N B Es kann eine Zeitspanne eingestellt werden sie kann kleiner oder größer als 90 Schnellkühlen oder 240 Schockfrosten sein Höchstgrenze 120 min für den Zyklus 3 C Höchstgrenze 300 min für den Zyklus 18 C Taste drücken um den Zyklus zu starten Nadelsonde Durch Druck der Taste Abb 3 wird vorübergehend die von der Nadelsonde gemessene Temperatur angezeigt Nach Ende des Schnellkühl Schockfrostzyklu...

Page 46: ...rtgesetzt aber das Symbol blinkt Auf DISPLAY1 blinkt der Hinweis AL5 Abb 9 Der Alarm wird beim Umschalten zur Konservierung automatisch gelöscht Wenn zu irgendeinem Zeitpunkt des Schnellkühlzyklus die Taste gedrückt wird wird die seit Beginn verstrichene Zeit angezeigt In der Konservierung wird bei Druck der Taste die Dauer des durchgeführten Schnellkühlprozesses angezeigt DiesePhaseendetbeiDrücke...

Page 47: ... 60 C 100 C S08 SollwertdesKernsPHASE3beiSchockkühlung 3 CSoft 3 C 60 C 100 C S09 Sollwert der Zeit PHASE3 bei Schockkühlung 3 C Soft 30min 0min 900min S10 Sollwert der Zelle bei Konservierung 3 C 2 C 60 C 100 C S11 Sollwert der Zelle PHASE1 bei Schockkühlung 3 C Hard 20 C 60 C 100 C S12 Sollwert des Kerns PHASE1 bei Schockkühlung 3 C Hard 22 C 60 C 100 C S13 Sollwert der Zeit PHASE1 bei Schockküh...

Page 48: ...0min S40 Sollwert der Zeit in P99 18 C 240min 0min 900min Sollwert Beschreibung Standard Min Max Auf dem DISPLAY1 wird der Wert für das Jahr angezeigt Auf dem DISPLAY2 wird die Meldung yy angezeigt Mit den Tasten und ist es möglich den Wert für das Jahr zu ändern Abb 11 1 Mit der Taste wird der eingegebene Wert bestätigt und dann zur Anzeige des Monats Abb 12 desTages Abb 13 der Stunde Abb 14 der ...

Page 49: ...itiver Konservierung 7 C 0 C 50 C bezüglich zum Sollwert CONS P03 Alarmschwelle für niedrige Temperatur bei positiver Konservierung 0 C 10 C 0 C P04 Alarmschwelle für hohe Temperatur bei negativer Konservierung 6 C 0 C 50 C bezüglich zum Sollwert CONS P05 AlarmschwellefürniedrigeTemperaturbeinegativerKonservierung 10 C 50 C 10 C bezüglich zum Sollwert CONS P06 Verzögerung des Temperaturalarms ab B...

Page 50: ... 10 C zum Einführen der Nadel P39 P40 Geräteadresse 1 1 147 P41 Steuerung der seriellen Schnittstelle 0 nicht verwendet 1 0 2 1 Druck 2 ModBus P42 Baudrate 0 2400 1 4800 2 9600 2 0 2 P43 Parität 0 keine Parität 1 ungleich 2 gleich 2 0 2 P44 Stichprobenzeit 10min 1 min 60min P50 Führt ein Abtauen am Anfang der Schockkühlung aus 0 0 1 0 Nein 1 Ja P51 Abtautemperatur 8 C 10 C 30 C P52 Maximale Dauer ...

Page 51: ...mautomatischzurückgesetzt 4 11 3 Alarm Für Tür Offen Nach zwei Minuten offener Tür bei gestartetem Schockkühl Gefrierzyklus stoppt der Verdichter und auf dem Display1blinkt die Meldung von Abb 18 4 11 4 AlarmdesDruckwächters Wenn der Alarm des Druckwächters ausgelöst wird Abb 19 werden die laufenden Schockkühlzyklen sofort beendet 4 11 5 Alarm für Time Out Sollte die laufende Schockkühl oder Gefri...

Page 52: ...Schockkühlprogramm nach Zeit zu beginnen oder fortzusetzen Dabei erfolgt die Steuerung des Verdichters über die Fühlernadel mit einem Delta P32 zum Sollwert da die Messung an der Fühlernadel kälter ist als am Fühler in der Zelle Ein noch nicht begonnenes Schockkühlprogramm nach Temperatur schaltet beim Start zu nach Zeit um Ein laufendes Schockkühlprogramm nach Temperatur schaltet nach Zeit um wen...

Page 53: ...gung mit wenig Wasser nachspülen und sorgfältig trocknen Das Gerät nicht mit direktem Wasserstrahl waschen da eventuelle Einsickerungen in die Elektrobestandteile die richtige Betriebsweise beeinträchtigen könnten Auch die Zonen unter und neben dem Gerät müssen täglich gereinigt werden immer mit Wasser und Seife und nicht mit giftigen Reinigungsmitteln oder auf Chlorbase Achten Sie bitte darauf da...

Page 54: ...üssen daher die gesetzlichen oder amtlichen Vorschriften der Länder beachtet werden in denen der Abruch vorgenommen wird Im allgemeinen muss des Geraet beim Wiederverkäufer oder an Sammel Abbruch Fachstellen abgeliefert werden Den Geraet demontieren und dabei die Bestandteile nach ihrer chemischen Natur gruppieren dabei bedenken dass der Kompressor Schmieröl und Kühlmittel enthält die zurückgewonn...

Page 55: ...na Inside equipment Zübehor Peso Weight Gewicht kg 47 92 93 Alimentazione Supply Spannung V Hz 230 1 50 for Mod _ _ R _ _ _ evap temp 10 C cond temp 45 C evap temp 0 C cond temp 55 C for Mod _ _ M_ _ _ evap temp 25 C cond temp 45 C evap temp 10 C cond temp 55 C per Mod _ _ R _ _ _ temp evap 10 C temp cond 45 C temp evap 0 C temp cond 55 C per Mod _ _ M_ _ _ temp evap 25 C temp cond 45 C temp evap ...

Page 56: ...efrigerating system VENTILATO VENTILATE BELÜFTET Kühlsystem Dotazione interna Inside equipment Zübehor 1coppia supporti 1 sonda al cuore 1 pair of tray slides support n 1 core probe 1 paar Auflageschienen n 1 Sonde Peso Weight Gewicht kg 113 113 115 115 140 140 Alimentazione Supply Spannung V Hz 230 1 50 for Mod _ _ R _ _ _ evap temp 10 C cond temp 45 C evap temp 0 C cond temp 55 C for Mod _ _ M_ ...

Page 57: ... T T T Capacità di refrigerazione W 2270 2850 1720 1300 2770 2850 Refrigeration capacity Gefriervermögen Tipo refrigerante Refrigerant Kühlmittel R404A Potenza Power Leistungsauf W max 2100 3500 1550 2000 2100 3500 Corrente assorb Absorb Current A max 3 1 4 2 7 1 9 7 3 1 4 2 Sistema di refrigerazione Refrigerating system VENTILATO VENTILATE BELÜFTET Kühlsystem Dotazione interna Inside equipment Zü...

Page 58: ...O VENTILATE BELÜFTET Kühlsystem Dotazione interna Inside equipment Zübehor 1coppia supporti 1 sonda al cuore 1 pair of tray slides support n 1 core probe 1 paar Auflageschienen n 1 Sonde Peso Weight Gewicht kg 200 200 210 210 Alimentazione Supply Spannung V Hz 400 3 50 for Mod _ _ R _ _ _ evap temp 10 C cond temp 45 C evap temp 0 C cond temp 55 C for Mod _ _ M_ _ _ evap temp 25 C cond temp 45 C ev...

Page 59: ...TO VENTILATE BELÜFTET Kühlsystem Dotazione interna Inside equipment Zübehor 1coppia supporti 1 sonda al cuore 1 pair of tray slides support n 1 core probe 1 paar Auflageschienen n 1 Sonde Peso Weight Gewicht kg 232 232 245 245 Alimentazione Supply Spannung V Hz 400 3 50 for Mod _ _ R _ _ _ evap temp 10 C cond temp 45 C evap temp 0 C cond temp 55 C for Mod _ _ M_ _ _ evap temp 25 C cond temp 45 C e...

Page 60: ...ettrico Wiring diagram Elektroschaltplan ABM023S 230V 1 50Hz 711 829 0 230 240V 1 50Hz PE N 7 7 1 M 1 M1 M M2 8 L 11 13 16 1415 1718 B1 B2 B3 7 7 M 1 R1 M3 C 10 G1 S 3 9 12 4 22 23 21 2 1 5 6 8 7 10 230V 7 CK buzzer ...

Page 61: ... I3 230 240V 1 50Hz PE N FU 7 7 1 M 1 M1 M 1 M2 Q1 8 4 1 230V 24V L FU 3 11 13 16 14 15 17 18 T B1 B2 B3 7 7 7 7 10 M2 M 1 C 5 6 M M3 1 R1 M3 C 10 10 9 7 W2 S T2 G1 S 3 9 12 4 22 23 21 P P 2 1 5 11 11 6 8 7 10 230V SOLO BF ONLY BF NO BC BF 051 7 7 FU 50mA CK buzzer Schema elettrico Wiring diagram Elektroschaltplan ...

Page 62: ... _ _ _161 Optional STP M 7 I3 PE 7 1 M 1 M2 8 230V 24V 11 13 16 14 15 17 18 T B1 B2 B3 7 7 7 M2 A2 A1 M 1 R1 M3 C 10 9 7 W2 S T2 G1 S 3 9 12 4 22 23 21 P P 2 1 5 11 6 8 7 10 230V SOLO BF ONLY BF 7 7 50mA 400V 3 50Hz 6 5 4 3 2 1 FU L3 L2 Y1 5 6 4 3 2 1 L1 K1 3 M M1 11 10 C M3 1 M 7 11 10 C M3 1 M 7 CK buzzer N 7 V1 FU 12 96 95 13 14 ...

Page 63: ... 840 0 Optional I3 230 240V 1 50Hz PE N FU 7 Q1 8 4 1 230V 24V L FU 3 11 13 16 14 15 17 18 T B1 B2 B3 7 7 7 7 10 M 1 C 5 6 M M3 1 R1 M3 C 10 10 9 7 W2 S T2 G1 S 3 9 12 4 22 23 21 2 1 5 11 11 6 8 7 10 230V SOLO BF ONLY BF 7 7 FU 50mA CK buzzer R 12 14 2 4 6 N 8 10 7 UMC 7118310 STP ...

Page 64: ... a 1 A1 2 A2 K2 3 a 4 2 4 6 Y2 1 2 A1 A2 K2 3 b 4 2 4 6 b Y2 14 13 13 14 1 5 3 14 13 1 5 3 Power Supply 400V 3Ph 50Hz 3 M 230 V 1 50 60 Hz 23 0V 1 5 0 60Hz 23 0V 1 50 6 0Hz 4 mm2 4 mm2 4 mm2 1 mm2 1 mm2 1 mm2 1 mm2 1 mm2 1 mm2 1 mm2 1 5 mm2 4 mm2 4 mm2 4 mm2 4 mm2 4 mm2 4 mm2 1 mm2 1 mm2 1 mm2 1 mm2 1 mm2 1 mm2 1 mm2 1 mm2 1 mm2 3A 25A 18 A 9 14 A 0 63 1 A 0 63 1A HP 1 P 2 LP1 P 4 4 2 1 P 2 4 CP 9...

Page 65: ...nza cornici R1 Frames resistance S Starter S Starter STP Stampante STP Printer T Trasformatore T Transformer T2 Reattore T2 Reactor UMC Unità motocondensante UMC Remote unit V1 Valvola solenoide V1 Solenoid valve W2 Lampada UVC W2 UVCLamp Y1 Magnetotermicocompressore Y1 Compressor thermal relay LEGENDE B1 Temperaturfühler B2 Abtausonde B3 Kühlgutsonde B4 Multisonde C Elektrischer Kondensator CK Bu...

Page 66: ... 66 ...

Page 67: ......

Reviews: