background image

22

En

04

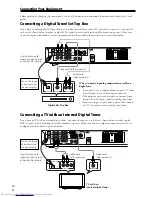
Automatic Switching between Analog & Digital Signals

This receiver will automatically choose the digital signal when both analog and digital signals
are input into the receiver.

The digital indicator will light when a digital signal is being used by the receiver. If the digital indicator doesn‘t
light even though you have your DVD player connected with an optical cable it may be due to the problems
below. Please check the list if you experience this problem.

• The power cord to the DVD player is disconnected.
• The DVD player’s digital output setting is turned off.
• You’re playing a disc that doesn’t output a digital signal.
• You’ve selected the Analog input mode (see page 39).

MEMO:

There is also a way to select an analog input whether a digital signal is being input or not. To do this see “Analog
Input Mode” on page 39.

Checking the Settings on Your DVD (or other) Player

If you don’t set the following two features correctly you may experience problems with your surround sound (for
example: no sound whatsoever; the sound is unidimensional or lacks punch; or other problems).

1 Digital output from your DVD player or other component outputting a digital source,

Set the DVD player so the signals below are output from the optical terminal (if you are unsure how to do this
check the manual that came with your DVD player). It may or may not be necessary to set the digital output on
other components, like a satellite tuner. Check the manual that came with the component.

• Dolby Digital
• DTS
• MPEG
• 96 kHz PCM (2 channel stereo)

2 Checking the soundtrack on your disc

Choose the surround sound signal (for example, Dolby Digital 5.1 or Dolby Surround) that you want to hear from
the disc. Check the manual that came with your DVD player for more information.

MEMO:

• Depending on your DVD player or source discs you may not be able to output sound from other than digital 2

channel stereo and  analog. In this case you need to change the listening mode to STANDARD if you want
multichannel surround sound.

Basic Playback

Summary of Contents for VSX-C300

Page 1: ...Operating Instructions AUDIO VIDEO MULTI CHANNEL RECEIVER VSX C300 VSX C300 S ...

Page 2: ...ronment H045 En Operating environment temperature and humidity 5 C 35 C 41 F 95 F less than 85 RH cooling vents not blocked Do not install in the following locations Location exposed to direct sunlight or strong artificial light Location exposed to high humidity or poorly ventilated location This product is for general household purposes Any failure due to use for other than household purposes suc...

Page 3: ...ound qualities giving the listener a wide range of possibilities Virtual Listening Mode p 30 This especially designed listening mode uses only two channels but through sound imaging imitates a full surround sound It allows you to experience surround sound with only two speakers Headphones Surround Mode p 30 This new headphone mode allows the user to get a surround like sound while listening on hea...

Page 4: ...ing Modes 30 Listening Modes 30 Selecting a Listening Mode 31 Tone Effects 32 MIDNIGHT Listening Mode 32 07 Using the Tuner 33 Finding a Station 33 Tuning Directly to a Station 34 Memorizing Stations 34 Naming Memorized Stations 35 Recalling Memorized Stations 35 An Introduction to RDS 36 Searching for RDS Programs 37 08 Using Other Functions 38 Muting the Sound 38 Using the Headphones 38 Changing...

Page 5: ...TV cable TV and VHS videotapes The important part here is all these sources have soundtracks recorded on them with various kinds of technology this is called the sound encoding Home theater sources are recorded encoded with multiple sound channels that is discrete parts of the overall sound CDs which are stereo sources work the same way but they only have two sound channels the left channel and th...

Page 6: ... below and use these easy settings on the VSX C300 C300 S In most cases you can leave the receiver in the default settings Default Settings Speaker Setting Automatically sensed by the receiver Input Setting DVD Analog Digital Signal Select Digital has priority but analog will play automatically if it is the only signal Listening Mode AUTO 1 Hook up your DVD player speakers subwoofer and TV First l...

Page 7: ... out the proper TV setting Confirm that DVD appears in the receiver s display indicating that the receiver is set to the DVD input If it does not press the DVD button to set the receiver to DVD input 3 Confirm the settings on your DVD player are correct for the source you want to play Make sure your DVD player is outputting a digital signal and choose the soundtrack Dolby Digital DTS etc that you ...

Page 8: ...ny hints in these explanations that help you get better sound and let you operate all your equipment more effectively Automatic Switching between Analog Digital Signals This receiver is equipped with the ability to automatically select a digital or analog signal depending upon what is being input If both a digital and an analog signal are being input the receiver will give priority to the digital ...

Page 9: ...sal at least 20 cm at the top 50 cm at the rear and front and 10 cm at each side If not enough space is provided between the unit and walls or other equipment heat will build up inside interfering with performance and or causing malfunctions If using a rack to hold the receiver make sure the back of the rack and the left side are open Also if you re using a case with glass doors leave the glass do...

Page 10: ...ween the remote control and the receiver s remote sensor Direct sunlight or fluorescent light is shining onto the remote sensor The receiver is located near a device that is emitting infrared rays The receiver is operated simultaneously with another infrared remote control unit Introductory Information Loading the Batteries The remote control operates on two AA batteries supplied 30 30 7m 9 9 9 9 ...

Page 11: ...l DTS MPEG multichannel soundtracks you need to make digital audio connections Connect your DVD player as shown below Optical cable sold separately don t pinch or bend cable sharply Video cord sold separately Video cord sold separately Why you need an analog connection as well as a digital one If you don t have an optical output on your DVD player you will need to use the analog connection shown h...

Page 12: ...TOR IN DVD IN VCR IN VCR OUT MONITOR OUT TV SAT IN DIGITAL OPTICAL AUDIO AUDIO FM UNBAL 75Ω AM LOOP ANTENNA VIDEO R L 1 2 R L R L SUB WOOFER OUT FRONT R L SURROUND R L CENTER SPEAKERS TV with an internal digital tuner Optical cable sold separately don t pinch or bend cable sharply Audio cord sold separately Video cord sold separately Connecting a TV with an Internal Digital Tuner If you have an TV...

Page 13: ...AV IN OUT AV IN OUT Audio video cord sold separately Audio video cord sold separately Before making or changing the connections switch off the power and disconnect the power cord from the AC wall outlet Connecting Video Components Connect your video components to the jacks as shown below All video decks are hooked up with analog connec tions If you want to record programs it is necessary to connec...

Page 14: ...e speaker tab push the speaker wire into the terminal and release speaker terminal tab When you re hooking up your subwoofer make sure its power cord is disconnected Before making or changing the connections switch off the power and disconnect the power cord from the AC wall outlet Connecting Speakers A full complement of five speakers is shown here but naturally everyone s home setup will vary Si...

Page 15: ...ay from the TV Install the center speaker above or below the TV so that the sound of the center channel is localized at the TV screen CAUTION If you choose to install the center speaker on top of the TV be sure to secure it by suitable means to reduce the risk of damage or injury resulting from the speaker falling from the TV in the event of external shocks such as earthquakes If possible install ...

Page 16: ...ted wire to the AM antenna terminal without disconnecting the supplied AM loop antenna For the best possible reception suspend horizontally outdoors Using External Antennas DVD IN VCR IN VCR OUT MONITOR OUT TV SAT IN DIGITAL OPTICAL AUDIO AUDIO FM UNBAL 75Ω AM LOOP ANTENNA VIDEO R L 1 2 R L R L SUB WOOFER OUT FRONT R L SUR R CENTER SPEAKERS 10mm 75 Ω coaxial cable PAL connector 5 6m Outdoor antenn...

Page 17: ...omponent This type of operation does not require control cords See page 41 for more information To use this kind of remote control you have to hook up a control cord AND the have the component and receiver hooked up with analog RCA audio video cords as well see page 11 13 Plugging in the Receiver After you have connected all your components including the speakers plug the receiver into a wall outl...

Page 18: ... headphones VIRTUAL PHONES SURR Lights when the VIRTUAL or PHONES SURR listening modes are selected STEREO Lights in stereo mode 6 MASTER VOLUME Use to set the overall listening volume 7 Input buttons Use to select the playback source the possibilities are DVD TV SAT VCR TUNER and FRONT 8 FRONT jacks You can connect a portable DVD player video camera video game system or whatever equipment you wou...

Page 19: ...a VCR or a video camera DVD recorder etc These are analog jacks 4 MONITOR output terminals connect a TV or monitor here see page 11 Use these terminals to output the signal from the above terminals 1 2 or 3 and FRONT These are video jacks MONITOR 2 outputs the same signal as MONITOR 1 DVD IN VCR IN VCR OUT MONITOR OUT TV SAT IN DIGITAL OPTICAL AUDIO AUDIO FM UNBAL 75Ω AM LOOP ANTENNA VIDEO R L 1 2...

Page 20: ...ator This indicator flashes when a command is sent from the remote control to the receiver It also flashes at when teaching the receiver preset codes INPUT SELECT button see page 23 Use to select the playback source This button lets you cycle through the different inputs DVD TV SAT VCR TUNER and FRONT MASTER VOLUME buttons Use to set the overall listening volume REMOTE SETUP button see page 42 Use...

Page 21: ...stening mode is best for dramatic movies and other soundtracks with lots of dialog ACTION button Press for ACTION listening mode This listening mode is best for action movies and other soundtracks with lots of animated sounds ROOM SETUP S M L buttons see page 24 Use these functions when setting up the surround sound speaker distances with the Quick Start easy to do method see page 3 2 2 2 2 2 3 3 ...

Page 22: ...lowing two features correctly you may experience problems with your surround sound for example no sound whatsoever the sound is unidimensional or lacks punch or other problems 1 Digital output from your DVD player or other component outputting a digital source Set the DVD player so the signals below are output from the optical terminal if you are unsure how to do this check the manual that came wi...

Page 23: ...re not sure which input on your TV this receiver is hooked up to confirm the input jack on the back of the TV and consult the manual that came with your TV to figure out the proper setting 5 Start playback of the component you selected in step 3 6 Press MASTER VOLUME to adjust the volume level VIRTUAL 5 D GAME TV SURR PHONES SURR STANDARD MIDNGHT AUTO 2 MULTI STEREO 2ch MULTI S M FLAT DIMMER QUIET...

Page 24: ...so see below For the distance between the listening position and the speakers see page 27 28 For the output level of each speaker see page 29 The settings made most recently whether here or manually on the pages mentioned directly above will supercede any previous settings The default setting is M 1 Press RECEIVER to turn the power on The STANDBY indicator goes out 2 Press RECEIVER This sets the r...

Page 25: ... the LFE channel a special bass channel when the LFE level is so high as to distort FRONT speakers distance setting mode page 27 Use to specify the distance from your listening position to your front speaker CENTER speakers distance setting mode page 27 Use to specify the distance from your listening position to your center speaker SURROUND speakers distance setting mode page 28 Use to specify the...

Page 26: ...our speaker s is larger than 12 centimeters set to Large SMALL If the cone size diameter of your speaker s is 12 centimeters or smaller set to Small None _ Choose this setting if you have no speaker s hooked up to this terminal Sound coming from this channel in the original source will be down mixed to one of the active speakers Follow steps 1 3 on page 25 Use the or fi buttons to choose a speaker ...

Page 27: ...to return to a previous receiver setting mode Press ENTER if you want to exit the setting mode MEMO The default setting is 200 Hz If there are no Small speakers in SPEAKERS setting mode crossover frequency cannot be set appears in the display LFE attenuator setting mode Dolby Digital and DTS audio sources include ultra low bass tones Set the LFE attenuator as needed to prevent the ultra low bass t...

Page 28: ...return to a previous receiver setting mode Press ENTER if you want to exit the setting mode MEMO The default setting is OFF SURROUND speakers distance setting mode Set the distance from the SURROUND speakers to the listening position Follow steps 1 3 on page 25 if necessary Press or fi to set the distance of the SUR ROUND speakers from the main listening position within a range from 0 3 m to 9 0 m ...

Page 29: ...set for each surround mode 6 Press TEST TONE to turn off the test tone MEMO Since the subwoofer transmits an ultra low frequency its sound may seem quieter than it actually is Be careful not to turn up your subwoofer too much and check the volume with an actual source The subwoofer volume is best controlled with the volume control on the powered subwoofer The speaker volume can be adjusted without...

Page 30: ...d retain a stereo sound Even if a multichannel source is input when you are using this listening mode you will only hear 2 channel sound Multichannel Listening modes for multichannel outputs STANDARD This mode is for pure decoding of multichannel sources like Dolby Digital 5 1 DTS 5 1 MPEG etc and for Dolby Pro Logic decoding of two channel sources Dolby Surround PCM etc No special effects are add...

Page 31: ...into the headphone jack The listening mode you choose with headphones is fully independent of the listening mode with speak ers If you disconnect the headphones while in PHONES SURR mode the receiver will return to the listening mode it was in before you selected PHONES SURR If you re using a DTS 2 channel stereo source it doesn t matter what listening mode you select the sound will only play in s...

Page 32: ...ll kinds of sources two channel stereo sources Dolby Surround sources Dolby Digital DTS or MPEG sources They can be used in conjunction with the listening modes explained on the previous page FLAT No tone effects added QUIET This mode reduces the bass and treble in the signal It is best used when you feel sounds are too harsh or sharp and would like to smooth them out S BASS This mode increases th...

Page 33: ...h for other stations Manual tuning To change the frequency one step at a time press the TUNE or TUNE buttons High speed tuning Press and hold the TUNE or TUNE buttons for high speed tuning releasing the button once the desired frequency is reached MPX mode If there is interference or noise during a FM radio broadcast or the radio reception is weak press the MPX button to switch the receiver into m...

Page 34: ...ows a blinking memory class B d 3 Press CLASS to select one of the three classes Repeatedly pressing this button cycles through the three available classes A B and C 4 Press the 2 or 3 buttons or the number buttons to select the station memory number you want Pressing these buttons repeatedly cycles through the 10 available station memories in each class After choosing the location you want the pr...

Page 35: ...name mode B d 5 Press 5 TUNE or TUNE to choose the first character Scroll through the letters numbers and symbols you can input Stop on the one you want B d 6 Press 3 to input the first of the four charac ters That character lights steadily in the display and the cursor automatically moves to the next space 7 Enter up to three more characters in the same way B d Any time you want to exit the proce...

Page 36: ...lk based material such as quiz shows or interviews POP M Pop music ROCK M Rock music M O R M Middle of the road music LIGHT M Light classical music CLASSICS Serious classical music OTHER M Other music not fitting any of the above categories WEATHER FINANCE Stock market reports commerce trading etc CHILDREN SOCIAL A Social affairs RELIGION PHONE IN Public expressing their views by phone TRAVEL Holi...

Page 37: ...ariety of others 1 Press the BAND button to select the FM band RDS is only broadcast on FM 2 To select the PTY search mode press the SEARCH button B d 3 Use the 5 TUNE or TUNE buttons to select the program type you want to hear B d 4 Press ENTER to search for the program type The tuner searches through the FM stations stored in the station memories If the tuner finds a matching program type the tu...

Page 38: ...MPX D ACCESS DISPLAY 1 Press the MUTING button on the remote control No sound will be audible until the MUTING button is pressed again to cancel the muting Alternatively you can press the MASTER VOLUME buttons to cancel the muting 1 Press the RECEIVER button 2 Press the DIMMER button on the remote control There are four display brightness settings including display off Each press will cycle you th...

Page 39: ... MULTI CHANNEL RECEIVER VSX C300 DVD TV SAT VCR FRONT TUNER MASTER VOLUME DOWN UP DTS MPEG VIRTUAL PHONES SURR STEREO AUDIO VIDEO MULTI CHANNEL RECEIVER VSX C300 DVD TV SAT VCR FRONT TUNER MASTER VOLUME DOWN UP Checking your Settings Use this feature to check your settings on the receiver s display The meaning of the displays for the input signal are explained below 1 Press the DISPLAY button on t...

Page 40: ... m OFF ch1 OFF FLAT OFF AUTO all inputs Front L R 0 dB Center 0 dB Surround L R 0 dB Subwoofer 0 dB DVD dB no sound Setting Type Default Settings Default Settings for the Receiver All the settings that return to their defaults when you reset the system are listed here see the previous page to Reset the System Using Other Functions page 26 page 26 page 26 page 27 page 27 page 27 page 28 page 28 pag...

Page 41: ...trol operation mode The factory settings for all the buttons are explained here All the settiings are all for Pioneer components but you can change this DVD DVD player TV SAT TV VCR DVD recorder TUNER the built in radio tuner FRONT VCR TV TV For a detailed chart of the factory settings see Clearing the Preset Codes on page 43 VOLUME CHANNEL REMOTE SETUP INPUT SELECT INPUT SELECT MASTER VOLUME TV T...

Page 42: ...he number buttons to enter the 3 digit setup code see pages 46 48 for Preset Code List The LED will blink After a code has been input the power of the component being input will turn on or off The remote will return to the previous mode after thirty seconds of inactivity MEMO The power of the component being input will only turn on or off if that component is able to be turned on directly by remot...

Page 43: ... CH LEVEL TESTTONE TOP MENU MENU ST MUSICAL DRAMA ACTION AUDIO VIDEOPRE PROGRAMMED REMOTECONTROLUNIT DVD TV SAT RECEIVER REMOTE SETUP INPUT SELECT INPUT SELECT MASTER VOLUME RECEIVER TV SOURCE TV CONTROL ROOM SETUP TUNER FRONT MUTING DISPLAY VCR TV 1 2 3 4 5 9 6 7 8 0 10 TUNE BAND CLASS EDIT SEARCH RF ATT MPX D ACCESS DISPLAY 2 1 2 VIRTUAL 5 D GAME TV SURR PHONES SURR STANDARD MIDNGHT AUTO 2 MULTI...

Page 44: ...R C V R D C D M D C k c e d e t t e s s a C r e d r o c e r D V D r e b m u N e c r u o s m a r g o r p a n o s k c a r t s s e c c a y l t c e r i D D L R D C D M D C s n o t t u B e c r u o s m a r g o r p a n o r e t p a h c s s e c c a y l t c e r i D r e d r o c e r D V D D V D l e n n a h c a t c e l e s y l t c e r i D R C V n o t t u B 0 1 g n i n i a m e r e h t d n a n o t t u b s i h t ...

Page 45: ... a S V T e l b a C U N E M m e t s y s t a h t f o u n e m V T e h t o t u o y s e k a T V T V T e t i l l e t a S V T e l b a C V T l a t i g i D U N E M P O T m e t s y s t a h t f o u n e m e d i u g e h t o t u o y s e k a T V T V T e t i l l e t a S V T e l b a C V T l a t i g i D Y A L P S I D l e n n a h c s u o i v e r p e h t o t u o y s e k a T V T g n i w e i v e r a u o y u n e m e h t...

Page 46: ...644 DECCA 607 648 DIXI 607 644 DUMONT 653 ELIN 607 ELITE 641 ELTA 644 EMERSON 642 ERRES 607 FINLANDIA 635 643 655 FINLUX 607 632 645 648 653 654 655 FIRSTLINE 640 644 FISHER 632 635 638 645 FORMENTI 607 632 642 FRONTECH 631 642 646 FRONTECH PROTECH 632 FUJITSU 648 FUNAI 640 646 GBC 632 642 GEC 607 634 648 GELOSO 632 644 GENEXXA 631 641 GOODMANS 607 639 647 648 656 GORENJE 638 GPM 641 GRAETZ 631 64...

Page 47: ...TRONIQUE 417 BUSH 424 446 447 448 453 CATRON 452 CGB 441 CIMLINE 453 CLATRONIC 452 CONDOR 452 CROWN 448 452 453 DAEWOO 448 452 DANSAI 453 DE GRAAF 406 DECCA 414 441 DUAL 417 DUMONT 414 441 444 ELCATECH 453 FIDELITY 441 FINLANDIA 414 444 FINLUX 406 414 441 444 FIRSTLINE 405 409 411 424 453 FISHER 444 FRONTECH 452 FUNAI 441 GBC 414 GENERAL 452 GOLDSTAR 411 GOODMANS 411 441 448 452 453 GRAETZ 417 444...

Page 48: ...IO LAB 304 CYRUS 336 DENON 309 DUAL 319 337 FISHER 340 GOLDSTAR 330 GRUNDIG 336 HITACHI 334 INTERSOUND 337 JVC 331 KENWOOD 310 311 KODAK 322 LINN 336 LUXMAN 341 M ELECTRONIC 344 MARANTZ 304 336 MATSUI 336 MCS 304 MEMOREX 300 MERIDIAN 336 MITSUBISHI 335 NAD 316 NAIM 336 ONKYO 342 PANASONIC 304 PHILIPS 322 336 QUAD 336 QUASAR 304 ROADSTAR 344 ROTEL 336 S A B A 319 SANYO 340 SHARP 343 SONY 316 329 TE...

Page 49: ...isplay and no sound is output THDCT NG blinks in the display and no sound is output The unit does not re spond when the but tons are pressed No sound is output when the TUNER is se lected Considerable noise in radio broadcasts Broadcast stations can not be selected auto matically Remedy Connect the power plug to the wall outlet Disconnect the power plug from the outlet and insert again Make sure t...

Page 50: ... function performed by the player slightly alters the digital informa tion making it unreadable The player is paused The player s sound output settings are wrong Different discs have different recording levels so some may be louder than oth ers Remedy Refer to Speakers setting mode on page 26 to check the speaker settings Turn levels up Refer to Setting the vol ume level of each channel on page 29...

Page 51: ...e to make some setting or control something on the receiver Something is plugged into the Control Terminal in see page 17 The plug was inserted improperly Remedy Turn on input attenuator see page 28 Turn the volume down Set the FRONT speakers to large refer to page 26 Make sure the video component is con nected correctly refer to pages 11 to 14 Make sure the proper component is se lected by pressi...

Page 52: ...ctly the only components required are a CD ROM player as might be used with a personal computer and a DTS processor and therefore less investment is required than with other formats For this reason the format is being introduced in more and more movie theaters and is being adopted in home movie software DVD LD and music software 5 1 channel CD Digital Audio Formats Home theater uses various types ...

Page 53: ...sibilities are listed below 2 Channel Stereo In this format the signal is recorded on two channels i e stereo left and right Most music CDs use this format 2 Channel Surround Dolby Surround Used mainly for videotape this is one of the original home theater formats and can be decoded by this receiver Because it developed over a time it is the most complicated system explained here The developers ha...

Page 54: ...ar four channel surround sound from 2 channel surround sound signals i e Dolby Surround Actually the surround speakers will be mono outputting the same sound but you will still be able to get theater like sound Multichannel Surround Playback MULTI ch indicator lights Technically speaking your source needs to have at least three channels and you need to be listening on at least three speakers to ha...

Page 55: ...ensitivity Mono 15 2 dBf IHF 1 6 µV 75 Ω 50 dB Quieting Sensitivity Mono 20 2 dBf Stereo 41 2 dBf Signal to Noise Ratio Mono 76 dB at 85 dBf Stereo 72 dB at 85 dBf Distortion Stereo 0 6 1 kHz Alternate Channel Selectivity 70 dB 400 kHz Stereo Separation 40 dB 1 kHz Frequency Response 30 Hz to 15 kHz 1dB Antenna Input DIN 75 Ω unbalanced AM Tuner Section Frequency Range 531 kHz to 1 602 kHz Sensiti...

Page 56: ...fornia 90801 1540 U S A PIONEER ELECTRONICS OF CANADA INC 300 Allstate Parkway Markham Ontario L3R OP2 Canada PIONEER EUROPE NV Haven 1087 Keetberglaan 1 B 9120 Melsele Belgium TEL 03 570 05 11 PIONEER ELECTRONICS AUSTRALIA PTY LTD 178 184 Boundary Road Braeside Victoria 3195 Australia TEL 03 9586 6300 PIONEER ELECTRONICS DE MEXICO S A DE C V San Lorenzo 1009 3er Piso Desp 302 Col Del Valle Mexico...

Reviews: