background image

4

4

21

Chapter

4

34

6

Basic playback

Playing a source

Here are the basic instructions for playing a source (such as 

a DVD disc) with your home theater system.

1

Switch on your system components and receiver.

Start by switching on the playback component (for 

example a DVD player), your TV and subwoofer (if you 

have one), then the receiver (press 

RECEIVER

).

Make sure the setup microphone is disconnected.

2

Switch the TV input to the input that connects this 
receiver.

For example, if you connected this receiver to the 

VIDEO


jacks on your TV, make sure that the 

VIDEO

 input is now 

selected.

3

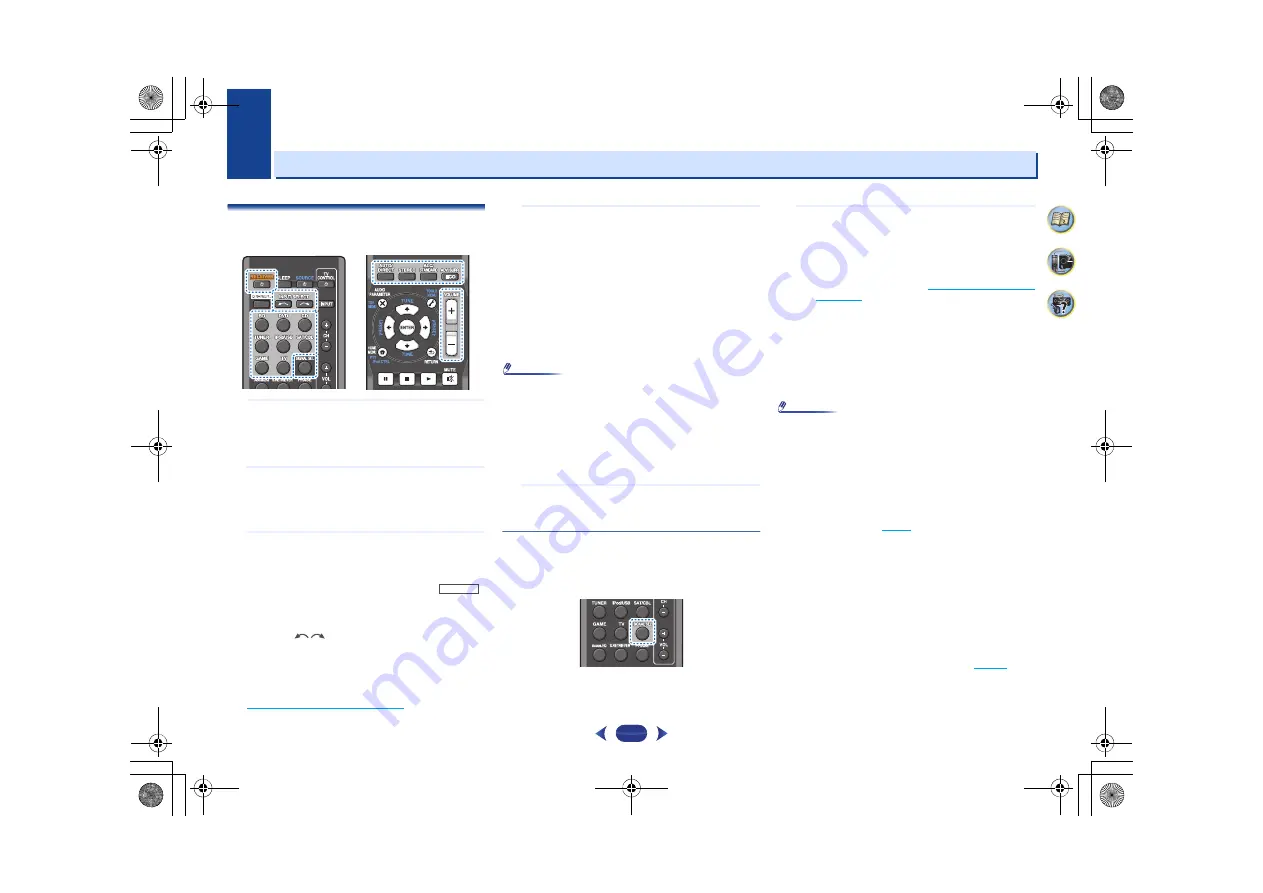
Press input function buttons to select the input function 
you want to play.

The input of the receiver will switch over, and you will 

be able to operate other components using the remote 
control. To operate the receiver, first press 


on the remote control, then press the appropriate 

button to operate.

The input source can also be selected by using 

INPUT 

SELECT


 buttons on the remote control, or by 

using the front panel 

INPUT SELECTOR

 dial. In this 

case, the remote control won’t switch operational 

modes.

If you selected the proper input source and there is still 

no sound, select the audio input signal for playback (see 

Selecting the audio input signal

 below

).

4

Press 

AUTO/DIRECT

 to select ‘AUTO SURROUND’ and 

start playback of the source.

If you’re playing a Dolby Digital or DTS surround sound 

DVD disc, with a digital audio connection, you should 

hear surround sound. If you’re playing a stereo source or 

if the connection is an analog audio connection, you will 

only hear sound from the front left/right speakers in the 

default listening mode.
It is possible to check on the front panel display whether 

or not surround sound playback is being performed 

properly.
If the display does not correspond to the input signal and 

listening mode, check the connections and settings.

Note

You may need to check the digital audio output settings on 

your DVD player or digital satellite receiver. It should be set 

to output Dolby Digital, DTS and 88.2 kHz/96 kHz PCM (2 

channel) audio, and if there is an MPEG audio option, set 

this to convert the MPEG audio to PCM.

Depending on your DVD player or source discs, you may 

only get digital 2 channel stereo and analog sound. In this 

case, the receiver must be set to a multichannel listening 

mode if you want multichannel surround sound.

5

Use 

/–

 to adjust the volume level.

Turn down the volume of your TV so that all sound is 

coming from the speakers connected to this receiver.

Selecting the audio input signal

The audio input signal can be selected for each input source. 

Once it is set, the audio input that was selected will be applied 

whenever you select the input source using the input function 

buttons.

 

Press 

SIGNAL SEL

 to select the audio input signal 

corresponding to the source component. 

Each press cycles through the following:

H

 – Selects an HDMI signal. 

H

 can be selected for 

BD

DVD

SAT/CBL

 or 

GAME

 input. For other inputs, 

H


cannot be selected.
-

When the 

HDMI

 option in 

Setting the Audio options


on page 28

 is set to 

THRU

, the sound will be heard 

through your TV, not from this receiver.

A

 – Selects the analog inputs. 

C1

/

O1

 – Selects the digital input. The coaxial 1 input is 

selected for 

C1

, and the optical 1 audio input is 

selected for 

O1

.

When 

H

 (HDMI) or 

C1

/

O1

 (digital) is selected and the 

selected audio input is not provided, 

A

 (analog) is 

automatically selected.

Note

BD

 and 

GAME

 inputs are fixed to 

H

 (HDMI). It cannot be 

changed.

For the 

TV

 input, only 

A

 (analog) or 

C1

/

O1

 (digital) can be 

selected. However, if the 

ARC

 at 

HDMI Setup

 is set to 

ON

the input is fixed to 

H

 (HDMI) and cannot be changed.

When set to 

H

 (HDMI) or 

C1

/

O1

 (digital), 

2

 lights when a 

Dolby Digital signal is input, and 

DTS

 lights when a DTS 

signal is input. 

When the 

H

 (HDMI) is selected, the 

A

 and 

DIGITAL


indicators are off (see 

page 7

).

When digital input (optical or coaxial) is selected, this 

receiver can only play back Dolby Digital, PCM (32 kHz to 

96 kHz) and DTS (including DTS 96 kHz/24 bit) digital signal 

formats. The compatible signals via the HDMI terminals 

are: Dolby Digital, DTS, SACD (DSD 2 ch only), PCM 

(32 kHz to 192 kHz sampling frequencies), Dolby TrueHD, 

Dolby Digital Plus, DTS-EXPRESS, DTS-HD Master Audio 

and DVD Audio (including 192 kHz). With other digital 

signal formats, set to 

A

 (analog).

You may get digital noise when a LD or CD player 

compatible with DTS is playing an analog signal. To prevent 

noise, make the proper digital connections (

page 13

) and 

set the signal input to 

C1

/

O1

 (digital).

RECEIVER

VSX-523_UCSMXCN_En_New.book  21 ページ  2013年5月20日 月曜日 午後1時59分

Summary of Contents for VSX-5231

Page 1: ...n insurance claim such as loss or theft Improve product development Your input helps us continue to design products that meet your needs Receive a free Pioneer newsletter Registered customers can opt in to receive a monthly newsletter Receive free tips updates and service bulletins on your new product AV Receiver VSX 5231 Operating Instructions VSX 523_UCSMXCN_En_New book 1 ページ 2013年5月20日 月曜日 午後1時...

Page 2: ...quipment into an outlet on a circuit different from that to which the receiver is connected Consult the dealer or an experienced radio TV technician for help D8 10 1 2_A1_En Information to User Alterations or modifications carried out without appropriate authorization may invalidate the user s right to operate the equipment D8 10 2_A1_En WARNING This equipment is not waterproof To prevent a fire o...

Page 3: ... off all power from the AC outlet Since the power cord serves as the main disconnect device for the unit you will need to unplug it from the AC outlet to shut down all power Therefore make sure the unit has been installed so that the power cord can be easily unplugged from the AC outlet in case of an accident To avoid fire hazard the power cord should also be unplugged from the AC outlet when left...

Page 4: ...playback Playing a source 21 Selecting the audio input signal 21 Playing an iPod 23 Playing back files stored on an iPod 23 Basic playback controls 23 Switches between the iPod controls and the receiver controls 23 Playing a USB device 24 Basic playback controls 24 Compressed audio compatibility 24 Listening to the radio 25 Improving FM sound 25 Saving station presets 25 Listening to station prese...

Page 5: ...tting to be made as necessary 1 Connecting the speakers Where you place the speakers will have a big effect on the sound Placing the speakers page 10 Connecting the speakers page 11 2 Connecting the components For surround sound you ll want to hook up using a digital connection from the Blu ray Disc DVD player to the receiver About video outputs connection page 13 Connecting a TV and playback comp...

Page 6: ...nent lights when the component is connected page 14 7 iPod iPhone indicator Lights when an iPod iPhone is connected and iPod USB input is selected page 23 8 Remote sensor Receives the signals from the remote control see Operating range of remote control on page 9 9 MASTER VOLUME dial 10 STANDBY ON 11 PHONES jack Use to connect headphones When the headphones are connected there is no sound output f...

Page 7: ... display Displays various system information 24 DTS indicators DTS Lights when a source with DTS encoded audio signals is detected HD Lights when a source with DTS EXPRESS or DTS HD encoded audio signals is detected 96 24 Lights when a source with DTS 96 24 encoded audio signals is detected NEO 6 When one of the NEO 6 modes of the receiver is on this lights to indicate NEO 6 processing page 26 25 ...

Page 8: ...d the Auto level control stereo mode page 26 ADV SURR Switches between the various surround modes page 27 ECO Switches between ECO Mode 1 ECO Mode 2 When ECO Mode is turned ON the display will go dark page 27 9 Receiver and component control buttons The following button controls can be accessed after you have selected the corresponding input function button BD DVD etc Press first to access AUDIO P...

Page 9: ...ly be used with Pioneer TVs Use to turn on off the power of the TV INPUT Use to select the TV input signal CH Use to select channels VOL Use to adjust the volume on your TV 15 VOLUME Use to set the listening volume 16 MUTE Mutes unmutes the sound 17 DISP Switches the display of this unit The listening mode sound volume or input name can be checked by selecting an input source Loading the batteries...

Page 10: ...r place the front speakers at a wider angle If not place them at a narrower angle Place the center speaker above or below the TV so that the sound of the center channel is localized at the TV screen Also make sure the center speaker does not cross the line formed by the leading edge of the front left and right speakers It is best to angle the speakers towards the listening position The angle depen...

Page 11: ...ARDOUS LIVE voltage To prevent the risk of electric shock when connecting or disconnecting the speaker cables disconnect the power cord before touching any uninsulated parts Make sure that all the bare speaker wire is twisted together and inserted fully into the speaker terminal If any of the bare speaker wire touches the back panel it may cause the power to cut off as a safety measure Front speak...

Page 12: ...ideo CD Super VCD and CD This receiver incorporates High Definition Multimedia Interface HDMI technology This receiver supports the functions described below through HDMI connections Digital transfer of uncompressed video contents protected by HDCP 1080p 24 1080p 60 etc 3D signal transfer Deep Color signal transfer x v Color signal transfer Audio Return Channel see The HDMI Setup menu on page 33 I...

Page 13: ... digital connections Standard RCA video cables These cables are the most common type of video connection and are used to connect to the composite video terminals The yellow plugs distinguish them from cables for audio About video outputs connection This receiver is not loaded with a video converter When you use HDMI cables for connecting to the input device the same cables should be used for conne...

Page 14: ...switch the TV input to analog to see the OSD screen for setup etc on the TV When the ARC function is ON and the receiver is connected to a compatible TV with an HDMI cable and you switch the input of the TV to composite the input of the receiver may automatically switch to TV If this happens switch the receiver s input back to the original input or turn OFF the ARC function see The HDMI Setup menu...

Page 15: ...dio signal O1 OPTICAL1 see Selecting the audio input signal on page 21 You can only connect one component to the coaxial input terminal If connecting other devices please use a different method to connect the audio In order to listen to the audio from the source component that is connected to this receiver using a coaxial cable first switch to the DVD DVD player or SAT CBL set top box then press S...

Page 16: ...direction giving the best reception 4 Connect the FM wire antenna into the FM antenna socket For best results extend the FM antenna fully and fix to a wall or door frame Don t drape loosely or leave coiled up Using external antennas To improve FM reception Use an F connector not supplied to connect an external FM antenna To improve AM reception Connect a 5 m to 6 m 16 ft to 20 ft length of vinyl c...

Page 17: ... iPod is connected to this unit Recharging is enabled only when the unit s power is turned on For instructions on playing the iPod see Playing an iPod on page 23 Note When the ARC function is ON and the receiver is connected to a compatible TV with an HDMI cable and you switch the input of the TV when the receiver s selection is iPod USB input the receiver may automatically switch to TV If this ha...

Page 18: ...tepped on A damaged power cord can cause a fire or give you an electrical shock Check the power cord once in a while When you find it damaged ask your nearest PIONEER authorized service center or your dealer for a replacement The receiver should be disconnected by removing the mains plug from the wall socket when not in regular use e g when on vacation Note After this receiver is connected to an A...

Page 19: ... are no obstacles between the speakers and the microphone If you have a tripod use it to place the microphone so that it s about ear level at your normal listening position Otherwise place the microphone at ear level using a table or a chair 4 Press on the remote control then press the HOME MENU button The Home Menu appears on your TV Use and ENTER on the remote control to navigate through the scr...

Page 20: ...d You return to the Home Menu The settings made in the Auto MCACC setup should give you excellent surround sound from your system but it is also possible to adjust these settings manually using the Home Menu starting on page 30 Note Depending on the characteristics of your room sometimes identical speakers with cone sizes of around 12 cm 5 inches will end up with different size settings You can co...

Page 21: ...e discs you may only get digital 2 channel stereo and analog sound In this case the receiver must be set to a multichannel listening mode if you want multichannel surround sound 5 Use VOLUME to adjust the volume level Turn down the volume of your TV so that all sound is coming from the speakers connected to this receiver Selecting the audio input signal The audio input signal can be selected for e...

Page 22: ...oing the following DVD BD CD TUNER SAT CBL DVD SAT CBL DVD SAT CBL GAME DVD SAT CBL C1 SIGNAL SEL TV TV 1 O1 2 SIGNAL SEL A SIGNAL SEL A SIGNAL SEL CD TV Audio Audio Audio Audio Video Audio HDMI Video Other than TV input TV input ANALOG IN1 audio input terminal is assigned to CD under factory settings If you want to change this to TV input please change the settings in the Input Assign menu page 3...

Page 23: ...lay shows NO DEVICE try switching off the receiver and reconnecting the iPod to the receiver The controls of your iPod will be inoperable when connected to this receiver Playing back files stored on an iPod To navigate songs on your iPod you can take advantage of the OSD of your TV connected to this receiver You can also control all operations for music in the front panel display of this receiver ...

Page 24: ... on again Reconnect the USB device with the receiver switched off Select another input source like BD then switch back to iPod USB Use a dedicated AC adapter supplied with the device for USB power For more information on error messages see USB messages on page 35 If this doesn t remedy the problem it is likely your USB device is incompatible Compressed audio compatibility Note that although most s...

Page 25: ...ee Listening to the radio above for more on this 2 Press TOOLS The display shows PRESET then a blinking MEM and station preset 3 Press PRESET to select the station preset you want You can also use the number buttons 4 Press ENTER The preset number stop blinking and the receiver stores the station Note If the receiver is left disconnected from the AC power outlet for over a month the station memori...

Page 26: ...ital DTS or Dolby Surround encoded the proper decoding format will automatically be selected and shows in the display When you select STEREO ALC Auto Level Control stereo mode this unit equalizes playback sound levels if each sound level varies with the music source recorded in a portable audio player When you select STEREO you will hear the source through just the front left and right speakers an...

Page 27: ...dphones Better sound using Phase Control This receiver s Phase Control feature uses phase correction measures to make sure your sound source arrives at the listening position in phase preventing unwanted distortion and or coloring of the sound ACTION Designed for action movies with dynamic soundtracks DRAMA Designed for movies with lots of dialog ADVANCED GAME Suitable for video games SPORTS Suita...

Page 28: ...nt source settings and status of the receiver 1 Press then press AUDIO PARAMETER button 2 Use to select the setting you want to adjust Depending on the current status mode of the receiver certain options may not be able to be selected Check the table below for notes on this 3 Use to set it as necessary See the table below for the options available for each setting 4 Press RETURN to confirm and exi...

Page 29: ...s The LFE is not limited when set to 0 dB which is the recommended value When set to 15 dB the LFE is limited by the respective degree When OFF is selected no sound is output from the LFE channel 0 0 dB 5 5 dB 10 10 dB 15 15 dB 20 20 dB OFF SACD G SACD Gain f Brings out detail in SACDs by maximizing the dynamic range during digital processing 0 0 dB 6 6 dB HDMI HDMI Audio Specifies the routing of ...

Page 30: ...wn menu on page 32 HDMI Setup Set the audio return channel function and set the HDMI input signal to Standby Through output or not during standby see The HDMI Setup menu on page 33 Manual speaker setup This receiver allows you to make detailed settings to optimize the surround sound performance You only need to make these settings once unless you change the placement of your current speaker system...

Page 31: ...ting 100Hz This setting decides the cutoff between bass sounds playing back from the speakers selected as LARGE or the subwoofer and bass sounds playing back from those selected as SMALL It also decides where the cutoff will be for bass sounds in the LFE channel For more on selecting the speaker sizes see Speaker Setting on page 30 1 Select Manual SP Setup from the Home Menu 2 Select X Over from t...

Page 32: ...turn to the Manual SP Setup menu The Input Assign menu ANALOG IN1 audio input terminal is assigned to CD under factory settings but this can be changed to TV input 1 Select Input Assign from the Home Menu 2 Select Analog Input from the Input Assign menu 3 Select the desired input option for the ANALOG IN1 audio input terminal 4 When you re finished press RETURN You return to the Input Assign menu ...

Page 33: ...to a TV with an HDMI cable you will need to switch the input on the TV to the input mode required to connect to this unit Then you can select a TV program Important The ARC function may not operate even if the above conditions are met If this is the case listen to the TV audio after connecting this unit and the TV with an audio cable The CEC Consumer Electronic Control function may activate when t...

Page 34: ...de page 21 Make sure the component is connected correctly see Connecting your equipment on page 10 Check the audio output settings of the source component Refer to the instruction manual supplied with the source component No image is output when an input function is selected Make sure the component is connected correctly see Connecting your equipment on page 10 Use the same type of video cables fo...

Page 35: ...a DVI device use a separate connection for the audio HDMI format digital audio transmissions require a longer time to be recognized Due to this interruption in the audio may occur when switching between audio formats or beginning playback Turning on off the device connected to this unit s HDMI OUT terminal during playback or disconnecting connecting the HDMI cable during playback may cause noise o...

Page 36: ...e or six times with water and wrung out well and then wipe again with a dry cloth Do not use furniture wax or cleansers Never use thinners benzine insecticide sprays or other chemicals on or near this unit since these will corrode the surface Specifications Amplifier section Continuous average power output of 80 watts per channel min at 8 ohms from 20 Hz to 20 000 Hz with no more than 0 08 total h...

Page 37: ...our sensitive hearing Sound can be deceiving Over time your hearing comfort level adapts to higher volumes of sound so what sounds normal can actually be loud and harmful to your hearing Guard against this by setting your equipment at a safe level BEFORE your hearing adapts ESTABLISH A SAFE LEVEL Set your volume control at a low setting Slowly increase the sound until you can hear it comfortably a...

Page 38: ... Shin ogura Saiwai ku Kawasaki shi Kanagawa 212 0031 Japan PIONEER ELECTRONICS USA INC P O BOX 1540 Long Beach California 90801 1540 U S A TEL 800 421 1404 PIONEER ELECTRONICS OF CANADA INC 340 Ferrier Street Unit 2 Markham Ontario L3R 2Z5 Canada TEL 1 877 283 5901 905 479 4411 PIONEER EUROPE NV Haven 1087 Keetberglaan 1 B 9120 Melsele Belgium TEL 03 570 05 11 PIONEER ELECTRONICS ASIACENTRE PTE LT...

Reviews: