background image

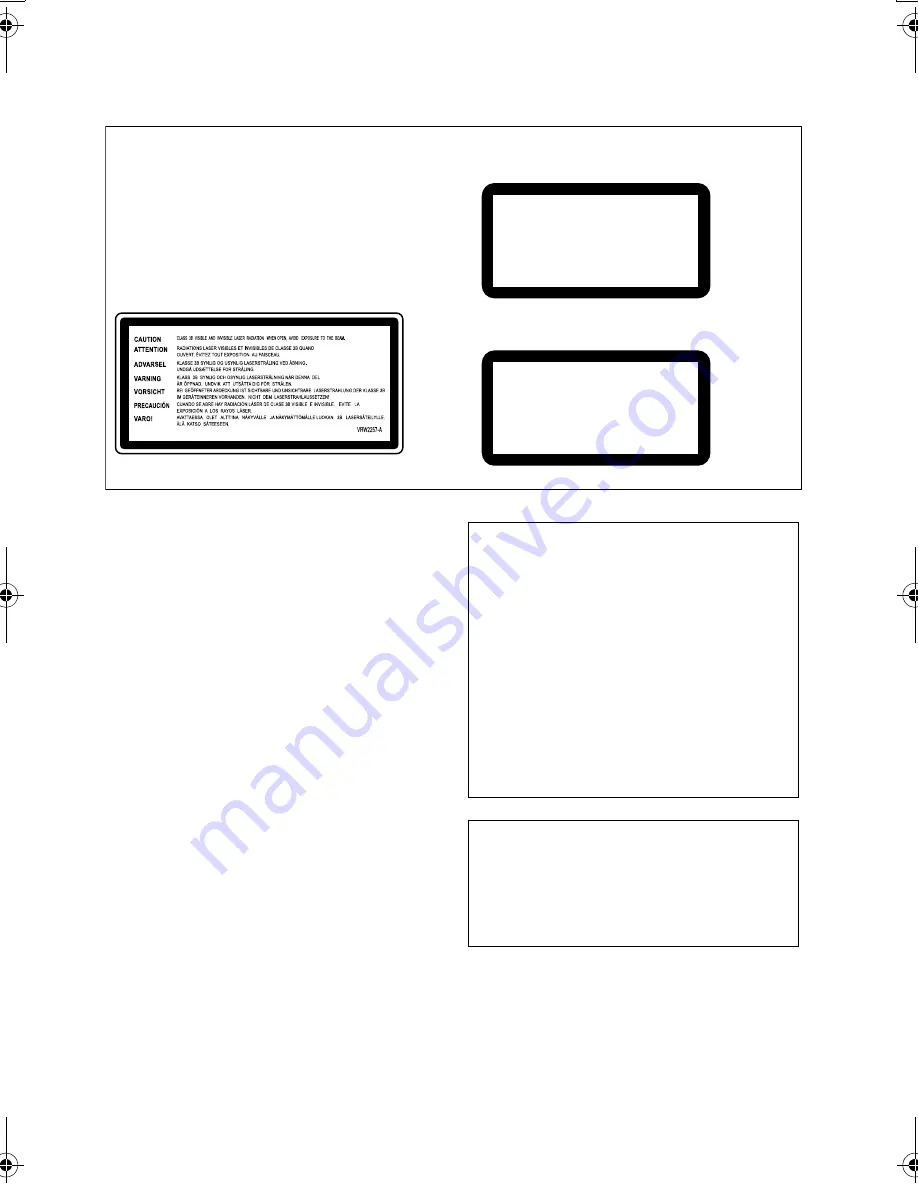
PRECAUCIÓN

Este a

p

a

r

ato es un 

pr

oducto de láse

r

 de clase 1, 

p

e

r

contiene un diodo de láse

r

 de clase su

p

e

r

io

r

 a 1.

Pa

r

a mantene

r

 la segu

r

idad en todo momento, no 

quite ninguna cubie

r

ta ni intente accede

r

 al inte

r

io

r


del a

p

a

r

ato.

Solicite todo el se

r

vicio técnico a 

p

e

r

sonal cualificado.

En su a

p

a

r

ato encont

r

a

r

á la siguiente etiqueta de 

pr

ecaución.

Ubicación : 

p

a

r

te su

p

e

r

io

r

 de la unidad

D3-4-2-1-8_B_Sp

CLASS 1
LASER PRODUCT

[Modelos para Sudamérica y 
Centroamérica]

[Modelos para el Ejército de EE.UU. y 
para las zonas libres de impuestos]

CLASS 1
LASER PRODUCT

PRODUCTO LASER CLASE 1

Si la clavija del cable de alimentación de CA de este 
a

p

a

r

ato no se ada

p

ta a la toma de co

rr

iente de CA 

que usted desea utiliza

r

, debe

r

á cambia

r

 la clavija 

p

o

r

 ot

r

a que se ada

p

te a

pr

o

p

iadamente. El 

r

eem

p

lazo y montaje de una clavija del cable de 

alimentación de CA sólo debe

r

á 

r

ealiza

r

los 

p

e

r

sonal 

de se

r

vicio técnico cualificado. Si se enchufa la 

clavija co

r

tada a una toma de co

rr

iente de CA, 

p

uede causa

r

 fue

r

tes desca

r

gas eléct

r

icas.

Asegú

r

ese de que se ti

r

a de la fo

r

ma a

pr

o

p

iada 

des

p

ués de habe

r

la ext

r

aído.

El a

p

a

r

ato debe

r

á desconecta

r

se desenchufando la 

clavija de la alimentación de la toma de co

rr

iente 

cuando no se 

pr

o

p

onga utiliza

r

lo du

r

ante mucho 

tiem

p

o (

p

o

r

 ejem

p

lo, antes de i

r

se de vacaciones).   


D3-4-2-2-1a_A_Sp

PRECAUCIONES CONCERNIENTES A LA 
MANIPULACIÓN DEL CABLE DE 
ALIMENTACIÓN

Tome el cable de alimentación 

p

o

r

 la clavija. No 

ext

r

aiga la clavija ti

r

ando del cable. Nunca toque el 

cable de alimentación cuando sus manos estén
mojadas, ya que esto 

p

od

r

ía causa

r

 co

r

toci

r

cuitos o 

desca

r

gas eléct

r

icas. No coloque la unidad, algún

mueble, etc., sob

r

e el cable de alimentación. Asegú

r

ese

de no hace

r

 nudos en el cable ni de uni

r

lo a ot

r

os 

cables. Los cables de alimentación debe

r

án se

r


dis

p

uestos de tal fo

r

ma que la 

pr

obabilidad de que 

sean 

p

isados sea mínima. Una cable de alimentación

dañado 

p

od

r

á causa

r

 incendios o desca

r

gas eléct

r

icas.

Revise el cable de alimentación está dañado, solicite el 

r

eem

p

lazo del mismo al cent

r

o de se

r

vicio auto

r

izado 

PIONEER más ce

r

cano, o a su dist

r

ibuido

r

.  

S002_Sp

Este 

pr

oducto es 

p

a

r

a ta

r

eas domésticas gene

r

ales. 

Cualquie

r

a ave

r

ía debida a ot

r

a utilización que 

ta

r

eas domésticas (tales como el uso a la

r

go 

p

lazo 

p

a

r

a motivos de negocios en un 

r

estau

r

ante o el uso 

en un coche o un ba

r

co) y que necesita una 

r

e

p

a

r

ación ha

r

á que cob

r

a

r

la incluso du

r

ante el 

p

e

r

íodo de ga

r

antía.

K041_Sp

XV-DV151_252_Sp.book  Page 3  Tuesday, April 11, 2006  9:32 PM

Summary of Contents for S-DV151

Page 1: ...Operating Instructions Manual de instrucciones HTZ151DVD DVD CD Receiver Receptor con DVD CD XV DV151 Speaker System Sistema de altavoces S DV151 ...

Page 2: ...provided for ventilation to ensure reliable operation of the product and to protect it from overheating To prevent fire hazard the openings should never be blocked or covered with items such as newspapers table cloths curtains or by operating the equipment on thick carpet or a bed D3 4 2 1 7b_A_En Operating Environment Operating environment temperature and humidity 5 ºC 35 ºC 41 ºF 95 ºF less than...

Page 3: ...hey are not likely to be stepped on A damaged power cord can cause a fire or give you an electrical shock Check the power cord once in a while When you find it damaged ask your nearest PIONEER authorized service center or your dealer for a replacement S002_En This product is for general household purposes Any failure due to use for other than household purposes such as long term use for business p...

Page 4: ...e from the program menu 20 Searching a disc 20 Switching subtitles 20 Switching language audio channels 20 Zooming the screen 21 Switching camera angles 21 Displaying disc information 21 05 USB playback Using the USB interface 22 Basic playback controls 22 Scanning files 23 Playing a JPEG slideshow 23 Browsing files with the Navigator 23 06 Audio Settings and Video Adjust menus Audio Settings menu...

Page 5: ...eshooting 36 General 36 DVD CD Video CD player 37 Tuner 38 USB connection 38 Error Messages 39 Resetting the system 39 Setting the Key Lock 39 Switching off the demo 39 Using the language code list 39 Language code list 40 Country Area code list 40 Specifications 41 ...

Page 6: ... 8 PHONES jack Connect headphones 9 Display See Display below Remote control 1 STANDBY ON Switches the system on or into standby 2 Function select buttons Selects the source you want to listen to DVD CD TUNER USB LINE 3 Number buttons CLEAR DISPLAY CLEAR Clears an entry DVD CD VOLUME OPEN CLOSE USB STANDBY ON 3 4 5 6 2 1 7 8 9 TVCONTROL VOLUME HOME MENU AUDIO SUBTITLE ANGLE ZOOM STANDBY ON MUTE LI...

Page 7: ...puts the test tone for speaker setup page 9 SURROUND Selects a Surround mode page 14 or switches to stereo playback page 15 SOUND Accesses the sound menu to adjust the SFC Mode bass and treble etc page 15 8 Playback controls See Basic playback controls on page 10 Disc playback features on page 16 and USB playback on page 22 for an explanation of these controls 9 TV CONTROL buttons These control Pi...

Page 8: ...ghts during program play page 19 7 Tuner indicators Lights when a broadcast is being received Lights when a stereo FM broadcast is being received in auto stereo mode Lights when FM mono reception is selected 8 RDM Lights during random play page 19 9 kHz MHz Indicates the frequency unit shown in the character display kHz for AM MHz for FM 10 Character display 11 Lights when sleep timer is active pa...

Page 9: ...test tone is output in the following order from the speakers active in the current listening mode L Front left speaker C Center speaker R Front right speaker SR Right surround speaker SL Left surround speaker SW Subwoofer3 2 Use the VOLUME button to adjust the volume to an appropriate level 3 Use to adjust the speaker levels in turn You should hear the test tone at the same volume from each speake...

Page 10: ...r Video CD Super VCD a menu may appear See DVD Video disc menus and Video CD Super VCD PBC menus on page 11 to navigate these If you loaded a disc containing JPEGs a slideshow will start See Playing a JPEG slideshow on page 16 for more on this If a disc contains a mixture of DivX video and other media file types MP3 for example first select whether to play the DivX video files DivX or the other me...

Page 11: ...ress to start fast forward scanning Skips to the start of the current track or chapter then previous tracks chapters Skips to the next track or chapter Numbers Use to enter a title chapter track number Press ENTER to select If the disc is stopped playback starts from the selected title for DVD or track for CD Video CD Super VCD If the disc is playing playback jumps to the start of the selected tit...

Page 12: ...3 Use to select FM MONO then press ENTER The mono indicator lights when the tuner is in mono reception mode Select FM AUTO above to switch back to auto stereo mode the stereo indicator lights when receiving a stereo broadcast Memorizing stations You can save up to 30 station presets so that you always have easy access to your favorite stations without having to tune in manually each time 1 Tune to...

Page 13: ...ollowing options SLP ON Switches off after about an hour SLP OFF Cancels the sleep timer After selecting SLP ON you can press SLEEP again to check how much time is left Each line indicates approximately 12 minutes remaining Dimming the display You can dim the display if you find it too bright 1 Press SETUP and use to choose DIMMER then press ENTER This is shown in the front panel display 2 Use to ...

Page 14: ...nd sound especially suited to music sources use with any two channel source STEREO See Listening in stereo below Using Front Surround The Front Surround mode is effective when DVD CD or USB is selected as the input source and you are using the Front surround 3 spot speaker setup as described in Home theater sound setup on page 9 and the Speaker Setup Guide The surround speakers should be placed on...

Page 15: ... additional surround sound effects 1 Press SOUND 2 Use to select SFC MODE then press ENTER 3 Press then ENTER to select an SFC Sound Mode Select between OFF ACTION DRAMA ROCK POP HALL or LIVE Adjusting the bass and treble Use the bass and treble controls to adjust the overall tone 1 Press SOUND 2 Use to select BASS or TREBLE then press ENTER 3 Use to adjust the sound then press ENTER to confirm Bo...

Page 16: ... Press repeatedly to change the slow motion speed shown on screen To resume playback press play 2 Frame advance frame reverse You can advance or back up DVD discs frame by frame With Video CD Super VCDs and DivX video you can only use frame advance 1 During playback press pause 2 Press or to reverse or advance a frame at a time To resume playback press play 2 Playing a JPEG slideshow After loading...

Page 17: ...RW disc Original Time Thumbnails from the Original content at 10 minute intervals Playlist Time Thumbnails from the Playlist at 10 minute intervals The screen shows up to six moving thumbnail images displayed one after another To display the previous next six thumbnails press 3 Select the thumbnail image for what you want to play You can use either and ENTER to select a thumbnail or the number but...

Page 18: ... JPEG from which you want the slideshow to start Playback of both the slideshow and the audio files repeats Playback controls are effective for the JPEG slideshow only To play the contents of the whole disc rather than just the current folder exit the Disc Navigator and start playback using the play button Looping a section of a disc The A B Repeat function allows you to specify two points A and B...

Page 19: ...ct Program then select Create Edit from the list of program options 3 Use and ENTER to select a title chapter or track for the current step in the program list For a DVD disc you can add a title or a chapter For a CD or Video CD Super VCD select a track to add to the program list After pressing ENTER to select the title chapter track the step number automatically moves down one 4 Repeat step 3 to ...

Page 20: ...back to resume from For example press 4 5 0 0 to have playback start from 45 minutes into the disc For 1 hour 20 minutes and 30 seconds press 8 0 3 0 5 Press ENTER to start playback Switching subtitles Some DVD discs and DivX video discs have subtitles in one or more languages the disc box will usually tell you which subtitle languages are available You can switch subtitle language during playback...

Page 21: ...tails When a multi angle scene is playing a icon appears on screen this can be switched off if you prefer see Display settings on page 26 During playback or when paused press ANGLE to switch angle Displaying disc information Various track chapter and title information can be displayed on screen during playback To show switch hide the information displayed press DISPLAY repeatedly Limited disc info...

Page 22: ...ted AC adapter supplied with the device for USB power If this doesn t remedy the problem it is likely your USB device is incompatible Basic playback controls The following table shows the basic controls on the remote for USB playback Note 1 This includes playback of WMA MP3 MPEG 4 AAC files except files with copy protection or restricted playback It is not pos sible to play DivX files through the ...

Page 23: ...f the folder When a JPEG file is selected a slideshow begins starting with that file and continues to the end of the folder Tip You can also play a JPEG slideshow while listening to WMA MP3 MPEG 4 AAC playback Simply select the audio file you want to listen to followed by the JPEG from which you want the slideshow to start Playback of both the slideshow and the audio files repeats Playback control...

Page 24: ...t menu From the Video Adjust screen you can adjust settings that affect picture presentation 1 Press HOME MENU and select Video Adjust from the on screen display 2 Make settings using and ENTER You can adjust the following settings Sharpness Adjusts the sharpness of edges in the picture Fine Standard Soft Brightness Adjusts the overall brightness 20 to 20 Contrast Adjusts the contrast between ligh...

Page 25: ...e from the DVD disc menu Initial Settings Setting Option What it means TV Screen See also Screen sizes and disc formats on page 35 4 3 Letter Box Set if you have a conventional 4 3 TV Widescreen movies are shown with black bars top and bottom 4 3 Pan Scan Set if you have a conventional 4 3 TV Widescreen movies are shown with the sides cropped so that the image fills the screen 16 9 Wide Set if you...

Page 26: ...nguage if possible Languages as displayed DVD menus are displayed in the selected language if possible Other Language Select to choose a language other than the ones displayed see Using the language code list on page 39 Subtitle Display On Subtitles are displayed in your selected subtitle language Off Subtitles are always off by default when you play a DVD disc Setting Option What it means OSD Lan...

Page 27: ...u can do this Select by code letter Use to change the Country Area code Select by code number Press then use the number buttons to enter the 4 digit Country Area code The new Country Area code takes effect after ejecting the disc once About DivX VOD content In order to play DivX VOD video on demand content on this player you first need to register the player with your DivX VOD content provider You...

Page 28: ... Settings 2 Select Speakers then Speaker Distance 3 Use to select a speaker 4 Press to change the speaker distance for the highlighted speaker 5 Use to change the distance When you change the distance settings of the front left L or front right R speakers all the other speaker distances change relative to it Front left right L R speaker distances can be set from 30 cm to 9 m in 30 cm incre ments 1...

Page 29: ...puts of an external playback component Connect using RCA pin plug stereo cables These jacks are labeled LINE on the rear panel Connecting the S video output If your TV has an S video input you can use this instead of the standard video output for a better quality picture Use an S video cable to connect the S VIDEO OUT to an S video input on your TV Line up the small triangle above the jack with th...

Page 30: ...omponent video output Compatibility of this player with progressive scan and high definition TVs This player is compatible with progressive video Macro Vision System Copy Guard 2 Note 1 The component video output is switchable between interlaced and progressive formats See Video Output settings on page 25 2 Consumers should note that not all high definition television sets are fully compatible wit...

Page 31: ...The non DVD audio side of the disc is not compliant with the CD Audio specification and therefore may not play The DVD side of a DualDisc plays in this product DVD Audio content will not play For more detailed information on the DualDisc specification please refer to the disc manufacturer or disc retailer Disc compatibility table DVD Video DVD R DVD RW Video CD Fujicolor CD Audio CD CD R CD RW VID...

Page 32: ...alian it Norwegian no Portuguese pt Rhaeto Romanic rm Scottish gd Spanish es Swedish sv Group 2 Albanian sq Croatian hr Czech cs Hungarian hu Polish pl Romanian ro Slovak sk Slovenian sl Compressed audio MPEG 1 Audio Layer 3 MP3 Windows Media Audio WMA MPEG 4 AAC Sampling rates 32 kHz 44 1 kHz 48 kHz Bit rates Any 128 kbps or higher recommended VBR variable bit rate MP3 WMA MPEG 4 AAC playback No ...

Page 33: ...P or Windows Media Player 9 Series Microsoft Windows Media and the Windows logo are trademarks or registered trademarks of Microsoft Corporation in the United States and or other countries Using and taking care of discs Handling discs Hold the disc by its edges when handling so as not to leave fingerprints dirt or scratches on either side of the disc Damaged or dirty discs can affect playback perf...

Page 34: ...in a kitchen or other room where the system may be exposed to smoke or steam Use on a thick rug or carpet or cover with cloth this may prevent proper cooling of the system unit Place on an unstable surface or one that is not large enough to support all four of the system unit s feet Cleaning the pickup lens The DVD player s lens should not become dirty in normal use but if for some reason it shoul...

Page 35: ...he system s settings so that the disc is shown in letterbox format regardless of the setting Set to 4 3 Letter Box widescreen discs are shown with black bars top and bottom Set to 4 3 Pan Scan widescreen discs are shown with the left and right sides cropped Although the picture looks larger you don t actually see the whole picture 2 Using the 16 9 Wide setting with a standard 4 3 TV or one of the ...

Page 36: ...o your nearest Pioneer authorized service center or your dealer for servicing No sound is output when a function is selected If you re using the line input make sure the component is connected correctly see Connecting auxiliary audio components on page 29 Press MUTE on the remote control to turn muting off No sound from surround or center speakers Refer to Setting the channel levels on page 9 to c...

Page 37: ...ange the Component Out setting to Interlace see Video Output settings on page 25 Screen is stretched or aspect doesn t change The TV Screen setting is incorrect Set the TV Screen option to match the TV monitor you re using see Video Output settings on page 25 When recorded on a VCR or passed through an AV selector there is disturbance in the playback picture This system uses copy protection techno...

Page 38: ...cting external antennas on page 29 Turn off other equipment that may be causing the noise or move it further away The tuning interval is incorrect for your country or region See Frequency step setting on page 35 to switch the tuning interval Auto tuning does not pick up some stations The radio signal is weak Auto tuning will only detect radio stations with a good signal For more sensitive tuning c...

Page 39: ...e code list Some of the language options see Language settings on page 25 allow you to set your preferred language from any of the 136 languages in the Language code list below 1 Select Other Language 2 Use to select either a code letter or a code number 3 Use to select a code letter or a code number See the Language code list next page for a complete list of languages and codes Message Descriptio...

Page 40: ...311 Malayalam ml 1312 Mongolian mn 1314 Moldavian mo 1315 Marathi mr 1318 Malay ms 1319 Maltese mt 1320 Burmese my 1325 Nauru na 1401 Nepali ne 1405 Norwegian no 1415 Occitan oc 1503 Oromo om 1513 Oriya or 1518 Panjabi pa 1601 Polish pl 1612 Pashto Pushto ps 1619 Portuguese pt 1620 Quechua qu 1721 Rhaeto Romance rm 1813 Kirundi rn 1814 Romanian ro 1815 Kinyarwanda rw 1823 Sanskrit sa 1901 Sindhi s...

Page 41: ...x 60 mm H x 330 mm D Weight 3 1 kg Accessories DVD CD receiver Remote control 1 AA R6 dry cell batteries to confirm system operation 2 Video cable yellow plugs 1 AM loop antenna 1 FM antenna 1 Power cord 2 Power plug adapter Central and South American models only 1 Warranty Card US Military and Duty Free models only 1 Setup Guide These operating instructions S DV151 Speaker system Front speakers E...

Page 42: ...nced by NEC corporation FontAvenue is a registered trademark of NEC Corporation This product incorporates copyright protection technology that is protected by method claims of certain U S patents and other intellectual property rights owned by Macrovision Corporation and other rights owners Use of this copyright protection technology must be authorized by Macrovision Corporation and is intended fo...

Page 43: ...Additional information 09 43 En English Français Deutsch Nederlands Italiano Español ...

Page 44: ... calor por lo menos 10 cm encima 10 cm detrás y 10 cm en cada lado ADVERTENCIA Las ranuras y aberturas de la caja del aparato sirven para su ventilación para poder asegurar un funcionamiento fiable del aparato y para protegerlo contra sobrecalentamiento Para evitar el peligro de incendio las aberturas nunca deberán taparse ni cubrirse con nada como por ejemplo periódicos manteles cortinas ni poner...

Page 45: ... deberá desconectarse desenchufando la clavija de la alimentación de la toma de corriente cuando no se proponga utilizarlo durante mucho tiempo por ejemplo antes de irse de vacaciones D3 4 2 2 1a_A_Sp PRECAUCIONES CONCERNIENTES A LA MANIPULACIÓN DEL CABLE DE ALIMENTACIÓN Tome el cable de alimentación por la clavija No extraiga la clavija tirando del cable Nunca toque el cable de alimentación cuand...

Page 46: ...etición 18 Uso de la reproducción aleatoria 19 Creación de una lista de programa 19 Otras funciones disponibles desde el menú de programa 20 Búsqueda en un disco 20 Cambio de subtítulos 20 Cambio del idioma canales de sonido 20 Ampliación de la imagen en pantalla 21 Cambio de ángulos de cámara 21 Visualización de la información de disco 21 05 Reproducción USB Uso de la interfaz USB 22 Controles de...

Page 47: ...sco 36 Configuración del sistema de TV 36 Ajuste de paso de frecuencia 36 Solución de problemas 37 General 37 Reproductor de DVD CD Vídeo CD 38 Sintonizador 39 Conexión USB 39 Mensajes de error 40 Restablecimiento del sistema 40 Ajuste de la función Key Lock 40 Cancelación de la demo 40 Uso de la lista de códigos de idioma 40 Lista de códigos de idioma 41 Lista de códigos del país zona 41 Especifi...

Page 48: ... los cascos 9 Pantalla Consulte Pantalla abajo Mando a distancia 1 STANDBY ON Enciende el sistema o lo pone en espera 2 Botones de selección de función Selecciona la fuente que desea escuchar DVD CD TUNER USB LINE 3 Botones numerados CLEAR DISPLAY CLEAR Borra una entrada DISPLAY Muestra cambia la información del disco que aparece en pantalla página 21 DVD CD VOLUME OPEN CLOSE USB STANDBY ON 3 4 5 ...

Page 49: ...reo página 15 SOUND Accede al menú de sonido para ajustar el modo de sonido SFC los graves y agudos etc página 15 8 Controles de reproducción Para obtener más información sobre estos controles consulte Controles de reproducción básicos en la página 10 Características de reproducción de disco en la página 16 y Reproducción USB en la página 22 9 Botones de control del televisor Controlan las pantall...

Page 50: ...na durante la reproducción en modo de programa página 19 7 Indicadores del sintonizador Se ilumina durante la recepción de una radiodifusión Se ilumina durante la recepción de una emisión FM en modo auto estéreo Se ilumina cuando se selecciona la recepción monoaural FM 8 RDM Se ilumina durante la reproducción en modo aleatorio página 19 9 kHz MHz Indica la unidad de frecuencia kHz para AM MHz para...

Page 51: ...orden desde los altavoces activos en el modo de escucha actual L Altavoz frontal izquierdo C Altavoz central R Altavoz frontal derecho SR Altavoz de sonido envolvente derecho SL Altavoz de sonido envolvente izquierdo SW Subwoofer3 2 Utilice el botón VOLUME para ajustar el volumen a un nivel adecuado 3 Utilice para ajustar los niveles de cada altavoz Desde la posición principal de escucha debe escu...

Page 52: ...a desplazarse por este menú consulte Menús de disco DVD Vídeo y Menús PBC de Vídeo CD Súper VCD en la página 11 Si introduce un disco con imágenes JPEG se inicia una presentación de diapositivas Para obtener más información consulte Reproducción de una presentación de diapositivas JPEG en la página 16 Si el disco contiene una mezcla de vídeo DivX y archivos de otros formatos por ejemplo MP3 selecc...

Page 53: ...en avance rápido Salta al principio de la pista o el capítulo actual y después a pistas o capítulos anteriores Salta a la siguiente pista o capítulo Números Úselos para introducir un número de título capítulo o pista Pulse ENTER para seleccionar Si el disco está detenido la reproducción se inicia desde el título para DVD o pista para CD Vídeo CD Súper VCD seleccionados Si se está reproduciendo el ...

Page 54: ...sione ENTER El indicador del modo monoaural se ilumina cuando el sintonizador está en modo de recepción monoaural Seleccione FM AUTO encima para volver al modo auto estéreo el indicador de estéreo se ilumina al recibir la señal en estéreo Memorización de emisoras Puede guardar hasta un máximo de 30 presintonías a fin de acceder siempre de forma fácil a sus emisoras favoritas sin tener que sintoniz...

Page 55: ... OFF Cancela el temporizador de apagado Después de seleccionar SLP ON puede pulsar SLEEP de nuevo para comprobar el tiempo que resta Cada línea indica 12 minutos restantes aproximadamente Debilitamiento de la luz de la pantalla Puede debilitar la luz de la pantalla si la encuentra demasiado brillante 1 Pulse SETUP y utilice para seleccionar DIMMER y a continuación pulse ENTER Se muestra en la pant...

Page 56: ...anales STEREO Consulte Escucha en estéreo abajo Uso del modo Front Surround Sonido envolvente frontal El modo Front Surround es eficaz cuando se ha seleccionado DVD CD o USB como fuente de entrada y además cuando se utiliza la disposición frontal de sonido envolvente de 3 puntos como se describe en Distribución del sonido del equipo home cinema en la página 9 y en la Guía de distribución de los al...

Page 57: ...para seleccionar SFC MODE y a continuación pulse ENTER 3 Pulse y a continuación ENTER para seleccionar un modo de sonido SFC Elija entre OFF ACTION DRAMA ROCK POP HALL o LIVE Ajuste de los graves y agudos Utilice los controles de graves y agudos para ajustar el tono general 1 Pulse SOUND 2 Utilice para seleccionar BASS graves o TREBLE agudos y pulse ENTER 3 Utilice para ajustar el sonido y pulse E...

Page 58: ... lenta Pulse varias veces para cambiar la velocidad lenta indicada en pantalla Para reanudar la reproducción pulse reproducción 2 Avance de cuadro retroceso de cuadro Puede hacer avanzar o retroceder un disco DVD cuadro a cuadro Con Vídeo CD Súper VCD y vídeo DivX sólo se puede usar el avance de cuadro 1 Durante la reproducción pulse pausa 2 Pulse o para avanzar o retroceder cuadro a cuadro Para r...

Page 59: ...inutos La pantalla muestra una tras otra hasta seis imágenes en miniatura en movimiento Para mostrar las imágenes en miniatura previas siguientes pulse 3 Seleccione la imagen en miniatura a partir de la cual quiere empezar la reproducción Para seleccionar una imagen en miniatura puede usar y ENTER o los botones numerados Para seleccionarla mediante los botones de número introduzca un número de dos...

Page 60: ... la presentación de diapositivas Se repite la reproducción de la presentación de diapositivas y los archivos de sonido Los controles de reproducción son sólo eficaces con la presentación de diapositivas JPEG Para reproducir todo el contenido del disco en lugar de la carpeta actual salga de Disc Navigator e inicie la reproducción mediante el botón reproducción Reproducción en bucle de una sección d...

Page 61: ...eate Edit en la lista de opciones de programa 3 Utilice y ENTER para seleccionar un título capítulo o pista para el paso actual de la lista de programas Para un disco DVD puede añadir un título o capítulo Para un CD o Vídeo CD Súper VCD seleccione una pista para añadir a la lista de programa Después de pulsar ENTER para seleccionar el título capítulo pista el número del paso disminuye automáticame...

Page 62: ...or ejemplo pulse 4 5 0 0 para hacer que la reproducción empiece en el minuto 45 del disco Para hacerlo a partir de 1 hora 20 minutos y 30 segundos pulse 8 0 3 0 5 Pulse ENTER para iniciar la reproducción Cambio de subtítulos Algunos discos DVD y de vídeo DivX tienen subtítulos en uno o más idiomas en la caja del disco se suelen indicar los idiomas disponibles para los subtítulos Puede cambiar el i...

Page 63: ...arios ángulos en pantalla aparece el icono que se puede desactivar consulte Configuración de Display Pantalla en la página 27 Durante la reproducción o en modo de pausa pulse ANGLE para cambiar el ángulo Visualización de la información de disco Durante la reproducción se pueden ver diversos datos de pista capítulo y título Para mostrar cambiar ocultar la información en pantalla pulse repetidamente...

Page 64: ...uipo para la alimentación USB Si esto no soluciona el problema lo más probable es que su dispositivo USB sea incompatible Controles de reproducción básicos La siguiente tabla muestra los controles básicos del mando a distancia para la reproducción USB Nota 1 Esto incluye la reproducción de archivos WMA MP3 MPEG 4 AAC excepto archivos protegidos contra copia o con reproduc ción restringida No se pu...

Page 65: ...Para reproducir una pista resaltada o visualizar el archivo JPEG resaltado pulse ENTER Cuando se selecciona un archivo WMA MP3 MPEG 4 ACC la reproducción empieza a partir del archivo y continúa hasta el final de la carpeta Cundo se selecciona un archivo JPEG empieza una presentación de diapositivas a partir del archivo y hasta el final de la carpeta Nota 1 En el caso de las pistas WMA MP3 MPEG 4 A...

Page 66: ...r seguido del JPEG desde el que desea iniciar la presentación de diapositivas Se repite la reproducción de la presentación de diapositivas y los archivos de sonido Los controles de reproducción son sólo eficaces con la presentación de diapositivas JPEG Para reproducir todo el contenido y no únicamente la carpeta actual salga del Navigator y empiece la reproducción con el botón reproducir ...

Page 67: ...Video Adjust Desde la pantalla Video Adjust puede hacer ajustes que afectan a la presentación de imágenes 1 Pulse HOME MENU y seleccione Video Adjust desde la información en pantalla 2 Realice ajustes mediante y ENTER Puede realizar los siguientes ajustes Sharpness Ajusta la nitidez de los bordes de la imagen Fine Standard Soft Brightness Ajusta el brillo general 20 a 20 Contrast Ajusta el contras...

Page 68: ... 4 3 Letter Box Use este ajuste si tiene un televisor convencional de 4 3 Las películas en formato Widescreen se reproducen con bandas negras en la parte superior e inferior de la pantalla 4 3 Pan Scan Use este ajuste si tiene un televisor convencional de 4 3 Las películas en formato Widescreen se reproducen cortando parte de la imagen por los lados 16 9 Wide Úselo si tiene un televisor panorámico...

Page 69: ...posible el menú del disco DVD aparecerá en pantalla en el idioma de subtítulos seleccionado Se visualizan imágenes Siempre que sea posible el menú del disco DVD aparecerá en pantalla en el idioma seleccionado Other Language Selecciónela para elegir un idioma distinto a los que aparecen en pantalla consulte Uso de la lista de códigos de idioma en la página 40 Subtitle Display On Los subtítulos se v...

Page 70: ... del código pulse y utilice los botones de número para introducir el código de país zona de 4 dígitos El nuevo código de país zona entrará en efecto después de expulsar el disco una vez Acerca de los contenidos DivX VOD Para poder reproducir contenidos DivX VOD vídeo bajo demanda en este equipo primero tiene que registrar el reproductor con su proveedor de contenidos DivX VOD Para ello hay que gen...

Page 71: ...Distance 3 Utilice para seleccionar un altavoz 4 Pulse para cambiar la distancia del altavoz resaltado 5 Utilice para modificar la distancia Cuando modifique la distancia de los altavoces frontales izquierdo L o derecho R las distancias de todos los demás altavoces cambiarán en relación con este ajuste La distancia de los altavoces frontales izquierdo derecho L R se puede fijar entre 30 cm y 9 m e...

Page 72: ...stéreo de contactos RCA Estas clavijas tienen la etiqueta LINE en el panel posterior Conexión de la salida S Vídeo Si su televisor dispone de entrada S Vídeo puede utilizarla en lugar de la salida de vídeo estándar para obtener imágenes de mejor calidad Use un cable S Vídeo para conectar S VIDEO OUT a una entrada de S Vídeo de su televisor Antes de realizar la conexión alinee el pequeño triángulo ...

Page 73: ... la salida de vídeo componentes Compatibilidad de este reproductor con televisores de exploración progresiva y alta definición Este reproductor es compatible con el vídeo progresivo Macro Vision System Copy Guard 2 Nota 1 La salida de vídeo componentes permite elegir entre dos formatos entrelazado y progresivo Consulte Configuración Video Output Salida de Vídeo en la página 26 2 El consumidor debe...

Page 74: ... DVD no cumple la especificación de CD Audio y por lo tanto no puede reproducirse La cara de DVD de un DualDisc sí se reproduce en este producto El contenido de DVD Audio no Para obtener más información sobre las características de DualDisc consulte al fabricante o al distribuidor del disco Tabla de compatibilidad de discos DVD Vídeo DVD R DVD RW Vídeo CD Fujicolor CD CD Audio CD R CD RW Súper Víd...

Page 75: ...h fr German de Icelandic is Irish ga Italian it Norwegian no Portuguese pt Rhaeto Romanic rm Scottish gd Spanish es Swedish sv Sonido comprimido MPEG 1 Audio Layer 3 MP3 Windows Media Audio WMA MPEG 4 AAC Frecuencias de muestreo 32 kHz 44 1 kHz 48 kHz Tasas de bits cualquiera se recomienda 128 kbps o superior Reproducción de archivos MP3 WMA MPEG 4 AAC en tasa de bits variable VBR o variable bit r...

Page 76: ...productor Windows Media para Windows XP o el reproductor Windows Media serie 9 Microsoft Windows Media y el logotipo de Windows son marcas o marcas registradas de Microsoft Corporation en Estados Unidos y o en otros países Uso y cuidado de los discos Manipulación de discos Sujete el disco por los bordes a fin de no dejar huellas ensuciarlo o rayarlo en cualquiera de los dos lados Un disco sucio o ...

Page 77: ...antena interna Use la unidad en la cocina u otra habitación en la que el sistema esté expuesto a humo o vapor Use la unidad encima de una alfombra gruesa ni la cubra con un trapo ya que impedirá la adecuada ventilación del sistema Coloque la unidad sobre una superficie inestable o demasiado reducida para sostener las cuatro patas del sistema Limpieza de la lente lectora La lente del reproductor de...

Page 78: ...el valor 16 9 Wide con un televisor estándar con formato 4 3 o el valor 4 3 con un televisor de pantalla ancha dará como resultado una imagen distorsionada Cuando ve discos grabados en formato 4 3 puede usar los controles del televisor para seleccionar la presentación de la im agen El televisor puede ofrecer varias opciones de zoom y ampliación para más información lea las instrucciones del televi...

Page 79: ... no se oye nada Si está utilizando la entrada de línea asegúrese de que el componente esté correctamente conectado consulte Conexión de componentes auxiliares en la página 30 Pulse MUTE en el mando a distancia para desactivar la función de desactivación del sonido Los altavoces de sonido envolvente o el altavoz central no producen ningún sonido Consulte Ajuste de los niveles de canal en la página ...

Page 80: ...figuración Video Output Salida de Vídeo en la página 26 La imagen en pantalla se alarga o el formato no cambia El ajuste de TV Screen no es el correcto Modifique la opción TV Screen para que corresponda con el televisor monitor que está usando consulte Configuración Video Output Salida de Vídeo en la página 26 Si la imagen ha sido grabada en un equipo de vídeo o se pasa a través de un selector AV ...

Page 81: ...a una pared También puede conectar una antena FM externa consulte Conexión de antenas externas en la página 30 Apague los otros aparatos que podrían estar causando el ruido o aléjelos de la unidad El intervalo de sintonización no corresponde a su país o zona Consulte Ajuste de paso de frecuencia en la página 36 para cambiar el intervalo de sintonización La sintonización automática no capta algunas...

Page 82: ...ina 26 le permiten elegir su idioma favorito entre los 136 de la Lista de códigos de idioma abajo 1 Seleccione Other Language 2 Use para seleccionar una letra o un número de código 3 Use para seleccionar una letra o un número de código Para obtener la lista completa de idiomas y códigos consulte Lista de códigos de idioma siguiente página Mensaje Descripción SND DEMO Está activada la demostración ...

Page 83: ...nian mk 1311 Malayalam ml 1312 Mongolian mn 1314 Moldavian mo 1315 Marathi mr 1318 Malay ms 1319 Maltese mt 1320 Burmese my 1325 Nauru na 1401 Nepali ne 1405 Norwegian no 1415 Occitan oc 1503 Oromo om 1513 Oriya or 1518 Panjabi pa 1601 Polish pl 1612 Pashto Pushto ps 1619 Portuguese pt 1620 Quechua qu 1721 Rhaeto Romance rm 1813 Kirundi rn 1814 Romanian ro 1815 Kinyarwanda rw 1823 Sanskrit sa 1901...

Page 84: ...ción Modelos para Sudamérica y Centroamérica 2 Modelos para el Ejército de EE UU y para las zonas libres de impuestos 1 Adaptador de cable de alimentación 1 Tarjeta de garantía Modelos exclusivos para el Ejército de EE UU y para las zonas libres de impuestos 1 Guía de configuración Este manual de instrucciones Sistema de altavoces S DV151 Altavoces frontales Caja Caja cerrada tipo estantería con p...

Page 85: ...20 Bases de apoyo para altavoces 4 Tornillos para las bases 12 Nota Las especificaciones y el diseño están sujetos a posibles modificaciones sin previo aviso debido a mejoras Fabricado bajo licencia de Dolby Laboratories Dolby Pro Logic y el símbolo de la doble D son marcas comerciales de Dolby Laboratories DTS y DTS Digital Surround son marcas registradas de Digital Theater Systems Inc Este produ...

Page 86: ... S A TEL 800 421 1404 PIONEER ELECTRONICS OF CANADA INC 300 Allstate Parkway Markham Ontario L3R OP2 Canada TEL 1 877 283 5901 PIONEER EUROPE NV Haven 1087 Keetberglaan 1 B 9120 Melsele Belgium TEL 03 570 05 11 PIONEER ELECTRONICS ASIACENTRE PTE LTD 253 Alexandra Road 04 01 Singapore 159936 TEL 65 6472 7555 PIONEER ELECTRONICS AUSTRALIA PTY LTD 178 184 Boundary Road Braeside Victoria 3195 Australi...

Reviews: