11
Enjoying through External Equipment
40
En
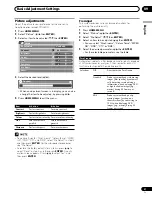
Item
Description
Auto
Automatically identifies input audio
(factory default)
signals.
Digital
Accepts digital audio signals.
Analogue
Accepts analogue audio signals.
4
Press
HOME MENU
to exit the menu.
• If no sound is output, specify another audio signal type.
• For the audio signal types to be specified, check the
operation manual that came with the connected equip-
ment.
• Depending on the equipment to be connected, you also
need to connect analogue audio cables.
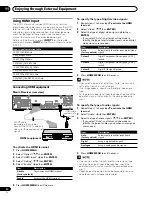
Using HDMI Input
The INPUT 3 terminals include HDMI terminals to which
digital video and audio signals can be input. To use the HDMI
terminal, activate the terminal and specify the types of video
and audio signals to be received from the connected equip-
ment. For the types of these signals, see the operation
manual that came with the connected equipment.
Before starting the menu, press
INPUT 3
on the remote
control unit or press
INPUT
on the Plasma Display to select
INPUT 3.
Input signal correlation table
1920
∗
1080i@50Hz
720
∗
576p@50Hz
1280
∗
720p@50Hz
720(1440)
∗
576i@50Hz
1920
∗
[email protected]/60Hz
720
∗
[email protected]/60Hz
1280
∗
[email protected]/60Hz
720(1440)
∗
[email protected]/60Hz
Connecting HDMI equipment
To specify the type of digital video signals:
1
Repeat steps 1 to 3 provided
To activate the HDMI
terminal
.
2
Select “Video” ( / then
ENTER
).
3
Select the type of digital video signals ( / then
ENTER
).
• If you select “Auto”, an attempt will be made to
identify the type of digital video signals when digital
video signals are received.
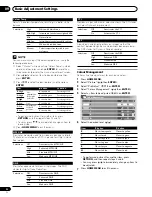
Item
Description
Auto
Automatically identifies input digital video
(factory default)
signals.
Colour-1
Digital Component Video signals (4:2:2)
locked
Colour-2
Digital Component Video signals (4:4:4)
locked
Colour-3
Digital RGB signals locked
4
Press
HOME MENU
to exit the menu.
• If you select a parameter other than “Auto”, make such a
setting that results in natural colour.
• If no image appears, specify another digital video signal
type.
• For the digital video signal types to be specified, check the
operation manual that came with the connected equip-
ment.
To specify the type of audio signals:
1
Repeat steps 1 to 3 provided
To activate the HDMI
terminal
.
2
Select “Audio” ( / then
ENTER
).
3
Select the type of audio signals ( / then
ENTER
).
• If you select “Auto”, an attempt will be made to
identify the type of audio signals when audio signals
are received.
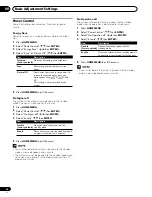
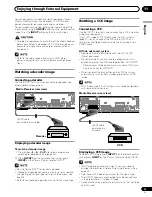
Media Receiver (rear view)
To activate the HDMI terminal:
1
Press
HOME MENU
.
2
Select “Option” ( / then
ENTER
).
3
Select “HDMI Input” ( / then
ENTER
).
4
Select “Setting” ( / then
ENTER
).
5
Select “Enable” ( / then
ENTER
).
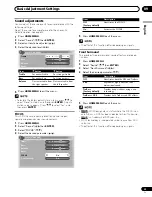
Item
Description
Disable
Deactivates the HDMI terminal.
(factory default)
Enable
Activates the HDMI terminal.
6
Press
HOME MENU
to exit the menu.
SERVICE ONLY
i / o link.A
SELECT
INPUT
2
3
INPUT 2
INPUT 1
INPUT 3
INPUT 2
Y
P
B
P
R
COMPONENT VIDEO
MONITOR
OUTPUT
R-AUDIO-L
S- VIDEO
VIDEO
HDMI
INPUT 3
HDMI cable
(commercially
available.)
SCART cable
(commercially available.)
Connect the SCART cable only
when inputting analogue audio
signals.
HDMI equipment

