Other connections
09
34
En
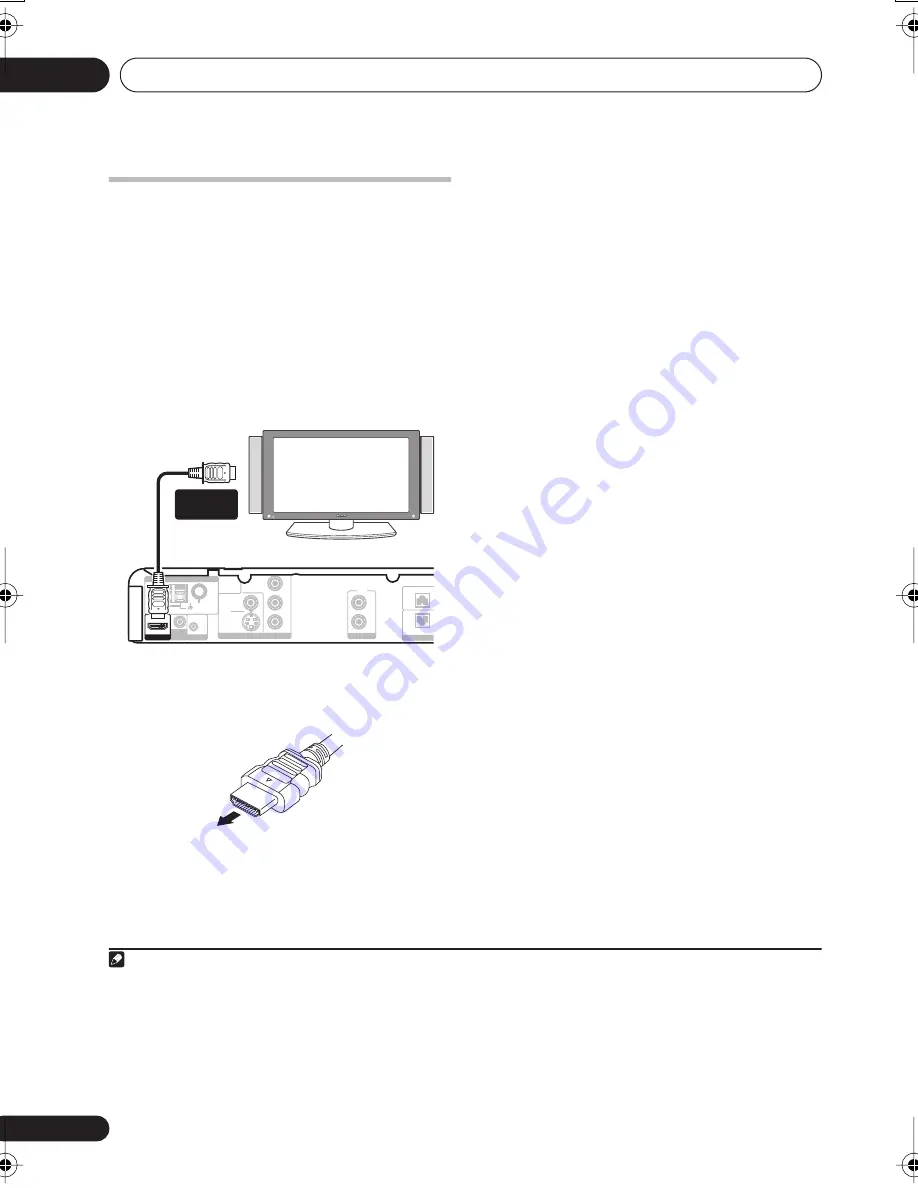
Connecting using HDMI
If you have a HDMI or DVI (with HDCP)
equipped monitor or display, you can connect
it to this player using a commercially available
HDMI cable for high quality digital video.
1
See
About HDMI
below for more about the
HDMI connection.
•
Use an HDMI cable to connect the HDMI
OUT interconnect on this player to an HDMI
interconnect on a HDMI-compatible monitor.
• The arrow on the cable connector body
should be face up for correct alignment
with the connector on the player.
You can also adjust the HDMI settings for
resolution and color. For more on these
settings see
Video Output settings
on page 27.
Switching the HDMI audio setting
To listen to audio from the HDMI interconnect,
make sure you’ve specified the HDMI audio
output setting.
1
Switch the system into standby.
2
Press
SHIFT+SETUP
and use
/
to
choose HDMI OUT then press
ENTER
.
3
Use
/
to choose the setting you want
then press
ENTER
.
•
AUDIO ON
– Audio signals are output
through the HDMI interconnect
2
•
AUDIO OFF
– Switches off HDMI audio
Resetting the HDMI connection
If you get an error message (the display shows
HDMI ERR
) or if the screen goes blank (for
example, after changing the resolution), check
the troubleshooting guide on page 44. If this
doesn’t solve the problem, follow the steps
below to reset the HDMI connection.
1
Switch the system into standby.
2
Press
SHIFT+SETUP
and use
/
to
choose HDMI INI then press
ENTER
.
The system will restart and the HDMI settings
are automatically reset to the factory defaults.
See
Video Output settings
on page 27 for more
on these settings.
Note
1 • An HDMI connection can only be made with DVI-equipped components compatible with both DVI and High Bandwidth Dig-
ital Content Protection (HDCP). If you choose to connect to a DVI connector, you will need a separate adaptor (DVI
HDMI) to
do so. A DVI connection, however, does not support audio signals. Consult your local audio dealer for more information.
• This unit has been designed to be compliant with HDMI (High Definition Multimedia Interface) Version 1.1. Depending on
the component you have connected, using a DVI connection may result in unreliable signal transfers.
• When you change the component connected to the HDMI output, you will also need to change the HDMI settings to match
the new component (see
Video Output settings
on page 27 to do this).
AM LOOP
FM
UNBAL75 Ω
R
L
R
FRONT
SURROUND
R
S-VIDEO
VIDEO
COMPONENT
VIDEO
C
R
/
P
R
C
B
/
P
B
Y
LINE
IN
ANTENNA
AUDIO IN
LINE
S
VIDEO OUT
CONTROL
MCACC
MIC
HDMI OUT
HDMI-compatible display
HDMI
connector
2 If the
AUTO
surround mode is selected, there are cases where you won’t hear sound from the center and surround speakers.
In this case, we recommend selecting
AUDIO OFF
.
XV-DV656.book 34 ページ 2006年4月7日 金曜日 午後6時40分
Summary of Contents for HTZ656DVD
Page 1: ......


