background image

PRO-730HDI

68

1

2

3

4

1

2

3

4

C

D

F

A

B

E

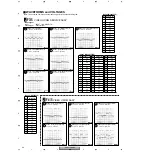
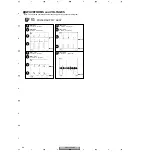
WAVEFORMS and VOLTAGES

Note : The encircled numbers denote measuring point in the schematic diagram.

P

F 1/3

POWER SUPPLY ASSY

GND

GND

Q201 Gate
V: 5V/div.  H: 5

µ

sec/div.

Q201 Drain
V: 50V/div.  H: 5

µ

sec/div.

102

102

103

103

GND

GND

IC201 - pin 1
V: 2V/div.  H: 5

µ

sec/div.

IC201 - pin 2
V: 0.5V/div.  H: 5

µ

sec/div.

104

104

105

105

GND

GND

IC201 - pin 3
V: 0.5V/div.  H: 5

µ

sec/div.

IC201 - pin 6
V: 5V/div.  H: 5

µ

sec/div.

106

106

107

107

GND

IC101 - pin 5
V: 50V/div.  H: 100

µ

sec/div.

108

Summary of Contents for Elite PRO-530HDI

Page 1: ...manual should be used together with the following manual s Parts of the exploded views are all mentioned in this manual The electrical parts are mentioned by contrast table in this manual Refer to 3 Contrast of miscellaneous parts Model Type Power Requirement Remarks PRO 730HDI KUXC CA AC120V PRO 530HDI KUXC CA AC120V Model No Order No Remarks PRO 730HD PRO530HD ARP3138 SAFETY INFORMATION SPECIFIC...

Page 2: ...CTION MONITOR an isolation transformer should be inserted between power line and the set in safety before any service is performed 3 When replacing a chassis in the set all the protective devices must be put back in place such as barriers nonmetallic knobs adjustment and compartment covershields isolation resistor capacitor etc 4 When service is required observe the original lead dress Extra preca...

Page 3: ...mary source of X radiation in this set is the picture tube For continued X radiation protection the replacement tube must be the same type as the original PIONEER approved type The picture tube CRT Service Assy R G B used in this set holds complete guarantee against X ray radiation when the X ray is sealed next page Accordingly when the current in flowing to the picture tube CRT Service Assy R G B...

Page 4: ...e Assy R G B there are notifications of caution in the individual schematic diagrams Be sure to read them for safety s sake The component parts for X ray protection are as follows When the current flows to the CRT Service Assy R G B be sure to perform it with these parts being attached Protection from the X ray radiation is maintained in the state in which these parts have been installed to the CR...

Page 5: ...es 5 Lubricants glues and replacement parts Appropriately applying grease or glue can maintain the product performances But improper lubrication or applying glue may lead to failures or troubles in the product By following the instructions in this manual be sure to apply the prescribed grease or glue to proper portions by the appropriate amount For replacement parts or tools the prescribed ones sh...

Page 6: ...N NAMES AND VOLTAGES 40 4 4 LED RLS ASSY 41 4 5 HDMI SERVICE ASSY 1 2 42 4 6 HDMI SERVICE ASSY 2 2 44 4 7 VIDEO UCOM SERVICE ASSY 1 5 48 4 8 VIDEO UCOM SERVICE ASSY 2 5 50 4 9 VIDEO UCOM SERVICE ASSY 3 5 54 4 10 VIDEO UCOM SERVICE ASSY 4 5 58 4 11 VIDEO UCOM SERVICE ASSY 5 5 60 4 12 POWER SUPPLY ASSY 1 3 62 4 13 POWER SUPPLY ASSY 2 3 64 4 14 POWER SUPPLY ASSY 3 3 66 5 PCB CONNECTION DIAGRAM 70 5 1...

Page 7: ...p 75 ohms load Audio signal 500 mV rms 100 modulation Output impedance Video output 75 ohms Audio output Less than 1 kilo ohms Effective output Front both channels driven 10 W 10 W Built in speaker system 16 cm 6 5 16 in full range x 2 This jack cannot be used with a personal computer Tuner section Circuit type Video signal detection PLL full synchronous detection PLL digital synthesizer system Au...

Page 8: ...y For the applying amount of lubricants or glue follow the instructions in this manual In the case of no amount instructions apply as you think it appropriate Parts marked by are important parts which relate in X rays radiation If any of these parts need to be replaced always replace with specified parts How to Attatch the Frame Cover How to remove Frame Cover 13 14 18 27 16 15 17 12 11 21 22 28 2...

Page 9: ...acking Case AHC1050 NSP 24 Caution Card ARM1057 NSP 25 Wrapper Bag AHG1076 NSP 26 Literature Bag AHG1222 NSP 27 Polyethylene Bag AHG1285 28 Screw ABA1239 29 Screw ABA1226 Mark No Description Part No Mark No Symbol and Description PRO 730HDI KUXC CA PRO 530HDI KUXC CA 1 Under Carton 64W AHD2995 Not used 1 Under Carton 53W Not used AHD3048 2 Under Pad L AHA2224 AHA2255 3 Under Pad R AHA2225 AHA2256 ...

Page 10: ...PRO 730HDI 10 1 2 3 4 1 2 3 4 C D F A B E 2 2 FRONT SECTION 1 1 8 7 6 5 9 2 4 3 Refer to 2 6 CRT SECTION 1 2 3 4 5 6 8 9 10 11 22 14 13 12 17 17 17 23 20 24 21 18 15 18 7 16 16 4 16 4 2 19 ...

Page 11: ...ousing Wire J11 ADX2801 9 1P Lead Wire J3 ADX2659 10 1P Lead Wire J4 ADX2660 11 1P Lead Wire J5 ADX2661 12 1P Lead Wire J6 ADX2662 13 1P Lead Wire J7 ADX2663 14 1P Lead Wire J8 ADX2664 15 Nylon Binder AEC 093 16 Screw ABA1240 17 Screw ABZ30P120FZK 18 Screw BBZ30P080FZK NSP 19 UL Caution Card AAX1238 NSP 20 Tray AMR3337 NSP 21 Solder Warning Label AAX2835 22 Wire Harness A J12 ADX2817 23 Purse Lock...

Page 12: ...3 22 13 22 14 15 23 23 23 12 24 24 24 24 24 16 17 18 27 27 29 2829 28 27 29 282928 27 27 27 2728 29 28 29 27 2928 29 28 26 25 25 25 25 17 17 24 PRO 730HDI Only PRO 730HDI Only PRO 730HDI Only PRO 730HDI Only PRO 730HDI Only 8 7 4 9 2 3 Q E D G How to check the serial number Remove the grille and look at the front panel from below F ...

Page 13: ...e Panel Assy R See Contrast table 2 NSP 16 Bottom Rail See Contrast table 2 17 Bottom Rail Holder ANG2289 18 Grille See Contrast table 2 19 Screw AMZ30P060FZK 20 Screw ABZ40P080FZK 21 Screw APZ30P080FZK 22 Screw ABA1240 23 Screw ABA1249 24 Screw ABA1239 25 Screw ABA1263 26 ELITE Badge AAM1081 NSP 27 Catcher A ANZ 241 28 Screw ABA1271 29 Magic Tape AEC1394 30 Catcher F2M AEC1609 Mark No Description...

Page 14: ...10 10 10 7 5 6 12 12 4 4 3 2 1 2 12 12 12 12 11 11 9 10 10 10 8 10 Caution Be sure to remove the mirror inside the cabinet before removing the mirror case If the mirror case is removed first the mirror will fall and likely become damaged A Torx driver is required to remove the No 11 screws ...

Page 15: ...NG2006 NSP 6 Mirror Upper Stay L ANG2004 NSP 7 Mirror Upper Stay R ANG2005 NSP 8 Mirror Case Label AAX2448 9 Mirror Case 51 AME2296 10 Screw ABA1240 11 Screw PYC40T140FZB 12 Screw BYC35P160FZK Mark No Description Part No Mark No Symbol and Description PRO 730HDI KUXC CA PRO 530HDI KUXC CA 1 Mirror 64W AMR3333 Not used 1 Mirror 53W Not used AMR3331 2 Mirror Frame V 64WB ANG2392 Not used 2 Mirror Fr...

Page 16: ...When attaching the screen holder to the cabinet make the left side basically level Screen Frame Assy 3 3 1 4 5 2 2 2 7 7 7 7 8 16 16 16 16 16 16 16 16 16 16 16 16 16 16 17 17 17 14 17 17 17 17 17 17 17 17 12 13 17 17 17 17 17 17 14 17 17 15 12 13 15 15 15 11 17 17 15 17 17 15 17 17 15 1717 14 17 9 9 10 10 6 6 ...

Page 17: ...een Metal A ANG2003 NSP 13 Under Screen Metal B ANG2009 NSP 14 Upper Screen Metal A ANG2001 NSP 15 Upper Screen Metal B ANG2002 16 Screw ABA1226 17 Screw BYC40P160FMC Mark No Description Part No Mark No Symbol and Description PRO 730HDI KUXC CA PRO 530HDI KUXC CA 1 Screen Holder TOP 64W ANG2530 Not used 1 Screen Holder TOP 53W Not used ANG2370 4 Fresnel 64W AMR3330 Not used 4 Fresnel 53W Not used ...

Page 18: ...C C B A Front Side Rear Side 15 21 21 22 14 14 1 2 4 5 PRO 530HDI Only 8 6 3 17 24 17 16 18 18 20 20 7 11 12 13 9 10 17 17 17 17 18 19 CRT Stand Accessory of Cabinet To Cabinet 21 21 21 21 23 23 23 22 22 24 R G G B 27 27 28 28 24 25 26 26 M L K F 27 Blue Green Red ...

Page 19: ... ATL1146 12 VM Coil L5 ATL1146 13 VM Coil L6 ATL1146 14 Lens Assy See Contrast table 2 15 Lens Assy See Contrast table 2 16 1P Lead Wire J15 ADX2505 17 Binder AEC 093 18 Cord Holder AEC1257 19 Bushing AEC1869 NSP 20 Lead Clamper M AEC1611 21 Screw ABA1168 22 Screw AMZ40P080FZK 23 Screw FBT40P120FZK 24 Screw BPZ30P080FZK 25 Screw BBZ30P080FZK 26 Screw ABZ30P120FZK NSP 27 Purse Lock S AEC1261 28 Pur...

Page 20: ...PRO 730HDI 20 1 2 3 4 1 2 3 4 C D F A B E 2 7 REAR SECTION Refer to 2 10 HDMI SECTION 8 12 13 6 5 2 5 4 5 6 3 6 5 5 5 7 7 7 4 1 9 10 10 11 11 8 8 8 8 4 Refer to 2 8 CHASSIS SECTION ...

Page 21: ... AAX2548 NSP 4 Cabinet Wire Holder AEC1263 5 Screw ABA1240 6 Screw ABZ30P120FZK 7 Screw ABA1269 8 Screw ABA1286 NSP 9 Back Cover Panel See Contrast table 2 10 Screw ABA1241 11 Screw ABA1296 12 Cable Clip AEC1369 13 Volume Case ANK1682 Mark No Description Part No Mark No Symbol and Description PRO 730HDI KUXC CA PRO 530HDI KUXC CA 1 Rear Cover 64 AMM3221 Not used 1 Rear Cover 53 58 Not used AMM3220...

Page 22: ... 2 3 4 C D F A B E 2 8 CHASSIS SECTION Refer to 2 10 REAR PANEL SECTION 19 14 14 14 7 15 22 22 22 20 12 21 11 22 22 22 21 21 2 18 17 1 6 21 16 4 5 10 22 22 22 22 22 22 22 22 21 21 21 21 13 22 22 15 3 14 8 9 J B O P N F F F F ...

Page 23: ...WV1966 6 Progressive Unit AXY1076 NSP 7 Chassis AMA1013 8 Ferrite Core L9 ATX1045 9 4P Housing Wire J13 ADX2818 10 2P Housing Wire J10 ADX2816 11 Power Cord ADG1205 NSP 12 AC Cord Holder ANG2539 NSP 13 U COM Shield ANK1697 NSP 14 Cabinet Wire Holder AEC1263 NSP 15 Lead Clamper M AEC1611 16 Cable Clip AEC1911 17 Cord Holder AEC1257 18 Cable Clip AEC1806 19 Screw PPZ40P120FMC 20 Screw ABZ30P120FZK 2...

Page 24: ... 1 2 3 4 C D F A B E 2 9 REAR PANEL SECTION Caution for the RF Switch installation Top View TUNER Assy RF Switch Rear side OK TUNER Assy RF Switch No Good 11 11 11 7 13 9 12 10 10 8 6 12 11 14 14 14 5 11 13 13 4 1 3 2 A H C ...

Page 25: ...3 D SUB Assy AWZ6714 4 RF Switch AXF1109 NSP 5 PCB Holder ANG2520 NSP 6 Cable Clip D3S AEC1782 NSP 7 ID Label See Contrast table 2 8 Rear Panel ANC2350 9 Nut BBN1005 10 Hexagonal Head Screw BBA1051 11 Screw BBZ30P080FCU 12 Screw BPZ30P140FZK 13 Washer WAX0F160N100 14 Screw BPZ30P100FZK Mark No Description Part No Mark No Symbol and Description PRO 730HDI KUXC CA PRO 530HDI KUXC CA NSP 7 ID Label 6...

Page 26: ... SECTION parts List 4 2 1 6 3 5 7 7 5 5 5 4 I 7 6 6 F F Mark No Description Part No 1 HDMI SERVICE Assy AWV2061 2 Wire Harness B J14 ADX2861 NSP 3 HDMI Chassis ANA1758 NSP 4 Lead Clamper M AEC1611 5 Screw BBZ30P080FZK 6 Screw ABZ30P100FZK NSP 7 HDMI Heatsink ANH1622 ...

Page 27: ...AGRAM AND SCHEMATIC DIAGRAM 5 PCB CONNECTION DIAGRAM and PCB PARTS LIST Mark No Symbol and Description PRO 730HD KUXC CA PRO 730HDI KUXC CA PRO 530HDI KUXC CA Remarks PCB ASSEMBLY 1 DVI SERVICE ASSY AWV1983 Not used Not used 1 HDMI SERVICE ASSY Not used AWV2061 AWV2061 1 1 VIDEO UCOM SERVICE ASSY AWV1992 AWV2058 AWV2058 1 1 POWER SUPPLY ASSY AWV1960 AWV2057 AWV2057 1 1 SIGNAL ASSY AWV1964 AWV2052 ...

Page 28: ...r MATRIX INPUT SELECT INPUT SELECT RGB YCbCr MATRIX SYNC SEP SYNC SEP SY SCB SCR MY MCB MCR SCL3 SDA3 V Y C S DET AV SW 7 INPUT 3 OUTPUT V Y C S DET V Y C S DET V Y C S DET IC2201 CXA2069Q SCCY EEPROM RS 232C 232C DRIVER RXD0 TXD0 RxD TxD RTS IC1801 SP3232ECY DAC IC SCL2 SDA2 DVIH DVIV MH MV SH SV MH MV SH SV HS VS SYNC SEP COLOR DEMOD 6dB AMP MCCY 3DY 3DC FIL TER SUB N HSW MAIN N HSW RGB DSUBRGB ...

Page 29: ...F L P F MUTE 6ch DAC IC DIGITAL CONVERGENCE PLL AMP V DEF PD P D PRE AMP HBLK SCL2 SDA2 CBUSY WP CRESET VBLK CVRGB CVBLK IC4602 TC74HC4053AF APL DET VBLK APL HS VS IC4601 M52055FP IC4610 TC74HC126AF IC4610 TC74HC126AF IC1203 24LC64 I P IC1205 CD0031AM IC401 IC402 STK392 180 SHARP NESS CP GEN SCP DCLP IC4301 AN5395FBP SCL2 SDA2 PURE RGB SPASS COMP FULL DY CTI ABL LTI SYNC PROCESS AFC VM HPIN COMP F...

Page 30: ...MUTE AMUTE RS 232C BLOCK TXD0 RXD0 TXD0 RXD0 IC3901 CXA2171Q IC3906 CXA2171Q AVI O BLOCK AUDIO PRE BLOCK MAIN SYNC Color Demodulation BLOCK 3D Y C SEP BLOCK SUB COMPONENT BLOCK SUB COMPONENT BLOCK HDMI BLOCK DIGITAL AUDIO BLOCK SCL1 SDA1 SCL1 SDA1 SCL1 SDA1 SCL1 SDA1 SCL1 SDA1 SCL2 SDA2 IC2804 M52055FP IC2805 M52055FP MMUTE MCCY SCCY REM BH3865F SCL2 SDA2 ESCL ESDA SCL2 SDA2 HP1 DVIRST IC3907 M520...

Page 31: ...ACLOFF STDSW PURERGB WP SUB SYNC Color Demodulation BLOCK SHARPNESS BLOCK VIDEO BLOCK PROGRESSIVE MODULE UNIT AXY1061 IP TWIN PICTURE RESIZE IC2806 TA1340F SUBN H SW SCL2 SDA2 SCL2 SDA2 SPASS SHARP SW 31K SW IC4608 CXA2180AQ IC4606 CXA2153S COMPFULL SCL2 SDA2 SCL2 SDA2 PGAIN PBRT AUTOACL IC4305 M52055FP IC4306 M52055FP IC4601 M52055FP SCL2 SDA2 ACL HBLK VBLK SCL2 SDA2 OSDR OSDG OSDB OSDBLK OSDHALF...

Page 32: ...R R L R L R L R L R L INPUT5 6 INPUT5 6 SW HDMI L R INPUTF L R INPUT3 L R INPUT2 L R INPUT1 L R 6dB ATT ATT ATT ATT ATT ATT ATT AMP AMP AMP 6dB R L VAR L R VAR FIX SW IC2203 MC14066BF R L MONITOR MUTE MONITOR TV OUT AUDIO OUT VAR FIX MUTE MON TV MUTE INPUT 6 analog R L INPUT 5 HDMI INPUT 6 HDMI TC4066BF PCM1742KE NJM12904V LPF AMP INPUT5 6 SW TC74VHC157FT SII9993CTG100 SII9993CTG100 AD SW TC4066BF...

Page 33: ...3 IC5504 NJM4558MD DC SPEAKER DETECTION TRAP IC5501 NJM4558MD AMP POWER AMP FRONT SURROUND TONE CONTROL BASS BOOST VOL CONTROL AUDIO MUTE IC2202 MC14066BF IC5502 BH3865S ATT AUDIO MUTE PHASE SECURITY CENTER SW CENTER L R CENTER PRE AMP AGC AMUTE CMUTE AMUTE2 SCL2 AMUTE2 SDA2 ...

Page 34: ... B SCL1 SDA1 AFT1 FE1 FE2 S DET S DET INPUT 1 INPUT 2 INPUT 3 INPUT F TV1 TV2 INPUT 1 INPUT 2 INPUT 3 2LY 3DY 3DC 2LC IC2503 UPD64083GF 3BA IC2701 TC90A45F MONITOR OUT RGB YCbCr MATRIX INPUT SELECT INPUT SELECT RGB YCbCr MATRIX SYNC SEP SYNC SEP V Y C S DET AV SW 7 INPUT 3 OUTPUT V Y C S DET V Y C S DET V Y C S DET IC2201 CXA2069Q RS 232C 232 DRIVER RXD0 TXD0 RxD TxD RTS IC1801 SP3232ECY DVIH DVIV...

Page 35: ... IC2806 TA1340F IC2804 M52055FP IC2805 M52055FP MAIN UCOM IC1906 M306V7FGFP PROGRESSIVE UNIT AXY1076 IC1903 24LC32A I P IC4608 CXA2180Q SCL1 SDA1 CRT AMP HBLK VBLK MCCY HBLK SCL2 SDA2 OSDRGB OSDBLK APL DET SCCY VBLK SY SCB SCR MY MCB MCR APL SHARP NESS CP GEN SCP DCLP IC4301 AN5395FBP IC4601 M52055FP DY SCC Y EEPROM HBLK 1 RGB SHARP NESS DETAIL RXD0 TXD0 MH MV SH SV SYNC SEP COLOR DEMOD 6dB AMP MM...

Page 36: ...AGE Block SECONDARY 2 Block PRIMARY 2 PRIMARY 2 Block PRIMARY 2 Block SECONDARY 2 Block PRIMARY 2 Block POWER SUPPLY 2 Block D901 VDRV HDRV LIVE NEUTRAL J901 V 21V IC901 AN8029 IC801 M5220P IC802 LA78045 IC502 NJM4558DXP T901 T601 HVRST FU1001 D1007 SW REGULATOR CONTROL 1 2 H DEF DRIVE H DEF OUT HIGH VOLTAGE OUTPUT H V CONTROL V 20V FU1002 D1009 HT FU1003 D1010 IC1001 V 120V B ANODE FOCUS F B PD C...

Page 37: ...CONDARY 1 Block AUDIO POWER AMP Block STANDBY Block CONVERGENCE AMP Block PRIMARY 1 Block POWER SUPPLY 1 Block DIGITAL CONVERGENCE Block VELOCITY MODULATION Block CONVERGENCE AMP Block VM Block SECONDARY 1 Block PRIMARY 1 Block T101 T201 VM HBLK VBLK V 4V IC201 AN8029 IC401 IC402 STK392 180 S5291 POWER FU301 D301 D102 D201 RY201 RY202 FU201 SW REG CONTROL 1 2 IC205 CD0031AM 6 ch DAC SVM VM AMP Blo...

Page 38: ...M VIDEO UCOM SERVICE ASSY AWV2058 HDMI SERVICE ASSY AWV2061 FRONT INPUT ASSY AWZ6715 G LED RLS ASSY AWZ6822 REMOTE SENSOR ASSY AWZ6717 PROGRESSIVE UNIT AXY1076 F TUNER ASSY AWZ6712 A FRONT CONTROL ASSY AWZ6718 D J F 1 5 J F 5 5 SIGNAL ASSY AWZ6716 B 1 5 B 5 5 B J F I F E F ...

Page 39: ... POWER SW ASSY AWZ6713 Q D SUB ASSY AWZ6714 H BNC ASSY AWZ6720 C B CRT DRIVE ASSY AWZ6711 M G CRT DRIVE ASSY AWZ6710 L R CRT DRIVE ASSY AWZ6709 K DEFLECTION SERVICE ASSY AWV1967 N 1 2 N 2 2 N Note When ordering service parts be sure to refer to EXPLODED VIEWS and PARTS LIST or PCB PARTS LIST P F ...

Page 40: ...S12 3 DVIR H4 1 SDA4 H4 2 SCL4 H4 3 HP2 H1 10 HP1 H1 9 V 3STB H1 8 MDET H1 7 MD H1 6 MC H1 5 DVIRST H1 4 ML H1 3 PTT H1 2 SCL3 H1 1 SDA3 14 GND 0 S12 4 GND 11 PTT 2 9 12 SCL3 4 9 13 SDA3 4 8 HDVI SERVICE ASSY SIGNAL ASSY P5 CN301 DC Voltage V H3 CN6001 Pin Name Pin Name 1 V 13 14 5 1 V 13 2 GND 0 2 GND 3 V 6 6 5 3 V 6 4 GND 0 4 GND 5 V 4 4 9 5 V 4 6 V 4 4 9 6 V 4 7 GND 0 7 GND 8 GND 0 8 GND V2 CN1...

Page 41: ...PRO 730HDI 41 5 6 7 8 5 6 7 8 C D F A B E 4 4 LED RLS ASSY FRONT CONTROL ASSY AWZ6718 D LED RLS ASSY AWZ6822 E F D E F D F E ...

Page 42: ...PRO 730HDI 42 1 2 3 4 1 2 3 4 C D F A B E 4 5 HDMI SERVICE ASSY 1 2 3 3 0 4 9 0 0 0 6 5 0 0 2 0 2 4 9 I F 1 2 ...

Page 43: ...R G or B SIGNAL ROUTE RGB AUDIO SIGNAL ROUTE R R R B B B G G G 29 28 30 31 27 HDMI SERVICE ASSY AWV2061 4 6 4 6 14 2 3 3 3 3 12 3 5 0 5 0 5 0 0 0 3 7 3 0 6 3 3 0 3 3 0 CN2205 S2 B 1 5 CN3904 S12 B 2 5 CN1901 V2 J F 1 5 CN301 P5 P F 1 3 CN6001 CN6005 I F 1 2 I F 1 2 I F 2 2 DIGITAL AUDIO BLOCK HDMI BLOCK ...

Page 44: ...PRO 730HDI 44 1 2 3 4 1 2 3 4 C D F A B E 4 6 HDMI SERVICE ASSY 2 2 I F 1 2 I F 2 2 HDMI BLOCK 11 3 12 6 0 6 0 6 0 6 0 ...

Page 45: ... 45 5 6 7 8 5 6 7 8 C D F A B E DIGITAL AUDIO BLOCK AUDIO SIGNAL ROUTE HDMI SERVICE ASSY AWV2061 I F 2 2 I F 2 2 I F 1 2 HDMI BLOCK 6 2 6 2 5 5 5 5 12 12 0 0 0 0 6 6 7 6 7 6 0 6 0 0 0 0 0 3 2 2 5 3 2 2 5 5 0 5 0 ...

Page 46: ...0 7 0 8 3 0 9 3 0 10 3 3 11 3 3 12 3 3 13 3 3 14 3 3 IC6006 TC74HC126 1 27 1 GND 27 31 31 CN6004 pin 1 DVIR V 200mV div H 5µsec div CN6004 pin 7 DVIH V 2V div H 5µsec div H rate 2 27 2 GND 28 30 30 CN6004 pin 3 DVIG V 200mV div H 2msec div CN6004 pin 9 DVIV V 2V div H 2msec div V rate 1 28 1 GND 28 31 31 CN6004 pin 3 DVIG V 200mV div H 5µsec div CN6004 pin 7 DVIH V 2V div H 5µsec div H rate 2 28 2...

Page 47: ...2 6 7 3 6 7 4 6 7 5 0 6 0 7 0 8 6 7 9 6 7 10 6 7 11 6 7 12 0 13 0 14 12 IC7006 TC4066BFT Voltage V Pin 1 6 2 2 6 5 3 6 5 4 0 5 6 5 6 6 5 7 6 2 8 12 IC7005 NJM12904V Voltage V Pin 1 6 7 2 6 1 3 6 1 4 6 1 5 11 9 6 11 9 7 0 8 6 1 9 6 2 10 6 2 11 6 7 12 0 13 0 14 12 IC7007 TC4066BFT I F 1 2 HDMI BLOCK Name Voltage V Pin 1 SDA3 2 SCL3 3 PTT 4 ML 5 DVIRST 6 MC 7 MD 8 MDET 9 V 3V 10 HP1 4 8 4 8 2 9 3 0 1...

Page 48: ...HDI 48 1 2 3 4 1 2 3 4 C D F A B E 4 7 VIDEO UCOM SERVICE ASSY 1 5 J F 1 5 J F 5 5 I F 1 2 J F 2 5 CN2208 S10 B 1 5 CN404 P2 P F 2 3 CN5001 D K1 CN6005 H1 TO SIRIAL WRITER JIG TO AUTO CONVER EEP ROM M306V7FGFP ...

Page 49: ...PRO 730HDI 49 5 6 7 8 5 6 7 8 C D F A B E J F 1 5 J F 1 5 J F 3 5 J F 4 5 J F 4 5 F J F 4 5 J F 3 5 VIDEO UCOM SERVICE ASSY AWV2058 UCOM BLOCK CN407 P1 P F 2 3 ...

Page 50: ... 5 MAIN COLOR DEMODULATION SUB COLOR DEMODULATION 480p 1080i PB PR 480p 1080i 480p 1080i 480p 1080i 480p 1080i PB PR 480p 1080i PB PR 480p 1080i PB PR 480p 1080i PB PR PB PR PB PB PR PB PB PB PR PR PR PR PB PR PR SUB PR SUB PR SUB PB SUB PB SUB PB SUB SUB SUB SUB SUB SUB SUB PR SUB PR SUB PB SUB PB SUB SUB SUB SUB SUB SUB SUB SUB SUB SUB SUB 32 33 34 40 41 42 ...

Page 51: ...p 1080i 480p 1080i 480p 1080i Y SIGNAL ROUTE 1080i or 480p PB SIGNAL ROUTE PB PB PR SIGNAL ROUTE PR PR PB PR PB PR PB PR PB PB PR PR PB PB PB PB PB PR PR PR PR PR PB PB PB PR PR PR PR PR PR PB PR PB PB SIGNAL SUB PB SUB PR SIGNAL SUB PR SUB PB SUB PB SUB PB SUB PR SUB PR SUB PR SUB PR SUB PR SUB Y SIGNAL ROUTE SUB SUB SUB SUB SUB SUB SUB SUB C SIGNAL ROUTE SUB SUB 35 47 52 51 45 44 43 46 39 38 36 ...

Page 52: ...IA color bar J F 1 5 VIDEO UCOM SERVICE ASSY IC1906 M306V7FGFP No Voltage V No Voltage V 1 0 51 0 2 0 52 3 3 3 0 5 53 3 3 4 0 5 54 0 5 0 55 0 3 3 6 0 56 0 7 0 57 0 8 0 58 3 3 9 0 59 3 3 10 0 60 3 3 11 3 3 61 3 3 12 3 3 62 0 3 0 13 0 3 3 63 3 3 14 0 64 0 3 0 15 1 3 1 7 65 3 0 16 3 3 66 0 17 0 67 0 18 68 0 19 3 2 69 0 3 3 20 0 70 0 3 3 IC1905 M62399FP 21 0 71 3 3 22 0 72 3 3 23 0 3 3 73 0 24 3 3 74 ...

Page 53: ...r bar 49 Foot of R2971 DCB V 0 5V div H 5µsec div Input INPUT1 COMPOSITE EIA color bar 50 Foot of R2972 DCR V 0 5V div H 5µsec div Input INPUT1 COMPOSITE EIA color bar 51 CN2804 pin 7 DHS V 1V div H 5µsec div Input INPUT1 COMPOSITE EIA color bar GND 52 CN2804 pin 6 DVS V 1V div H 2msec div Input INPUT1 COMPOSITE EIA color bar No Voltage V No Voltage V 1 9 0 16 2 4 2 2 4 17 0 6 3 18 0 4 2 4 19 2 4 ...

Page 54: ...J F 3 5 J F 4 5 J F 1 5 J F 2 5 J F 1 5 J F 4 5 J F 5 5 J F 1 5 J F 2 5 J F 2 5 CN303 P3 P F 1 3 IC INTERNAL TH 1 5V 480p 1080i 480p 1080i 480p 1080i 480p 1080i 480p 1080i PB PR 480p 1080i 480p 1080i 480p 1080i PB PB PB PR PR PB PB PR PR PB PR 480p 1080i PB PR PR 54 53 55 56 ...

Page 55: ...HARPNESS CONTROL The power supply is shown with the marked box AUDIO SIGNAL ROUTE 480p 1080i Y SIGNAL ROUTE 1080i or 480p PB SIGNAL ROUTE PB PR SIGNAL ROUTE PR 480p 1080i 480p 1080i 480p 1080i PB PB PR PR 480p 1080i 480p 1080i 480p 1080i 480p 1080i 480p 1080i 480p 1080i 480p 1080i 480p 1080i PB PB PR PB PB PR PR PR 57 58 59 ...

Page 56: ...4608 pin 51 Jungle input Y V 1V div H 5µsec div 62 IC4608 pin 53 Jungle input Pr V 1V div H 5µsec div 61 IC4608 pin 52 Jungle input Pb V 1V div H 5µsec div 63 IC4608 pin 34 Jungle output R V 1V div H 5µsec div 64 IC4608 pin 32 Jungle output G V 1V div H 5µsec div 65 IC4608 pin 30 Jungle output B V 1V div H 5µsec div IC4301 AN5395FBP No Voltage V 1 5 6 2 0 3 2 6 4 5 9 0 6 9 0 7 2 6 8 0 9 10 11 0 12...

Page 57: ... 0 5 29 5 0 61 9 0 30 4 4 62 4 4 31 5 0 63 5 7 32 4 4 64 3 5 No Voltage V 1 4 7 2 3 3 2 4 0 5 3 2 6 3 2 7 8 4 7 9 4 7 10 0 11 4 7 12 13 9 1 14 4 7 15 0 16 4 7 No Voltage V 1 0 7 2 0 7 3 0 7 4 0 7 5 0 7 6 0 7 0 8 0 9 0 10 0 11 0 12 0 7 13 0 7 14 0 7 15 0 7 16 5 0 No Voltage V No Voltage V 1 3 3 16 0 5 2 4 9 17 0 5 3 3 3 18 3 1 4 2 9 19 3 5 5 3 3 20 3 5 6 0 21 3 5 7 4 0 22 12 0 8 0 23 9 0 9 0 24 0 1...

Page 58: ...M SERVICE ASSY 4 5 J F 4 5 J F 1 5 J F 2 5 J F 3 5 J F 2 5 CN3905 S7 B 2 5 RGB SW RGB MATRIX COLOR CONTROL RGB PREAMP J F 2 5 J F 1 5 J F 3 5 J F 1 5 J F 1 5 J F 2 5 J F 1 5 J F 3 5 480p 1080i PB PR R R G B R G G B B 60 66 69 68 67 63 61 64 65 62 R R G B G B ...

Page 59: ... A B E J F 4 5 J F 4 5 J F 3 5 VIDEO UCOM SERVICE ASSY AWV2058 VIDEO BLOCK OSD SW CN5201 M B2 CN5101 K R2 CN5151 L G2 Y SIGNAL ROUTE R G or B SIGNAL ROUTE RGB PB SIGNAL ROUTE PB PR SIGNAL ROUTE PR R R R R G G G G G G B B B B B B B 70 71 ...

Page 60: ...60 1 2 3 4 1 2 3 4 C D F A B E 4 11 VIDEO UCOM SERVICE ASSY 5 5 J F 5 5 J F 5 5 J F 1 5 J F 2 5 J F 3 5 J F 1 5 VIDEO UCOM SERVICE ASSY AWV2058 AUDIO PRE BLOCK CN2206 S6 B 1 5 AUDIO PREAMP PREAMP BLOCK TRAP BLOCK ...

Page 61: ...2 4 8 3 4 8 4 0 5 4 8 6 4 8 7 4 8 8 9 0 No Voltage V 1 2 9 2 2 9 3 2 9 4 0 5 2 9 6 2 9 7 2 9 8 9 No Voltage V 1 2 9 2 2 9 3 2 9 4 0 5 2 9 6 2 9 7 2 9 8 9 0 No Voltage V 1 4 5 2 0 3 4 0 4 5 6 4 5 7 4 5 8 4 5 9 2 5 10 4 5 11 4 5 12 4 5 13 0 5 14 0 5 15 0 5 16 0 5 No Voltage V 17 0 5 18 19 20 4 5 21 22 23 4 5 24 4 5 25 1 5 26 4 5 27 4 5 28 4 5 29 4 5 30 31 9 32 4 5 ...

Page 62: ...0HDI 62 1 2 3 4 1 2 3 4 C D F A B E 4 12 POWER SUPPLY ASSY 1 3 P F 1 3 J901 N 2 2 TO REAR PANEL AC IN Q POWER SW ASSY AWZ6713 Q CHARGED SECTION 107 108 103 102 104 105 106 P F 1 3 POWER SUPPLY ASSY AWV2057 W1 ...

Page 63: ...8 5 6 7 8 C D F A B E P F 1 3 P F 3 3 P F 3 3 P F 2 3 CN2501 S5 B 3 5 CN4301 V9 J F 3 5 CN6001 H3 NOTE FOR FUSE REPLACEMENT FOR CONTINUED PROTECTION AGAINST RISK OF FIRE REPLACE WITH SAME TYPE AND RATINGS ONLY CAUTION I F ...

Page 64: ...4 1 2 3 4 C D F A B E 4 13 POWER SUPPLY ASSY 2 3 P F 2 3 P F 2 3 P F 1 3 P F 3 3 P F 1 3 P F 3 3 P F 3 3 F P F 1 3 POWER SUPPLY ASSY AWV2057 CONVERGENCE BLOCK J506 D1 N 1 2 CN502 D3 N 1 2 CN501 D2 N 1 2 CN1907 V11 J F 1 5 ...

Page 65: ...PRO 730HDI 65 5 6 7 8 5 6 7 8 C D F A B E P F 2 3 CN1202 O CN1909 V10 J F 1 5 C2 CN1201 L1 R CONVERGENCE YOKE L2 G L3 B O C1 109 110 112 114 111 113 ...

Page 66: ...HDI 66 1 2 3 4 1 2 3 4 C D F A B E 4 14 POWER SUPPLY ASSY 3 3 P F 3 3 P F 3 3 P F 1 3 P F 2 3 P F 1 3 P F 1 3 POWER SUPPLY ASSY AWV2057 SVM and AUDIO POWER BLOCKS SVM BLOCK CN5106 K R1 CN5157 L G1 CN5207 M B1 ...

Page 67: ...F 2 3 P F 1 3 P F 1 3 AUDIO POWER BLOCK AUDIO POWER AMP TO SPEAKER 115 115 GND CN1101 pin 4 AUDIO L V 5V div H 500µsec div Input TUNER 1kHz 400mVrms Vol MAX IC1101 LA4282 No Voltage V 1 1 1 2 0 7 3 17 2 4 0 5 0 7 6 1 1 7 17 2 8 0 9 0 10 34 9 11 17 2 12 0 ...

Page 68: ...P F 1 3 POWER SUPPLY ASSY GND GND Q201 Gate V 5V div H 5µsec div Q201 Drain V 50V div H 5µsec div 102 102 103 103 GND GND IC201 pin 1 V 2V div H 5µsec div IC201 pin 2 V 0 5V div H 5µsec div 104 104 105 105 GND GND IC201 pin 3 V 0 5V div H 5µsec div IC201 pin 6 V 5V div H 5µsec div 106 106 107 107 GND IC101 pin 5 V 50V div H 100µsec div 108 ...

Page 69: ...ND CN403 pin 3 BHD V 10V div H 2msec div GND CN401 pin 1 RVD V 10V div H 2msec div GND CN401 pin 3 RHD V 10V div H 2msec div GND CN402 pin 1 GVD V 10V div H 2msec div 114 113 112 109 110 111 IC401 STK392 180 No Voltage V 1 0 2 0 3 19 0 4 20 2 5 22 0 6 7 8 20 2 9 10 22 0 11 12 20 2 13 14 15 16 17 20 2 18 IC402 STK392 180 No Voltage V 1 0 2 0 3 19 0 4 20 2 5 22 0 6 7 8 20 2 9 10 22 0 11 12 20 2 13 1...

Page 70: ...s For further information for respective destinations be sure to check with the schematic diagram 4 View point of PCB diagrams Symbol In PCB Diagrams Symbol In Schematic Diagrams Part Name B C E D D G G S S B C E B C E D G S B C E B C E B C E Transistor Transistor with resistor Field effect transistor Resistor array 3 terminal regulator Capacitor Connector P C Board Chip Part SIDE A SIDE B For DEF...

Page 71: ...ED RLS ASSY J5002 D D FRONT CONTROL ASSY D LED RLS ASSY ANP2018 B ANP2018 B Q5003 PC5001 Q5002 Q5001 VR5001 J5001 J5002 CN1904 V1 CN5001 SIDE A SIDE B J5002 FRONT CONTROL ASSY D LED RLS ASSY ANP2018 B ANP2018 B J5001 CN5001 J5002 E F E F E F E F J F ...

Page 72: ...001 SIDE A SIDE A Q6006 Q6007 Q6018 Q7013 Q7011 Q7022 Q7025 Q7023 Q7024 Q7007Q7009 Q7004 Q7002 Q7003 Q7001 Q6014 Q7008 Q6002 IC6010 IC6007 IC6003 IC6006 IC6009 IC7006 IC7005 IC7007 Q6016 Q6012 Q7021 Q7015 Q7026 Q7014 Q7012 Q7027 Q7019 Q7028 Q6011 Q6010 Q6009 Q7020 Q7017 Q7016 Q7018 Q7091 Q6015 IC6001 IC6008 Q7010 Q6017 Q6003 IC6011 IC6012 IC6004 IC6005 IC7003 IC8002 IC7001 IC7004 IC6013 IC7002 Q60...

Page 73: ...PRO 730HDI 73 5 6 7 8 5 6 7 8 C D F A B E I I HDMI SERVICE ASSY ANP2047 A CN6001 CN6004 CN6005 CN6003 SIDE B SIDE B F F F I ...

Page 74: ...Q1914 Q1913 Q1912 Q1909 Q1908 Q1910 Q2826 Q2832 Q1907 Q1906 Q1905 Q1901 Q1904 IC4604 IC4610 IC1905 IC1907 IC5504 IC4304 IC4303 IC5503 IC5502 Q4635 Q5508 Q5503 Q5505 Q5504 Q5501 Q5502 Q1911 IC1908 IC1906 Q1919 Q2844 CN2208 CN1906 B S10 CN2601 CN2801 B S9 CN2701 CN2803 B S8 CN3905 CN4602 B S7 CN2206 CN5501 B S6 CN303 CN4301 P P3 CN404 CN1909 P P2 CN6005 CN1901 I H1 To REPLACEMENT BOARD CN1902 F F F ...

Page 75: ...Q4665 IC4611 IC4609 IC4613 IC4612 Q4645 Q4612 Q4611 Q4624 Q4641 Q4614 Q4625 Q4646 Q4642 Q4633 Q4620 Q4637 Q4636 Q4671 Q4668 Q4667 Q4647 IC4605 Q4651 Q4657 Q4655 Q4650 Q4666 Q4669 Q4653 Q4627 Q4628 Q4615 Q4631 Q4632 Q4623 Q4619 Q4613 IC4606 Q4640 Q4638 IC4608 IC4610 IC4610 Q4310 Q4332 IC2809 IC4305 IC4301 IC4601 IC4306 IC4615 IC2801 IC2802 Q2819 Q2818 Q2831 Q2830 Q2829 Q2838 Q2837 Q2836 Q2839 Q2808...

Page 76: ...PRO 730HDI 76 1 2 3 4 1 2 3 4 C D F A B E F SIDE B VIDEO UCOM SERVICE ASSY J J CN1904 CN1905 CN2802 CN2804 CN1908 CN1907 CN4601 F ...

Page 77: ...PRO 730HDI 77 5 6 7 8 5 6 7 8 C D F A B E F SIDE B J ANP2046 A CN1906 CN2801 CN2803 CN4602 CN5501 CN4301 CN1909 CN1901 CN1902 ...

Page 78: ...Q301 Q1109 VR301 VR1 Q1107 Q1 IC1101 IC1103 Q104 Q102 IC101 IC102 IC202 IC201 IC301 mark shows a high voltage generation point Charged section POWER SUPPLY ASSY POWER SW ASSY Q ANP2016 B J901 CN202 N D4 AC IN CN201 CN6001 H3 CN301 CN2501 B S5 CN302 CN4301 CN303 SPEAKER CN1101 REAR PANEL P F J F I F P F ...

Page 79: ...58 Q760 Q756 Q755 Q403 Q404 Q402 Q304 Q302 Q303 Q108 Q109 Q104 Q107 Q102 IC102 Q103 ANP2014 B CN501 CN408 N D2 J506 CN410 N D1 CN502 CN409 N D3 CN1909 V10 CN404 CN1202 O C2 CN405 CN1907 V11 CN407 CN1201 O C1 CN406 CN4301 V9 CN303 ER CN402 CONVERGENCE YOKE L1 R L2 G CN403 L3 B CN401 CN5207 CN751 M B1 CN5157 L G1 CN5106 K R1 P F J F J F J F ...

Page 80: ...PRO 730HDI 80 1 2 3 4 1 2 3 4 C D F A B E I F J F P F SIDE A P a P b POWER SUPPLY ASSY CN6001 H3 CN301 CN2501 B S5 CN302 C CN3 SPEAKER CN1101 REAR ...

Page 81: ... 5 6 7 8 C D F A B E Q Q201 Q1108 Q301 Q1109 VR301 IC1103 IC101 IC102 IC202 IC201 IC301 P a P b mark shows a high voltage generation point Charged section POWER SW ASSY Q ANP2016 B J901 CN202 N D4 AC IN CN201 REAR PANEL P F ...

Page 82: ...30HDI 82 1 2 3 4 1 2 3 4 C D F A B E F J F J F SIDE A P a P b CN1909 V10 CN404 CN1202 O C2 CN405 CN1907 V11 CN407 CN1201 O C1 CN406 CN4301 V9 CN303 CN402 CONVERGENCE YOKE L1 R L2 G CN403 L3 B CN401 CN5207 M ...

Page 83: ... IC1101 3 Q1101 Q405 Q401 Q752 Q763 Q751 Q757 Q762 Q761 Q759 Q758 Q760 Q756 Q755 Q403 Q404 Q402 Q304 Q302 Q303 Q108 Q109 Q104 Q107 Q102 IC102 Q103 P a P b ANP2014 B CN501 CN408 N D2 J506 CN410 N D1 CN502 CN409 N D3 CN5207 CN751 M B1 CN5157 L G1 CN5106 K R1 P F ...

Page 84: ...3 1 2 D SUB ASSY AWZ6714 1 2 FRONT INPUT ASSY AWZ6715 1 NSP 1 SIGNAL ASSY AWV2052 2 SIGNAL ASSY AWZ6716 1 2 REMOTE SENSOR ASSY AWZ6717 1 2 FRONT CONTROL ASSY AWZ6718 1 2 BNC ASSY AWZ6720 1 2 LED RLS ASSY AWZ6822 1 HDMI SERVICE ASSY AWV2061 1 VIDEO UCOM SERVICE ASSY AWV2058 1 POWER SUPPLY ASSY AWV2057 1 DIGITAL CONV ASSY AWV1966 1 1 DEFLECTION SERVICE ASSY AWV1967 1 Note 1 The PCB PARTS Refer to Se...

Page 85: ...17 Q7021 2SC2712 Q7023 Q7024 Q7026 2SC2712 D7001 D7004 D7005 1SS184 D7006 D7009 1SS226 COILS AND FILTERS F7001 ATF1194 CAPACITORS C7013 C7027 CCSRCH181J50 C7014 C7029 CCSRCH681J50 C7011 C7012 C7019 C7020 C7025 CEAT100M50 Mark No Description Part No C7015 C7026 C7035 C7038 CEAT101M16 C7028 C7030 C7033 C7036 CEAT1R0M50 C7002 C7004 CEAT220M50 C7009 C7018 C7022 CEAT221M6R3 C7003 C7010 C7016 C7017 C702...

Page 86: ...0 C2831 CCSRCH220J50 C2946 C2947 CCSRCH221J50 C2844 C2859 C2868 C2869 C2873 CCSRCH330J50 C2897 C2911 C2930 C2937 CCSRCH330J50 C2845 C2860 C2874 C2898 C2912 CCSRCH331J50 C2832 C2833 C2846 C2861 C2875 CCSRCH470J50 C2899 C2913 CCSRCH470J50 C2825 C2829 C2881 C2887 CEAT101M10 C2801 C2805 C2806 C2810 C2958 CEAT102M6R3 C2827 C2893 CEAT1R0M50 C2854 C2855 C2908 C2909 C2959 CEAT220M50 C2950 C2954 CEAT221M16...

Page 87: ...4610 Q4614 Q4616 Q4618 2SC2712 Q4625 Q4628 Q4629 Q4635 Q4638 2SC2712 Q4640 Q4642 Q4644 Q4646 Q4653 2SC2712 Q4658 Q4663 Q4665 Q4671 2SC2712 Q4611 Q4623 Q4631 2SK209 Q4650 HN1A01FU Q4603 Q4605 Q4612 Q4624 Q4641 HN1B04FU Q4666 Q4670 HN1B04FU Q4620 Q4630 Q4647 Q4649 Q4651 HN1C01FU Q4664 HN1C01FU D4601 D4602 1SS184 D4614 1SS226 D4603 D4604 D4606 D4609 D4610 1SS355 D4612 D4615 1SS355 D4617 D4619 D4623 D...

Page 88: ...T220M50 C5509 CEAT471M16 C5512 C5520 C5524 C5527 C5528 CEAT4R7M50 C5533 C5537 CFTLA274J50 C5532 C5539 CFTLA393J50 C5529 C5538 CFTLA473J50 C5530 C5536 CFTLA684J50 C5503 C5510 C5531 C5535 CKSRYB103K50 C5522 CKSRYB104K16 C5517 C5525 CKSRYB471K50 C5521 CKSRYB562K50 C5513 C5526 CKSRYB683K16 RESISTORS R5549 R5550 R5552 R5553 RS1 10S271J R5533 R5537 R5558 R5562 RS1 10S561J Mark No Description Part No R55...

Page 89: ...D315 MTZJ5 1A D301 D303 YG802C06R Mark No Description Part No D305 YG911S2R COILS AND FILTERS L305 L314 L316 ATH1107 L301 L303 L307 L308 L311 ATH1108 L319 L322 ATH1108 L320 ATH1109 L306 ATX1008 L304 L309 L310 L312 L318 ATX1021 CAPACITORS C302 4700pF AC250V ACG1064 C317 C318 CCCSL101K2H C303 C307 C310 C314 C321 CCCSL221K2H C313 C325 C327 C328 CEAT100M50 C330 CEAT101M10 C323 CEAT1R0M50 C319 CEHAT100...

Page 90: ... C761 CEAT1R0M50 C751 CEAT470M50 C760 C764 CEHAT220M2C C767 CEHAT3R3M2C C759 C765 C766 CKCYE103P2H C769 CKCYF103Z50 C752 C757 C772 CKCYF473Z50 C768 CQMA472J50 C758 CQMA472K2E RESISTORS R766 RD1 2MMF100J R767 RD1 2MMF152J R769 R776 RD1 2PM2R2J R757 R758 RD1 4MUF100J R753 RD1 4MUF101J R768 R781 RD1 4MUF560J R752 R764 RS1MMF472J R770 R775 RS2MMF271J R774 RS3LMF471J Other Resistors RD1 4PU J Mark No D...

Page 91: ...retain the adjustment data of the unit and to facilitate adjustment after the replacement of the assemblies Notes Even if the EEPROMs are replaced adjustment may be necessary depending on the part or assembly to be replaced For details see page 93 Even if the EEPROMs are replaced if the EEPROMs are damaged or if their data have been changed from the adjustment data the status before the failure wi...

Page 92: ...RVICE Assy R G CRT DRIVE Assy BK GK RK R CRT DRIVE Assy Deflection Yoke B Deflection Yoke G Deflection Yoke R 5 Convergence Adjustment 6 White Balance Adjustment 7 Panel Adjustmen for 480i 8 Panel Adjustment for 480P FBT Anode Cable MEASURING METHOD SERVICEMAN WARNING Note When reconnecting the cable proceed in the reverse order After reconnecting tug on the cable to check that it is secure Before...

Page 93: ... 1 Others 2 1 2 3 5 6 If CRT ASSY R G or B is repaired or replaced Brightness Adjustment 2 White Balance Adjustment Composite STD 1 Others 2 Panel Adjustment for 480i 1 Panel Adjustment for 480P 1 1 6 7 8 If VIDEO UCOM SERVICE ASSY is repaired or replaced Focus Adjustment Lens 1 VR1 Focus VR 2 Convergence Adjustment 2 3 5 If LENS ASSY R G or B is repaired or replaced Convergence Adjustment 2 5 If ...

Page 94: ... continue lighting after flashing three times Repeat 500ms off and 500ms on three times and continue lighting Relay welding Repeat three times flashing and once stop Repeat 100ms on 100ms off 100ms on 100ms off 100ms on 100ms off and 1S off 2 Specification of green LED Power on lighting During power saving mode operation power management Flashing Repeat 2s on and 2s off About power management When...

Page 95: ...ality parameters cannot be adjusted except those for Pure Cinema 3D Y C LEVEL and 3D NR LEVEL If the Video Microcomputer Assy for an ISF adjusted product is to be replaced be sure to also replace the EEPROM IC1903 24LC32 I P The indications for the PICTURE Mode in the menu after adjustment are then changed Before ISF MODE adjustment After ISF MODE adjustment The modes change cyclically The modes a...

Page 96: ...nit or main unit To release FACTORY mode use the key s of the remote control unit or the main unit or turn the power off If the unit remains in FACTORY mode without any operation for 8 minutes it will be automatically released In FACTORY mode data for the picture and audio qualities are standard and the FLESH TONE setting is always off When the unit enters FACTORY mode settings such as audio mutin...

Page 97: ... ADJ 2 2 3 S VIDEO ADJ 3 2 3 COMPOSITE ADJ 4 2 2 COMPONENT ADJ 5 2 2 S VIDEO ADJ 6 2 2 COMPOSITE ADJ Do not perform the adjustment for service PureCinema Mode 7 HDMI INFORMATIN MODE 1AVI Info 2 SPD Info 3 Audio Info 4 MS Info 5 Video Status 6 Audio Status HDMI CONTROL SET MODE 7 Int Mask SET 8 General Control SET 9 HDMI EDID Audio SET Do not perform the adjustment for service HDMI Information mode...

Page 98: ...T DRIVE ASSY Oscilloscope CH1 CH2 X Y Cut off level 180V DC GND TP RK VR5101 R CRT DRIVE ASSY R CRT DRIVE ASSY When the DEFLECTION SERVICE Assy or VIDEO UCOM SERVICE Assy is replaced check the following to confirm if the above adjustment is necessary 1 Make a note of the data of CUT R CUT G CUT B and BRIGHT 1st FAC DOWN 2 Input 0 as parameters for 1 and check TP RK TP GK and TP BK of the CRT DRIVE...

Page 99: ...t move 2 Screen Center Adjustment Start Cross hatch 1 2 Turn the deflection yoke of the replaced CRT so that the cross hatch of the color corresponding to the replaced CRT converges with that of the CRTs not replaced When a CRT is replaced check the position of the VM Velocity Modulation yoke Turn to adjust Input a stable signal e g from an DVD LD player or SG to the INPUT 1 connector MENU SETUP C...

Page 100: ...hat For Green the vertical and horizontal lines at the center become their thinnest the scanning lines at the center are their strongest the red halo faintly appears at the center For Red the vertical and horizontal lines at the center become their thinnest the scanning lines at the center are their strongest For Blue the vertical and horizontal lines at the center become their thinnest the green ...

Page 101: ...D A C B I 1 H SIZE 15K Approx 36 30 2 V SIZE Approx 01 10 6 H SIZE HD Approx 27 30 7 V SIZE HD Approx 06 10 V Size H Size 15 kHz Size mode b H SIZE HD fixed value C can be varied V SIZE HD fixed value I can be varied A B Adjustment values C I Fixed values A C Addition of A and C B I Addition of B and I or CH CH H PHA 31kHz H PHA 33kHz H PHA 33K RGB H PHA 31K RGB H PHA 15K Table on H SIZE and V SIZ...

Page 102: ... 480P 33K RGB RGB 1080i 3 4 Horizontal Size Adjustment 1st FAC Start or Green screen Note Screen mode FULL ADJUST H SIZE F1 INPUT TV General broadcasting Adjust the size so that the picture is completely displayed on the screen 91 2 INPUT 1 Monoscope Note After the V SIZE adjustment enter the H SIZE adjustment by pressing 1 key After the H SIZE adjustment check that V SIZE is 91 2 If not readjust ...

Page 103: ...f necessary repeat steps 7 and 8 Blue adjustment is completed 9 Display the green red and blue colors at the same time to check the convergence Readjust the convergence if necessary 5 2 Prior to Adjustment There are five screen modes but convergence adjustment is required for two mode For adjustment input the following video signal Screen Mode Input Signal 1 FULL FULL 4 3 NORMAL ZOOM CINEMA WIDE N...

Page 104: ...ER MODE 1 by pressing the DOT key once 3 Enter the FULL screen mode by pressing the SCREEN mode key once When the unit enters FACTORY mode the screen mode automatically becomes FULL 4 Check the indication on the screen by pressing the numeric key 3 Indication at the bottom of the screen F DFI 00F If the adjustment value is 00F adjustment is not required If the adjustment value is other than 00F ad...

Page 105: ...Key No 7 LIN Key No 8 SIZE Key No 6 PIN Key No 7 LIN Key No 8 SIZE Fixed position Note 1 When the Green CRT is replaced or when the deflection yoke for the green is replaced prior to the convergence adjustment tune the center of the image to the center of the screen by turning the centering magnet Note 2 When the DEFLECTION SERVICE Assy or DIGITAL CONV Assy is replaced make coarse adjustment as sh...

Page 106: ... Horizontal Line downward press the key The value increases To move the Vertical Line to the left press the key The value decreases To move the Vertical Line to the right press the key The value increases To select one color use the RED key for the red GREEN key for the green BLUE key for the blue Pressing this key toggles color muting on or off To mute all the colors press the DISPLAY key To rele...

Page 107: ... on off or pressing keys on the remote control unit or on the main unit etc during this period because doing so may affect your adjustment data In a case of an error in convergence Adjustable points Bad adjustment Good adjustment 20 2 5 Adjustment data 30 3 5 Adjustment data Right half Adjust from the edge toward the center Left half Adjust from the center toward the edge Upper half Adjust from th...

Page 108: ...n center lines 3 6 2 Adjust the red vertical lines so that they converge with the green vertical lines Proceed to adjustment of the right half of the screen then the left half Adjustment should be done from the part where convergence is greatly dislocated 3 6 3 Adjust the red horizontal lines so that they converge with the green horizontal lines Proceed to adjustment of the upper half of the scree...

Page 109: ...e power of the TV is turned off standby during Convergence Adjustment mode coarse and fine adjustments turn on the TV enter FACTORY mode and enter Convergence Adjustment mode by pressing the SET ENTER key Then press the MENU key The data will be written to the EEPROM as described above 2 Do NOT turn off the main power during or after convergence adjustment If you do so the adjusted data may be los...

Page 110: ...ote Refer to the following adjustment procedure White Balance Adjustment 2 Start 1st FAC DOWN Telop Blue CUT G 128 to 127 CUT B 128 to 127 CUT R 128 to 127 DRV B 128 to 127 DRV R 128 to 127 BRIGHT 128 to 127 CONTRAST 128 to 127 TINT 32 to 31 COLOR 32 to 31 COMPONENT 33K STD OFFSET PURE RGB STD COLOR 24 Data value Data value Picture Quality b b a b a 1 2 3 This mode is to set the standard picture q...

Page 111: ... 3 CONTRAST 0 4 BLACK LVL 0 5 SHARPNESS 20 6 DETAIL 87 7 SVM 2 8 R DRV 0 9 B DRV 0 0 R CUT 0 CH G CUT 0 CH B CUT 0 COMP 33kHz 1 COLOR ADJ 2 TINT ADJ 3 CONTRAST ADJ 4 BLACK LVL 0 5 SHARPNESS 10 7 SVM 7 8 R DRV ADJ 9 B DRV ADJ 0 R CUT ADJ CH G CUT ADJ CH B CUT ADJ DIRECT KEY Sub CH PinP CH OFFSET MODE KEY ADJ NAME Adjustment COMP 45kHz 1 COLOR ADJ 2 TINT ADJ 3 CONTRAST ADJ 4 BLACK LVL 0 5 SHARPNESS ...

Page 112: ...T 1 3 CONTRAST 0 4 BLACK LVL 0 5 SHARPNESS 20 6 DETAIL 87 7 SVM 0 8 R DRV 0 9 B DRV 0 0 R CUT 0 CH G CUT 0 CH B CUT 2 RGB YCbCr 33k 1 COLOR 1 2 TINT 3 3 CONTRAST 0 4 BRIGHT 0 5 SHARPNESS 10 6 DETAIL 0 8 R DRV 0 9 B DRV 0 0 R CUT 0 CH G CUT 0 CH B CUT 7 DIRECT KEY OFFSET MODE KEY ADJ NAME Adjustment NEWS COLOR TEMP 3 CONTRAST 0 8 R DRV 15 9 B DRV 12 0 R CUT 0 CH G CUT 0 CH B CUT 1 LIVE COLOR TEMP 3...

Page 113: ...is unnecessary When there is not a cross hatch of composite signal and does not replace the EEPROM IC input a value of 45 Method refers to the following When perform the above adjustment and display END NG input a value of 45 Method refers to the following AUTO ACL ADJUST START Data value AUTO ACL ADJUST END OK Perform this adjustment after the white balance adjustment by all means or 6 Several se...

Page 114: ...1 of the GREEN CRT DRIVE assembly with the oscilloscope adjust the brightness level which is low by 30V from Black level of the main screen 3 Switch the input signal to a 100 white signal Adjust the panel part and the main screen with CONTRAST Observe the same site as described in Step 2 above and adjust the amplitude of the luminosity Main screen black 210V GND 31 7µS Approx 30V Approx 0V Panel p...

Page 115: ...of the gray part panel of the 4 3 normal screen of 480P signal RIGHT Note The adjustment procedures are the same as those described in Panel Adjustment for 480i except for the following Send the black burst of the 480P signal to the INPUT 1 connector Send a 100 white 480P signal to the INPUT 1 connector When 480P signal is not obtained and adjustment does not complete input a value the same as BRI...

Page 116: ...he SP line CN1101 is disconnected Connect the SP line The voltage at the negative electrode of the C1114 and C1117 is 5 5V or more C1114 C1117 POWER SUPPLY Assy Note The anode of the diode is high only for a short time after the power is turned on until the protection circuits are activated P D The LEDs are lit by the HOLD circuit In a case when the power cannot be on with no LED lit check the fol...

Page 117: ...f this happens disconnect the AC cord from the AC outlet or turn the main power switch OFF and wait for five minutes Be sure to check the fuses in the DEFLECTION SERVICE Assy because one or more may be blown as a result of short circuiting of the load circuit of the DEFLECTION SERVICE Assy Status Causes Check Items Probable Defective Parts D1006 ANODE Hi Blown fuse s The voltage approx 23V at R831...

Page 118: ...PRO 730HDI 118 1 2 3 4 1 2 3 4 C D F A B E POWER SW ASSY AWZ6713 Q POWER SUPPLY ASSY AWV2057 VIDEO UCOM SERVICE ASSY AWV2058 J 3 Block Diagram of the Protection Circuit P F F ...

Page 119: ...PRO 730HDI 119 5 6 7 8 5 6 7 8 C D F A B E DEFLECTION SERVICE ASSY AWV1967 N ...

Page 120: ... and AR Panel 1 Frame Cover V Assy L Frame Cover V Assy R Frame Cover H Flat blade Screw Driver Cloth Flat blade Screw Driver Cloth Flat blade Screw Driver Cloth Note You can remove the Screen without removing the Frame Cover and AR Panel 3 3 3 Remove five screws 4 4 Remove four screws 5 5 Remove the Panel Frame H Panel Frame H Panel Frame V Panel Frame V 6 6 6 Remove the Panel Frame V 2 4 2 2 3 ...

Page 121: ...d with water If stains persist use undiluted alcohol 1 Remove eight screws 2 Remove the Screen Frame Assy 3 Remove four screws to remove the Screen Side Fitting 4 Remove a screw 5 Remove a screw Only unscrew in the lens adjustment 6 Remove the Upper Cabinet Metal 7 Remove four screws to remove the Upper Cabinet Metal Only unscrew in the lens adjustment Screen 2 Screen Frame Assy 1 1 1 1 3 4 5 7 6 ...

Page 122: ...n to right when perform the lens adjustment 8 Remove the Screen Screen Holder TOP Fresnel Lenticular Sheet Notes To assemble the screen perform the above procedures in reverse order After assembling it put positions together so that right and left become equal 8 ...

Page 123: ...cting the cable proceed in the reverse order After reconnecting tug on the cable to check that it is secure Before removing the anode cable turn off the power unplug the AC plug and let the unit discharge for more than 1 minut Disconnect the FBT anode cable as shown below Measure at the point where the cable enters the FBT Caution Take extra precaution when measuring the voltage High voltage are a...

Page 124: ...IAGRAM Front Section FBT Focus Wire At least 15 mm away from any other parts Binder Binder 10 cm CRT R CRT G CRT B Yoke Wire Yoke Wire R B R G B G Yoke Wire Purse Lock Purse Lock Focus VR VR1 HV Distributor FBT Focus Wire more than 15 mm more than 15 mm 5 cm ...

Page 125: ...PRO 730HDI 125 5 6 7 8 5 6 7 8 C D F A B E Rear Section FBT DEFLECTION SERVICE Assy POWER SUPPLY Assy R 50 mm R 30 mm Anode Cable more than 15 mm ...

Page 126: ...ABOUT THE SERVICE RS232C PORT CONTROL SERVICE ONLY IN OUT INPUT 1 INPUT 2 INPUT 3 INPUTS S VIDEO Rear Panel Specification of this port is not decided at present Please refer to the service information issued separately after specification was decided ...

Page 127: ...circuits for OSD Open SR remote control signal input CEC input and output not use OSD BLK output OSDHALFoutput Level synchronous count input for tuner 1 reception Signal for conver EEPROM rewriting Level synchronous count input for tuner 2 reception BUSY signal for CM0021 digital conver control RESET signal for CM0021 digital conver control CM0022AF digital conver TA1340F main sub synchronization ...

Page 128: ...gnal Sub video mute signal Reset signal output for 3 dimensional YC HDMI1 for HOT PLUG control signal Sub video signal composite component change signal INPUT3 D sub INPUT5 6 DVI change signal Synchronized signal for CCD display and HBLK input Signal for 3DYC postposing filter change Synchronized signal for CCD display and Vsync input Input for electric discharge detection Signal output 1 for func...

Page 129: ...input distinction Secondary side voltage It rises and is a detection input Analog DC voltage input for ACL signal distinction External parts for sub CCD standard voltage generating circuits are connected External parts for sub CCD timing signal generating circuits are connected Picture signal input for small screen V CHIP detection 1 5Vpp Test input terminal it fixes to Lo STB5V Picture signal inp...

Page 130: ...PRO 730HDI 130 1 2 3 4 1 2 3 4 C D F A B E Pin Assignment Top view Block Diagram SiI 9993CTG100 HDMI SERVICE ASSY IC6007 IC6013 HDMI PanelLink Receiver ...

Reviews: