background image

Recording

06

59

En

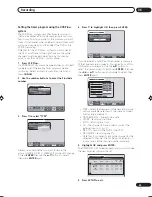
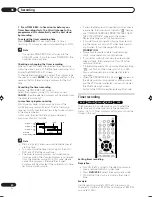
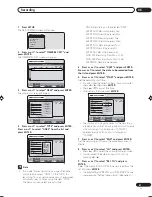
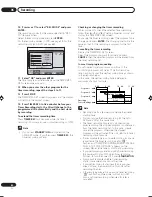
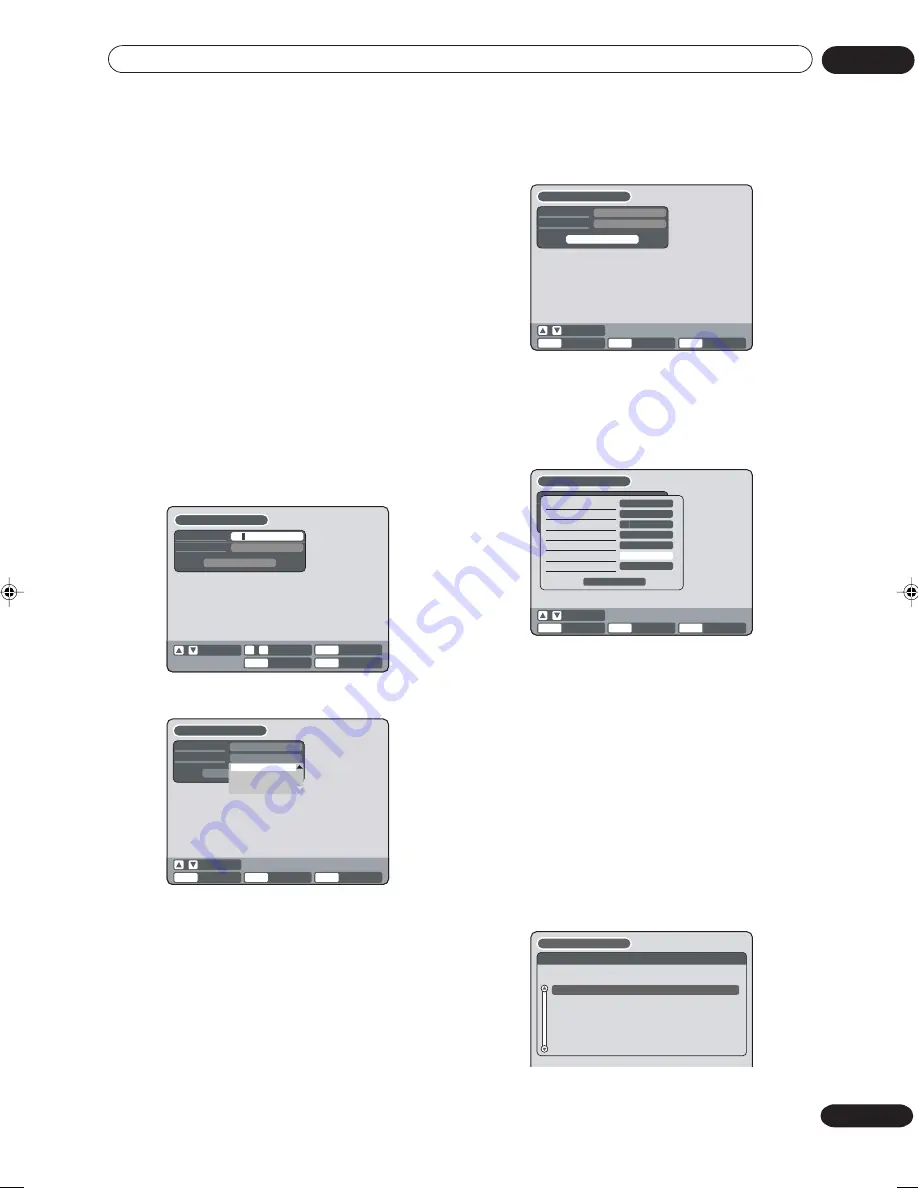
Setting the timer program using the VCR Plus+
system

The VCR Plus+ system simplifies timer recording so
that you just enter a PlusCode number (which you can
find in your TV listings guide) for the program you want
to record, tell the recorder whether you want to record it
just once or regularly, and then select the DVD or the
VCR for recording.
Note that for the VCR Plus+ system to work correctly,
the clock must be set to the right time and the guide
channels must be setup (see 

Checking the channel

setup to use the VCR Plus+ system

 above).

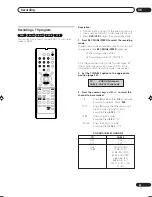
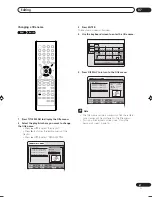
1

Press VCR Plus+.

If a PROGRAM FULL message appears then you’ll need
to delete one of the existing timer programs before
continuing. Select a timer program from the list and
press 

CANCEL

.

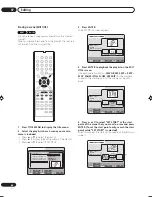
2

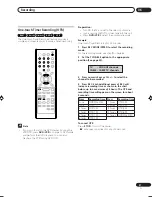
Use the number buttons to enter the PlusCode

number.

RETURN

CANCEL

VCR

Plus+

DELETE

BACK

END

SELECT

INPUT NO.

-

 9

VCR Plus+

PlusCode#

TYPE

OK

ONCE

1


-


-   -   -   -   -   -   -

3

Press 

 to select “TYPE”.

ENTER

RETURN

BACK

SELECT

ENTER

VCR Plus+

PlusCode#

TYPE

OK

ONCE

1   2   3   4   5   6   7   8   9

VCR

Plus+

END

OK

ONCE

DAILY

WEEKLY

Here you can set whether you want to record the
program ONCE, DAILY or WEEKLY. If you want to change
it, press 

ENTER

 then use the 

/

 buttons to select,

then press 

ENTER

 again.

4

Press 

 to highlight OK, then press ENTER.

ENTER

RETURN

BACK

SELECT

ENTER

VCR Plus+

PlusCode#

TYPE

OK

ONCE

1   2   3   4   5   6   7   8   9

VCR

Plus+

END

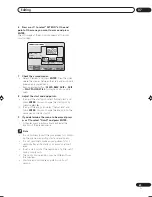
If you’ve entered a valid PlusCode number, a summary
of the timer recording appears. You can edit any of this
information as necessary. Use the 

/

 buttons to

select the item you want to edit, press 

ENTER

, then use

the 

/

 or 

/

 buttons as appropriate to select, then

press 

ENTER

 again.

ENTER

RETURN

BACK

END

SELECT

ENTER

TYPE

DATE (MM/DD)

START

END

CH

REC TO

REC MODE

ONCE

07

DVD

XP

OK

09/27(SA)

01:54AM

02:54AM

VCR Plus+

VCR

Plus+

• TYPE – select the frequency of the recording (more

options available here than in the previous screen,
such as every weekday)

• DATE (MM/DD) – the recording date
• START – recording start time
• END – recording end time
• CH – the channel to be recorded, or one of the

external inputs (L1 or L2)

• REC TO – record to the DVD or the VCR
• REC MODE – recording quality
• Note that If you haven’t set a guide channel for the

selected TV channel, the CH field will be blank (—).
In this case, set the channel number manually.

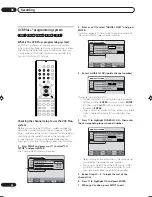
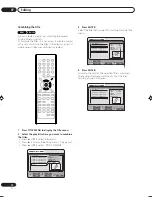
5

Highlight OK and press ENTER.

The TIMER REC SET screen appears and you should see
the new timer recording in the list.

TIMER REC SET

SETUP MENU

DATE

START

END

CH

REC

TO

REC

MODE

NEW

DVD

MON-SAT

09/27(SA)

01:35

02:35

80

DVD

EP

15:00

16:00

08

VCR

SP

SUN

17:00

18:00

12

XP

09/27(SA)

01:54

02:54

07

DVD

XP

6

Press SETUP to exit.

 2J40801B_En_59_64

5/29/06, 4:50 PM

59

Summary of Contents for DVR-RT502

Page 1: ... ...

Page 2: ... radio communications However there is no guarantee that interference will not occur in a particular installation If this equipment does cause harmful interference to radio or television reception which can be determined by turning the equipment off and on the user is encouraged to try to correct the interference by one or more of the following measures Reorient or relocate the receiving antenna I...

Page 3: ...m the product OUTDOOR ANTENNA GROUNDING If an outside antenna or cable system is connected to the product be sure the antenna or cable system is grounded so as to provide some protection against voltage surges and built up static charges Article 810 of the National Electrical Code ANSI NFPA 70 provides information with regard to proper grounding of the mast and supporting structure grounding of th...

Page 4: ...ted due to environmental considerations For disposal or recycling information please contact your local authorities or the Electronics Industries Alliance www eiae org K057_En POWER CORD CAUTION Handle the power cord by the plug Do not pull out the plug by tugging the cord and never touch the power cord when your hands are wet as this could cause a short circuit or electric shock Do not place the ...

Page 5: ...mple 30 Quiet library soft whispers 40 Living room refrigerator bedroom away from traffic 50 Light traffic normal conversation quiet office 60 Air conditioner at 20 feet sewing machine 70 Vacuum cleaner hair dryer noisy restaurant 80 Average city traffic garbage disposals alarm clock at two feet THE FOLLOWING NOISES CAN BE DANGEROUS UNDER CONSTANT EXPOSURE 90 Subway motorcycle truck traffic lawn m...

Page 6: ...O FINALIZE 28 DIMMER Brightness of the display window 29 DISPLAY CALL Turning the screen display ON or OFF 29 Setting the screen 29 TV SCREEN 29 STILL MODE 29 LINE1 INPUT LINE2 INPUT 30 Setting the image quality 30 BRIGHTNESS 30 BLACK LEVEL CONTROL PLAY 30 Setting the audio 30 DRC 30 EXTERNAL AUDIO INPUT 31 SAP Second Audio Program 31 DOLBY DIGITAL OUTPUT 31 Setting the recording 31 INITIAL REC TO...

Page 7: ...sed under license Playing back a selected track 42 Random playback 43 Repeat playback of selected track 43 Repeat playback of all tracks 43 Playing back programs 43 Playing back track by specifying the time 43 MP3 WMA JPEG DivX playback 44 Using the BROWSER screen 44 When the file to be displayed is selected 44 Playing back MP3 WMA files 45 Playing back JPEG files 46 Playing back DivX video files ...

Page 8: ...whatever you like from video tape to disc or from disc to video tape Dubbing cannot be carried out when attempting to copy a copy guarded video tape or disc Chapter 1 Before you start Features Not only can you playback and record video tapes but you can also playback DVD discs or make recordings using DVD RAM DVD RW DVD R discs with this unit In addition you can enjoy editing the programs you reco...

Page 9: ...ack correctly If a disc is played back by mistake extensively loud sounds may blow the speakers or may damage the hearing of those in hearing range Do not playback the discs listed below CDG Photo CD CD ROM CD TEXT CD EXTRA VCD SVCD SACD PD CDV DVD ROM DVD R RW DVD audio DVD R DL dual layer DVD R DL dual layer DVD R VR mode etc The below DVD Video may not be played back DVD Video that do not have ...

Page 10: ... below Media type Logo mark DVD RAM Ver 2 0 Ver 2 1 DVD RW Ver 1 0 Ver 1 1 Ver 1 2 Ver 1 1 CPRM support Ver 1 2 CPRM support 1 6x SPEED DVD R Ver 2 0 Ver 2 1 1 16x SPEED DVD RAM When using cartridge type DVD RAM discs it will be necessary to remove the disc from the cartridge Use only DVD RAM discs that comply with DVD RAM standard Version 2 0 or 2 1 The recorder cannot record on a disc formatted ...

Page 11: ...d videos Disc playback in other players A disc recorded in this unit can be finalized The disc can be played back in other players that can playback DVD RW and DVD R For more information on finalization see FINALIZE in Setting the disc page 28 When recording in the VR mode Even if a disc recorded in the VR mode is finalized you can record or edit by cancelling the finalization See UNDO FINALIZE on...

Page 12: ... indicator CHANNEL buttons DUBBING button Display window Rear panel AC power cord FAN Make sure that when installed the fan is not obstructed COAXIAL DIGITAL AUDIO OUT jack DVD Priority DVD VCR common AUDIO L R VIDEO OUT jacks DVD AUDIO L R OUT jacks DVD Priority AUDIO L R VIDEO IN LINE 1 jacks S VIDEO IN LINE 1 jack S VIDEO OUT jack DVD Priority COMPONENT OUT jacks DVD Priority RF IN jack RF OUT ...

Page 13: ...nit Clock display Colon flashes Counter display in hour minute second Cable TV channel display TV channel display Track number display for CD Display for afternoon out in the morning The external input channel L1 or L2 display Error display Lights during playback of DVD and CD Flashes in auto resume DVD or CD is temporarily stopped Lights during DVD recording CD CD R DVD DVD R DVD RW VR TV 10 00 0...

Page 14: ...s playback 19 PAUSE STILL pages 36 51 Pauses recording or playback press again to restart 20 SKIP page 36 Skips forward or back chapters 21 INDEX page 52 Searches for INDEX marks on a tape 22 REW SEARCH pages 36 50 51 Rewind review playback 23 F FWD SEARCH pages 36 50 51 Fast forward forward search playback 24 ONE TOUCH REPEAT page 38 Repeats playback of the last 10 seconds of video 25 CM SKIP pag...

Page 15: ... using numeric keys Each press of DVD VCR switches the screen between the DVD screen DVD mode and the VCR screen VCR mode Using the remote control Keep in mind the following when using the remote control Make sure that there are no obstacles between the remote and the remote sensor on the unit Remote operation may become unreliable if strong sunlight or fluorescent light is shining on the unit s r...

Page 16: ...DVD VCR must be connected between the antenna and the TV First disconnect the antenna from the TV and connect it to the DVD VCR Then connect the DVD VCR to the TV Below are 3 common methods of connecting an antenna system to a DVD VCR Find the type of antenna system you are using and follow the connection diagram 1 75 Ω coaxial cable DVD VCR 300 Ω twin lead flat wire Matching transformer 300 Ω inp...

Page 17: ...t TV To DVD VCR RF antenna cable supplied 1 TV To DVD VCR RF antenna cable supplied Splitter 75 Ω input 75 300 Ω outputs not supplied TV with 300 Ω UHF and 75 Ω VHF antenna inputs 2 TV with 300 Ω UHF and 300 Ω VHF antenna inputs 3 Note A clear picture will not be obtained by the DVD VCR unless the antenna signal is good Connect the antenna to the DVD VCR properly For better quality recording an in...

Page 18: ... Incoming cable TV Allows Recording of channels through the converter box scrambled and un scrambled Using the programmable timer to record only the channel selected at the converter box Prevents Recording one channel while watching another Using the DVD VCR tuner to select channels 2 Note To record from converter descrambler DVD VCR tuner must be tuned to the converter output channel usually chan...

Page 19: ...nels through the converter box Prevents Watching scrambled channels while recording another channel Using the DVD VCR tuner to select channels 5 Allows Recording of nonscrambled channels Recording of one channel while watching another Watching premium channels through the converter while recording nonscrambled channels Using the programmable timer Prevents Recording scrambled channels Allows Recor...

Page 20: ...each component for the location of video and audio inputs and outputs Connect to a TV with Audio Video output You can enjoy playback by connecting the unit to a TV Connect the unit to a TV equipped with audio input L R and video input jacks using the supplied audio video cable Connect to a TV with Component video output You can enjoy the highest quality picture by connecting the unit s component v...

Page 21: ...Audio L output Audio R output To Audio Video intput AV Amplifier with built in various decoder as above Audio Video cable supplied Coaxial digital audio output Coaxial digital cable not supplied TV Note When you connect the recorder to other equipment be sure to turn off the power and unplug all of the equipment from the wall outlet before any connections When you connect to a TV with a component ...

Page 22: ...r plug the clock setting will be lost In this case wait 30 minutes before turning the DVD VCR on With cable box connection if the auto clock setting is unsuccessful select the PBS channel carrying the XDS information then turn the DVD VCR off After 30 minutes turn the DVD VCR on If the clock is not set automatically set the clock manually See page 26 Setting the video channel To view playback of a...

Page 23: ...une the TV to receive a sharp color picture from the video cassette recorder Refer to your TV owner s manual for details Note When shipped from factory the video channel is set to CH 3 1 Press SETUP while the DVD and video tape is stopped The SETUP MENU screen will appear TIMER REC SET SYSTEM SETUP AV SETUP REC SETUP CH SETUP OTHER SETUP MENU ENTER RETURN SETUP ENTER BACK END SELECT 2 Press or to ...

Page 24: ...as the AUDIO setting the subtitles will appear during playback OFF Subtitles do not appear Note If the selected language is not recorded on the disc the first priority language is selected OSD LANGUAGE You can set the language for on screen display Select OSD LANGUAGE and select the language from the list below Selectable languages ENGLISH FRANCAIS ESPANOL DVD MENU When several menu languages are ...

Page 25: ...er this The unit cannot restrict playback of some discs Some discs may not be encoded with specific rating level information though its disc jacket says adult Parental control will not work with those discs If you forget the password you can reset the recorder to its factory settings see Resetting the recorder on page 91 then set a new password Temporarily cancelling parental control Parental cont...

Page 26: ... with quartzcontrolled precision To indicate that the power failure has lasted for an excessive period of time 0 00 will appear on the display In this case readjust time and date STANDARD TIME Time zone In the rare event that you live within the broadcast range of two stations in two different time zones the DVD VCR may recognize the wrong station for the auto clock set To correct the situation Se...

Page 27: ... appear REFORMAT When you select CANCEL and press ENTER the DISC SETUP screen will appear NEW DISC FORMAT If you insert an unused disc the disc is automatically formatted If you use the DVD RW Ver 1 1 1 2 you can select the mode to be used for automatic format Select NEW DISC FORMAT and select the mode from the list below VR Format the disc in the VR mode VIDEO Format the disc in the Video mode Wh...

Page 28: ...ct ON to protect the disc To cancel the disc protection select OFF UNDO FINALIZE You can cancel the finalization of a finalized DVD RW in VR mode You cannot cancel the finalization for discs other than above You can record or edit on a disc whose finaliza tion has been canceled Select UNDO FINALIZE and the screen below will appear UNDO FINALIZE START CANCEL When you select START and press ENTER th...

Page 29: ...r TV SCREEN You can select the TV screen size to suit the screen image Select TV SCREEN and select screen size from the list below 4 3 Pan scan It displays a wide picture across the whole screen with left and right edges automatically cut off 4 3 Letter box Select this mode when connecting to a conventional TV When playing back a wide screen DVD disc it displays a wide picture with black bands at ...

Page 30: ...tting the audio This section describes audio settings Preparation Turn ON the TV and set it to the video input mode Select AUDIO from AV SETUP For the proce dure see steps 1 to 3 in Using the SETUP MENU on page 23 TIMER REC SET SYSTEM SETUP AV SETUP REC SETUP CH SETUP OTHER AUDIO DRC EXTERNAL AUDIO INPUT SAP DOLBY DIGITAL OUTPUT STD STEREO OFF DOLBY DIGITAL SETUP MENU ENTER RETURN ENTER BACK END S...

Page 31: ...NU on page 23 TIMER REC SET SYSTEM SETUP AV SETUP REC SETUP CH SETUP OTHER REC SETUP INITIAL REC TO INITIAL REC MODE AUTO CHAPTER INDEX PICTURE BLACK LEVEL CONTROL REC SETUP MENU ENTER RETURN SETUP ENTER BACK END DVD SP 10MIN 0 SEC OFF SELECT INITIAL REC TO You can select the recording media that is first dis played in the item REC TO on the timer recording screen Select INITIAL REC TO and select ...

Page 32: ...be activated The channel display will count up and when finished the screen returns to normal ADD DELETE channels You can add the channels you want or delete the channels you do not want manually Select ADD DELETE and select ADD or DEL for each channel Press or to select the channel The numeric keys can also be used for selection When you want to delete the selected channel press to select DEL and...

Page 33: ...r OPEN CLOSE READ ING will appear and then it will change to NO DISC Some playback operations of DVDs may be intentionally fixed by software producers Since this DVD VCR plays DVDs according to the disc contents the software producers designed some playback features may not be available Also refer to the instructions supplied with the DVDs When playing DTS encoded Audio CDs excessive noise will be...

Page 34: ... editing various discs and titles For details of editing operation see page 65 If you create a playlist an original title and playlist appear in the title menu For creating a playlist see page 66 You cannot switch to the VCR mode when the title menu is showing Press TITLE MENU to clear the title menu then press DVD VCR to switch to the VCR mode The recording information of discs that have been rec...

Page 35: ...The symbols indicate that the player is in chase playback The progress bar shows the current position of playback and the position of recording Normally the recording position is shown as being at 100 Items other than these appear the same as on a normal information screen Note The displayed information varies with the type of media Some information may not appear due to media type or operating co...

Page 36: ...s PLAY Review playback Press REW during normal playback Each press of REW will increase the speed of the search x2 x12 x24 x100 The speed of the serch is increased up to only 2 steps in Audio CD To resume normal playback press PLAY Still playback Press PAUSE STILL during normal playback To resume normal playback press PLAY Frame advance Press PAUSE STILL during still playback One frame is advanced...

Page 37: ...H and press ENTER TIME SEARCH Input the time until the playback is restarted CHAPTER SEARCH Select the chapter number to be played back TITLE SEARCH Select the title number to be played back TIME SEARCH CHAPTER SEARCH TITLE SEARCH REPEAT CHAPTER1 CHAPTER2 CHAPTER3 The screen above is displayed when CHAPTER SEARCH is selected 3 When selecting TIME SEARCH input the time until the playback is restart...

Page 38: ... repeat This feature can be used to repeat the last 10 seconds of viewed material then playback as normal Press ONE TOUCH REPEAT during playback The video returns to a point 10 seconds before and playback resumes A B repeat playback A B repeat playback allows you to repeat material between two selected points 1 Press REPEAT A B during playback The start point is selected A 2 Press REPEAT A B again...

Page 39: ...e able to select the title and a title menu may simply be called a menu or title in the instructions supplied with the disc Depending on the DVD you may not be able to resume palyback at the scene where you pressed TOP MENU TITLE MENU or DVD MENU DVD menu Some DVDs allow you to select the disc contents using the menu When you playback these DVDs you can select the subtitles language soundtrack lan...

Page 40: ...ou are viewing the scene from 1 Press ANGLE during playback The current angle will appear 2 Press ANGLE repeatedly until the desired angle is selected Zooming This unit will allow you to zoom in on the frame image You can then make selections by switching the position of the frame 1 Press ZOOM during playback The center part of the image will be zoomed in Each press of ZOOM will change the ZOOM x2...

Page 41: ... title In some cases the subtitles language is not changed to the selected one immediately Changing soundtrack language You can select the language when you play a multilin gual disc 1 Press AUDIO during playback The current soundtrack language will appear 2 Press AUDIO repeatedly until the desired language is selected The on screen display will disappear after a few seconds Turning the subtitles ...

Page 42: ...he music data during playback Scroll bar The elapsed time and total time of the whole CD Current playback mode The track number during playback The music data recorded on the CD Press The menu list will appear TRACK 02 TRACK 03 TRACK 04 TRACK 05 TRACK 06 TRACK 07 TRACK 08 TRACK 09 TRACK 10 TRACK 01 Track 01 00 00 19 00 03 54 00 00 19 00 45 28 Mode NORMAL REPEAT OFF TRACK INFO ENTER RETURN ENTER BA...

Page 43: ...edly To cancel the repeat all playback select REPEAT ALL from the menu list again and press ENTER See also A B Repeat on page 38 Playing back programs You can specify the playback order yourself 1 Press or to select PROGRAM PLAYBACK from the menu list and press ENTER 2 Press or to select the track number that you want to change the order of and press ENTER The mark will appear at the right side of...

Page 44: ...playback Preparation Turn ON the TV and set to the video input mode Load the disc storing MP3 WMA JPEG or DivX Press DVD VCR to select the DVD mode The DVD indicator will light Using the BROWSER screen 1 Press TITLE MENU The BROWSER screen will appear popArt Grammy03_01 mp3 Grammy03_02 mp3 Grammy03_03 mp3 Grammy03_04 mp3 Grammy03_05 mp3 Grammy03_06 mp3 Grammy03_07 mp3 Grammy03_08 mp3 Toulouse Laut...

Page 45: ...select MP3 or WMA file In case the disc includes more than 10 files you can turn to the next or the previous page See page 42 Grammy03_02 mp3 Grammy03_03 mp3 Grammy03_04 mp3 Grammy03_05 mp3 Grammy03_06 mp3 Grammy03_07 mp3 Grammy03_08 mp3 Grammy03_09 mp3 Grammy03_10 mp3 Grammy03_01 mp3 BROWSER ENTER RETURN ENTER BACK SET END SELECT TITLE MENU 2 Carry out either of the item a or b below a Press ENTE...

Page 46: ...Press ENTER b Press to select PLAY and press ENTER The thumbnail images of the JPEG files stored in the route directory or the folder appear Press or to select the pages of the thumbnail images or select the JPEG file to be displayed at first for the slide show Base_ball jpg Friend jpg Drive jpg party_240803 jpg practice_ski jpg My_car jpg ENTER RETURN PLAY BACK END SELECT SELECT TITLE MENU 3 Pres...

Page 47: ...will be displayed in which case the file will not be played BROWSER PLAY RETURN TITLE MENU BACK END SELECT SET Video01 divx Video02 divx Video03 divx Video04 divx Video05 divx Video06 divx ENTER Playing back DivX video files DivX video specifications DivX file must have the extension letters avi div or divx DivX version DivX 3 4 5 and 6 specifically 3 1 1 4 1 2 5 0 2 5 0 5 5 1 1 5 2 1 6 0 at Home ...

Page 48: ...chnology that simultaneously displays odd numbered scanning lines and even numbered scanning lines from top to bottom Also called 480p p meaning progressive Note Some discs may not be played back with the progressive scan mode correctly because of the disc characteristics or recording condition There are some progressive TV and High Definition TV sets that are not fully compatible with the unit re...

Page 49: ...while the unit is turned off 1 Press EJECT on the unit or the remote control 2 Remove the cassette tape Automatic tape eject This VCR will automatically rewind the tape when the tape has ended And when the tape is rewound to its beginning the cassette tape will be ejected automati cally To prevent accidental erasure Remove the erase prevention tab with a screwdriver Automatic power ON When you ins...

Page 50: ... REW To forward the tape Press F FWD To stop the tape winding press STOP To switch to playback directly without STOP press PLAY Forward Reverse picture search mode When the tape is being wound you can switch to picture search mode see next page To do this press REW or F FWD and hold it down The unit will resume the tape winding as soon as the button is released Cassette tape playback VCR Note This...

Page 51: ...cture quality during playback Manual tracking adjustment If automatic tracking cannot eliminate noises well during playback press TRK to eliminate the noises MANUAL TR will appear Press it briefly for a fine adjustment or press and hold for a coarse adjustment Press ATR to reactivate automatic tracking again AUTO TR will appear Repeat playback The entire video tape will be played until its end The...

Page 52: ...clock and counter Press CLOCK COUNTER The clock and tape counter alternate with each other in the display Video index search system This function enables you to locate the beginning of any recording made on the VCR Note When you record an INDEX mark at the very beginning of the tape the mark may not be found During INDEX search the tape may stop and begin to play at a slightly different location I...

Page 53: ...cur or should the AC cord plug be disconnected while recording editing initializing finalizing or any other function the Chapter 6 Recording Recording mode XP SP LP EP Recording time Approx 60 min Approx 120 min Approx 240 min Approx 360 min Quality Can record high quality images Can record normal quality images Quality deteriorates slightly but recording time is longer Recording time is prioritiz...

Page 54: ...ding is paused at that instant When the recording prohibited signal ends recording resumes This unit incorporates a built in copy guard It cannot record software or broadcasted programs that contain copy restriction signals designed to protect copyright etc Copy Once one time recordable Programs images that contain the one time recordable signal can be recorded only in the VR mode using a DVD RW d...

Page 55: ...for video tapes EP offers 3 times the recording time as SP For more information on DVD recording modes see page 53 2 Set the TV CABLE option to the appropriate position page 32 3 Press the numeric keys or CH to select the channel to be recorded 1 9 Press 0 twice and then 1 9 as required Example To select 2 Press 002 10 12 Press 0 first and then the remaining 2 digits in order from left to right Ex...

Page 56: ...he video tape The unit will change to the STOP mode When recording onto a video tape you can select a recording channel in the recording pause mode You cannot change a recording channel in the DVD recording pause mode Chapter marks are made when recording to a DVD in the VR Mode 4 Press REC When recording starts appears on the screen for about 4 seconds Note When recording onto a DVD it takes some...

Page 57: ... MODE SPEED to select the recording mode For the recording mode see step 1 on page 55 2 Set the TV CABLE option to the appropriate position See page 32 3 Press numeric keys or CH to select the channel to be recorded 4 Press REC Each additional press of REC will increase recording time as shown in the chart below up to a maximum of 6 hours The OTR and recording time will appear on the screen for ab...

Page 58: ...H SETUP TV CABLE SELECT AUTO CH MEMORY ADD DELETE GUIDE CH SET CABLE PROCEED PROCEED PROCEED SETUP MENU ENTER RETURN ENTER BACK END SELECT SETUP INPUT NO 0 9 GUIDE CH NO TUNER CH NO OK 001 3 Enter a GUIDE CH NO guide channel number TIMER REC SET SYSTEM SETUP AV SETUP REC SETUP CH SETUP OTHER CH SETUP TV CABLE SELECT AUTO CH MEMORY ADD DELETE GUIDE CH SET CABLE PROCEED PROCEED PROCEED SETUP MENU GU...

Page 59: ...then press ENTER again 4 Press to highlight OK then press ENTER ENTER RETURN BACK SELECT ENTER VCR Plus PlusCode TYPE OK ONCE 1 2 3 4 5 6 7 8 9 VCR Plus END If you ve entered a valid PlusCode number a summary of the timer recording appears You can edit any of this information as necessary Use the buttons to select the item you want to edit press ENTER then use the or buttons as appropriate to sele...

Page 60: ...ording mode to LP the TV program is on channel 12 starting at 8 00 PM and stopping at 9 30 PM on a date of 20th Note Recording starts a few seconds before the preset starting time You cannot use the timer recording for the both DVD and VCR at the same time The timer recording program is stopped during timer recording the stopped program is not erased from the timer recording list In this case plea...

Page 61: ... After setting the time press ENTER ENTER RETURN BACK END SELECT SETUP ENTER SETUP MENU DATE START END CH REC TO REC MODE NEW TYPE DATE MM DD START END CH REC TO REC MODE ONCE 01 DVD SP OK 11 20 TH 03 17PM 04 17PM 08 17PM SELECT The starting and stopping times for the recording are displayed on the 12 hour am pm clock Twelve o clock midnight is displayed as 12 00AM whereas twelve o clock noon is d...

Page 62: ... you enter the other program for the timer recording repeat the steps 3 to 11 13 Press SETUP The TIMER REC SET screen disappears and the display will return to the normal screen 14 Press TIMER REC In five minutes before your Timer Recording starts the CH will change to the programmed CH automatically and the unit stand by recording To extend the timer recording time Press TIMER REC for 2 seconds w...

Page 63: ...u will find this function of great advantage on long programs as you do not have to wait for the end of recording to begin playback Note Chase playback is not available when recording a DVD RW R disc and video tape Chase playback is not available when recording in XP mode Slow Commercial skip One touch replay A B repeat and Frame advance will not work during chase playback Chase playback does not ...

Page 64: ... the audio will be heard through the speakers Normally set to the Hi Fi STEREO position this button can be set to the MONO position if the stereo audio is of poor quality The R and L positions allow the audio from the Right or Left Hi Fi channel to be heard over both TV speakers This button has no effect when viewing a monaural audio program Each time when you press the button output selection dis...

Page 65: ...reate a playlist to customize your viewing preferences and choose to delete it the original titles will not be affected It is recommended to create and edit the playlist to prevent important titles from being erased accidentally If you create a playlist both the original title and playlist will be displayed on the title menu Editable items The items that can be edited are different between origina...

Page 66: ...IST 5 Press ENTER The editing menu closes and the created playlist appears at the bottom of the list ENTER RETURN PLAY BACK SET END SELECT TITLE MENU DISC NAME Title 1 11 25 2006 10 03PM 011 SP 11 29 2006 11 30AM 009 SP 12 01 2006 06 52PM 006 XP 11 23 2006 08 41AM 006 EP PL 11 23 2006 08 41AM 006 EP REC DATE 11 23 2006 TIME 08 41AM LENGTH 00 30 17 CHANNEL 006 REC MODE EP TITLE MENU Created playlis...

Page 67: ...ITLE RENAME TITLE TITLE COMBINE RENAME TITLE 3 Press ENTER The keyboard screen will appear 4 Use the keyboard screen to enter the title name Family 1 2 a b c 3 d e f CANCEL Back RETURN Exit STOP Caps 0 Space bar 4 g h i 5 j k l 6 m n o 7 q p r s 8 t u v 9 w x y z DISPLAY OK DISPLAY OK Numbers Signs Letters 5 Press DISPLAY to return to the title menu ENTER RETURN PLAY BACK SET END SELECT TITLE MENU...

Page 68: ...TITLE screen appears ENTER RETURN ENTER BACK END TITLE MENU EDIT TITLE NAME Family CHAPTER 1 3 LENGTH 00 00 00 00 30 17 00 00 00 00 00 00 00 00 00 Preview Press SELECT to start 4 Press ENTER to playback the playlist on the EDIT TITLE screen Use each operation button F FWD REW SKIP SKIP PLAY PAUSE STILL SLOW CM SKIP for the playback to search the starting point of the scene you want to erase SELECT...

Page 69: ...rt and end points To adjust the start point select Adjust start and press ENTER You can change the start point by pressing or To adjust the end point select Adjust end and press ENTER You can change the end point in the same way as the start point 9 If you determine the scene to be erased press or to select Finish and press ENTER A chapter mark is automatically added at the location of the erased ...

Page 70: ...y REC DATE 11 23 2006 TIME 08 41AM LENGTH 00 30 17 CHANNEL 006 REC MODE EP TITLE MENU PLAY EDIT TITLE DELETE TITLE RENAME TITLE TITLE COMBINE TITLE COMBINE 3 Press ENTER Select the title that you want to combine from the title menu ENTER RETURN ENTER BACK END SELECT TITLE MENU DISC NAME 11 23 2006 08 41AM 006 EP 11 25 2006 10 03PM 011 SP 11 29 2006 11 30AM 009 SP 12 01 2006 06 52PM 006 XP Family R...

Page 71: ...ELECT TITLE MENU DISC NAME 11 23 2006 08 41AM 006 EP 11 25 2006 10 03PM 011 SP 11 29 2006 11 30AM 009 SP 12 01 2006 06 52PM 006 XP Family REC DATE 11 23 2006 TIME 08 41AM LENGTH 00 30 17 CHANNEL 006 REC MODE EP TITLE MENU PLAY EDIT TITLE DELETE PROGRAM RENAME TITLE TITLE COMBINE DELETE TITLE 3 Press ENTER The selected playlist will be erased ENTER RETURN PLAY BACK SET END SELECT TITLE MENU DISC NA...

Page 72: ...to select the original title Press to display the editing menu of the original title Press or to select ADD CHAPTER MARK ENTER RETURN ENTER BACK SET END SELECT TITLE MENU DISC NAME 11 23 2006 08 41AM 006 EP 11 25 2006 10 03PM 011 SP 11 29 2006 11 30AM 009 SP 12 01 2006 06 52PM 006 XP Family REC DATE 11 23 2006 TIME 08 41AM LENGTH 00 30 17 CHANNEL 06 REC MODE EP PLAY COMBINE CHAPTERS EDIT TITLE DEL...

Page 73: ...ed and the position of the added chapter mark appears green ADD CHAPTER MARK 17 NAME 11 23 2006 08 41 AM CHAPTER 2 4 LENGTH 00 03 08 00 30 17 The added chapter mark 6 If you want to continue to add chapter marks repeat step 5 To display the title menu press RETURN To return to the normal screen press TITLE MENU ...

Page 74: ...arks repeat steps 4 and 5 To display the title menu press RETURN To return to the normal screen press TITLE MENU Changing an original title name RAM VR mode Video mode DVD R You can only add title names to DVD R and Video mode discs before they have been finalized 1 Press TITLE MENU to display the title menu 2 Select the original title that you want to rename Press or to select the original title ...

Page 75: ...29 2006 11 30AM 009 SP 12 01 2006 06 52PM 006 XP Family REC DATE 11 23 2006 TIME 08 41AM LENGTH 00 30 17 CHANNEL 06 REC MODE EP TITLE MENU PLAY ADD CHAPTER MARK COMBINE CHAPTERS EDIT PROGRAM DELETE TITLE RENAME TITLE NEW PLAYLIST EDIT TITLE 3 By pressing ENTER the following message screen will appear 4 Press or to select YES and press ENTER then the EDIT TITLE screen will appear By selecting NO th...

Page 76: ...editing menu of original title Press or to select DELETE TITLE ENTER RETURN ENTER BACK SET END SELECT TITLE MENU DISC NAME 11 23 2006 08 41AM 006 EP 11 25 2006 10 03PM 011 SP 11 29 2006 11 30AM 009 SP 12 01 2006 06 52PM 006 XP Family REC DATE 11 23 2006 TIME 08 41AM LENGTH 00 30 17 CHANNEL 06 REC MODE EP TITLE MENU PLAY ADD CHAPTER MARK COMBINE CHAPTERS EDIT TITLE DELETE TITLE RENAME TITLE NEW PLA...

Page 77: ...LENGTH CHANNEL REC MODE TITLE MENU PLAY RENAME DISC 3 Press ENTER The keyboard screen will appear 4 Use the keyboard screen to enter the disc name Drama_Family Numbers Signs Letters 1 2 a b c 3 d e f CANCEL Back RETURN Exit STOP Caps 0 Space bar 4 g h i 5 j k l 6 m n o 7 q p r s 8 t u v 9 w x y z DISPLAY OK DISPLAY OK 5 Press DISPLAY to return to the title menu 11 23 2006 08 41AM 006 EP 11 25 2006...

Page 78: ...ack RETURN Exit 0 Space bar 4 _ 5 6 7 8 9 DISPLAY OK DISPLAY OK Inputting characters There are two methods for inputting characters Character input 1 1 Press or to select the character to be input 2 Press ENTER The selected character will be input Character input 2 Example Explained here is the procedure when you input F and J 1 Press the numeric keys continuously and select the character to be in...

Page 79: ... titles using the keyboard screen with the Letters tab 1 Press STOP Or press or to select Caps then press ENTER Live Show 1 2 a b c 3 d e f CANCEL Back RETURN Exit STOP Caps 0 Space bar 4 g h i 5 j k l 6 m n o 7 q p r s 8 t u v 9 w x y z DISPLAY OK DISPLAY OK Numbers Signs Letters Upper Lower Auto caps 2 Press or to select the type of letters in the list below and press ENTER Auto caps Determines ...

Page 80: ...cator lights 4 Press DUBBING The unit is changed to DVD mode automatically The VCR is waiting for playback and the DVD is waiting for recording Then the following message will appear 5 Press DUBBING or press or to select YES and press ENTER Dubbing starts To cancel dubbing press STOP or select NO and press ENTER During dubbing VCR playback DVD recording and dub dubbing indicator appear on the disp...

Page 81: ...playlist Dubbing only a specified scene When you want to dub only specific scene on the disc press PAUSE STILL at the desired scene and then press DUBBING and proceed from step 5 above Dubbing a disc onto a tape RAM VR mode Video mode DVD R VCR You can record both video and audio from a disc to a video tape When a disc with a copy guard is used a distorted image is recorded onto the video tape Not...

Page 82: ...nnect Audio L IN jack to Audio OUT using only one audio cable When this unit is used as a playback device a mark or a character displayed on the screen is also dubbed as an image When the screen display is set to OFF see DISPLAY on page 29 If no special permission is obtained from the copyright owner videos recorded from TV programs or movies can only be used for your own personal enjoyment You ma...

Page 83: ...2823 Romanian 2825 Russian 2831 Samoan 2923 Sanskrit 2911 Scots Gaelic 1714 Serbian 2928 Serbo Croatian 2918 Shona 2924 Sindhi 2914 Singhalese 2919 Slovak 2921 Slovenian 2922 Somali 2925 Spanish 1529 Sundanese 2931 Swahili 2933 Chapter 9 Additional information Screen sizes and disc formats Swedish 2932 Tagalog 3022 Tajik 3017 Tamil 3011 Tatar 3030 Telugu 3015 Thai 3018 Tibetan 1225 Tigrinya 3019 T...

Page 84: ... below the playback images during playback of a disc recorded in wide 16 9 format on a 4 3 TV connected to this unit MP3 One type of audio compression that uses MPEG1 This format compresses the sound to use up about 1 10 of the original file space with minimal loss of sound quality Glossary A B Repeat Playback Playback that repeats between two set points A and B angle Recorded onto some DVD discs ...

Page 85: ...a timed recording by pushing just one button up to 6 hours pan scan Feature that cuts the left and right edges of playback images to a 4 3 size during playback of a disc recorded in wide 16 9 format on a 4 3 TV connected to this unit parental control Some discs control viewing according to the age of the viewer A control level can be set for those types of discs PBS Acronym for Public Broadcast Sy...

Page 86: ...isc having no space Recording was tried onto the disc which does not support record ing Disc erase protection is applied Recording was tried onto the fi nalized disc Adding data was tried onto the disc recorded in the other unit Adding data was tried to the disc where PC data was recorded A scratch or contamination was found on the disc 99 titles were recorded on the disc 999 chapters exist on the...

Page 87: ... recording Recording was attempted of a Copy Once program onto a disc Video mode Recording was attempted of a Copy Once program onto a disc without CPRM When a recordable tape is not inserted or no disc space is available TIMER REC was pressed From about 6 minutes before DVD timer recording starts DVD playback cannot be done CANNOT RECORD PROTECTED IMAGE RECORDING INTERRUPTED PROTECTED IMAGE CANNO...

Page 88: ...nsor Operate within Approx 5 meters or reduce the light in the room Clear the path of the beam The batteries are weak Replace the batteries Check the batteries are inserted correctly Check all Cable TV connections Station or Cable TV system problems try another station This unit may on rare occasions stop working in certain situations such as when a soiled or damaged disc is used If this occurs ho...

Page 89: ...nd The unit or remote operation key is not functioning Playback does not start when the title is selected Audio soundtrack and or subtitle language is not changed when you playback a DVD No subtitles Angle cannot be changed appears on the screen The progressive scan mode is active through the unit is connected to a TV via the VIDEO OUT jack The setup does not match your TV Select Display ON Check ...

Page 90: ...ome with discs Do not load more than one disc into the recorder Damaged discs Discs spin at high speed inside the recorder If you can see that a disc is cracked chipped warped or otherwise damaged don t risk using it you could end up damaging the recorder This recorder is designed for use with conventional fully circular discs only Use of shaped discs is not recommended for this product Pioneer di...

Page 91: ...order If you need to you can reset the recorder to all its factory settings 1 Make sure that the recorder is on and remove the disc 2 Press and hold STOP and press w w w w w STANDBY ON The recorder turns off with all settings reset Hints on installation We want you to enjoy using this unit for years to come so please bear in mind the following points when choosing a suitable location for it Do Use...

Page 92: ...Switchable F FWD REW Time Approx 1minute and 48 seconds with T 120 Cassette Tape at 25 C DVD section Signal system NTSC Applicable disc DVD 12cm 8cm Self Recording Playback only CD 12cm 8cm Recording format DVD Video Recording VR mode DVD VIDEO Video mode Recording discs DVD RAM DVD RW DVD R Recording time based on a 4 7GB disc XP Approx 60 min SP Approx 120 min LP Approx 240 min EP Approx 360 min...

Page 93: ...Additional information 09 93 En ...

Page 94: ...Additional information 09 94 En ...

Page 95: ...Additional information 09 95 En ...

Page 96: ... 9120 Melsele Belgium TEL 03 570 05 11 PIONEER ELECTRONICS ASIACENTRE PTE LTD 253 Alexandra Road 04 01 Singapore 159936 TEL 65 6472 7555 PIONEER ELECTRONICS AUSTRALIA PTY LTD 178 184 Boundary Road Braeside Victoria 3195 Australia TEL 03 9586 6300 PIONEER ELECTRONICS DE MEXICO S A DE C V Blvd Manuel Avila Camacho 138 10 piso Col Lomas de Chapultepec Mexico D F 11000 TEL 55 9178 4270 K002E Published...

Reviews: