background image

14

En

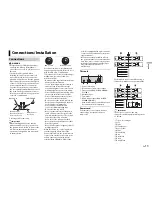
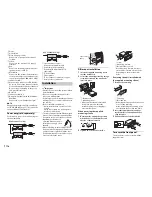
Violet
Violet/black
Black (chassis ground)
Connect to a clean, paint-free metal 
location.
Yellow
Connect to the constant 12 V supply 
terminal.
Red
Connect to terminal controlled by the 
ignition switch (12 V DC).
Blue/white
Connect to the system control terminal 
of the power amp or auto-antenna relay 
control terminal (max. 300 mA 12 V DC).
Subwoofer (4 Ω)
When using a subwoofer of 70 W (2 Ω), 
be sure to connect the subwoofer to the 
violet and violet/black leads of this unit. 
Do not connect anything to the green 
and green/black leads.
Not used.
Subwoofer (4 Ω) × 2
Orange/white (Only for DEH-X3800UI/
X3810UI)
Connect to a car’s illumination signal.

NOTE

Change the initial menu of this unit. Refer 
to [SP-P/O MODE] (page 5). The subwoofer 
output of this unit is monaural.

Power amp (sold separately)

Perform these connections when using the 
optional amplifier.

System remote control
Connect to blue/white cable.

Power amp (sold separately)
Connect with RCA cables (sold 

separately)

To front output
Front speaker
To rear output or subwoofer output
Rear speaker or subwoofer

 Important

Check all connections and systems before 
final installation.

Do not use unauthorized parts as this 
may cause malfunctions.

Consult your dealer if installation requires 
drilling of holes or other modifications to 
the vehicle.

Do not install this unit where:
– it may interfere with operation of the 

vehicle.

– it may cause injury to a passenger as a 

result of a sudden stop.

The semiconductor laser will be damaged
if it overheats. Install this unit away from 
hot places such as near the heater outlet.

Optimum performance is 
obtained when the unit is 
installed at an angle of less 
than 60°.

When installing, to ensure proper heat 
dispersal when using this unit, make sure 
you leave ample space behind the rear 
panel and wrap any loose cables so they 
are not blocking the vents.

DEH-X3800UI/X3810UI

Installation

DEH-X2800UI/X2810UI

DIN mount installation

1

Insert the supplied mounting sleeve 
into the dashboard.

2

Secure the mounting sleeve by using a
screwdriver to bend the metal tabs 
(90°) into place.

Dashboard
Mounting sleeve

Make sure that the unit is installed 
securely in place. An unstable 
installation may cause skipping or 
other malfunctions.

When not using the supplied 
mounting sleeve

1

Determine the appropriate position 
where the holes on the bracket and 
the side of the unit match.

2

Tighten two screws on each side.

Screw
Mounting bracket
Dashboard or console

Use either truss (5 mm × 9 mm) or 
flush surface (5 mm × 9 mm) screws, 
depending on the bracket screw 
holes.

Removing the unit (installed with 
the supplied mounting sleeve)

1

Remove the trim ring.

Trim ring
Notched tab

Releasing the front panel allows easier 
access to the trim ring.

When reattaching the trim ring, point 
the side with the notched tab down.

2

Insert the supplied extraction keys 
into both sides of the unit until they 
click into place.

3

Pull the unit out of the dashboard.

To secure the front panel

The front panel can be secured with the 
supplied screw.

Leave ample 
space

5 cm

5 cm

Summary of Contents for DEH-X2800UI

Page 1: ...00UI DEH X3810UI DEH X2800UI DEH X2810UI Owner s Manual Important Serial number The serial number is located on the bottom of this unit For your own security and convenience be sure to record this number on the enclosed warranty card ...

Page 2: ... turn up the volume so high that you can t hear what s around you Use caution or temporarily discontinue use in potentially hazardous situations Do not use headphones while operating a motorized vehicle the use of headphones may create a traffic hazard and is illegal in many areas Before You Start This device complies with Part 15 of the FCC Rules Operation is subject to the following two conditio...

Page 3: ... outside sounds After sales service for Pioneer products Please contact the dealer distributor from where you purchased this unit or the authorized PIONEER Service Station for after sales service or any other information In case the necessary information is not available please contact the companies listed below Please do not ship your unit to the companies at the addresses listed below for repair...

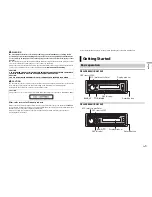
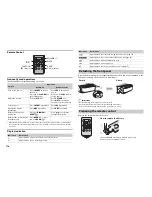
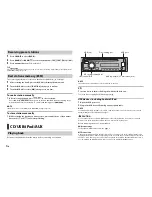
Page 4: ...ous folder Return to the normal display from the menu Press BAND or press and hold BAND Indication Description Appears when a lower tier of the menu or folder exists Appears when the button is pressed SRC source VOLUME MUTE DISP display FUNCTION AUDIO Detach the front panel to prevent theft Remove any cables and devices attached to the front panel and turn off the unit before detaching it Importan...

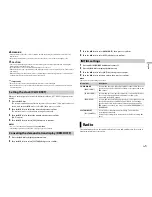
Page 5: ...m NOTES You can cancel the menu setting by pressing SRC OFF This setting can be made at any time See page 11 for more details 1 Press the M C dial to display the main menu 2 Turn the M C dial to select SYSTEM then press to confirm Setting the clock CLOCK SET Canceling the demonstration display DEMO OFF 3 Turn the M C dial to select DEMO OFF then press to confirm 4 Turn the M C dial to select YES t...

Page 6: ...SM CD USB iPod AUX Playing back NOTE The arrangement of the buttons varies depending on the unit CD 1 Insert a disc into the disc loading slot with the label side up To eject a disc stop playback first then press USB devices including Android iPod 1 Open the USB port cover 2 Plug in the USB device iPod using an appropriate cable NOTE To automatically switch to USB source when a USB device iPod is ...

Page 7: ...abetical list To cancel alphabetical search press DIMMER or BAND 1 Compressed audio files only 2 This function is disabled when USB is selected as a source and the MIXTRAX function is on 3 When there is no 3 S Rtrv button on the unit the sound retriever function can be set by the FUNCTION settings Link play mode You can access songs based on the artist album or genre currently playing 1 While list...

Page 8: ... can control an application by using the unit Important Use of third party apps may involve or require the provision of personally identifiable information whether through the creation of a user account or otherwise and for certain applications the provision of geolocation data ALL THIRD PARTY APPS ARE THE SOLE RESPONSIBILITY OF THE PROVIDERS INCLUDING WITHOUT LIMITATION COLLECTION AND SECURITY OF...

Page 9: ... aspects of the application such as source selection pause etc by using the unit For details on what operations are available on the application see the application s help section WARNING Do not attempt to operate the application while driving Make sure to pull off the road and park your vehicle in a safe location before attempting to use the controls on the application For iPhone users This funct...

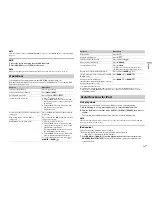
Page 10: ... BSM Store the six strongest stations on the number buttons 1 to 6 automatically LOCAL FM OFF LV1 LV2 LV3 LV4 AM OFF LV1 LV2 Restrict the tuning station according to the signal strength SEEK MAN PCH Assign or buttons to seek the stations one by one manual tuning or select a station from the preset channels S RTRV 1 effective for low compression rates 2 effective for high compression rates OFF Enha...

Page 11: ...PF SETTING Cut offfrequency OFF 50HZ 63HZ 80HZ 100HZ 125HZ 160HZ 200HZ Slope level 12 24 Only frequencies higher than the high pass filter HPF cutoff are output from the speakers SLA 4 to 4 Adjust the volume level for each source except FM Each of the below combinations are set to the same setting automatically USB iPod PANDORA iPhone ANDROID and APP iPhone Menu Item Description You can also acces...

Page 12: ...ings Menu Item Description SHORT PLAYBCK SHORT MODE 1 0 MIN 1 5 MIN 2 0 MIN 2 5 MIN 3 0 MIN OFF Select the length of the playback time FLASH AREA Only for DEH X3800UI X3810UI KEY DISPLAY KEY OFF Select the area for the illumination effect When OFF is selected the color set under the ILLUMINATION settings page 12 is used as the display color FLASH PATTERN Only for DEH X3800UI X3810UI SOUND LEVEL 1 ...

Page 13: ...r any disconnected cable connectors with insulating tape Do not shorten any cables Never cut the insulation of the power cable of this unit in order to share the power with other devices The current capacity of the cable is limited Use a fuse of the rating prescribed Never wire the negative speaker cable directly to ground Never band together negative cables of multiple speakers When this unit is ...

Page 14: ...result of a sudden stop The semiconductor laser will be damaged if it overheats Install this unit away from hot places such as near the heater outlet Optimum performance is obtained when the unit is installed at an angle of less than 60 When installing to ensure proper heat dispersal when using this unit make sure you leave ample space behind the rear panel and wrap any loose cables so they are no...

Page 15: ...nnection Turn the ignition switch OFF and back to ON again If the message remains contact your dealer or an authorized Pioneer Service Station for assistance NO XXXX NO TITLE for example There is no embedded text information Switch the display or play another track file CD player ERROR 07 11 12 17 30 The disc is dirty Clean the disc The disc is scratched Replace the disc ERROR 07 10 11 12 15 17 30...

Page 16: ... was not formatted properly Format the USB device with FAT12 FAT16 or FAT32 ERROR 16 The iPod firmware version is old Update the iPod version iPod failure Disconnect the cable from the iPod Once the iPod s main menu is displayed reconnect the iPod and reset it STOP There are no songs in the current list Select a list that contains songs NOT FOUND No related songs Transfer songs to the iPod Pandora...

Page 17: ...the iPod such as the equalizer and repeat play are changed automatically when the iPod is connected to the unit Once the iPod is disconnected those settings will return to the original settings Incompatible text saved on the iPod will not be displayed by the unit Handling guidelines Only the first 32 characters can be displayed as a file name including the file extension or a folder name The unit ...

Page 18: ...demarks of Apple Inc registered in the U S and other countries Lightning is a trademark of Apple Inc Made for iPod and Made for iPhone mean that an electronic accessory has been designed to connect specifically to iPod or iPhone respectively and has been certified by the developer to meet Apple performance standards Apple is not responsible for the operation of this device or its compliance with s...

Page 19: ... Media Player WAV signal format Linear PCM MS ADPCM Non compressed FM tuner Frequency range 87 9 MHz to 107 9 MHz Usable sensitivity 11 dBf 1 0 μV 75 Ω mono S N 30 dB Signal to noise ratio 72 dB IHF A network AM tuner Frequency range 530 kHz to 1 710 kHz Usable sensitivity 25 μV S N 20 dB Signal to noise ratio 62 dB IHF A network CEA2006 Specifications Power output 14 W RMS 4 Channels 4 Ω and 1 TH...

Reviews: