background image

10

En

You can operate the unit from Pioneer Smart Sync installed on an Android device. In 
some cases, you can control aspects of the application, such as source selection, pause, 
etc., by using the unit.
For details on what operations are available on the application, see the application’s help 
section.

NOTE

The APP source is not available when a Pioneer Smart Sync connection is not made or [USB MTP] is set 
to [ON] in the SYSTEM settings (page 14).

 WARNING

Do not attempt to operate the application while driving. Make sure to pull off the road and park your 
vehicle in a safe location before attempting to use the controls on the application.

For Android device users

This function is compatible with devices that have Android OS 5.0 or later installed.
You can download Pioneer Smart Sync on Google Play.

NOTE

Some Android devices connected via AOA 2.0 may not work properly or emit sounds due to their own 
software design, regardless of the OS version.

What kind of function does the application have? 

Promoting the use of the unit 

The interface of the unit can be evolved by using your Android device.

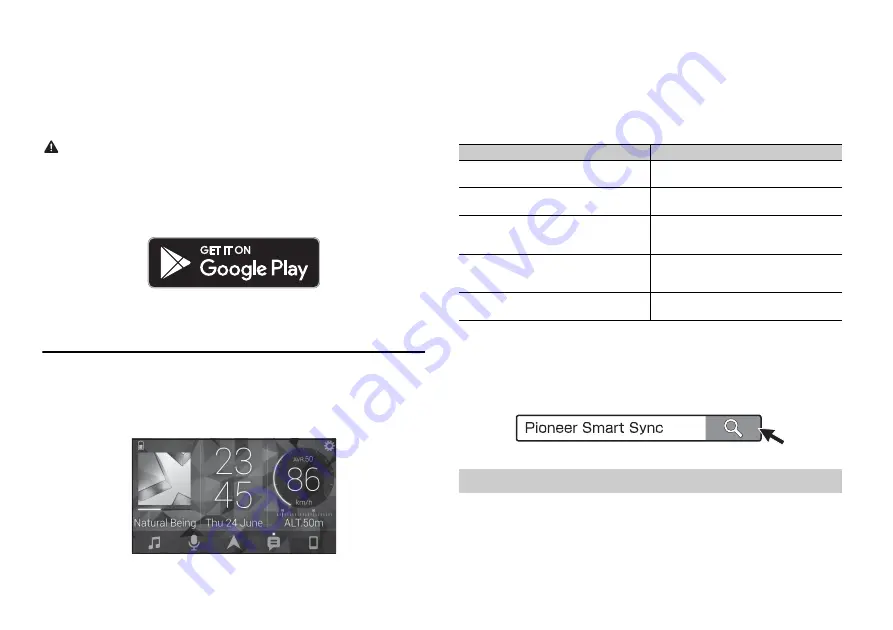
Image (example):

Examples:

– Selecting a source of the unit
– Listening to the music on your Android device
– Controlling the sound field intuitively
– Controlling your connected Bluetooth device 

Extending the functions of the unit by using the application 

The following functions, which are unavailable on the unit alone, are available by 
making a Pioneer Smart Sync connection.

NOTES

Some functions may be restricted depending on the connection conditions with the application.

The 31 Band EQ setting is converted into 13 bands when a music source from this product is engaged.

TIP

It is recommended to enter the search term "Pioneer Smart Sync" in the search field to search for the 
application.

1

Press the 

M.C.

 dial to display the main menu.

2

Turn the 

M.C.

 dial to select [SYSTEM], then press to confirm.

3

Turn the 

M.C.

 dial to select [APP CONTROL], then press to confirm.

4

Turn the 

M.C.

 dial to select one of the below.

Menu Item (example)

Description

Using a navigation application

You can specify and start the navigation 
application installed on your device.

Message reading

You can read messages received from the 
apps installed on your device.

31 Band EQ setting

You can select an equalizer band from the 
31-band graphic equalizer (13-band for not 
using the Pioneer Smart Sync connection).

Super "Todoroki" Sound

You can boost the bass level more 
dynamically than when not using the 
Pioneer Smart Sync connection.

Easy Sound Fit

You can perform the time alignment setting 
easily by selecting your vehicle type.

Making a connection with Pioneer Smart Sync

Summary of Contents for DEH-S3190BT

Page 1: ...English CD RDS RECEIVER DEH S3190BT Owner s Manual ...

Page 2: ...persons without training and experience in electronic equipment and automotive accessories may be dangerous and could expose you to the risk of electric shock injury or other hazards Do not attempt to operate the unit while driving Make sure to pull off the road and park your vehicle in a safe location before attempting to use the controls on the device CAUTION Do not allow this unit to come into ...

Page 3: ... Press SRC to turn on the power Press and hold SRC to turn off the power Adjust the volume Turn the M C dial Press VOLUME or Press MUTE to mute the unit Press MUTE again or press VOLUME or to unmute Select a source Press SRC OFF repeatedly Press SRC repeatedly Change the display information Press DISP DISP OFF repeatedly Press and hold DISP DISP OFF to turn off the display information Press DISP r...

Page 4: ... Smart Sync connection is made page 9 Detaching the front panel Resetting the microprocessor Indication Description Detach Attach Remove the insulation sheet before use WARNING Do not ingest the battery Chemical Burn Hazard The remote control supplied with This product contains a coin button cell battery If the coin button cell battery is swallowed it can cause severe internal burns in just 2 hour...

Page 5: ...e then press to confirm FM STEP Select the FM tuning step from 100 kHz or 50 kHz 100 50 AM STEP Select the AM tuning step from 10 kHz or 9 kHz 10 9 1 Press the M C dial to display the main menu 2 Turn the M C dial to select SYSTEM then press to confirm 3 Turn the M C dial to select DEMO OFF then press to confirm 4 Turn the M C dial to select YES then press to confirm 1 Press and hold SRC OFF until...

Page 6: ...ons memory BSM Menu Item Description The unit searches for a station by PTY program type information 1 Press and hold during FM reception 2 Turn the M C dial to select a program type from NEWS INFO POPULAR CLASSICS or OTHERS 3 Press the M C dial The unit begins to search for a station When it is found its program service name is displayed NOTES To cancel the search press the M C dial The program o...

Page 7: ...rward or reverse 2 Press and hold or Search for a file from a list 1 Press and hold to display the list 2 Turn the M C dial to select the desired file folder name or category then press to confirm 3 Turn the M C dial to select the desired file then press to confirm Playback starts 1 Compressed audio files only 2 When you use the fast forward or reverse function while playing a VBR file the playbac...

Page 8: ... C dial to select a name or phone number then press to confirm The phone call starts To answer an incoming call 1 Press any button when a call is received Bluetooth telephone TIP When two phones are connected to the unit via Bluetooth and there is an incoming call while one phone is being used for a call a message will appear in the display To answer that incoming call you need to end the existing...

Page 9: ...nd Bluetooth device address Bluetooth audio When the Bluetooth audio player is in use you cannot connect to a Bluetooth telephone automatically Depending on the type of Bluetooth audio player you have connected to this unit operation and information displayed may vary based on availability and functionality 1 Make a Bluetooth connection with the Bluetooth audio player 2 Press SRC OFF to select BT ...

Page 10: ...nd field intuitively Controlling your connected Bluetooth device Extending the functions of the unit by using the application The following functions which are unavailable on the unit alone are available by making a Pioneer Smart Sync connection NOTES Some functions may be restricted depending on the connection conditions with the application The 31 Band EQ setting is converted into 13 bands when ...

Page 11: ...kers can be adjusted FRONT REAR SUBWOOFER NOTE SUBWOOFER can only be selected when ON is selected in SUBWOOFER page 12 1 Press the M C dial to display the main menu Listening to music on your device Audio Adjustments Adjusting the cut off frequency value and the slope value 2 Turn the M C dial to select AUDIO then press to confirm 3 Turn the M C dial to select CROSSOVER then press to confirm 4 Tur...

Page 12: ... Pioneer Smart Sync AUDIO settings Menu Item Description EQ SETTING SUPER BASS POWERFUL DYNAMIC TODOROKI VOCAL VIVID SET BY APP CUSTOM1 CUSTOM2 FLAT SET BY APP is displayed when the preset equalizer curve that is not available in the unit has been set from Pioneer Smart Sync Select an equalizer band and level for further customizing Equalizer band 50HZ to 12 5kHZ Equalizer level 6 to 6 Select or c...

Page 13: ... HI Boost the bass level dynamically to offer an effect as if a subwoofer was added to the system LOUDNESS OFF LOW MID HI Compensate for clear sound at low volume Menu Item Description 1 Not available when SUB W SUB W is selected in SP P O MODE in the INITIAL settings page 5 2 Not available when REAR REAR is selected in SP P O MODE in the INITIAL settings page 5 You can also access to these menus ...

Page 14: ...e is connected to the unit S REMOTE 1 2 OFF PIONEER PRESET Select PIONEER or PRESET according to your wired remote control USB AUTO ON OFF Select ON to automatically switch to USB source when a USB device is connected to the unit Select OFF when a USB device is being connected to the unit just for charging Menu Item Description ILLUMINATION settings Menu Item Description DIM SETTING SYNC CLOCK MAN...

Page 15: ...battery by passing it through the hole to the engine compartment Cover any disconnected cable connectors with insulating tape Do not shorten any cables Never cut the insulation of the power cable of this unit in order to share the power with other devices The current capacity of the cable is limited Use a fuse of the rating prescribed Never wire the negative speaker cable directly to ground Never ...

Page 16: ...u leave ample space behind the rear panel and wrap any loose cables so they are not blocking the vents DIN mount installation 1 Insert the supplied mounting sleeve into the dashboard 2 Secure the mounting sleeve by using a screwdriver to bend the metal tabs 90 into place Installation Leave ample space 5 cm 5 cm Dashboard Mounting sleeve Make sure that the unit is installed securely in place An uns...

Page 17: ...h audio source is not played back There is a call in progress on a Bluetooth connected cellular phone The sound will be played back when the call is terminated A Bluetooth connected cellular phone is currently being operated Stop using the cellular phone The connection between the unit and the cellular phone is not established correctly after a call made by a Bluetooth connected cellular phone Mak...

Page 18: ... Sync connection is not made Make a connection withPioneer Smart Sync page 9 Discs and player Use only discs that feature either of the following two logos Use 12 cm discs Use only conventional fully circular discs The following types of discs cannot be used with this unit DualDiscs 8 cm discs Attempts to use such discs with an adaptor may cause the unit to malfunction Oddly shaped discs Discs oth...

Page 19: ...is unit Sequence of audio file depends on the connected device Note that the hidden files in a USB device cannot be played back Example of a hierarchy Bluetooth The Bluetooth word mark and logos are registered trademarks owned by Bluetooth SIG Inc and any use of such marks by PIONEER CORPORATION is under license Other trademarks and trade names are those of their respective owners WMA Windows Medi...

Page 20: ...dB oct 18 dB oct 24 dB oct 30 dB oct 36 dB oct OFF Phase Normal Reverse Speaker level 10 dB to 24 dB 1 dB step Time alignment 0 cm to 350 cm 2 5 cm Step CD player System Compact disc audio system Usable discs Compact disc Specifications Signal to noise ratio 94 dB 1 kHz IEC A network Number of channels 2 stereo MP3 decoding format MPEG 1 2 Audio Layer 3 WMA decoding format Ver 7 8 9 9 1 9 2 2 ch a...

Page 21: ...21 En English ...

Page 22: ...22En ...

Page 23: ...23 En English ...

Page 24: ... 2018 PIONEER CORPORATION All rights reserved QRB3801 A ID ...

Reviews: