


Built-in CD Player
Basic Operations
4
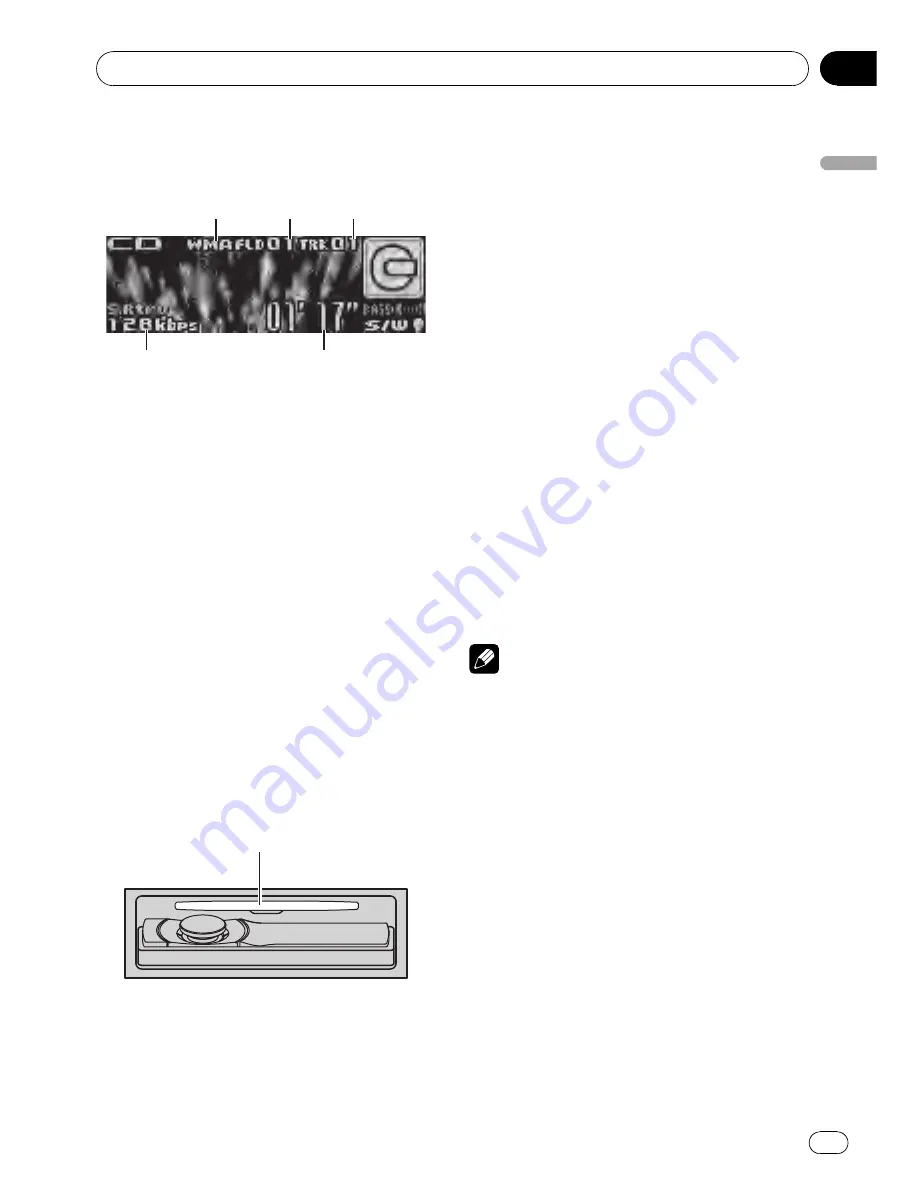
1
2
3
5
1
WMA/MP3/AAC/WAV
indicator
Shows the type of audio file currently playing
when the compressed audio is playing.
2
Folder number indicator
Shows the folder number currently playing
when the compressed audio is playing.
3
Track number indicator
4
Play time indicator
5
Bit rate/sampling frequency indicator
Shows the bit rate or sampling frequency of
the current track (file) when the compressed
audio is playing.
!
When playing back VBR (variable bit
rate)-recorded WMA files, the average
bit rate value is displayed.
!
When playing back VBR (variable bit
rate)-recorded MP3 files,
VBR
is dis-
played instead of bit rate value.
%
Open the front panel
Press
EJECT
.
Disc loading slot appears.
Disc loading slot
#
When loading a disc, face the label side of
a disc up.
%
Eject a disc
Press
EJECT
.
%
Select a folder
Push
MULTI-CONTROL
up or down.
#
You cannot select a folder that does not have
a compressed audio file recorded in it.
%
Select a track
Push
MULTI-CONTROL
left or right.
%
Fast forward or reverse
Push and hold
MULTI-CONTROL
left or right.
#
When playing compressed audio, there is no
sound on fast forward or reverse.
%
Return to root folder
Press and hold
BAND
.
#
If folder 01 (ROOT) contains no files, playback
commences with folder 02.
%
Switch between compressed audio and
CD-DA
Press
BAND
.
#
This operation is available only when playing
CD-EXTRA or MIXED-MODE CDs.
#
If you have switched between compressed
audio and CD-DA, playback starts at the first
track on the disc.
Notes
!
The built-in CD player can play back audio CD
and compressed audio recorded on a CD-
ROM. (Refer to page 68 for files that can be
played back.)
!
Read the precautions for discs and player on
page 65.
!
After a disc has been inserted, press
SRC
to
select the built-in CD player.
!
There is sometimes a delay between starting
up disc playback and the sound being issued.
When being read,
FORMAT READ
is dis-
played.
!
If an error message is displayed, refer to
Error
messages
on page 64.
!
Playback is carried out in order of file number.
Folders are skipped if they contain no files. (If
folder 01 (ROOT) contains no files, playback
commences with folder 02.)
!
You can eject the CD by pressing and holding
EJECT
with eject position when the CD load-
ing or ejecting cannot operate properly.
Operating this unit
En
15
Section
02
Operating
this
unit


