33
DDJ-T1
5
6
7
8
5
6
7
8
A
B
C
D
E
F
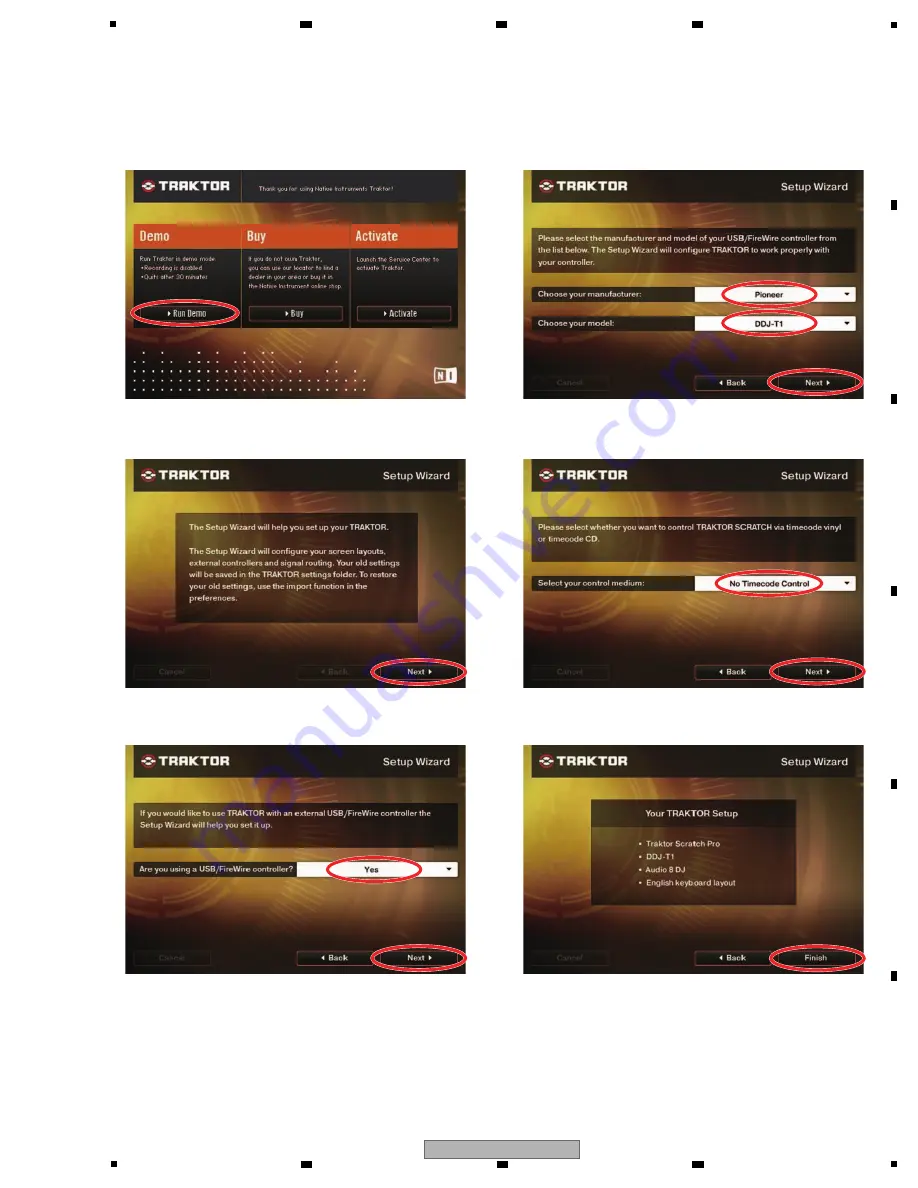
Click on “Run Demo.”
Click on “
N
ext.”
Select “Yes” then click on “
N
ext.”
Select “Pioneer” on the pulldown menu for the
manufacturer and “DDJ-T1” for the model then click on
“
N
ext.”
Select “
N
o Timecode Control” then click on “
N
ext.”
Click on “Finish” to complete operation of the Setup
Wizard.
3. Standard use setting of TRAKTOR
Double-click on the “Traktor” icon on the desktop.
Summary of Contents for DDJ-T1
Page 7: ...7 DDJ T1 5 6 7 8 5 6 7 8 A B C D E F 2 2 PANEL FACILITIES Rear panel Front panel ...
Page 8: ...8 DDJ T1 1 2 3 4 A B C D E F 1 2 3 4 Control panel ...
Page 9: ...9 DDJ T1 5 6 7 8 5 6 7 8 A B C D E F 1 Browser ...
Page 10: ...10 DDJ T1 1 2 3 4 A B C D E F 1 2 3 4 2 Deck ...
Page 11: ...11 DDJ T1 5 6 7 8 5 6 7 8 A B C D E F 3 Mixer ...
Page 12: ...12 DDJ T1 1 2 3 4 A B C D E F 1 2 3 4 4 Effect ...
Page 15: ...15 DDJ T1 5 6 7 8 5 6 7 8 A B C D E F ...
Page 53: ...53 DDJ T1 5 6 7 8 5 6 7 8 A B C D E F ...
Page 56: ...56 DDJ T1 1 2 3 4 A B C D E F 1 2 3 4 9 2 EXTERIOR SECION Refer to 9 3 PCB LAYER SECTION ...


