39
En
Changing
the
settings
Duplicating the settings onto DJ
players connected by PRO DJ LINK
The [UTILITY] settings and other settings can be duplicated onto DJ play-
ers connected by PRO DJ LINK.
!
The duplicated settings are as shown below.
—
[UTILITY] settings
PLAY MODE
,
EJECT/LOAD LOCK
,
AUTO CUE LEVEL
,
SLIP
FLASHING
,
ON AIR DISPLAY
,
JOG BRIGHTNESS
,
JOG
INDICATOR
,
DISC SLOT ILLUMINATION
,
LANGUAGE
,
LCD
BRIGHTNESS
—
Other settings
TIME MODE (how the time is displayed on the main unit display),
AUTO CUE, JOG MODE, TEMPO RANGE, MASTER TEMPO,
QUANTIZE, SYNC
1 Select [DUPLICATION] and enter.
2 Stop playback on the DJ player(s) on which you want
to reflect the settings.
3 Use the rotary selector to select and enter [PLAYER X]
or [ALL].
[
PLAYER1
]–[
PLAYER4
]: The settings are duplicated on the specified DJ
player. Currently playing DJ players cannot be selected.
[
ALL
]: The settings are duplicated on all the DJ players connected by
PRO DJ LINK. The settings cannot be duplicated on currently playing DJ
players.
[DUPLICATED] is displayed on the specified player’s display and this
unit’s [UTILITY] settings and other settings are duplicated on the speci-
fied player.
[
DEFAULT
]: Restores this unit’s settings to the settings set upon
purchase.
About the driver software
(Windows)
Installing the driver software
!
There is no need to install the driver software when using Mac OS X.
Operating environment
Supported operating systems
Windows
®
7 Home Premium/Professional/
Ultimate
32-bit version
1
64-bit version
1
1
Windows Vista
®
Home Basic/
Home Premium/Business/Ultimate (SP2 or
later)
32-bit version
1
64-bit version
1
1
Windows
®
XP Home Edition/
Professional (SP3 or later)
32-bit version
1
1
When using a 64-bit version of Windows, the driver software can only be used for
32-bit applications.
Before installing the driver software
!
Read
Software end user license agreement
on page 8 carefully.
!
If you connect this unit to your computer without installing the driver
software first, an error may occur on your computer depending on
the system environment.
!
If installation of the driver software is interrupted after it has started,
start the installation procedure over again from the beginning.
1 Turn off this unit’s power switch and disconnect the
USB cable connecting this unit to the computer.
2 Log in as the user set as the computer’s administrator.
3 Quit any other programs running on the computer.
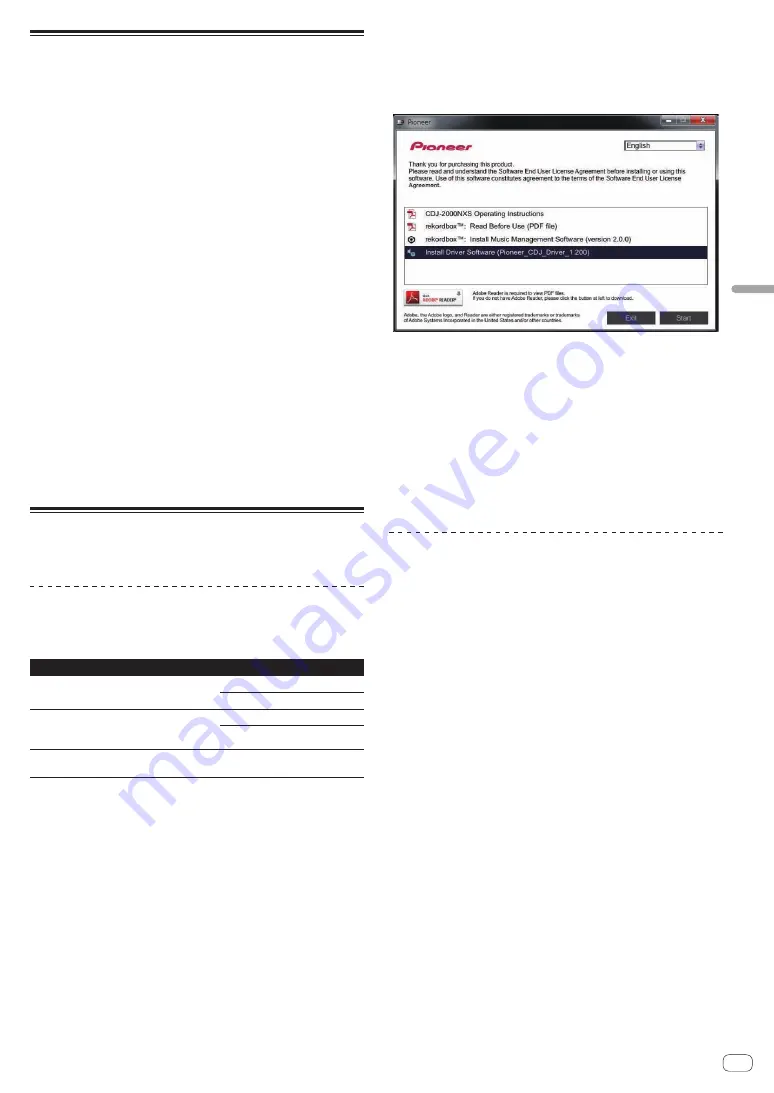
4 Insert the CD-ROM into the computer’s optical drive.
The CD-ROM menu is displayed.
!
If the CD-ROM menu does not appear when the CD-ROM is inserted,
open the optical drive from [
Computer
(or
My Computer
)] in the
[
Start
] menu, then double-click the [
CD_menu.exe
] icon.
5 When the CD-ROM’s menu is displayed, select [Install
Driver Software], then click [Start].
!
To close the CD-ROM menu, click [
Exit
].
6 Proceed with installation according to the instructions
on the screen.
If [
Windows Security
] appears on the screen while the installation is
in progress, click [
Install this driver software anyway
] and continue
with the installation.
!
When installing on Windows XP
If [
Hardware Installation
] appears on the screen while the installa-
tion is in progress, click [
Continue Anyway
] and continue with the
installation.
!
When the installation program is completed, a completion message
appears.
Connecting this unit and a computer by
USB
1 Connect this unit to your computer via a USB cable.
For instructions on connecting, see
Using other brands of DJ software
on
page 15.
2 Press the [POWER ON/OFF] button.
Turn on the power of this unit.
!
The message [
Installing device driver software
] may appear when
this unit is first connected to the computer or when it is connected to
a different USB port on the computer. Wait a while until the message
[
Your devices are ready for use
] appears.
!
When installing on Windows XP
—
[
Can Windows connect to Windows Update to search for
software?
] may appear while the installation is in progress.
Select [
No, not this time
], then click [
Next
] to continue
installation.
—
[
What do you want the wizard to do?
] may appear while
the installation is in progress. Select [
Install the software
automatically (Recommended)
], then click [
Next
] to continue
installation.
—
If [
Hardware Installation
] appears on the screen while the
installation is in progress, click [
Continue Anyway
] and con-
tinue with the installation.


