background image

6

Touch [AUX] on the AV source selection

screen.

The image is displayed on the screen.

7

Use the touch panel keys on the screen

to control the external unit.

=

For details, refer to

Using the touch panel

keys

on page 85.

Setting the video signal

When you connect this product to an AUX
equipment, select the suitable video signal
setting.

p

You can operate this function only for the
video signal input into the AUX input.

1

Press the HOME button to display the

Top menu screen.

2

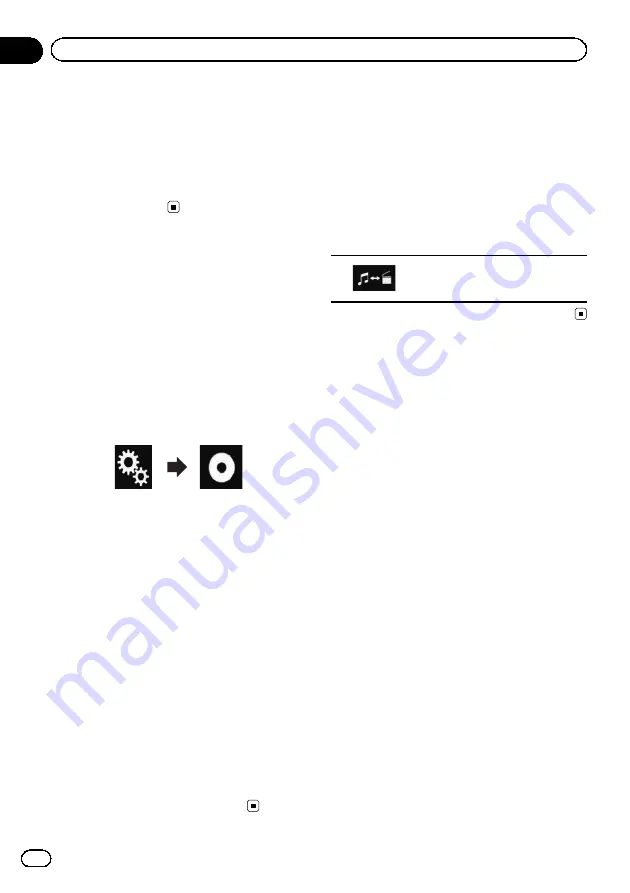
Touch the following keys in the follow-

ing order.

The

Video Setup

screen appears.

3

Touch [Video Signal Setting].

4

Touch [AUX].

The pop-up menu appears.

5

Touch the item you want to set.

!

Auto

(default):

Adjusts the video signal setting automati-
cally.

!

PAL

:

Sets the video signal to PAL.

!

NTSC

:

Sets the video signal to NTSC.

!

PAL-M

:

Sets the video signal to PAL-M.

!

PAL-N

:

Sets the video signal to PAL-N.

!

SECAM

:

Sets the video signal to SECAM.

Switching the operation
screen

You can switch between the screen to operate
music files and that to operate video files.

p

This touch panel key is only available when
there are both audio and video files on the
auxiliary equipment.

%

Touch the following key.

Switches between the screen to
operate video files and that to oper-
ate music files.

Engb

86

Chapter

16

Using an AUX source

Summary of Contents for AVH-X8600BT

Page 1: ...Operation Manual DVD RDS AV RECEIVER AVH X8600BT English ...

Page 2: ... 13 Removing the front panel 14 Attaching the front panel 14 Notes on using the LCD panel 14 Adjusting the LCD panel angle 15 Inserting ejecting connecting media 15 Inserting and ejecting a disc 15 Inserting and ejecting an SD memory card 15 Connecting and disconnecting an iPod 16 Plugging and unplugging a USB storage device 16 Startup and termination 16 On first time startup 16 Regular startup 17...

Page 3: ... volume 33 Using the voice recognition function for iPhone 33 Notes for hands free phoning 34 iPod iPhone or smartphone setup operation The basic flow of iPod iPhone or smartphone setup 36 Setting the device connection method 36 iPod compatibility 36 Android device compatibility 37 MirrorLink device compatibility 37 Information on the connections and functions for each device 38 Using the radio Us...

Page 4: ...laying compressed video files Using the touch panel keys 59 Reading the screen 60 Starting procedure for Disc 60 Starting procedure for USB SD 60 Selecting files from the file name list 60 Setting a repeat play range 61 Frame by frame playback 61 Slow motion playback 61 Switching the media file type 61 Operating with the hardware buttons 61 Playing compressed still image files Using the touch pane...

Page 5: ...g the screen 82 Starting procedure 82 Selecting files from the file name list 83 Playing files in random order 83 Setting a repeat play range 83 Operating with the hardware buttons 83 Using an HDMI source Using the touch panel keys 84 Reading the screen 84 Starting procedure 84 Using an AUX source Using the touch panel keys 85 Reading the screen 85 Starting procedure 85 Setting the video signal 86...

Page 6: ...qualiser 107 Adjusting the equaliser curve automatically Auto EQ 108 Before operating the Auto EQ function 108 Performing Auto EQ 109 Theme menu Setting the illumination colour 111 Selecting the colour from the preset colours 111 Creating a user defined colour 111 Selecting the background display 112 Changing to the background display image stored on the external device USB SD 112 Selecting the th...

Page 7: ...ing 131 Error messages 133 Handling and care of discs 137 Built in drive and care 137 Ambient conditions for playing a disc 137 Playable discs 138 DVD Video and CD 138 AVCHD recorded discs 138 Playing DualDisc 138 Dolby Digital 138 Detailed information for playable media 138 Compatibility 138 Media compatibility chart 142 Bluetooth 146 SDHC 146 WMA WMV 146 DivX 146 AAC 147 Android 147 MirrorLink 1...

Page 8: ...duct classi fied under the Safety of laser products IEC 60825 1 2007 and contains a class 1M laser module To ensure continued safety do not re move any covers or attempt to gain access to the inside of the product Refer all servicing to qualified personnel CAUTION CLASS 1M VISIBLE AND INVISIBLE LASER RADIATION WHEN OPEN DO NOT VIEW DIRECTLY WITH OPTICAL INSTRUMENTS Important safety information WAR...

Page 9: ...systems or safety features including air bags or hazard lamp buttons or iii impair the driver s ability to safely operate the vehi cle Please remember to fasten your seat belt at all times while operating your vehicle If you are ever in an accident your injuries can be considerably more severe if your seat belt is not properly buckled Never use headphones while driving Handbrake interlock Certain ...

Page 10: ...e this product as an aid to keep an eye on trailers or backing into a tight parking spot WARNING SCREEN IMAGE MAY APPEAR REVERSED USE INPUT ONLY FOR REVERSE OR MIRROR IMAGE REAR VIEW CAMERA OTHER USE MAY RESULT IN INJURY OR DAMAGE CAUTION The rear view mode is to use this product as an aid to keep an eye on the trailers or while back ing up Do not use this function for entertainment purposes Handl...

Page 11: ... When using a mobile phone keep the aer ial of the mobile phone away from the LCD screen to prevent disruption of the video in the form of spots coloured stripes etc p To protect the LCD screen from damage be sure to touch the touch panel keys only with your finger and do so gently Notes on internal memory Before removing the vehicle battery If the battery is disconnected or discharged the memory ...

Page 12: ...corded contents are reset to the factory settings 1 1 RESET button About this manual This manual uses diagrams of actual screens to describe operations However the screens on some units may not match those shown in this manual depending on the model used Engb 12 Chapter 01 Precaution ...

Page 13: ... play on page 17 6 TRK button Press to perform manual seek tuning fast forward reverse and track search controls 7 h button 8 RESET button For details of the operations refer to Re setting the microprocessor on page 11 9 Auto EQ microphone input jack Use to connect a microphone for acoustical measurement sold separately a Disc loading slot Insert a disc to play For details refer to Inserting and e...

Page 14: ...bottom of the front panel to the right and lift up the front panel while pushing down on the dial 4 Put the front panel into the provided protective case for safe keeping Attaching the front panel 1 Slide the front panel into the top of the unit and push it into place Slide the inserter on the front panel into the in sertion slot on top of the unit and push it into place 2 Push on the bottom of th...

Page 15: ...uring data transfer can damage the SD memory card Be sure to eject the SD memory card by the pro cedure described in this manual Do not press the h button when an SD mem ory card is not fully inserted Doing so may da mage the card Do not press the h button before an SD mem ory card has been completely removed Doing so may damage the card Inserting and ejecting a disc Inserting a disc 1 Press the h...

Page 16: ...ing and unplugging a USB storage device p This product may not achieve optimum per formance with some USB storage devices p Connection via a USB hub is not possible p A USB cable is required for connection Plugging in a USB storage device 1 Pull out the plug from the USB port of the USB cable 2 Plug a USB storage device into the USB cable 2 1 1 USB cable 2 USB storage device Unplugging a USB stora...

Page 17: ...lays the Top menu screen If you touch the display returns to the pre vious screen Regular startup Start the engine to boot up the system After a short pause the splash screen comes on for a few seconds p The screen shown will differ depending on the previous conditions p If the anti theft function is activated you must enter your password Turning off the display You can turn off the display at nig...

Page 18: ...How to use the screens Switching screens using the touch panel keys 1 2 3 4 7 8 9 5 6 Engb 18 Chapter 02 Basic operation ...

Page 19: ... Changing the display order of source icons on page 21 7 AV operation screen You can customise the settings for each source 8 Application operation screen You can control the iPhone or smartphone applications directly on this product p If applications are not available the Ap plication operation screen will not be dis played 9 Application menu screen This product can switch to the application menu...

Page 20: ...page 106 5 Displays the Phone menu screen For details refer to Displaying the phone menu on page 28 Selecting a front source on the AV source selection screen 1 Press the HOME button to display the Top menu screen 2 Touch the following key Displays the AV source selection screen 3 Touch the source icon you want to se lect The AV operation screen of the selected source appears Selecting a front sou...

Page 21: ... p If the source icon is moved the order of the source list is also changed Changing the display order of source keys You can change the display order of source keys on the source list 1 Press the HOME button to display the Top menu screen 2 Touch the AV operation key 1 1 AV operation key The AV operation screen appears 3 Touch the following key Displays the source list 4 Touch Open The source key...

Page 22: ...orresponding to the po sition of the key is displayed while drag ging the key Operating the on screen keyboard 6 5 4 3 8 7 2 1 1 Displays the characters that are entered If there is no text in the box an informative guide with text appears 2 Allows you to move the cursor to the right or left for a number of characters equivalent to the number of touches 3 Touching the keys enters the characters in...

Page 23: ...t to this product for the first time A total of three devices can be registered Two regis tration methods are available Searching for nearby Bluetooth devices Pairing from your Bluetooth devices p If three devices are already paired Mem ory Full is displayed and pairing cannot be performed In such cases delete a paired device first For details refer to Deleting a registered device on page 25 Searc...

Page 24: ...he phone book registered in the device may be automatically trans mitted to this product If you touch the following key you can switch the display between the device names and Bluetooth device addresses Switches between the device names and Bluetooth device ad dresses Pairing from your Bluetooth devices You can register a Bluetooth device by setting this product to standby mode and requesting a co...

Page 25: ... phone will be also cleared CAUTION Never turn this product off while the paired Bluetooth device is being deleted 1 Press the HOME button to display the Top menu screen 2 Touch the following keys in the follow ing order The Bluetooth screen appears 3 Touch Connection 4 Touch the following key Deletes a paired device A message prompting you to delete a regis tered device appears 5 Touch Yes The de...

Page 26: ...r a PIN code on your Bluetooth device to verify the connection The default code is 0000 but you can change it with this function 1 Press the HOME button to display the Top menu screen 2 Touch the following keys in the follow ing order The Bluetooth screen appears 3 Touch PIN Code Input The PIN Code screen appears 4 Touch 0 to 9 to input pin code up to 8 digits 5 Touch the following key Stores the ...

Page 27: ...rn this product off and never disconnect the phone while the software is being updated 1 Press the HOME button to display the Top menu screen 2 Touch the following keys in the follow ing order The Bluetooth screen appears 3 Touch BT Software Update 4 Touch Start The data transfer screen is displayed p Follow the on screen instructions to finish updating the Bluetooth software Displaying the Blueto...

Page 28: ... AV operation screen On the App control side bar on the AppRadio Mode and MirrorLink screens Touch the following key Displays the Phone menu screen p The Phone Book screen appears when using this function for the first time The screen of the last used function appears from the next time Touch panel keys 4 2 3 5 1 6 7 8 1 Displays the preset dial screen 2 Switches to the phone book list 3 Switches ...

Page 29: ...ect the entry and make the call p The contacts on your phone will normally be transferred to this product automatically when the phone is connected If it is not use your phone menu to transfer the contacts The visibility of this product should be on when you use the Bluetooth menu For details refer to Switching visibility on page 26 1 Press the HOME button to display the Top menu screen 2 Touch th...

Page 30: ...ears Changes the character 5 Touch the list to display the phone number list of the selected entry The details screen of the phone book appears If several phone numbers are included in an entry select one by touching the list 6 Touch the phone number you want to dial The dial screen appears 7 Dialling starts p To cancel the call touch 8 Touch the following key Ends the call The call ends Dialling ...

Page 31: ...number to the Preset Dial list Dialling from the preset dial list 1 Press the HOME button to display the Top menu screen 2 Touch the following keys in the follow ing order The Preset Dial screen appears 3 Touch the desired entry on the list to make a call The dial screen appears 4 Dialling starts p To cancel the call touch 5 Touch the following key Ends the call The call ends Deleting a phone numb...

Page 32: ...p AV sources cannot be selected even if the dial confirm screen is minimised while talk ing on the phone 1 Touch the following key The dial confirmation screen is minimised 2 Touch the following key Displays the dial confirmation screen again Changing the phone settings Answering a call automatically This product automatically answers incoming calls to the connected mobile phone so you can answer ...

Page 33: ...ng the names of your contacts from this product does not affect the data on your Bluetooth device Setting the private mode During a conversation you can switch to pri vate mode talk directly on your mobile phone Touch the following keys to turn pri vate mode on or off Talk directly on your mobile device Hands free phoning Adjusting the other party s listening volume To maintain good sound quality ...

Page 34: ...s connect your phone and then perform pairing again from your phone to this pro duct Making and receiving calls You may hear a noise in the following situa tions When you answer the phone using the button on the phone When the person on the other end of the line hangs up the phone If the person on the other end of the line cannot hear the conversation due to an echo decrease the volume level for h...

Page 35: ...rst and last names may be re versed If the phone book in the mobile phone con tains image data the phone book may not be transferred correctly Image data can not be transferred from the mobile phone Depending on the mobile phone phone book transfer may not be available Engb 35 Chapter 04 Using hands free phoning Using hands free phoning ...

Page 36: ... the device to be connected Connection Select the connection meth od p Configure the settings correctly according to the device to be connected and the con nection method to be used For details refer to Information on the connections and functions for each de vice on page 38 p If you change the setting the confirmation screen appears Touch OK The setting will change after the following processes a...

Page 37: ...n iPod nano 3rd generation iPod with Lightning connector iPhone 5c iPhone 5s iPhone 5 iPod touch 5th generation iPod nano 7th generation Android device compatibility p Operation methods may vary depending on the Android device and the software ver sion of the Android OS p Depending on the version of the Android OS it may not be compatible with this pro duct p Compatibility with all Android devices...

Page 38: ...B port 1 for using AppRadio Mode Available source iPod audio 1 1 iPod video 1 1 aha 1 1 1 AppRadio Mode 1 iPod iPhone with a Lightning connector Required cable sold separately Cable connection is not required CD IU52 CD IH202 CD IU52 Lightning Digital AV Adapter Smartphone Setup Device iPhone iPod iPhone iPod iPhone iPod Connection Wireless via BT USB Digital AV adapter Bluetooth connection Blueto...

Page 39: ...nk device Required cable sold separately Cable connection is not required CD AH200 CD MU200 Smartphone Setup Device Others Others Others Connection Wireless via BT HDMI USB Bluetooth connection Bluetooth connec tion is required for using aha Bluetooth connec tion is required Bluetooth connec tion is required for using aha Connection requirement Connect to USB port 2 Connect to USB port 2 Available...

Page 40: ...refer to Seek tuning on page 41 9 Displays the preset channels For details refer to Selecting a preset channel from the preset channel list on page 42 a Recalls the preset channel stored to a key from memory with a single touch of the key Stores the current broadcast frequency to a key for later recall by continuing to touch the key For details refer to Storing broadcast fre quencies on page 42 Re...

Page 41: ...n the AV source selec tion screen The Radio screen appears 3 Use the touch panel keys on the screen to control the radio For details refer to Using the touch panel keys on page 40 Selecting a band Touch the following key repeatedly until the desired band appears Switches between the following FM bands FM1 FM2 and FM3 Switches between the following MW LW bands MW and LW p This function is convenien...

Page 42: ...ee FM bands as well as six MW LW sta tions can be stored in memory Storing the strongest broadcast frequencies BSM best stations memory function automa tically stores the six strongest broadcast fre quencies under the preset tuning keys 1 to 6 and once stored there you can tune into them with the touch of a key p Storing broadcast frequencies with BSM may replace broadcast frequencies you have alr...

Page 43: ...t standby lets you re ceive traffic announcements automatically no matter what source you are listening to TA can be activated for both a TP station a sta tion that broadcasts traffic information or an other enhanced network s TP station a station carrying information that cross references TP stations 1 Press the HOME button to display the Top menu screen 2 Touch the following keys in the follow i...

Page 44: ...ed on the FM band If you are listening to a broadcast and the re ception becomes weak or there are other pro blems this product will automatically search for a different station in the same network that is broadcasting a stronger signal 1 Press the HOME button to display the Top menu screen 2 Touch the following keys in the follow ing order The System screen appears 3 Touch AV Source Settings 4 To...

Page 45: ...f independently for each FM band Switching Auto PI seek If this product fails to find a suitable alterna tive frequency or if you are listening to a broadcast and the reception becomes weak this product will automatically search for a dif ferent station with the same programming Activating the Auto PI seek for preset stations This product can automatically search for a different station with the s...

Page 46: ...ble Switches to settings that prioritise noise prevention Hi Fi Switches to the settings that give priority to the sound quality Storing song information to an iPod iTunes Tagging p For details refer to Storing song information to an iPod iTunes Tagging on page 125 Operating with the hardware buttons Press the TRK button You can move the preset channels up or down Press and hold the TRK button You...

Page 47: ... l m 8 k j 8 i g h 7 Playback screen page 2 n o p e q r 1 Displays the source list For details refer to Selecting a front source on the source list on page 20 2 Displays the Time and date setting screen For details refer to Setting the time and date on page 125 3 Displays the Setting menu screen 4 Recalls equaliser curves For details refer to Using the equaliser on page 106 5 Selects a track from ...

Page 48: ...nguage For details refer to Switching the subtitle language on page 51 j Switches the audio language For details refer to Switching the audio language on page 52 k Stops playback l Changes the wide screen mode For details refer to Changing the wide screen mode on page 126 m Moves ahead one frame frame by frame playback or slows down playback speed slow motion playback For details refer to Frame by...

Page 49: ...tly play ing 8 Title number indicator Shows the title number currently playing 9 Chapter number indicator Shows the chapter number currently playing a PBC ON indicator Indicates that a disc with PBC On is being played Starting procedure 1 Display the AV source selection screen For details of the operations refer to Dis playing the AV operation screen on page 20 2 Insert the disc you want to play i...

Page 50: ...he repeat play range Audio default Repeats the current disc Repeats just the current track p If you turn random play on when the repeat play range is set to the whole of the current disc the repeat play range changes to the current track automatically p If you turn random play on when the repeat play range is set to the current track the re peat play range changes to the whole of the current disc ...

Page 51: ...r 4 Touch the following key Registers the numbers and starts playback Operating the DVD menu You can operate the DVD menu by touching the menu item on the screen directly p This function may not work properly with some DVD disc content In that case use touch panel keys to operate the DVD menu 1 Touch the screen to display the touch panel keys 2 Touch the following key Displays the touch panel keys...

Page 52: ...ng slow motion play back p With some discs images may be unclear during slow motion playback p Reversed slow motion playback is not possi ble Returning to a specified scene When using a disc that has a point recorded that indicates where to return to the disc re turns to the specified point and begins play back from there This function cannot be used if a specified scene has not been preprogrammed...

Page 53: ...ng key repeatedly until the desired setting appears Switches between viewing angles During the playback of a scene shot from multiple angles the angle icon is displayed Turn the angle icon display on or off using the DVD DivX Setup menu For details refer to Setting the angle icon display on page 117 Selecting the audio output When playing DVDs recorded with LPCM audio you can switch the audio outp...

Page 54: ...ls refer to Selecting a file from the list related to the song currently play ing link search on page 57 7 Switches the text display between tag in formation and file folder information For details refer to Reading the screen on page 55 For details refer to Switching the browse mode on page 56 8 Displays the Phone menu screen For details refer to Displaying the phone menu on page 28 9 Switches to ...

Page 55: ...urrently playing Folder name Shows the name of the folder contain ing the file currently playing 2 Current time and date 3 Album artwork Album art of the current song is displayed if it is available 4 Playback condition indicator Indicates the current playback condition Playing files in random order Indicator Meaning Does not play files in random order Plays all files within the repeat range in ra...

Page 56: ... screen to control the external storage device USB SD For details refer to Using the touch panel keys on page 54 p Playback is performed in order of folder numbers Folders are skipped if they con tain no playable files If there are no play able files in folder 01 root folder playback starts from folder 02 Switching the browse mode This product supports two types of browse modes Folder Browse mode ...

Page 57: ...o refine Refine the item until the desired song title or file name is displayed on the list p Touching All on the list includes all op tions in the current list For example if you touch All after touching Artists you can proceed to the next screen with all artists in the list selected p After you select Artists Albums or Genres go on to touch one of the lists to start playing the first song in the...

Page 58: ...p menu for selecting a media file type to play on the disc or in the external storage device USB SD 2 Touch the item you want to set Music Switches the media file type to music com pressed audio Video Switches the media file type to video CD DA Switches the media file type to CD audio data CD DA Photo Switches the media file type to still image JPEG data Operating with the hardware buttons Press t...

Page 59: ...el keys again 7 Sets a repeat play range For details refer to Setting a repeat play range on page 61 8 Switches the subtitle language With DivX featuring multi subtitle recordings you can switch between subtitle languages during playback 9 Displays the Phone menu screen For details refer to Displaying the phone menu on page 28 a Skips files forward or backward b Switches the audio language With Di...

Page 60: ...ys on page 59 Starting procedure for USB SD 1 Display the AV source selection screen For details of the operations refer to Dis playing the AV operation screen on page 20 2 Insert the SD memory card into the SD card slot or plug the USB storage device into the USB connector For details refer to Plugging in a USB sto rage device on page 16 For details refer to Inserting and ejecting an SD memory ca...

Page 61: ... r until an arrow icon is displayed during playback The arrow icon is displayed and forward slow motion playback begins p To return to normal playback touch d e 2 Touch r to adjust playback speed during slow motion playback p There is no sound during slow motion play back p With some discs and external storage de vices USB SD images may be unclear during slow motion playback p Reversed slow motion...

Page 62: ...a repeat play range For details refer to Setting a repeat play range on page 63 b Rotates the displayed picture 90 clock wise c Selects the previous folder or the next folder d Switches the media file type For details refer to Switching the media file type on page 63 e Switches between playback and pause f Changes the wide screen mode For details refer to Changing the wide screen mode on page 126 ...

Page 63: ...es not play files in random order Plays all files in the current repeat play range in random order p If you turn random play on when the re peat play range is set to the current file the repeat play range changes to the whole of the current external storage de vice USB SD automatically Setting a repeat play range The repeat play range can be changed by only touching a single key Touch the followin...

Page 64: ...sec JPEG images switch at intervals of 15 sec onds Manual JPEG images can be switched manually Operating with the hardware buttons Press the TRK button You can skip files forward or backward Press and hold the TRK button You can search 10 JPEG files at a time p If the number of files in the folder from the file currently being played to the first or last file is fewer than 10 the first or last fil...

Page 65: ...ning connector is connected to this product with a interface cable CD IH202 sold se parately For details of the connections refer to the Installation Manual When you want to play audio and or video files on your iPod with a Lightning connec tor first install CarMediaPlayer on your iPod with a Lightning connector and then launch CarMediaPlayer while in AppRadio Mode For details about the CarMediaPl...

Page 66: ...lay on page 67 e Sets a repeat play range For details refer to Setting a repeat play range on page 67 f Changes the audiobook speed For details refer to Changing the speed of audiobook playback on page 69 g Hides the touch panel keys Touching this area hides the touch panel keys p Touch anywhere on the LCD screen to display the touch panel keys again h Changes the wide screen mode For details refe...

Page 67: ...g an iPhone or iPod touch quit applications before connecting 3 Touch iPod on the AV source selection screen 4 Use the touch panel keys on the screen to control your iPod For details refer to Using the touch panel keys for audio on page 65 For details refer to Using the touch panel keys for video on page 65 p The video image of the iPod may have noise if the rear display outputs the video image Wh...

Page 68: ...e not displayed 4 Touch the Initial Search Bar to display the alphabet search screen p The Initial Search Bar is not displayed in the top category list or the song list 5 Touch the first letter of the title of the song or video you are looking for While searching touch panel key operation is not available p To refine the search with a different letter touch Cancel 6 Touch the title of the list tha...

Page 69: ...p down to a chapter 3 Touch the following key Switches the control mode to con trol iPod functions from this pro duct Changing the speed of audiobook playback The playback speed can be changed while playing an audiobook Touch the following key Changes the playback speed default Plays back in normal speed Plays back faster than normal speed Plays back slower than normal speed Displaying lists relat...

Page 70: ...ls refer to Using this product s iPod function from your iPod on page 69 7 Displays the Phone menu screen For details refer to Displaying the phone menu on page 28 8 Skips files forward or backward 9 Switches between playback and pause Reading the screen 1 2 3 4 5 6 1 App name Shows the App name of the currently playing 2 Song title Shows the title of the song currently playing when available No T...

Page 71: ...www pioneer eu AppRadioMode p Be sure to read Using app based connected content before you perform this operation For details refer to Using app based con nected content on page 148 Pioneer is not liable for any issues that may arise from incorrect or flawed app based content The content and functionality of the sup ported applications are the responsibility of the App providers In AppRadio Mode f...

Page 72: ...tion is already running the application operation screen will appear on this product 6 Touch the desired application icon The desired application is launched and the application operation screen appears 7 Operate the application 8 Press the HOME button to go back to the Top menu screen For iPhone with a Lightning connector users 1 Register your iPhone and connect it to this product via Bluetooth w...

Page 73: ...handbrake is engaged p This function is only available in AppRadio Mode on the iPhone When you tap the text input area of an applica tion for iPhone a keyboard will be displayed on the screen You can input the desired text directly from this product p The language preference for the keyboard of this product should be same as the set ting on your iPhone If the settings for this product and the iPho...

Page 74: ...e HOME button to display the Top menu screen 2 Touch the following keys in the follow ing order The System screen appears 3 Touch Input Output settings 4 Touch AppRadio Video Adjustment The confirmation screen appears 5 Touch OK 6 Touch the following keys to adjust the line to fit smartphone image size Moves the line to the left Moves the line to the right Moves the line upward Moves the line down...

Page 75: ...ner of the screen 1 Connect your iPhone p The cable connection method varies de pending on your device For details of the connections refer to the Installation Manual 2 Press the HOME button to display the Top menu screen 3 Touch APPS The image in your iPhone appears on the screen 4 Launch an application on your iPhone An image of the application appears on the screen 5 Press the HOME button to re...

Page 76: ...irrorLink device this key is not appears 5 Displays the Phone menu screen For details refer to Displaying the phone menu on page 28 6 Displays the current source p In MirrorLink mode App control side bar will appear p If you press the HOME button twice the App control side bar will disappear Press the HOME button twice again and the App control side bar will appear Starting procedure When connecti...

Page 77: ...func tion on or off Left tab The audio mix function is en abled mix on The App volume is dis played If you touch the App volume the volume keys will be displayed Right tab The audio mix function is dis abled mix off 3 Adjusts the application audio volume Each touch of or increases or de creases the volume level p The AV operation screen and the Appli cation screen can be switched by press ing the ...

Page 78: ...Facebook account log ging into Twitter or creating a Twitter account Aha Radio is a service not affiliated with Pioneer More information is available at http www aharadio com A specific version of the Aha Radio applica tion must be installed on your iPhone or smartphone to enjoy Aha Radio content on this product Because the application for the iPhone or smartphone is not provided by Pioneer the re...

Page 79: ...hows the rated value of the current content displayed only when and where applicable 5 Current station information Shows which source has been selected Shows information on the content currently being played p is displayed if there is no corre sponding information Starting procedure When connecting an iPhone or smartphone to this product you must select the method for connecting your device Settin...

Page 80: ... to Using the touch panel keys on page 78 For smartphone users 1 Unlock your smartphone 2 Connect your smartphone p Connect via USB Bluetooth or HDMI and Bluetooth For details of the Bluetooth connection refer to Registering your Bluetooth de vices on page 23 p The cable connection method varies de pending on your device For details of the connections refer to the Installation Manual 3 Display the...

Page 81: ...if you switch to another source while listening to a song on your Bluetooth audio player song playback may continues p Depending on the Bluetooth audio player you connected to this product operations on this product to control the player may differ from those explained in this manual p When you are talking on a mobile phone connected to this product via Bluetooth wireless technology song playback ...

Page 82: ... p In the following cases file information will only be displayed after a file starts or resumes playing You connect a Bluetooth audio player compatible with AVRCP1 3 and op erate the player to start playing You select another file when play back is paused Starting procedure 1 Pull out the connecting cable for using AppRadio Mode p You cannot use Bluetooth audio player when the connecting cable fo...

Page 83: ...unction is only available when the connected Bluetooth audio player supports AVRCP 1 3 Touch the following key repeatedly until the desired setting appears Turns random play on or off Setting a repeat play range The repeat play range can be changed by only touching a single key p This function is only available when the connected Bluetooth audio player supports AVRCP 1 3 Touch the following key re...

Page 84: ...splays the Setting menu screen 4 Recalls equaliser curves For details refer to Using the equaliser on page 106 5 Hides the touch panel keys Touching this area hides the touch panel keys p Touch anywhere on the LCD screen to display the touch panel keys again 6 Displays the Phone menu screen For details refer to Displaying the phone menu on page 28 7 Changes the wide screen mode For details refer t...

Page 85: ...n page 106 5 Hides the touch panel keys Touching this area hides the touch panel keys p Touch anywhere on the LCD screen to display the touch panel keys again 6 Displays the Phone menu screen For details refer to Displaying the phone menu on page 28 7 Switches the operation screen For details refer to Switching the opera tion screen on page 86 8 Changes the wide screen mode For details refer to Ch...

Page 86: ...up screen appears 3 Touch Video Signal Setting 4 Touch AUX The pop up menu appears 5 Touch the item you want to set Auto default Adjusts the video signal setting automati cally PAL Sets the video signal to PAL NTSC Sets the video signal to NTSC PAL M Sets the video signal to PAL M PAL N Sets the video signal to PAL N SECAM Sets the video signal to SECAM Switching the operation screen You can switc...

Page 87: ...on the LCD screen to display the touch panel keys again 6 Displays the Phone menu screen For details refer to Displaying the phone menu on page 28 7 Changes the wide screen mode For details refer to Changing the wide screen mode on page 126 Reading the screen 1 1 Current time and date Starting procedure You can display the video image output by the device connected to video input 1 Press the HOME ...

Page 88: ... 2 Touch the following keys in the follow ing order The Video Setup screen appears 3 Touch Video Signal Setting 4 Touch AV The pop up menu appears 5 Touch the item you want to set Auto default Adjusts the video signal setting automati cally PAL Sets the video signal to PAL NTSC Sets the video signal to NTSC PAL M Sets the video signal to PAL M PAL N Sets the video signal to PAL N SECAM Sets the vi...

Page 89: ...em selection screen For details of the operations refer to Se lecting an item to play songs on page 89 5 Displays the playback list screen For details of the operations refer to Se lecting songs not to be played on page 90 6 Sets to the original BPM Beats Per Minute 7 Specifies the playback portion For details of the operations refer to Specifying the playback portion on page 90 8 Touch to select ...

Page 90: ...ort portion p The most suitable sound effect is automati cally applied when switching to the next song Setting the flash pattern The flashing colour changes with the changes in the sound and bass levels 1 Press the HOME button to display the Top menu screen 2 Touch the following keys in the follow ing order The System screen appears 3 Touch MIXTRAX Settings 4 Touch Flash Pattern repeatedly until t...

Page 91: ... the follow ing order The System screen appears 3 Touch AV Source Settings 4 Touch Bluetooth Audio repeatedly until the desired setting appears On default Activates the Bluetooth audio source Off Deactivates the Bluetooth audio source Setting the ever scroll When Ever Scroll is set to On recorded text information scrolls continuously in the display Set to Off if you prefer the informa tion to scro...

Page 92: ...lines and the message will be displayed on the camera image after a little while Be sure to check the conditions around the vehicle even before the guidelines and the mes sage are displayed Camera for Camera View mode Camera View can be displayed at all times e g when monitoring an attached trailer etc Please note that with this setting the camera image is not resized to fit and that a portion of ...

Page 93: ...o set the rear view camera for Camera View mode Back Camera Input needs to be set to On For details refer to Setting rear view camera activation on page 92 1 Press the HOME button to display the Top menu screen 2 Touch the following keys in the follow ing order The System screen appears 3 Touch Camera settings 4 Touch Camera View repeatedly until the desired setting appears Off default Turns the c...

Page 94: ...vehicle width and distance The guidelines are straight lines The image quality may deteriorate depending on the usage environment such as at night or in dark surroundings 1 Park your vehicle in a safe place and apply the handbrake 2 Using packing tape or similar place markings approximately 25 cm from each side of the vehicle and approximately 50 cm and 2 m from the rear bumper Rear bumper 25 cm 5...

Page 95: ...off the demo screen If the demo screen appears perform the fol lowing procedure to turn off the demo screen 1 Press the HOME button to display the Top menu screen 2 Touch the following keys in the follow ing order The System screen appears 3 Touch Demo Mode repeatedly until the desired setting appears Off default Hides the demo screen On Displays the demo screen You can also turn off the demo scre...

Page 96: ...eatedly until the desired setting appears Off default Does not reverse the climate control status display On Reverses the climate control status dis play Setting the keyboard language with the application for iPhone You can use the keyboard in AppRadio Mode by setting the language of the keyboard for iPhone p This function is only available in AppRadio Mode on the iPhone 1 Press the HOME button to...

Page 97: ...button the adjustment is cancelled 7 Gently touch the centre of the mark displayed on the screen The target indicates the order After you touch all marks the adjusted posi tion data is saved If you press the HOME button the previous adjustment position returns If you press and hold the HOME button the adjustment is cancelled 8 Press and hold the HOME button The adjustment results are saved Adjusti...

Page 98: ...ghttime These are switched automatically depend ing on whether the vehicle s headlights are on or off p The adjustment of Dimmer is stored se parately when your vehicle s headlights are off daytime and when your vehicle s head lights are on nighttime Dimmer is switched automatically only when the value of nighttime is lower than that of daytime p The picture adjustment may not be avail able with s...

Page 99: ...leted if the up date is successful p When the firmware update starts the source is turned off and the Bluetooth con nection is disconnected p If an error message appears on the screen touch Continue to proceed and start the recovery sequence Checking the connections of leads Check that the leads are properly connected between this product and vehicle Also check whether they are connected in the co...

Page 100: ...d Rear to 0 when using a dual speaker system 5 Touch the following keys to adjust the left right speaker balance Moves towards the left Moves towards the right Each time you touch the keys the left right speaker balance moves towards the left or right p Left25 to Right25 is displayed as the left right speaker balance moves from the left to right p The default setting is L R 0 p You can also set th...

Page 101: ...ource levels SLA source level adjustment lets you adjust the volume level of each source to prevent ra dical changes in volume when switching be tween sources p Settings are based on the FM tuner volume level which remains unchanged p This function is not available when the FM tuner is selected as the AV source 1 Compare the FM tuner volume level with the level of the source you want to adjust 2 P...

Page 102: ...B port to which the device is connected The source level ad justment volume that is automatically set varies depending on whether the device is connected to USB port 1 or USB port 2 p When an iPod iPhone with a Lightning connector is connected to USB port 1 or USB port 2 using a USB interface cable for iPod iPhone CD IU52 sold separately the source level adjustment volume is auto matically set to ...

Page 103: ...ault setting is On 4 Touch Cross Over The Cutoff screen appears 5 Touch the following keys to select Front or Rear Selects the adjustable previous speak er Selects the adjustable next speaker 6 Touch HPF to turn on 7 Drag the line graph horizontally to ad just the range of cut off frequency from 50 Hz to 200 Hz p The default setting is 100 Hz 8 Drag the tip of the slope to adjust the range of leve...

Page 104: ...reen appears 3 Touch Listening Position The Listening Position screen appears 4 Touch the desired position Off default Changes the listening position setting to off Front Changes the listening position setting to front Front L Changes the listening position setting to front left Front R Changes the listening position setting to front right All Changes the listening position setting to all Adjustin...

Page 105: ...es the speaker level of the rear left speaker Rear Right Changes the speaker level of the rear right speaker Subwoofer Changes the speaker level of the subwoofer speaker If you touch Apply Auto EQ the result of A EQ TA Measurement will be applied to the speaker level setting p To use this function the vehicle s acoustics must be measured in advance Adjusting the time alignment By adjusting the dis...

Page 106: ...ed listening position Front Right Changes the distance between the front right speaker and the selected listening po sition Rear Left Changes the distance between the rear left speaker and the selected listening position Rear Right Changes the distance between the rear right speaker and the selected listening po sition Subwoofer Changes the distance between the subwoo fer speaker and the selected ...

Page 107: ...f you make adjustments when a curve S Bass Powerful Natural Vocal or Flat is selected the equaliser curve set tings will be changed to Custom1 man datorily p If you make adjustments when the Cus tom2 curve is selected for example the Custom2 curve will be updated p Custom1 and Custom2 curves can be created common to all sources 1 Press the HOME button to display the Top menu screen 2 Touch the fol...

Page 108: ... quiet a place as pos sible with the vehicle engine and air condi tioning switched off Also cut power to car phones or mobile phones in the vehicle or remove them from the vehicle before per forming Auto EQ Sounds other than the measurement tone surrounding sounds engine sound telephones ringing etc may prevent correct measurement of the vehicle s acoustics Be sure to perform Auto EQ using the mi ...

Page 109: ...n roof and then turn the engine off If the engine is left running engine noise may prevent correct Auto EQ p If driving restrictions are detected during measurement measurement is cancelled 2 Fix the microphone for acoustical mea surement sold separately in the centre of the headrest of the driver s seat facing for ward The Auto EQ may differ depending on where you place the microphone If desired ...

Page 110: ...e noise is emitted from the speakers and the Auto EQ measurement begins 13 Wait until the measurement is com pleted When Auto EQ is completed a message is dis played indicating that the measurement is completed p If the vehicle s acoustics cannot be mea sured correctly an error message will be displayed p The measurement time varies depending on the type of vehicle p To stop the measurement touch ...

Page 111: ...op menu screen or the AV operation screen by touching Home or AV respectively Creating a user defined colour You can create a user defined colour The cre ated colour is stored and you can select the colour when setting the illumination colour the next time 1 Press the HOME button to display the Top menu screen 2 Touch the following keys in the follow ing order The Theme screen appears 3 Touch Illu...

Page 112: ...ack ground display image stored on the exter nal device USB SD on page 112 off Hides the background display Changing to the background display image stored on the external device USB SD You can change the background display image to an image imported from the external device USB SD p Background display image must be used within the following formats JPEG image files jpg or jpeg Allowable data size...

Page 113: ...2 Touch the following keys in the follow ing order The Theme screen appears 3 Touch Clock p You can also change the screen for settings by touching Illumination Theme or Background on this screen 4 Touch the item you want to set Preset images Selects the desired preset clock image off Hides the clock display p You can preview the Top menu screen or the AV operation screen by touching Home or AV re...

Page 114: ...ve made on the Theme screen to an SD memory card These settings can be exported separately p This setting is available only when you stop your vehicle in a safe place and apply the handbrake CAUTION Do not turn off the engine while exporting the set tings 1 Insert an SD memory card into the SD card slot For details refer to Inserting and ejecting an SD memory card on page 15 2 Press the HOME butto...

Page 115: ...memory card 1 Insert the SD memory card into the SD card slot For details refer to Inserting and ejecting an SD memory card on page 15 A message confirming whether to import the stored setting data appears 2 Touch Import Data import starts When the data is successfully imported an import complete message is displayed p The source is turned off and the Bluetooth connection is disconnected before th...

Page 116: ... by touching the switch subtitle languages key during playback p The setting made here will not be affected even if the subtitle language is switched during playback using the switch subtitle languages key Setting the audio language You can set the preferred audio language 1 Press the HOME button to display the Top menu screen 2 Touch the following keys in the follow ing order The Video Setup scre...

Page 117: ... angle setting on Off Turns the multi angle setting off Setting the aspect ratio There are two kinds of displays A wide screen display has a width to height ratio TV aspect of 16 9 while a regular display has a TV aspect of 4 3 If you use a regular rear display with a TV aspect of 4 3 you can set the aspect ratio suitable for your rear display We recommend use of this function only when you want t...

Page 118: ...a code number the parental lock will not operate 1 Press the HOME button to display the Top menu screen 2 Touch the following keys in the follow ing order The Video Setup screen appears 3 Touch DVD DivX Setup 4 Touch Parental The Parental screen appears 5 Touch 0 to 9 to input a four digit code number 6 While the input number is displayed touch the following key Registers the code number and you c...

Page 119: ...provider Displaying your DivX VOD deregistration code A registration code registered with a deregis tration code can be deleted p This setting is available when the selected source is Disc CD Video CD or DVD 1 Press the HOME button to display the Top menu screen 2 Touch the following keys in the follow ing order The Video Setup screen appears 3 Touch DVD DivX Setup 4 Touch DivX VOD The DivX VOD sc...

Page 120: ...s the video signal setting automati cally PAL Sets the video signal to PAL NTSC Sets the video signal to NTSC PAL M Sets the video signal to PAL M PAL N Sets the video signal to PAL N SECAM Sets the video signal to SECAM Setting the video output format You can switch the video output format of the rear display between NTSC and PAL p The video output format setting has no ef fect on AUX AV and iPod...

Page 121: ...ngala sv 1922 Swedish da 0401 Danish lo 1215 Lao sw 1923 Swahili de 0405 German lt 1220 Lithuanian ta 2001 Tamil dz 0426 Dzongkha lv 1222 Latvian te 2005 Telugu el 0512 Greek mg 1307 Malagasy tg 2007 Tajik en 0514 English mi 1309 Maori th 2008 Thai eo 0515 Esperanto mk 1311 Macedonian ti 2009 Tigrinya es 0519 Spanish ml 1312 Malayalam tk 2011 Turkmen et 0520 Estonian mn 1314 Mongolian tl 2012 Taga...

Page 122: ...der The Favorites screen appears 3 Touch the star icon that you want to add to the favourite menu The star icon for the selected menu is filled in To cancel the registration touch the star icon in the menu column again Removing a shortcut 1 Press the HOME button to display the Top menu screen 2 Touch the following keys in the follow ing order The Favorites screen appears 3 Touch and hold the star ...

Page 123: ...p This function is only available for vehicles equipped with a parking sensor system p The Parking Assist screen is not dis played until the navigation screen has started 1 3 2 1 Switches the display to the rear view camera image p The display switches only when the rear view camera setting is set to On and the gearstick is in the REVERSE R po sition 2 Displays the position of detected obstacles 3...

Page 124: ... screen returns p If you do not operate the climate control panel for a few seconds the previous screen is displayed automatically 7 Displays the seat heating setting for the right seat 8 Displays the internal temperature setting for the right seat 9 Displays the fan direction a Displays the fan speed b Displays the internal temperature setting for the left seat c Displays the seat heating setting...

Page 125: ...it p The iTunes Tagging function is available while digital broadcasts are being received p This function is available for the following iPod models iPhone 5c iPhone 5s iPhone 5 iPhone 4s iPhone 4 iPhone 3GS iPhone 3G iPhone iPod touch 5th generation iPod touch 4th generation iPod touch 3rd generation iPod touch 2nd generation iPod touch 1st generation iPod classic iPod nano 6th generation iPod na...

Page 126: ...le this product is storing song informa tion transfer to an iPod is not possible Setting the Sound Retriever function The Sound Retriever function automatically enhances compressed audio and restores rich sound Touch the following key repeatedly until the desired setting appears on the AV operation screen Sets the Sound Retriever function Mode1 default Activates the Sound Retriever function Mode2 ...

Page 127: ...ical ratio differs between the display and the image the image may be displayed partly cut off either at the top bottom or sides p This setting is for JPEG images only p You cannot operate this function while driv ing p Different settings can be stored for each video source p When a video is viewed in a wide screen mode that does not match its original as pect ratio it may appear different p The v...

Page 128: ...patible file types are MPEG 4 H 264 WMV MKV and FLV only AV The video and sound of AV are output to the rear display The video image and sound are output only when AV has both video and sound The video image and sound are output only when the corresponding settings on AV Input is On For details refer to Setting AV input on page 91 SD The video and sound of the SD memory cards are output to the rea...

Page 129: ...s Entering the password On the password input screen you must enter the current password 1 Enter the password 2 Touch Go When the correct password is entered this product will be unlocked Deleting the password The current password and password hint can be deleted 1 Press the HOME button to display the Top menu screen 2 Touch the following keys in the follow ing order The System screen appears 3 To...

Page 130: ...s setting is available only when you stop your vehicle in a safe place and apply the handbrake CAUTION Do not turn off the engine while restoring the set tings 1 Press the HOME button to display the Top menu screen 2 Touch the following keys in the follow ing order The System screen appears 3 Touch Restore Settings 4 Touch the item you want to initialise All settings Audio settings p This setting ...

Page 131: ...eo skips This product is not firmly secured Secure this product firmly No sounds are produced The volume level will not rise Cables are not connected correctly Connect the cables correctly The system is performing still slow motion or frame by frame playback with DVD Video There is no sound during still slow motion or frame by frame playback with DVD Video The system is paused or performing fast r...

Page 132: ...ct back on Update the iPod software version Cables are not connected correctly Connect the cables correctly Sound from the iPod cannot be heard The audio output direction may switch automatically when the Bluetooth and USB connections are used at the same time Use the iPod to change the audio output di rection Problems with the phone screen Symptom Cause Action Dialling is impossible because the t...

Page 133: ...witched off on contact your dealer or an authorised Pioneer Service Station for assis tance Product overheat System will be shut down automatically in 1 minute Restart the pro duct by ACC Off On may fix this problem If this message keep showing up it is possi ble that some problem oc cured in the product The temperature is too high for this product to operate Follow the instructions displayed on t...

Page 134: ...ult your dealer Your device is not authorized to play this DivX protected video This product s DivX registration code has not been authorised by the DivX VOD contents provider Register this product to the DivX VOD con tents provider Video frame rate not sup ported DivX file s frame rate is more than 30 fps Select a file that can be played Audio Format not supported This type of file is not support...

Page 135: ...not use it Turn the ignition switch to OFF then to ACC or ON and then connect a com pliant USB storage device The USB interface cable for iPod iPhone is short circuited Confirm that the USB interface cable for iPod iPhone or USB cable is not caught in some thing or damaged Audio Format not supported This type of file is not supported on this product Select a file that can be played Page 142 Page 1...

Page 136: ...er forming the above action reset the smart phone If the error message is still displayed after per forming the above action please contact your dealer or an authorised Pioneer Service Sta tion There is no supportted appli cation on your MirrorLink de vice No supported applications can be found Install MirrorLink compliant applications to your MirrorLink device Communication error oc curred There ...

Page 137: ... making the disc un playable The labels may come off during play back and prevent ejection of the discs which may result in damage to the equipment To clean a disc wipe it with a soft cloth moving outward from the centre Condensation may temporarily impair the built in drive s performance Leave it to ad just to the warmer temperature for about one hour Also wipe any damp discs with a soft cloth Pl...

Page 138: ...roduct Frequent loading and ejecting of a DualDisc may result in scratches to the disc Serious scratches can lead to playback pro blems on this product In some cases a DualDisc may become stuck in the disc loading slot and will not eject To prevent this we recommend you refrain from using DualDisc with this product Please refer to the manufacturer for more detailed information about DualDiscs Dolb...

Page 139: ...m Common notes about the external storage device USB SD Do not leave the external storage device USB SD in any location with high tem peratures Depending on the kind of the external sto rage device USB SD you use this pro duct may not recognise the storage device or files may not be played back properly The text information of some audio and video files may not be correctly displayed File extensio...

Page 140: ...started This product corresponds to a DivX file dis play of up to 1 590 minutes 43 seconds Search operations beyond this time limit are prohibited DivX VOD file playback requires supplying the ID code of this product to the DivX VOD provider Regarding the ID code refer to Displaying your DivX VOD registration code on page 119 Plays all versions of DivX video except for DivX 7 with standard playbac...

Page 141: ...ntrol code For materials that use a high transfer rate the subtitles and video may not be comple tely synchronised If multiple subtitles are programmed to dis play within a very short time frame such as 0 1 seconds the subtitles may not be dis played at the correct time Engb 141 Appendix Appendix Appendix ...

Page 142: ...V Notes Maximum playback time of audio file stored in the disc 60 h Maximum playback time of audio file stored on an external storage device USB SD 7 5 h 450 minutes MP3 compatibility Media CD R RW DVD R R SL R DL DVD RW USB storage de vice SD memory card File extension mp3 Bit rate 8 kbps to 320 kbps CBR VBR Sampling frequency 16 kHz to 48 kHz 32 kHz 44 1 kHz 48 kHz for emphasis 8 kHz to 48 kHz I...

Page 143: ...e de vice SD memory card File extension WAV files on the CD R RW DVD R RW R SL R DL cannot be played wav Format Linear PCM LPCM Sampling frequency 16 kHz to 48 kHz Quantisation bits 8 bits and 16 bits Note The sampling frequency shown in the display may be rounded AAC compatibility Media CD R RW DVD R R SL R DL DVD RW USB storage de vice SD memory card File extension m4a Bit rate 8 kbps to 320 kbp...

Page 144: ...6 pixels Maximum file size 4 GB Notes This product is not compatible with the following DivX Ultra format DivX files without video data DivX files encoded with LPCM Linear PCM audio codec Depending on the file information composition such as the number of audio streams there may be a slight delay in the start of playback on discs If a file contains more than 4 GB playback stops before the end Some...

Page 145: ...s Depending on the version of Windows Media Player used to encode WMA files album names and other text information may not be correctly displayed There may be a slight delay when starting playback of audio files encoded with image data This product is not compatible with packet write data transfer This product can recognise up to 32 char acters beginning with the first character including extensio...

Page 146: ...er a registered trade mark or trademark of Microsoft Corporation in the United States and or other countries p This product includes technology owned by Microsoft Corporation and cannot be used or distributed without a licence from Microsoft Licensing Inc DivX DivX is a compressed digital video format cre ated by the DivX video codec from DivX LLC a subsidiary of Rovi Corporation This unit can pla...

Page 147: ...cepts no responsibility for data lost from an iPod even if that data is lost while using this product Please back up your iPod data regularly Do not leave the iPod in direct sunlight for ex tended amounts of time Extended exposure to direct sunlight can result in iPod malfunc tion due to the resulting high temperature Do not leave the iPod in any location with high temperatures Firmly secure the i...

Page 148: ...ellular and or Wi Fi network coverage for the purpose of al lowing your smartphone to connect to the In ternet Service availability may be geographically lim ited to the region Consult the connected con tent service provider for additional information Ability of this product to access connected content is subject to change without notice and could be affected by any of the following compatibility ...

Page 149: ...should be used within the temperature ranges shown in Specifica tions Do not use the LCD screen at temperatures higher or lower than the operating tem perature range because the LCD screen may not operate normally and could be da maged The LCD screen is exposed in order to in crease its visibility within the vehicle Please do not press strongly on it as this may damage it Do not push the LCD scree...

Page 150: ...egrade the image quality because of the character istics of the LCD screen Image quality will improve with an increase in temperature The product lifetime of the LED backlight is more than 10 000 hours However it may decrease if used in high temperatures If the LED backlight reaches the end of its product lifetime the screen will become dimmer and the image will no longer be visible In that case p...

Page 151: ...oct Subwoofer Frequency 50 Hz 63 Hz 80 Hz 100 Hz 125 Hz 160 Hz 200 Hz Slope 6 dB oct 12 dB oct 18 dB oct Gain 10 dB to 24 dB Phase Normal Reverse Time alignment 0 to 200 step 2 5 cm step DVD drive System DVD Video VCD CD MP3 WMA AAC DivX JPEG MPEG player Usable discs DVD VIDEO VIDEO CD CD CD R CD RW DVD R DVD RW DVD RDL Region number 2 Frequency response 5 Hz to 44 000 Hz with DVD at sampling freq...

Page 152: ...VE signal format Linear PCM H 264 video decoding format BaseLine Profile Main Pro file High Profile WMV video decoding format VC 1 SP MP AP WMV 7 8 MPEG4 video decoding format SimpleProfile Advanced SimpleProfile except GMC JPEG decoding format JPEG Bluetooth Version Bluetooth 3 0 EDR certi fied Output power 4 dBm Max Power class 2 FM tuner Frequency range 87 5 MHz to 108 0 MHz Usable sensitivity ...

Page 153: ...Engb 153 ...

Page 154: ...Engb 154 ...

Page 155: ...Engb 155 ...

Page 156: ...12 0031 JAPAN PIONEER EUROPE NV Haven 1087 Keetberglaan 1 B 9120 Melsele Belgium Belgique TEL 0 3 570 05 11 PIONEER ELECTRONICS USA INC P O Box 1540 Long Beach California 90801 1540 U S A TEL 800 421 1404 2014 PIONEER CORPORATION All rights reserved CRB4367 A EW KOKZ13L ...

Reviews: