background image

Playing a disc

1

3

5 6

2

4

You can use this unit to control a DVD player or

multi-DVD player, which is sold separately.

For details concerning operation, refer to the

DVD player

s or multi-DVD player

s operation

manual. This section provides information on

DVD operations with this unit which differs

from that described in the DVD player

s or

multi-DVD player

s operation manual.

!

Switch the remote control selection to sui-

table setting to operate DVD players. (Refer

to page 93.)

!

Switch the remote control operation mode

to

DVD

to operate the DVD player by using

remote control. (Refer to page 17.)

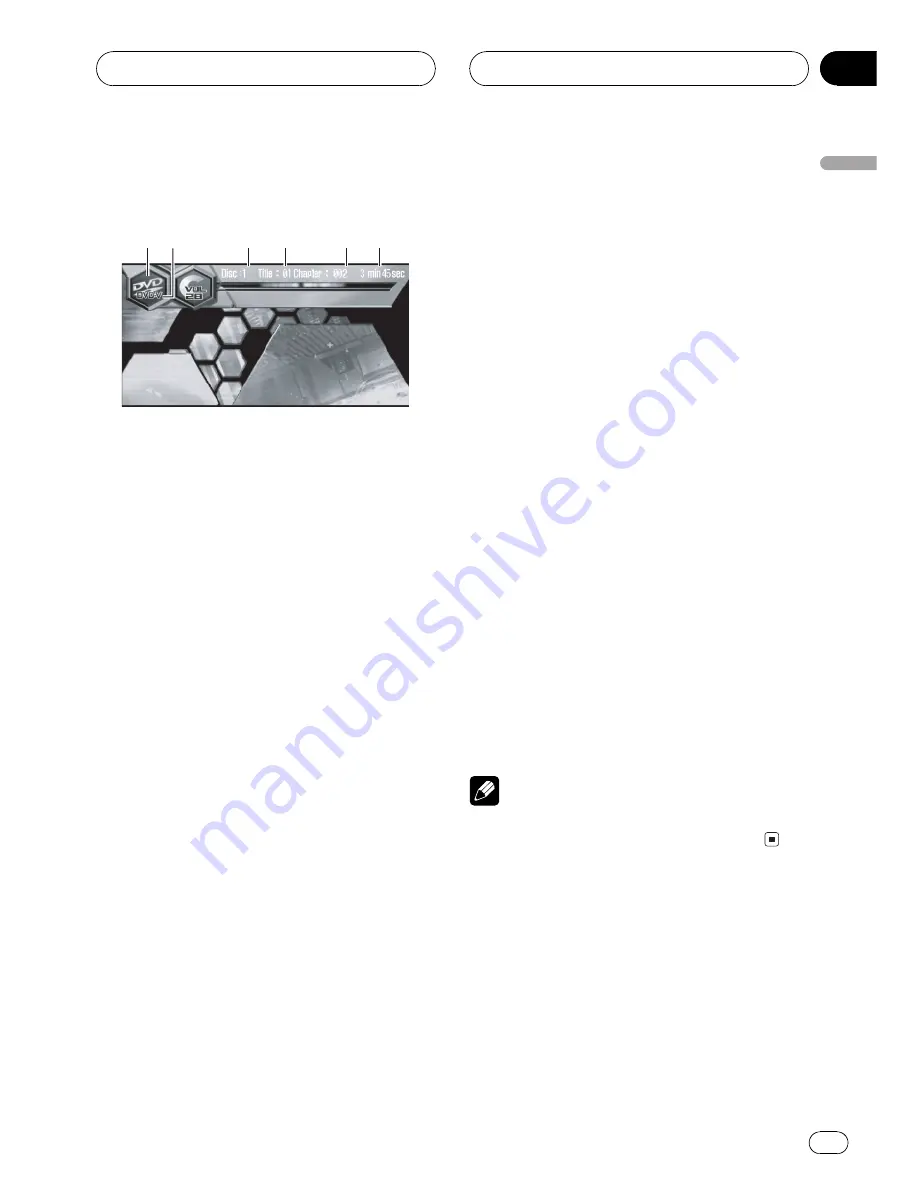
1

Source icon

Shows which source has been selected.

2

Disc type indicator

Shows the type of the currently playing disc.

3

Disc number indicator

Shows the disc currently playing when

using a multi-DVD player.

4

Title number indicator

Shows the title currently playing during

DVD video playback.

5

Chapter/track number indicator

Shows the chapter/track currently playing.

6

Play time indicator

Shows the elapsed playing time of the cur-

rent chapter/track.

1 Touch the source icon and then touch

S-DVD to select the DVD player.

#

When the source icon is not displayed, you

can display it by touching the screen.

2 Touch the screen to display the touch

panel keys.

3 To skip back or forward to another

chapter/track, briefly touch

c

or

d

.

#

You can also skip back or forward to another

chapter/track by moving the joystick left or right.
When using the joystick on the remote control,
switch the remote control operation mode to

AVH

. (Refer to page 17.)

4 To perform fast forward or reverse,

keep touching

c

or

d

for about one second

and release.

#

You can also perform fast reverse/fast forward

by holding the joystick left or right.
When using the joystick on the remote control,
switch the remote control operation mode to

AVH

. (Refer to page 17.)

Note

If you do not use the touch panel keys within 30
seconds, they will be hidden automatically.

Turning the DVD player on

or off

!

Only the remote control can operate this

function. To perform this function, switch

the remote control operation mode to

DVD

.

(Refer to page 17.)

DVD Player

En

69

Section

14

DVD

Player

Summary of Contents for AVH-P6600DVD

Page 1: ...Operation Manual AV Receiver DVD Player with 6 5 inch Wide Display AVH P6600DVD English ...

Page 2: ...ng the unit off 20 Using the rear display 20 Displaying the navigation image 21 Touch panel key basic operation 21 Opening and closing the LCD panel 22 Changing the wide screen mode 23 Adjusting the picture adjustment 24 Protecting your unit from theft 25 Tuner Listening to the radio 27 Introduction of advanced tuner operation 28 Storing and recalling broadcast frequencies 28 Tuning in strong sign...

Page 3: ...d built in DVD player MP3 WMA operation 52 Repeating play 52 Playing tracks in a random order 52 Scanning folders and tracks 53 Pausing MP3 WMA playback 53 Searching for a desired track in the current folder 53 Displaying text information on MP3 WMA disc 53 Scrolling text information in the display 54 Selecting tracks from the file name list 54 Multi CD Player Listening to a CD 55 50 disc multi CD...

Page 4: ...ignal Processor Introduction of DSP adjustments 78 Using the sound field control 78 Using the position selector 79 Using balance adjustment 79 Adjusting source levels 80 Using the dynamic range control 80 Using the down mix function 80 Using the direct control 81 Using the Dolby Pro Logic B 81 Setting the speaker setting 82 Selecting a cut off frequency 83 Adjusting the speaker output levels 83 Ad...

Page 5: ...ut 99 Setting for rear view camera 99 Selecting the video of rear display 100 Setting the automatic open function 100 Setting the clock 100 Setting the display appearance 101 Using the AUX source 101 Switching the background display 102 Using the PGM button 103 Additional Information Troubleshooting 104 Error messages 106 Understanding auto TA and EQ error messages 106 DVD player and care 108 DVD ...

Page 6: ...ll times while operating your vehicle If you are ever in an accident your injuries can be considerably more severe if your seat belt is not properly buckled 9 Never use headphones while driving To ensure safe driving WARNING LIGHT GREEN LEAD AT POWER CON NECTOR IS DESIGNED TO DETECT PARKED STATUS AND MUST BE CON NECTED TO THE POWER SUPPLY SIDE OF THE PARKING BRAKE SWITCH IM PROPER CONNECTION OR US...

Page 7: ...Video CD or TV while driving To avoid battery exhaustion Be sure to run the vehicle engine while using this unit Using this unit without running the engine can result in battery drainage WARNING Do not use with vehicles that do not feature an ACC position Precautions En 7 Section 01 Precautions ...

Page 8: ...atest version of the navigation map disc that is correspond ing to the touch panel operation When you use this unit with the Pioneer DVD navigation unit make sure that you use the map disc CNDV 30 or later This manual ex plains the operations with the combined use of them If you do not use the map disc CNDV 30 but use an older version with the navigation unit this unit may have some failures or in...

Page 9: ...y covers or attempt to gain access to the inside of the product Refer all servicing to qualified personnel The following labels appear on your unit Location On the bottom of the unit CLASS1 LASER PRODUCT On the top of the unit The Pioneer CarStereo Pass is for use only in Germany Keep this manual handy as a reference for operating procedures and precautions Always keep the volume low enough so tha...

Page 10: ...wise images will not be correctly reproduced Dolby Digital DTS compatibility When using this unit with a Pioneer multi channel processor you can enjoy the atmo sphere and excitement provided by DVD movie and music software featuring 5 1 channel re cordings Manufactured under license from Dolby La boratories Dolby and the double D sym bol are trademarks of Dolby Laboratories DTS is a registered tra...

Page 11: ...tc For viewing LCD comfortably Due to its construction the view angle of the LCD screen is limited The viewing angle verti cal and horizontal can be increased however by using BRIGHT to adjust the black density of the video When using for the first time adjust the black density in accordance with the view ing angle vertical and horizontal to adjust for clear viewing DIMMER can also be used to adju...

Page 12: ...o ACC ON before pressing RESET Use and care of the remote control Installing the battery Slide the tray out on the back of the remote control and insert the battery with the plus and minus poles pointing in the proper di rection When using for the first time pull out the film protruding from the tray WARNING Keep the battery out of the reach of children Should the battery be swallowed immediately ...

Page 13: ...ote control may not function prop erly in direct sunlight Important Do not store the remote control in high tem peratures or direct sunlight Do not let the remote control fall onto the floor where it may become jammed under the brake or accelerator pedal Before You Start En 13 Section 02 Before You Start ...

Page 14: ...rightness of the display to compensate for ambient light 5 FLIP DOWN CLOCK button Press to turn the LCD panel horizontal tem porarily from upright position Press to turn the clock display on or off when the LCD panel is closed 6 OPEN CLOSE button Press to open or close the LCD panel 7 ENTERTAINMENT button Press to switch between the background displays 8 WIDE button Press to select a desired mode ...

Page 15: ...mode of functions g ANGLE button Press to change the LCD panel angle h ATT button Press to quickly lower the volume level by about 90 Press once more to return to the original volume level i BACK TEXT button Press to return to the previous display Press and hold to turn radio text display on or off j REAR ON button Press to watch a DVD Video CD on a rear display if DVD built in DVD player is not s...

Page 16: ...arch controls Also used for controlling functions 6 Remote control operation mode switch Switch the operation mode between AVH DVD and TV modes Normally set to AVH AVH For common operation of this unit DVD Only for DVD player operation TV Only for TV tuner operation For details refer to Using the remote control operation mode switch on the next page 7 BOOKMARK BOOK M button AVH mode Press to opera...

Page 17: ...DVD playback k STEP r q button Press to move ahead one frame at a time during DVD VideoCD playback Press and hold for one second to activate slow play back l SUBTITLE S TITLE button Press to change the subtitle language dur ing DVD playback m DISPLAY button Press to select different displays n AUDIO button Press to change the audio language during DVD playback o RETURN button Press to display the ...

Page 18: ... Note With the mode switched to DVD you cannot use these buttons BACK ENTERTAINMENT and DISPLAY TV mode operation If you use the rear output on TV tuner you can watch the TV picture on the rear display inde pendently To operate the TV on the rear dis play independently switch the mode to TV In this case the joystick operation is changed for TV For details concerning operation refer to the TV tuner...

Page 19: ...M CD multi CD player EXT 1 external unit 1 EXT 2 exter nal unit 2 AUX AUX NAVI navigation unit Notes In the following cases the sound source will not change When there is no unit corresponding to the selected source connected to this unit When there is no disc in the unit When there is no disc in the DVD player When there is no magazine in the multi CD player When there is no magazine in the multi...

Page 20: ... to in crease or decrease the volume With the remote control press VOLUME to in crease or decrease the volume Turning the unit off When using the touch panel keys touch the source icon and then touch OFF When the source icon is not displayed you can display it by touching the screen When using the button press SOURCE and hold until the unit turns off Using the rear display You can watch a DVD Vide...

Page 21: ... the re mote control Switching to the navigation image Press V ADJ to switch the display to na vigation image To return to the video of each source press V ADJ again Touch panel key basic operation Activating the touch panel keys 1 1 Touch panel keys Touch to do various operations 1 Touch the screen to activate the touch panel keys corresponding to each source The touch panel keys appear on the di...

Page 22: ... also perform most of the menu items by using the joystick Switch the remote control operation mode to AVH to operate the menu by using the joystick on the remote control Refer to page 17 1 Click the joystick during display of each source to display MENU MENU appears on the display 2 Move the joystick up or down and then click it to display the function names you want to operate To go to the next ...

Page 23: ...o press ANGLE Forcibly adjusting the LCD panel by hand may damage it Press ANGLE to adjust the LCD panel to an easily viewable angle The LCD panel angle continues changing as long as you press ANGLE and hold The adjusted the LCD panel angle will be memorized and automatically returned to the next time the LCD panel is opened Turning the LCD panel horizontal When the LCD panel is upright and it hin...

Page 24: ...iny when viewed in CINEMA or ZOOM mode The navigation map and the backup camera picture is always FULL Adjusting the picture adjustment You can adjust BRIGHT brightness CONTRAST contrast COLOR color and HUE hue for each source and rear view cam era The adjustments of BRIGHT and CONTRAST are stored separately for light ambient daytime and dark ambient night time A sun or moon is displayed to the le...

Page 25: ... The farther yellow moves to the right the brighter the screen 4 Touch ESC to hide the touch panel keys Note The icons indicating the current ambient bright ness used for adjusting BRIGHT and CONTRAST may differ from DIMMER slightly Protecting your unit from theft The front panel can be detached from the head unit to discourage theft If the front panel is not detached from the head unit within fiv...

Page 26: ...Attaching the front panel Replace the front panel by holding it upright to the unit and clipping it securely into the mounting hooks Basic Operations En 26 Section 04 ...

Page 27: ... TUNER to select the tuner When the source icon is not displayed you can display it by touching the screen 2 Touch the screen to display the touch panel keys 3 Touch BAND to select a band Touch BAND repeatedly until the desired band is displayed FM1 FM2 FM3 for FM or MW LW 4 To perform manual tuning briefly touch c or d The frequencies move up or down step by step You can also perform manual tunin...

Page 28: ...re in memory keep touching one of preset tuning keys P1 P6 until the preset number stops flashing The number you have touched will flash in the preset number indicator and then remain lit The selected radio station frequency has been stored in memory The next time you touch the same preset tun ing key the radio station frequency is recalled from memory When the touch panel keys are not displayed y...

Page 29: ...and once stored there you can tune in to those frequencies with the touch of a key 1 Touch A MENU and FUNCTION and then touch BSM 2 Touch a to turn BSM on BSM begins to flash While BSM is flashing the six strongest broadcast frequencies will be stored under preset tuning keys P1 P6 in order of their signal strength When finished BSM stops flashing To cancel the storage process touch b Note Storing...

Page 30: ... can dis play it by touching the screen You can also display MENU by clicking the joystick To go to the next group of function names touch NEXT To return to the previous group of function names touch PREV To return to the previous display touch BACK To return to the frequency display touch ESC Notes If you do not operate the function within about 30 seconds the display is automatically re turned t...

Page 31: ...becomes weak the unit will automatically search for a different station with the same programming During the search PI SEEK is displayed and the output is muted The muting is discontinued after com pletion of the PI Seek whether or not a differ ent station is found Using Auto PI Seek for preset stations When preset stations cannot be recalled as when travelling long distances the unit can be set t...

Page 32: ...s being received to cancel the announcement The tuner returns to the original source but re mains in the standby mode until TA NEWS is pressed again You can also cancel the announcement by pressing SOURCE or BAND ESC or by moving the joystick while a traffic announcement is being received Notes You can also turn the TA function on or off using TA To display TA touch A MENU and then touch FUNCTION ...

Page 33: ...tation stops broadcasting the emergency announcement the system re turns to the previous source An emergency announcement can be can celled by pressing TA NEWS You can also cancel an emergency an nouncement by pressing SOURCE or BAND ESC or by moving the joystick Using radio text This tuner can display radio text data trans mitted by RDS stations such as station infor mation the name of the curren...

Page 34: ... previous page 2 Press any buttons 1 6 and hold to store the selected radio text The memory number will display and the se lected radio text will be stored in memory The next time you press the same button in the radio text display the stored text is recalled from memory RDS En 34 Section 06 ...

Page 35: ... music Nat Mus National music Oldies Oldies music golden oldies Folk Mus Folk music Classics L Class Light classical music Classic Serious classical music Others Educate Educational programs Drama All radio plays and serials Culture National or regional culture Science Nature science and technology Varied Light entertainment Children Children s Social Social affairs Religion Religious affairs or s...

Page 36: ...aded in the unit you cannot se lect DVD DVD player Insert a disc in the unit Refer to page 20 With some discs a menu may be displayed Refer to Operating the DVD menu on the next page 2 Touch the screen to display the touch panel keys 3 To skip back or forward to another chapter touch o or p Touching p skips to the start of the next chapter Touching o once skips to the start of the current chapter ...

Page 37: ...the desired menu item 3 Touch ENTER Playback starts from the selected menu item If you switch the remote control operation mode to DVD the joystick on the remote control can also operate the DVD menu Refer to page 17 You cannot operate the DVD menu from the joystick on the head unit The way to display the menu differs depending on the disc Skipping back or forward to another title To skip back or ...

Page 38: ...t 1 Touch A MENU and FUNCTION and then touch REPEAT 2 Touch any of the following touch panel keys to select the repeat range TITLE Repeat just the current title CHAPTER Repeat just the current chapter REPEAT OFF Play through the current disc Notes If you perform chapter search or fast forward reverse the repeat play range changes to REPEAT OFF You cannot operate repeating play when DVD DISC AUTO i...

Page 39: ...t possible With some discs images may be unclear dur ing slow motion playback Reverse slow motion playback is not possi ble Searching for a desired scene starting playback from a specified time You can use the search function to search for a desired scene by specifying a title or chapter and the time search function to specify the time on a disc at which play starts Chapter search and time search ...

Page 40: ...s Notes You can also switch between languages audio systems using AUDIO on the remote control The number in the 2 mark on a DVD s pack age indicates the number of recorded lan guages audio systems With some DVDs switching between lan guages audio systems may only be possible using a menu display You can also switch between languages audio systems using DVD SETUP For details refer to Setting the au...

Page 41: ...were shot Touching ANGLE during fast forward fast re verse pause or slow motion playback returns you to normal playback Resume playback Bookmark The Bookmark function lets you resume play back from a selected scene the next time the disc is loaded During playback press BOOKMARK BOOK M at the point you want to resume playback next time The selected scene will be bookmarked so that playback resumes ...

Page 42: ...hen the menu is two or more pages long touch o or p to switch between displays You can display the menu by pressing RETURN during PBC playback For details refer to the instructions provided with the disc After operating the menu we recommend that you switch remote control operation mode to AVH Refer to page 17 3 Touch the screen to display the touch panel keys 4 To skip back or forward to another ...

Page 43: ...u select the range for repeat play Note PBC playback of Video CD cannot be cancelled Introduction of advanced Video CD operation 1 1 Function display Shows the function names Touch A MENU and then touch FUNCTION to display the function names The function names are displayed and oper able ones are highlighted When A MENU is not displayed you can dis play it by touching the screen You can also displ...

Page 44: ... This lets you move ahead one frame at a time during playback Touch r during playback Each time you touch r you move ahead one frame To return to normal playback touch f Notes Depending on the disc and the playback loca tion on the disc the icon may be displayed indicating that frame by frame playback is not possible With some discs images may be unclear dur ing frame by frame playback Slow motion...

Page 45: ...and 3 in that order To select 1 hour 11 minutes convert the time into 71 minutes 00 seconds and touch 7 1 0 and 0 in that order To cancel the inputted numbers touch C You can also input the desired number by using the joystick and 0 9 4 While the inputted number is dis played touch ENTER This starts playback from the selected scene Selecting audio output You can switch between stereo and monaural ...

Page 46: ...er track touch o or p Touching p skips to the start of the next track Touching o once skips to the start of the current track Touching it again will skip to the previous track You can also skip back or forward to another track by moving the joystick left or right 4 Touch d to display m and n Touch d until m and n appear in the dis play 5 To perform fast forward or reverse keep touching m or n You ...

Page 47: ...1 Touch A MENU and FUNCTION and then touch REPEAT 2 Touch either of the following touch panel keys to select the repeat range TRACK Repeat just the current track DISC Repeat the current disc Notes If you perform track search or fast forward re verse repeat play is automatically cancelled When playing discs with MP3 WMA files and audio data CD DA repeat play performs within the currently playing da...

Page 48: ...touch ENTER This starts playback from the selected track Entering disc titles You can input CD titles and display the title The next time you insert a CD for which you have entered a title the title of that CD will be displayed Use the disc title input feature to store up to 48 CD titles in the unit Each title can be up to 10 characters long When playing a CD TEXT disc you cannot switch to TITLE E...

Page 49: ...ort the functions listed below Displaying titles on CD TEXT discs Touch DISP Touch DISP repeatedly to switch between the following settings Disc Title disc title Disc Artist disc artist name TrackTitle track title Track Artist track artist name If specific information has not been recorded on a CD TEXT disc NO XXXX will be displayed e g NO ARTIST Scrolling titles in the display This unit can displ...

Page 50: ...layer Insert a disc in the unit Refer to page 20 2 Touch the screen to display the touch panel keys 3 To skip back or forward to another track touch o or p Touching p skips to the start of the next track Touching o once skips to the start of the current track Touching it again will skip to the previous track You can also skip back or forward to another track by moving the joystick left or right 4 ...

Page 51: ...ed as VBR variable bit rate When playing back files recorded as VBR variable bit rate files the play time will not be correctly displayed if fast forward or reverse operations are used If the inserted disc contains no files that can be played back NO AUDIO is displayed If the inserted disc contains WMA files that are protected by digital rights management DRM TRK SKIPPED is displayed while the pro...

Page 52: ...U and FUNCTION and then touch REPEAT 2 Touch any of the following touch panel keys to select the repeat range FOLDER Repeat the current folder TRACK Repeat just the current track DISC Repeat all tracks Notes If you select another folder during repeat play the repeat play range changes to DISC If you perform track search or fast forward re verse during TRACK the repeat play range changes to FOLDER ...

Page 53: ... on or off using PAUSE To display PAUSE touch A MENU and then touch FUNCTION Searching for a desired track in the current folder You can use the search function to specify a track to search for a desired track Track search is not possible when disc play back has been stopped 1 Touch A MENU and FUNCTION and then SEARCH 2 Touch TRACK 3 Touch 0 9 to input the desired num ber To select 3 touch 3 To se...

Page 54: ...text to the left so that the rest of the text information can be seen Keep touching DISP until the text infor mation begins to scroll to the left The rest of the text information will appear in the display Selecting tracks from the file name list File name list lets you see the list of file names or folder names and select one of them to playback 1 Touch A MENU and FUNCTION and then touch FOLDER T...

Page 55: ... DISP You can also sequentially select a disc by using a b 4 To skip back or forward to another track touch c or d Touching d skips to the start of the next track Touching c once skips to the start of the cur rent track Touching again will skip to the pre vious track You can also skip back or forward to another track by moving the joystick left or right 5 To perform fast forward or reverse keep to...

Page 56: ...one track repeat and DISC disc repeat 1 Touch A MENU and FUNCTION and then touch REPEAT 2 Touch to select the repeat range Touch repeatedly until the desired repeat range appears in the display M CD Repeat all discs in the multi CD player TRACK Repeat just the current track DISC Repeat the current disc You can also select the repeat range by mov ing the joystick left or right Notes If you select o...

Page 57: ...those in the multi CD player magazine After you have added your favorite tracks to the playlist you can turn on ITS play and play just those selec tions Creating a playlist with ITS programming You can use ITS to enter and play back up to 99 tracks per disc up to 100 discs with the disc titles With multi CD players sold before the CDX P1250 and CDX P650 up to 24 tracks can be stored in the playlis...

Page 58: ... your ITS playlist and playback of the next track from your ITS playlist begins If there are no tracks from your playlist in the current range ITS EMPTY is displayed and nor mal play resumes Erasing a CD from your ITS playlist When you want to delete all tracks of a CD from your ITS playlist you can if ITS play is off 1 Play the CD that you want to delete Touch a or b to select the CD 2 Touch A ME...

Page 59: ... the entered title in memory 8 Touch ESC to return to the playback dis play Notes Titles remain in memory even after the disc has been removed from the magazine and are recalled when the disc is reinserted After data for 100 discs has been stored in memory data for a new disc will overwrite the oldest one Displaying disc titles You can display the title of any disc that has had a disc title entere...

Page 60: ...uch TRACK LIST 2 Touch or to switch between the lists of titles 3 Touch your favorite track title That selection will begin to play Using compression and bass emphasis You can use these functions only with a multi CD player that supports them Using COMP compression and DBE dy namic bass emphasis functions lets you ad just the sound playback quality of the multi CD player Each of the functions has ...

Page 61: ...o which service the DAB tuner is tuned 5 WEATHER indicator Shows when area weather flash is received 6 ANNOUNCE indicator Shows when announcement is received 7 NEWS indicator Shows when news announcement is re ceived 8 TRAFFIC indicator Shows when traffic announcement is re ceived 9 TEXT indicator Shows that the currently received service has a dynamic label a Preset list display Shows the preset ...

Page 62: ...s Touch A MENU and then touch FUNCTION to display the function names The function names are displayed and oper able ones are highlighted When A MENU is not displayed you can dis play it by touching the screen You can also display MENU by clicking the joystick To return to the previous display touch BACK To return to the frequency display touch ESC Note If you do not operate the function within abo...

Page 63: ... assigned to preset tuning keys P01 P06 You can also perform the same operations using P CH MEMO To display P CH MEMO touch A MENU and then touch FUNCTION Setting the announcement support interruption 1 Touch A MENU and FUNCTION and then touch AS 2 Touch or to select the desired an nouncement support Touch to select ANNOUNCE announce ment Touch to select WEATHER area weather flash 3 Touch to turn ...

Page 64: ...and then touch PTY SEARCH 2 Touch or to switch between the lists of available PTYs 3 Touch your favorite available PTY to begin the PTY search DAB receives the desired PTY service Notes The PTY method displayed is narrow The wide method cannot be selected when using DAB as source If no service broadcasting the selected pro gramming type is found NOT FOUND is dis played for about two seconds and th...

Page 65: ...l You can store data from up to six dynamic label transmissions at buttons 1 6 1 Display the dynamic label you want to store in memory Refer to Displaying dynamic label on the pre vious page 2 Press any buttons 1 6 and hold to store the selected dynamic label The memory number will display and the se lected dynamic label will be stored in memory The next time you press the same button in the dynam...

Page 66: ... can display it by touching the screen 2 Touch the screen to display the touch panel keys 3 Touch BAND to select a band Touch BAND repeatedly until the desired band is displayed TV1 or TV2 4 To perform manual tuning briefly touch c or d The channels move up or down step by step You can also perform manual tuning by mov ing the joystick left or right 5 To perform seek tuning keep touching c or d fo...

Page 67: ...ashing The number you have touched will flash in the preset number indicator and then remain lit The selected station has been stored in mem ory The next time you touch the same preset tun ing key the station is recalled from memory To switch between P01 P06 and P07 P12 touch or When the touch panel keys are not displayed you can display them by touching the screen When P01 P06 and P07 P12 are not...

Page 68: ...NCTION and then touch COUNTRY 2 Touch or to select the country group Touch or until the desired country group appears in the display COUNTRY 1 CCIR channel COUNTRY 2 Italy channel COUNTRY 3 U K channel COUNTRY 4 OIRT channel TV tuner En 68 Section 13 ...

Page 69: ... Play time indicator Shows the elapsed playing time of the cur rent chapter track 1 Touch the source icon and then touch S DVD to select the DVD player When the source icon is not displayed you can display it by touching the screen 2 Touch the screen to display the touch panel keys 3 To skip back or forward to another chapter track briefly touch c or d You can also skip back or forward to another ...

Page 70: ...D Introduction of advanced DVD player operation 1 1 Function display Shows the function names Touch A MENU and then touch FUNCTION to display the function names The function names are displayed and oper able ones are highlighted When A MENU is not displayed you can dis play it by touching the screen You can also display MENU by clicking the joystick To return to the previous display touch BACK To ...

Page 71: ...h b Scanning tracks of a CD You can operate this function only during CD playback 1 Touch A MENU and FUNCTION and then touch SCAN 2 Touch a to turn scan play on The first 10 seconds of each track is played 3 When you find the desired track touch b to turn scan play off Using ITS playlists You can operate these functions only when a multi DVD player is connected to this unit This function differs s...

Page 72: ...output and subwoofer controller on page 96 When selecting the FM tuner as the source you cannot switch to SLA To return to the previous display touch BACK To return to the display of each source touch ESC Note If you do not operate the audio function within about 30 seconds the display is automatically re turned to the source display Using balance adjustment You can select a fader balance setting ...

Page 73: ...alizer curves by switching alternatively between FLAT and a set equalizer curve Press EQ to select the equalizer Press EQ repeatedly to switch between the fol lowing equalizers SUPER BASS POWERFUL NATURAL VOCAL CUSTOM FLAT Adjusting equalizer curves You can adjust the currently selected equalizer curve setting as desired Adjusted equalizer curve settings are memorized in CUSTOM You can adjust the ...

Page 74: ...fer to Setting the sound focus equalizer SFEQ on page 77 1 Touch A MENU and AUDIO and then touch BASS 2 Touch or to select the desired fre quency Touch or until the desired frequency ap pears in the display 40Hz 63Hz 100Hz 160Hz 3 Touch or to adjust the bass level Each time you touch or increases or de creases the bass level 6 6 is displayed as the level is increased or decreased Adjusting treble ...

Page 75: ...e level is increased or de creased 5 Touch and then touch or to se lect cut off frequency Each time you touch or selects cut off frequencies in the following order 50Hz 80Hz 125Hz Only frequencies lower than those in the se lected range are outputted from the sub woofer Using nonfading output When the nonfading output setting is on the audio signal does not pass through this unit s low pass filter...

Page 76: ...t the source vo lume Each time you touch a or b it increases or de creases the source volume 4 4 is displayed as the source volume is increased or decreased Notes The MW LW tuner volume level can also be adjusted with source level adjustments Video CD CD and MP3 are set to the same source level adjustment volume automatically DVD and the optional DVD player are set to the same source level adjustm...

Page 77: ... 1 Touch A MENU and AUDIO and then touch NEXT 2 Touch SFEQ EQ EX and then touch SFEQ 3 Touch or to select the desired SFEQ setting Touch or repeatedly to switch between the following settings OFF off FRONT1 H front 1 high FRONT1 L front 1 low FRONT2 H front 2 high FRONT2 L front 2 low CUSTOM custom 4 Touch or to select the desired po sition Touch or until the desired position ap pears in the displ...

Page 78: ...ction names touch PREV When playing discs recorded with more than 96 kHz sampling frequency you cannot use audio functions Also equalizer curve setting POSITION AUTO EQ and AUTO TA will be can celled When playing discs recorded with more than 96 kHz sampling frequency audio is outputted from front speaker only When selecting the FM tuner as the source you cannot switch to SLA When playing other th...

Page 79: ...nd position of occupied seats When used in con junction with the SFC the feature will make the sound image more natural and offer a pa noramic sound that envelops you 1 Touch A MENU and DSP and then touch POSITION 2 Touch c d a b to select a listening po sition Touch one of these c d a b to select a lis tening position as listed in the table Key Display Position c FRONT L Front seat left d FRONT R...

Page 80: ...et to the same source level adjustment volume auto matically DVD and the optional DVD player are set to the same source level adjustment volume automatically External unit 1 and external unit 2 are set to the same source level adjustment volume automatically AUX auxiliary input and AV video input are set to the same source level adjustment vo lume automatically Using the dynamic range control The ...

Page 81: ...uch NEXT 2 Touch DOLBY PRO LOGIC B 3 Touch any of the following touch panel keys to select the desired mode MOVIE The Movie mode suitable for movie playback MUSIC The Music mode suitable for music playback MATRIX The Matrix mode for when FM radio reception is weak OFF Turn Dolby Pro Logic B off MUSIC ADJUST Adjust the Music mode You can operate MUSIC ADJUST only when MUSIC has been selected Adjust...

Page 82: ... to OFF and the front and rear speakers set to SMALL or OFF It is imperative that non installed speakers be set to OFF Set the front or rear speaker to LARGE if the speaker is capable of reproducing bass content or if no subwoofer is installed 1 Touch A MENU and DSP and then touch NEXT 2 Touch SPEAKER SETTING 3 Touch or to select the speaker to be adjusted Each time you touch or selects the speake...

Page 83: ...h sounds are reproduced through the subwoo fer If the installed speakers include one whose size has been set to SMALL you can select a frequency under which sounds are repro duced through a LARGE speaker or subwoo fer 1 Touch A MENU and DSP and then touch NEXT 2 Touch CROSS OVER 3 Touch or to select the speaker to be adjusted Each time you touch or selects the speaker in the following order FRONT ...

Page 84: ...you hear the test tone are shown in the display FRONT L front speaker left CENTER center speaker FRONT R front speaker right REAR R rear speaker right REAR L rear speaker left SUB WOOFER subwoofer Check each speaker output level If no adjust ments are needed perform step 5 to stop the test tone You can also start the test tone output by mov ing the joystick up The settings do not appear for speake...

Page 85: ...1 Touch A MENU and DSP and then touch NEXT 2 Touch TIME ALIGNMENT and then touch ADJUSTMENT You cannot select ADJUSTMENT when neither FRONT L nor FRONT R is selected in POSITION 3 Touch the speaker to be adjusted You cannot select speakers whose size is set at OFF 4 Touch a or b to adjust the distance be tween the selected speaker and the listen ing position Each time you touch a or b increases or...

Page 86: ... speaker output to the balance you have already got among the other speakers 1 Touch A MENU and DSP and then touch NEXT twice 2 Touch PARAMETRIC EQ 3 Touch or to select the desired item Each time you touch or selects the item in the following order SP SEL speakers BAND bands FREQUENCY center frequency LEVEL equalizer level Q FACTOR Q factor 4 Touch or to select the speaker to be adjusted Touch or ...

Page 87: ...tically ad justed for the distance between each speaker and the listening position The auto equalizer automatically measures the car interior acoustic characteristics and then creates the auto equalizer curve based on that information WARNING To prevent accidents never carry out auto TA and EQ while driving When this function measures the car interior acoustic characteristics to create an auto equ...

Page 88: ...in the following circumstances However the distance has been calculated by computer to be the optimum delay to give accurate results for the circum stances so please continue to use this value When the reflected sound within a vehi cle is strong and delays occur When delays occur for low sounds due to the influence of the LPF on active subwoofers or external amps Auto TA and EQ changes the audio s...

Page 89: ... the 10 second count down starts The measurement tone noise is outputted from the speakers and auto TA and EQ be gins When all speakers are connected auto TA and EQ is completed in about nine minutes To stop auto TA and EQ touch STOP To cancel auto TA and EQ part way through touch BACK or ESC 10 When auto TA and EQ is completed Complete is displayed When correct measurement of car interior acousti...

Page 90: ...on within about 30 seconds the display is automati cally returned to the playback display Setting the subtitle language You can set a desired subtitle language If the selected subtitle language is recorded on the DVD subtitles are displayed in that language 1 Touch SETUP and LANGUAGE and then touch SUB TITLE LANGUAGE A subtitle language menu is displayed and the currently set language is highlight...

Page 91: ...uring playback Multi audio on page 40 Even if you use AUDIO to switch the audio language this does not affect the settings here Setting the menu language You can set the preferred language for dis plays of menus recorded on a disc 1 Touch SETUP and LANGUAGE and then touch MENU LANGUAGE A menu language menu is displayed and the currently set language is highlighted To switch to the second language ...

Page 92: ...t do not specify PANSCAN playback is with LETTER BOX even if you select PANSCAN setting Confirm whether the disc package bears the 16 9 LB mark See page 11 Some discs do not enable changing of the TV aspect For details refer to the disc s in structions Setting the parental lock Some DVD video discs let you use parental lock to restrict the viewing of violent and adult oriented scenes by children Y...

Page 93: ...is set If you forget your code number Refer to Changing the level on this page and touch C 10 times The registered code number is canceled letting you register a new one Automatic playback of DVDs When a DVDs disc with DVD menu is inserted this unit will cancel the DVD menu automati cally and start playback from the first chapter of the first title Some DVDs may not operate properly If this functi...

Page 94: ...to take the following procedure If you select A B mode take the following procedure and change the code type to the appropriate type 2 Press 7 and 0 on the remote control si multaneously to change the code type Initially the code type is set to A Each time you press 7 and 0 simultaneously on the re mote control the code type switches between A and B Setting up the DVD player En 94 Section 17 ...

Page 95: ... the display of each source touch ESC Setting the FM tuning step Normally the FM tuning step employed by seek tuning is 50 kHz When AF or TA is on the tuning step automatically changes to 100 kHz It may be preferable to set the tuning step to 50 kHz when AF is on 1 Touch A MENU and INITIAL and then touch FM STEP 2 Touch c or d to select the FM tuning step Touching c or d will switch the FM tuning ...

Page 96: ...liary amp Initially the unit is set for rear full range speak er connection FULL When rear output is connected to full range speakers when FULL is selected you can connect the RCA sub woofer output to a subwoofer In this case you can select whether to use the subwoofer con troller s low pass filter phase built in SUB W or the auxiliary FULL When the multi channel processor e g DEQ P6600 is connect...

Page 97: ... sound muting attenuation Sound from this system is muted attenuated or mixed automatically in the following cases When a call is made or received using a cellular telephone connected to this unit When the voice guidance is output from a Pioneer navigation unit connected to this unit 1 Touch A MENU and INITIAL and then touch NEXT 2 Touch TEL GUIDE 3 Touch or to select any of the mut ing attenuatio...

Page 98: ...idance voice only You can operate this function only when a Pioneer navigation unit is connected to this unit When the multi channel processor e g DEQ P6600 is connected to this unit you cannot use this function We recommend that you select GUIDE to ensure quality sound 1 Touch A MENU and INITIAL and then touch NEXT 2 Touch NAVI MIXING 3 Touch a or b to switch the mixing of navigation voice beep T...

Page 99: ...ap pears in the display OFF No video component is connected VIDEO External video component M DVD DVD player connected with RCA cable When a DVD player is connected with an AV BUS cable do not select M DVD otherwise no picture will be displayed even if you select S DVD Setting for rear view camera CAUTION Pioneer recommends the use of a camera which outputs mirror reversed images other wise screen ...

Page 100: ...e selected source on rear display NAVI Display the navigation image on rear display Setting the automatic open function To prevent the display from hitting the shift lever of an automatic vehicle when it is in P park position or when you do not wish the display to open close automatically you can set the automatic open function in the manual mode Furthermore to adjust the LCD panel slide po sition...

Page 101: ...ackground pic ture MOTION TEXT motion text setting 3 Touch or to select the touch panel key color Touch to select the touch panel key color blue and BLUE appears in the display Touch to select the touch panel key color silver and SILVER appears in the display Changing the touch panel key color switches the skin of the SPEANA1 spectrum analyzer 1 and LEVEL METER2 level meter 2 Refer to Switching th...

Page 102: ...e order such as Z Y X C B A 4 Touch to move the cursor to the next character position When the desired letter is displayed touch to move the cursor to the next next position and then select the next letter Touch to move backwards in the display 5 Touch OK to store the entered title in memory 6 Touch ESC to return to the playback dis play Switching the background display You can switch background d...

Page 103: ...K M Press BOOK M to turn pause on when selecting the following sources DVD Built in DVD player S DVD DVD player multi DVD player M CD Multi CD player To turn pause off press BOOK M again Press BOOK M and hold to turn BSM on when selecting TUNER as the source Press BOOK M and hold until the BSM turns on To cancel the storage process press BOOK M again Press BOOK M and hold to turn BSSM on when sele...

Page 104: ... disc is loaded Change to a disc compatible to your video system No sounds are heard The volume level will not rise Cables are not connected correctly Connect the cables correctly The unit is performing still slow mo tion or frame by frame playback There is no sound during still slow motion or frame by frame playback There is no picture The parking brake cord is not con nected Connect a parking br...

Page 105: ... the disc menu Switch using the disc menu No subtitles are displayed The DVD playing does not feature subtitles Subtitles are not displayed if they are not re corded on the disc You can only switch between items indicated in the disc menu Switch using the disc menu Playback is not with the audio language and subtitle language settings selected in DVD SETUP The DVD playing does not feature dialog o...

Page 106: ... this unit Replace the DVD video with one bearing the correct region number NON PLAYABLE DISC NON PLAY This type of disc cannot be played by this unit Replace the disc with one this unit can play The disc is loaded upside down Check that the disc is loaded correctly THERMAL PROTECTION IN MOTION TEMP The temperature of this unit is out side the normal operating range Wait until the unit s temperatu...

Page 107: ...ophone cannot pick up the measuring tone of a speaker Confirm that the speakers are connected correctly Correct the input level setting of the power amp connected to the speakers Set the microphone correctly Error check noise The surrounding noise level is too high Stop your car in a place that is as quiet as possible and switch off the engine air condi tioner or heater Set the microphone correctl...

Page 108: ...ible to play back some DVD video discs When DVD R DVD RW discs are used playback is possible only for discs which have been finalized When DVD R DVD RW discs are used playback is possible only for discs which have been recorded with the Video format video mode It is not possible to play back DVD RW discs which have been recorded with the Video Recording format VR mode It may not be possible to pla...

Page 109: ...d CD RW discs Disc recordings compatible with level 1 and level 2 of ISO9660 and with the Romeo and Joliet file system can be played back It is possible to play back multi session compatible recorded discs MP3 WMA files are not compatible with packet write data transfer The maximum number of characters which can be displayed for a file name including the extension mp3 or wma is 64 from the first c...

Page 110: ...e able to enjoy sound of a certain quality we recommend using only discs recorded with a bit rate of at least 128 kbps WMA additional information This unit plays back WMA files encoded by Windows Media Player version 7 and 8 You can only play back WMA files in the fre quencies 32 44 1 and 48 kHz The sound quality of WMA files generally becomes better with an increased bit rate This unit can play r...

Page 111: ...g the display When the display is subjected to direct sun light for a long period of time it will be come very hot resulting in possible damage to the LCD screen When not using this unit close the display and avoid exposing it to direct sunlight The display should be used within the tem perature ranges shown below Operating temperature range 10 to 50 C Storage temperature range 20 to 80 C At tempe...

Page 112: ...ed to direct sunlight When using a portable phone keep the an tenna of the portable phone away from the display to prevent disruption of the video by the appearance of spots colored stripes etc Keeping the display in good condition When removing dust from the screen or cleaning the display first turn the system power off then wipe with the supplied cloth When wiping the screen take care not to scr...

Page 113: ...14 Sesotho st 1920 Azerbaijani az 0126 Kashmiri ks 1119 Sundanese su 1921 Bashkir ba 0201 Kurdish ku 1121 Swahili sw 1923 Byelorussian be 0205 Kirghiz ky 1125 Tamil ta 2001 Bulgarian bg 0207 Latin la 1201 Telugu te 2005 Bihari bh 0208 Lingala ln 1214 Tajik tg 2007 Bislama bi 0209 Laothian lo 1215 Thai th 2008 Bengali bn 0214 Lithuanian lt 1220 Tigrinya ti 2009 Tibetan bo 0215 Latvian lv 1222 Turkm...

Page 114: ...e year of production comments and other data The contents can be freely edited using software with ID3 Tag editing functions Although the tags are restricted as to the num ber of characters the information can be viewed when the track is played back ISO9660 format This is the international standard for the for mat logic of CD ROM folders and files For the ISO9660 format there are regulations for t...

Page 115: ...ting in the course of transmis sion is minimized An optical digital output input is designed to transmit and receive digi tal signals optically Packet write This is a general term for a method of writing on CD R etc at the time required for a file just as is done with files on floppy or hard discs Parental lock Some DVD video discs with violent or adult or iented scenes feature parental lock which...

Page 116: ...n priority sound quality WMA WMA is short for Windows Media Audio and refers to an audio compression technol ogy that is developed by Microsoft Corpora tion WMA data can be encoded by using Windows Media Player version 7 or later Microsoft Windows Media and the Windows logo are trademarks or registered trademarks of Microsoft Corporation in the United States and or other countries Additional Infor...

Page 117: ...x output level output impedance 4 0 V 100 W Equalizer 3 Band Parametric Equalizer Low Frequency 40 80 100 160 Hz Q Factor 0 35 0 59 0 95 1 15 6 dB when boosted Gain 12dB Mid Frequency 200 500 1k 2k Hz Q Factor 0 35 0 59 0 95 1 15 6 dB when boosted Gain 12dB High Frequency 3 15k 8k 10k 12 5k Hz Q Factor 0 35 0 59 0 95 1 15 6 dB when boosted Gain 12dB Loudness contour Low 3 5 dB 100 Hz 3 dB 10 kHz M...

Page 118: ...ity 10 dBf 0 9 µV 75 W mono Signal to noise ratio 75 dB IEC A network Distortion 0 3 at 65 dBf 1 kHz stereo 0 1 at 65 dBf 1 kHz mono Frequency response 30 15 000 Hz 3 dB Stereo separation 45 dB at 65 dBf 1 kHz Selectivity 80 dB 200 kHz MW tuner Frequency range 531 1 602 kHz 9 kHz Usable sensitivity 18 µV S N 20 dB Signal to noise ratio 65 dB IEC A network LW tuner Frequency range 153 281 kHz Usabl...

Page 119: ...TS 10 114 H Hue 24 L Language code chart 113 Linear PCM LPCM 114 M Menu language 91 MPEG 115 Multi angle 41 115 Multi audio 40 115 Multi subtitle 40 115 O Optical digital output input 115 P Parental lock 92 115 PBC playback control 42 Playback control PBC 115 R Region number 8 115 S Subtitle language 40 90 T Title 115 TV aspect 92 V Video CD 8 W Wide screen mode 23 Index En 119 ...

Page 120: ...ECTRONICS AUSTRALIA PTY LTD 178 184 Boundary Road Braeside Victoria 3195 Australia TEL 03 9586 6300 PIONEER ELECTRONICS OF CANADA INC 300 Allstate Parkway Markham Ontario L3R OP2 Canada TEL 905 479 4411 PIONEER ELECTRONICS DE MEXICO S A de C V Blvd Manuel Avila Camacho 138 10 piso Col Lomas de Chapultepec Mexico D F 11000 TEL 55 9178 4270 HÒ ý Plø lø ð q ï µ44_13 ûq 02 2521 3588 HÒûP Plø w Î LFm Ã...

Reviews: