


Note that the images are for illustration purposes only; the actual images may differ.
7.
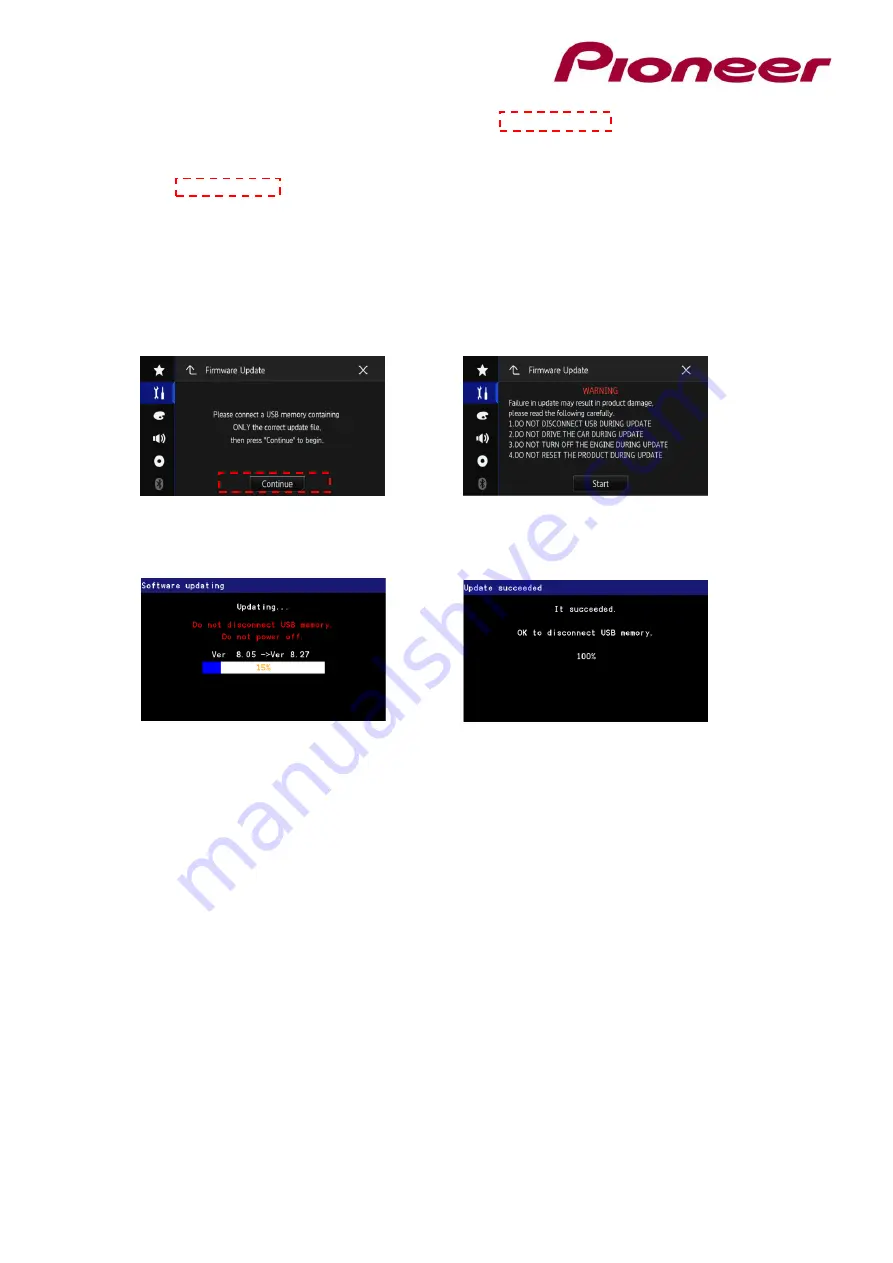
The “Firmware Update” screen appears
. Touch [Continue] to display the data transfer
mode.
Read the “WARNING,” then touch the [Start] button to start the update process. If
it shows “ERROR” on the d
isplay, try another USB device.
8.
After starting, there will be a progress bar while updating. When the update is complete,
the display will show: “It succeeded…”
(Please note: version number will differ from image below.)
9.
The product will reboot when the update finished.
Do not touch anything even when
the screen is blacked out.
After rebooting, the screen will return to the menu screen.
10.
The firmware update is now complete. Your Pioneer AV Receiver is now ready for use.
Check the firmware version as described in paragraph A
“
Displaying the firmware
version
”
to confirm that the update was successful.
Contact Information
Pioneer Customer Support Center
http://www.pioneer.eu
------------------------------------------------------------
Copyright(c) 2019 Pioneer Corporation


