Printer Installation Guide
3
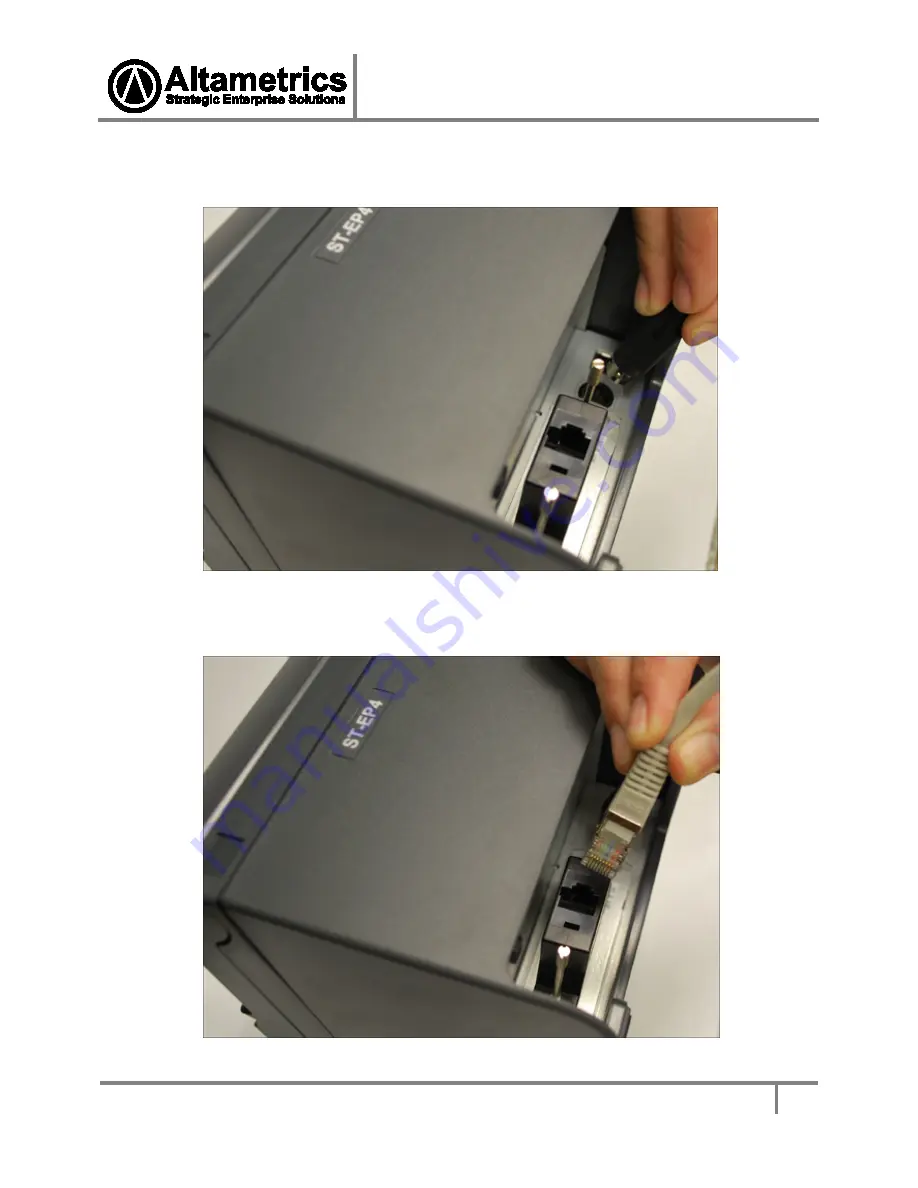
2.
Connect the power supply to the designated 24V power port, also located on the back of
the printer.
3.
Connect the included RJ-45 Ethernet printer cable to the 25-pin DB connector that we
connected in
Step 1
.
Page 1: ...Printer Installation Guide 1 Asterix ST EP4 Printer Installation Guide This guide will walk you through connecting the Asterix ST EP4 printer to an Altametrics e Smart All in One Station ...
Page 2: ...er it is already connected by default to COM1 on the computer It is also possible however to connect an Asterix ST EP4 thermal remote printer to an S Line Series terminal to work with Hula POS by following the steps outlined below 1 Connect the included black 25 pin DB connector to the labeled 25 pin RS 232 port on the back of the printer ...
Page 3: ...ion Guide 3 2 Connect the power supply to the designated 24V power port also located on the back of the printer 3 Connect the included RJ 45 Ethernet printer cable to the 25 pin DB connector that we connected in Step 1 ...
Page 4: ...to COM2 Note It is a good idea to note down which COM port the printer has been connected for future reference as you will need this information when configuring the printer s in the Hula software 5 Your printer is now physically connected to the station For instructions on enabling and configuring printers in the HulaPOS software please refer to our Getting Started Guide ...