


18
Setting the A419 Control Set point Value
To view and adjust Set point, follow these steps:
1.
Press and hold MENU (about 2 seconds) until the display flashes SP.
2.
Press MENU again to display the existing set point value.
3.
Press Up or Down (arrows) to change the set point value.
4.
Press MENU again to save the new value. The display returns to the sensed temperature.
Note
: If no setup entry is made for 30 seconds, the control reverts to the (normal) temperature
display.
IMPORTANT:
If MENU is not presses after changing the set point value, the control reverts the
previously programmed set point value.
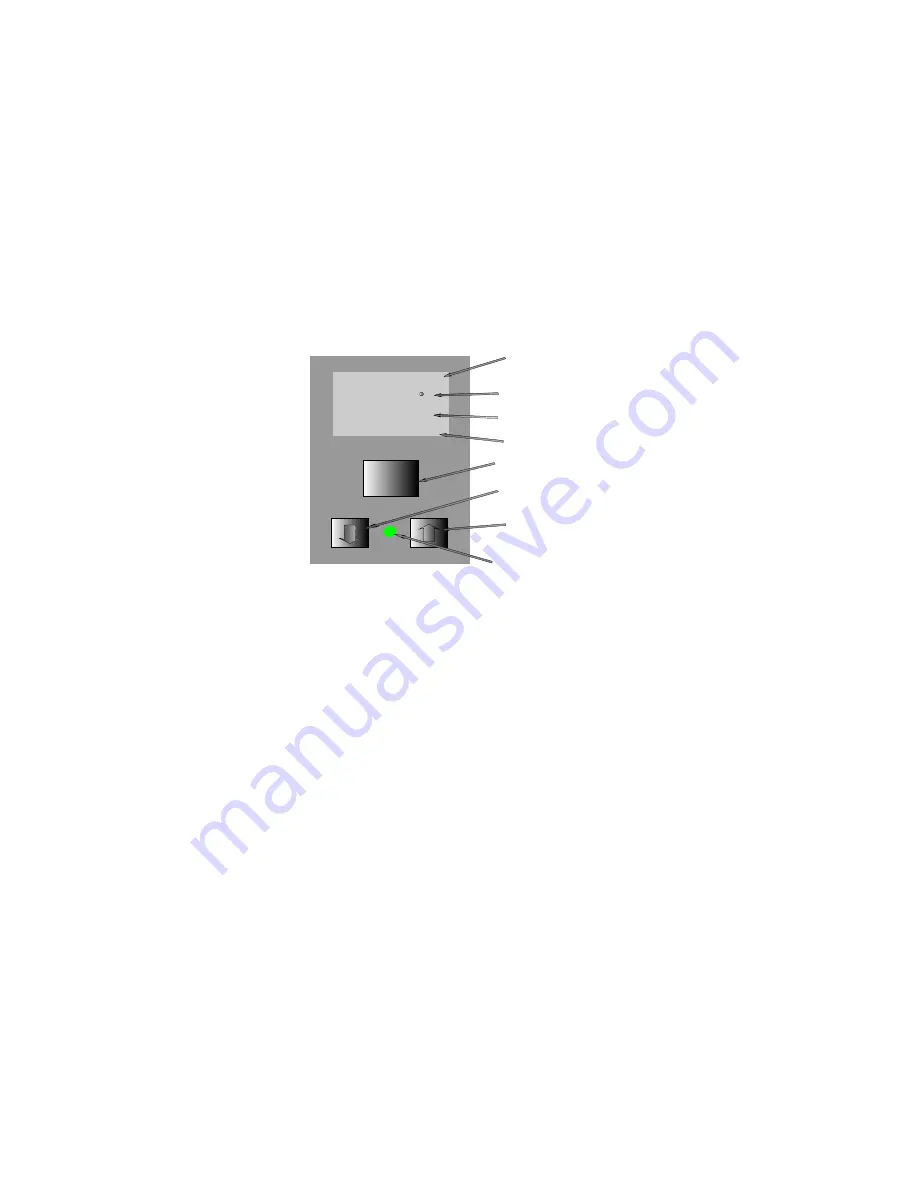
Figure 6: Liquid Crystal Display, Touchpad, and LED Indicator
Settings on the Other A419 Control Functions
To set the Differential, Anti-short Cycle Delay, Temperature Offset, or Sensor failure operation, use the
following method.
1.
Press and hold Menu until the display changes to flashing SP. (This takes about 2 seconds.)
2.
Press Up or Down (arrows) repeatedly until the desired function is displayed. (See Table 3.)
3.
Press Menu to display the functions current value.
4.
Press Up or Down (arrows) until the desired value is displayed.
5.
Press MENU to save the new value. The display returns to the sensor temperature.
IMPORTANT
: If MENU is not pressed after changing the settings, the new settings are no saved and
the control reverts to the previously programmed setting values.
NOTE:
If no setup entry is made for 30 seconds, the control reverts to the (normal) temperature
display.
NOTE:
Any saved A419 control settings are non-volatile and remain in the control’s memory during
power interruptions.
MENU
-10
BIN
F
*
Temperature
Offset Indicator
Temperature
Units Indicator
Operating Mode
Indicator
Liquid Crystal
Display
Menu Button
Down Arrow
Key
Up Arrow
Key
Output Relay
Status Indicator
LED
*