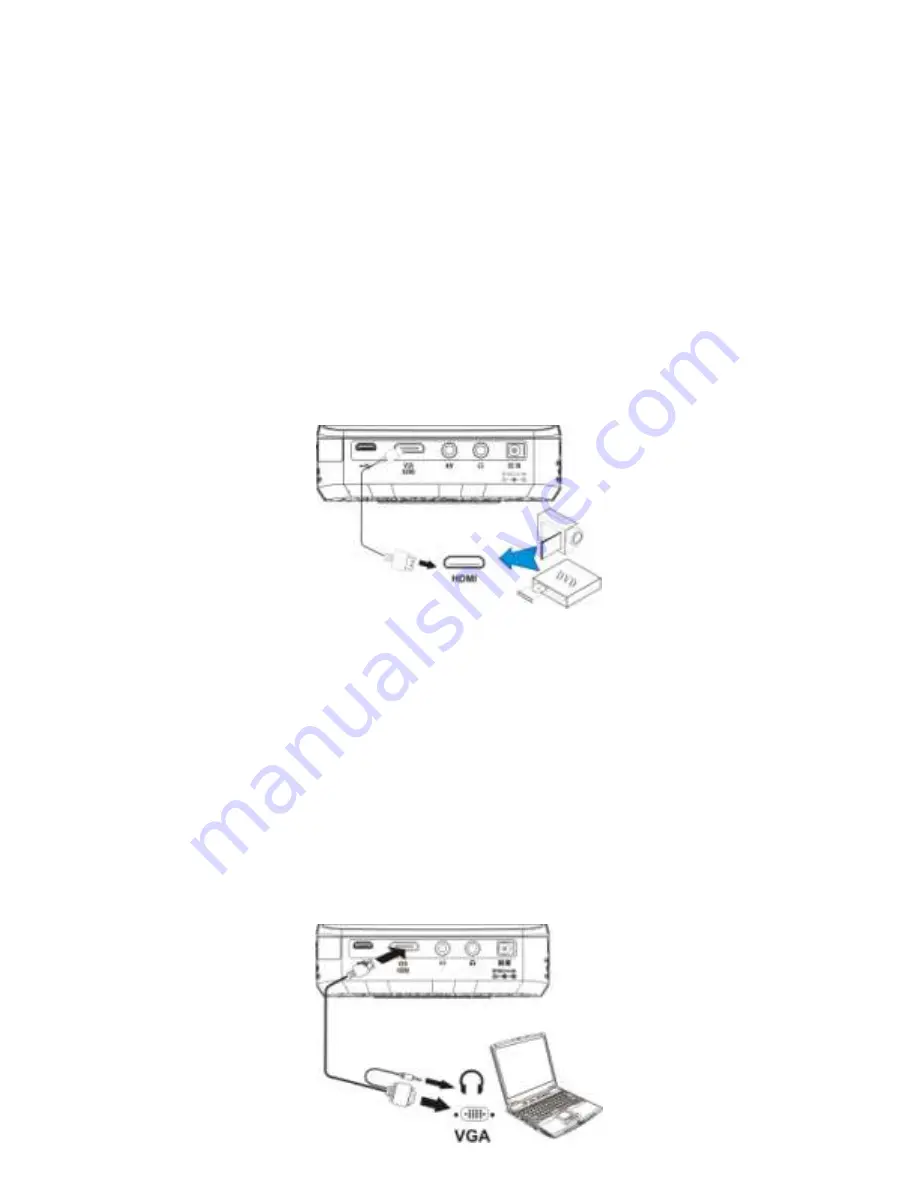
PICO MPP-14001 User Manual Download Page 9


HDMI 

1.


Use HDMI cable to connect the mini HDMI port on rear the panel of 

the  projector  to  the  external  HDMI  signal  source.  Ensure  that  the 

HDMI input signal is enabled. 

2.


Enter “Source” on main menu and select “HDMI ”mode. 


VGA 

Use Mini HDMI to VGA cable (optional) to connect the HDMI port on the 

rear panel of the projector to PC or other external source. 

1.


Plug one end of Mini HDMI to VGA Cable into the mini HDMI port 

on the projector. 

2.


Plug  the  other  end  of  the  cable  into  the  VGA  connector  on  PC  or 

other external source. 

3.


Enter “Source” on main menu and select “VGA” mode. 


Summary of Contents for MPP-14001

Page 1: ...Pico Projector MPP 14001 FCC ID 2ACX4MPP14001 User Manual...

Page 2: ...hat the used power outlet is always readily available and never hidden In case of emergency use the power adapter to separate the device from the power network 4 Keep your device away from all flames...

Page 3: ...duct and user s manual are subject to further improvement or supplement without further notice 16 Avoid facing directly into the projector s lens 17 The device should not be used in a very dusty envir...

Page 4: ...change or modifications to the equipment not expressly approved by the party responsible for compliance could void your authority to operate such equipment If the time arises to throw away your produc...

Page 5: ...xternal Source 7 Connecting USB Device 9 Connecting your PC Used as USB Storage Device 9 Using Headphone 10 Power Bank Function 11 Functions and Operations 12 Main Menu 12 Videos 12 Pictures 13 Music...

Page 6: ...power bank mode the power bank indicator lights and slide and hold on for about 3s to turn on the device under power on mode slide to enter standby mode and slide again to resume slide and hold on for...

Page 7: ...10 Next File Button 11 Volume Adjustment Button Warning Improper use of the battery may cause overheating explosion or ignition which can result in an injury or a fire Battery leakage may damage the r...

Page 8: ...t use Battery Status Monitor During charging the battery charge indicator is red It turns colorless automatically when the battery is fully charged Projecting from External Source AV IN 1 Follow the f...

Page 9: ...on main menu and select HDMI mode VGA Use Mini HDMI to VGA cable optional to connect the HDMI port on the rear panel of the projector to PC or other external source 1 Plug one end of Mini HDMI to VGA...

Page 10: ...r manual to make relative settings Connecting micro SD Card A built in memory card reader is available for reading micro SD card Gently insert the card until it reached the bottom of the slot To remov...

Page 11: ...music from your PC to the internal memory or delete the files on the internal memory Note Please switch off USB debugging in Developer options of Setting menu before connecting to PC Using Headphone...

Page 12: ...mobile phone charging 1 When projector is off you can slide the power switch to turn on off power bank function 2 When projector is on select Power Bank on the main menu and activate it the screen wi...

Page 13: ...em and press OK to enter the submenu press to return to Main Menu Note Before Video Picture Music playback please store available files into the flash memory or insert micro SD card connect USB device...

Page 14: ...controller to adjust the volume Note The Projector supports the following video formats MJPEG MPEG 1 2 MPEG 4 H 263 H 264 Pictures Select and play images 1 The pictures are shown as thumbnail Press t...

Page 15: ...ess to pause the music and press it again to resume normal playback Note The projector supports the following music formats MP3 WAV WMA AAC Source When projecting from external AV source HDMI AV or VG...

Page 16: ...and press OK to open it and surf on Internet Press to return to Main Menu Settings Wi Fi 1 On the settings menu select Wi Fi press to enter WiFi setting and press OK to turn on WiFi 2 A moment later...

Page 17: ...ion connect your projector with a mouse so that you can use the function conveniently 1 On the settings menu select Bluetooth press to enter Bluetooth setting and press OK to turn on Bluetooth 2 Turn...

Page 18: ...creen will come up a tip and disappear very quickly Don t worry about it 6 Just drag down the task bar in the top left corner of the screen by using a mouse the screen will come up a window tap to ope...

Page 19: ...select Language Input and then press OK and to enter submenu to set language and keyboard and input method etc USB Debugging Function Use USB cable to connect projector to PC Press to select Developer...

Page 20: ...rs projection For long time projection you are recommended to use AC adapter If it is low battery without charging the projector will shut down automatically When the battery is too low to stay in ope...

Page 21: ...Brightness AC Mode Up to ANSI 80 Lumens Battery Mode Up to ANSI 50 Lumens Focus Manual Lens Offset 100 Internal Memory 4 GB Internal Speaker Mono USB Micro USB USB AV source AV in 3 5 mm mini jack PAL...

Page 22: ...for a Class B digital device pursuant to part 15 of the FCC Rules These limits are designed to provide reasonable protection against harmful interference in a residential installation This equipment g...

Reviews: