background image

20

3.5  Configure Ethernet Interface

The Ethernet interface can be configured under menu item


Setup

 > 

Interfaces

The following parameters are necessary for operating the printer in a network. 

Contact your network administrator if required.
•  IP address
•  Subnet mask
•  if necessary gateway

Alternatively, the Ethernet configuration is also available via DHCP server. In this 

case, make sure that the transmitted configuration is always the same.

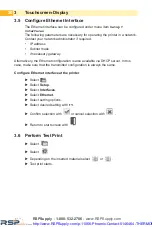
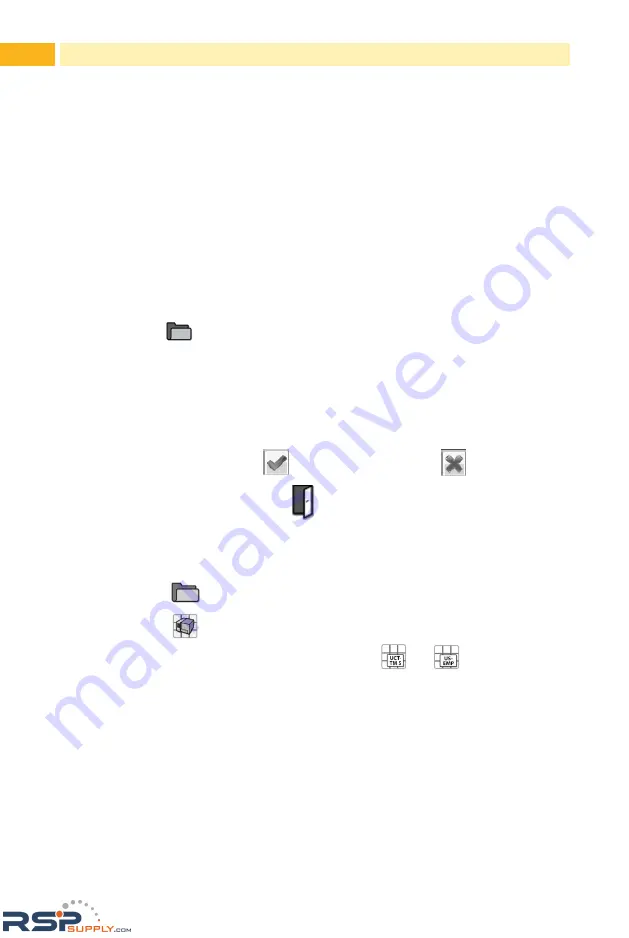
Configure Ethernet interface at the printer


Select 

.


Select 

Setup

.


Select 

Interfaces

.


Select 

Ethernet

.


Select setting options.


Select desired setting with 

}


|

.


Confirm selection with 

or cancel selection with 

 .


Return to start screen with 

 .

3.6  Perform Test Print


Select  


Select  


Depending on the inserted material select 


or 

.


Test print starts.

Touchscreen-Display

RSPSupply  -  1-888-532-2706 -  www.RSPSupply.com

http://www.RSPSupply.com/p-11066-Phoenix-Contact-5146464-THERMOMARK-Card-Printer.aspx

Summary of Contents for THERMOMARK CARD

Page 1: ...User manual Thermal transfer printer for cards UM EN THERMOMARK CARD RSPSupply 1 888 532 2706 www RSPSupply com http www RSPSupply com p 11066 Phoenix Contact 5146464 THERMOM...

Page 2: ...n Order No Thermal transfer printer for cards User manual UM EN THERMOMARK CARD 04 Designation Order no THERMOMARK CARD 5146464 THERMOMARK CARD AR 5146736 THERMOMARK CARD PLUS 5146481 RSPSupply 1 888...

Page 3: ...y liability This manual including all illustrations contained herein is copyright protected Any changes to the contents or the publication of extracts of this document is prohibited Phoenix Contact re...

Page 4: ...lect a different language proceed as follows Touch to open the menu Select then for the settings With you access the regional settings Touch the symbol Use the horizontal arrows to select your languag...

Page 5: ...printer you want to install and then click New The printer name can be modified Select the printer driver from the drop down menu If your printer is not listed check whether the printer driver has bee...

Page 6: ...Ink side Maximum 300 m Maximum 68 mm 25 4 mm Outside Interfaces USB 2 0 full speed slave Ethernet 10 100Base T Display and Operation Touch display with 160 x 255 pixels 96 31 mm diagonal Voltage 100...

Page 7: ...g the Touchscreen Display 16 3 3 Symbols on the Start Display 17 3 4 Printer States 18 3 5 Configure Ethernet Interface 20 3 6 Perform Test Print 20 4 Loading Material 21 4 1 Loading Transfer Ribbon 2...

Page 8: ...ation that could lead to injuries or material damage Attention Draws attention to possible dangers material damage or loss of quality i Notice Gives you tips They make a working sequence easier or dra...

Page 9: ...Safety Instructions The device is configured for voltages of 100 to 240 V AC It only has to be plugged into a grounded socket Only connect the device to other devices which have a protective low volta...

Page 10: ...jured The maximum sound pressure level is less than 70 dB A Danger Danger to life and limb from power supply X X Do not open the device casing 1 5 Environment Obsolete devices contain valuable recycla...

Page 11: ...er 2 Ribbon supply hub 3 Ribbon take up hub 4 Transport lock 5 Print mechanics 6 Transport slide Fig 1 Device Overview 2 Installation RSPSupply 1 888 532 2706 www RSPSupply com http www RSPSupply com...

Page 12: ...tware driver and documentation THERMOMARK RIBBON 110 50 TC Magazine THERMOMARK CARD UCT MAG 1 and THERMOMARK CARD US MAG 1 Printed Samples UCT and US Label cards UCT and US Package of felt sticks i No...

Page 13: ...nter is equipped with a wide area power unit for a supply voltage of 100 V to 240 V 1 Check that the device is switched off 2 Plug the power cable into the power connection jack 5 3 Plug the power cab...

Page 14: ...the printer X X Connect computer with THERMOMARK CARD using the included USB cable X X Insert DVD with the driver software into the DVD drive X X The Windows installation wizard is started automatical...

Page 15: ...mputer to a printer by a suitable cable 2 4 Switching on the Device Attention X X Unlock transport lock before switching on the printer 7 1 on page 28 When all connections have been made X X Switch th...

Page 16: ...ting the buttons on the touchscreen display 1 settings can be made Fig 4 Touchscreen Display 3 2 Operating the Touchscreen Display The touchscreen display is operated directly by touch To open a menu...

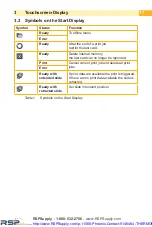
Page 17: ...nger be reprinted Print Cancel current print job and delete all print jobs Error Ready with extended slide If print data are available the print is triggered If there are no print data available the s...

Page 18: ...ssed Print Card description and the number of the printed card in the print job the symbols and The printer is currently processing an active print job Data can be transmitted for a new print job The...

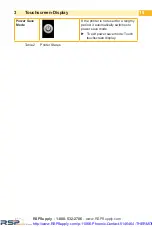
Page 19: ...y period it automatically switches to power save mode X X To exit power save mode Touch touchscreen display Table 2 Printer States 3 Touchscreen Display RSPSupply 1 888 532 2706 www RSPSupply com http...

Page 20: ...make sure that the transmitted configuration is always the same Configure Ethernet interface at the printer X X Select X X Select Setup X X Select Interfaces X X Select Ethernet X X Select setting op...

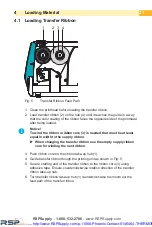
Page 21: ...n X X When changing the transfer ribbon use the empty supply ribbon core for winding the next ribbon 3 Push ribbon core on the ribbon take up hub 1 4 Guide transfer ribbon though the printing unit as...

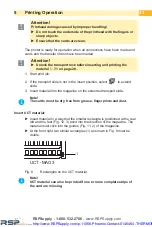
Page 22: ...t slide X X Extend transport slide with Insert UCT magazine 2 1 Fig 6 Insert UCT Magazine X X Place magazine with holes onto the pins 1 of the transport slide X X Position magazine in a way that the h...

Page 23: ...al into the magazine on the extended transport slide i Note The cards must be dry free from grease fingerprints and dust Insert UCT material X X Insert material in a way that the smaller rectangle is...

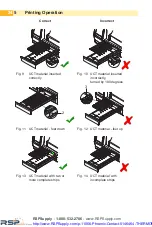
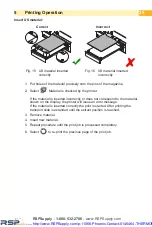
Page 24: ...erted incorrectly turned by 180 degrees 2 Fig 11 UCT material feet down 3 Fig 12 UCT material feet up Fig 13 UCT material with two or more complete strips Fig 14 UCT material with incomplete strips RS...

Page 25: ...ot correspond to the material shown on the display the printer will issue an error message If the material is inserted correctly the print is started After printing the transport slide is extended unt...

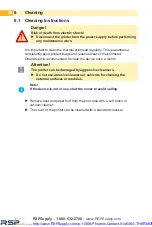
Page 26: ...recommended to clean the device once a month Attention The printer can be damaged by aggressive cleansers X X Do not use abrasive cleaners or solvents for cleaning the external surfaces or modules i N...

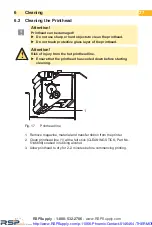
Page 27: ...d line X X Ensure that the printhead has cooled down before starting cleaning 1 Fig 17 Printhead line 1 Remove magazine material and transfer ribbon from the printer 2 Clean printhead line 1 with a fe...

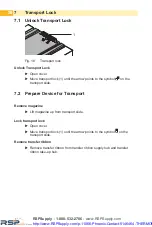
Page 28: ...for Transport Remove magazine X X Lift magazine up from transport slide Lock transport lock X X Open cover X X Move transport lock 1 until the arrow points to the symbol on the transport slide Remove...

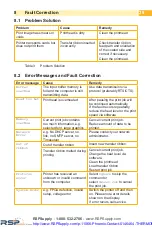
Page 29: ...a software Memory overflow Current print job contains too much information e g selected font large graphics Cancel current print job Reduce amount of data to be printed Network Error e g No DHCP serve...

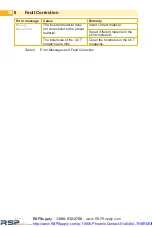
Page 30: ...et material Insert correct material Select different material in the print command The boreholes of the UCT magazine are dirty Clean the boreholes in the UCT magazine Table 4 Error Messages and Fault...

Page 31: ...31 9 1 EC Declaration of Conformity 9 Licences RSPSupply 1 888 532 2706 www RSPSupply com http www RSPSupply com p 11066 Phoenix Contact 5146464 THERMOM...

Page 32: ...32 9 Licences RSPSupply 1 888 532 2706 www RSPSupply com http www RSPSupply com p 11066 Phoenix Contact 5146464 THERMOM...

Page 33: ...33 9 Licences RSPSupply 1 888 532 2706 www RSPSupply com http www RSPSupply com p 11066 Phoenix Contact 5146464 THERMOM...

Page 34: ...License LGPL As applicable the terms of the GPL and LGPL and information on obtaining access to the GPL Code and LGPL Code used in this product are available to you at http www phoenixcontact net cat...

Page 35: ...ibbon 21 M Modifications 10 P Power Save Mode 19 Power Supply 13 Printer States 18 Printhead Cleaning 27 Damage 23 Problem Solution 29 R Ready 18 Recycling 10 S Safety Instructions 9 Service Work 10 S...

Reviews: