Maintenance
3799_en_D
PHOENIX CONTACT
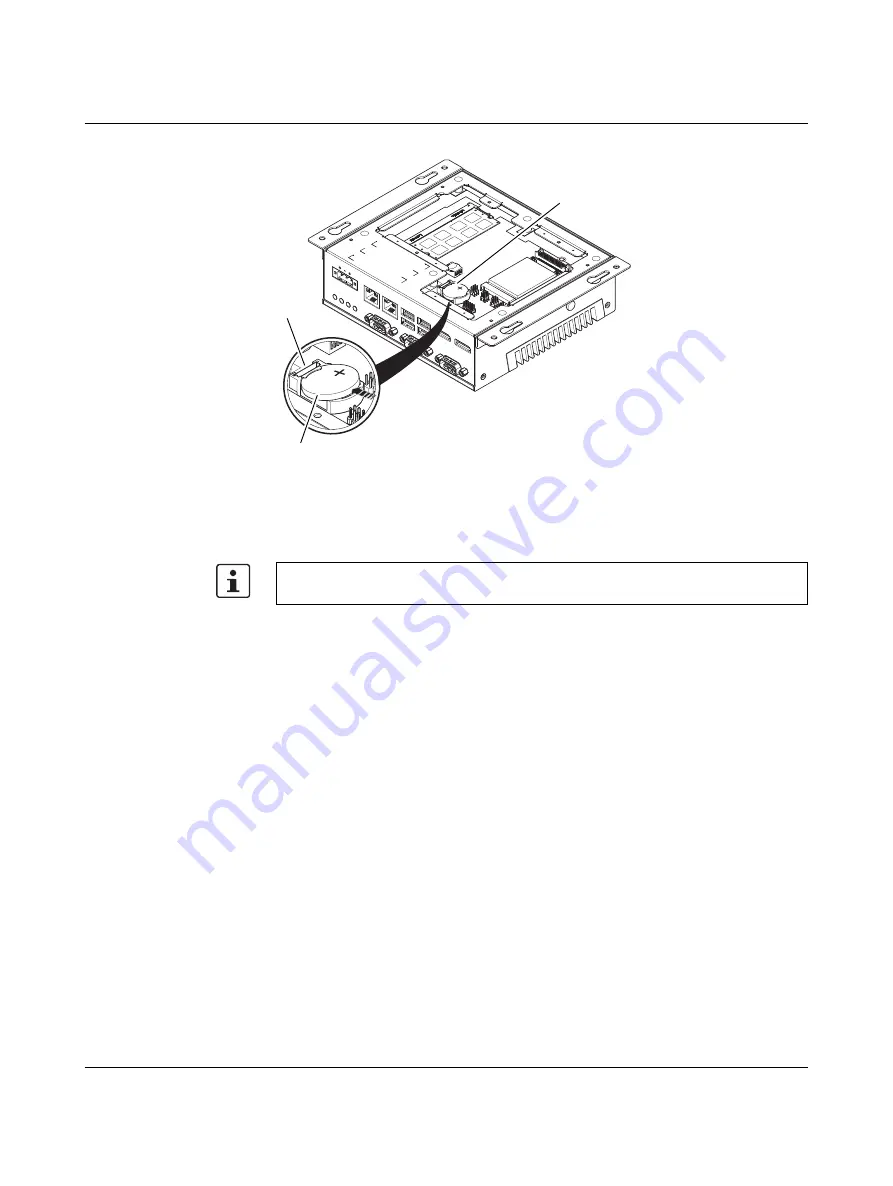
Figure 5-3
Battery replacement
To replace the battery:
1.
Access the battery by removing the service panel (see “Service panel” on page 17).
2.
Locate the battery holder (1).
3.
To remove the battery, pull the retention clip (2) at the bottom of the battery housing and
the battery (3) will release from the housing.
4.
To install a new battery, insert one end under the retention clip. Push the battery toward
the clip until the battery fully drops into the housing.
5.
Reset the CMOS and UEFI using the appropriate jumpers (see “CMOS/UEFI reset” on
6.
Reinstall the service panel or reattach the case to the display panel.
7.
Reconnect the power connector and apply power. During the boot process, a message
will appear notifying the user that the CMOS and UEFI settings have been reset to the
factory defaults.
8.
During the boot process, press the <F2> key to access the UEFI settings (see “UEFI”
9.
Update the UEFI configuration with any appropriate user-defined requirements.
LOC
K
OPE
N
X1:
PW
R 2
4VD
C
X11
: CO
M
X10
: C
OM
X12
: CO
M
X6:
US
B
X7:
US
B
X4:
US
B
X5:
US
B
X2:
ETH
X3:
ET
H
ERR
OR
RUN
SAT
A
PW
R
X8:
DP
X9:
DP
BR 2
032
3V
BR 2032
3V
1
2
3
Note the orientation of the battery. One side should have a plus (+) symbol. The
replacement battery must be installed the same way.
Summary of Contents for 1016236
Page 1: ...User manual UM EN BL2 1000 2000 7000 Basicline 2 configurable industrial PCs...
Page 8: ...BL2 1000 2000 7000 6 36 PHOENIX CONTACT 3799_en_D...
Page 18: ...BL2 1000 2000 7000 16 36 PHOENIX CONTACT 3799_en_D...
Page 30: ...BL2 1000 2000 7000 28 36 PHOENIX CONTACT 3799_en_D...
Page 32: ...BL2 1000 2000 7000 30 36 PHOENIX CONTACT 3799_en_D...
Page 34: ...BL2 1000 2000 7000 32 36 PHOENIX CONTACT 3799_en_D...
Page 36: ...BL2 1000 2000 7000 34 36 PHOENIX CONTACT 3799_en_D...


