background image

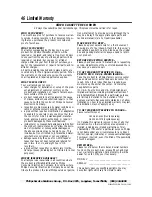
VIDEO CASSETTE RECORDER

90 Days Free Labor/One Year Parts Exchange.  This product must be carried in for repair.

WHO IS COVERED?
You must have proof of purchase to receive warran-
ty service. A sales receipt or other document show-
ing that you purchased the product is considered
proof of purchase.

WHAT IS COVERED?
Warranty coverage begins the day you buy your
product. For 90 days thereafter, all parts will be
repaired or replaced, and labor is free. From 90 days
to one year from the day of purchase, 
all parts will be
repaired or replaced, but you pay for all labor
charges. After one year from the day of purchase, you
pay for the replacement or repair of all parts, and for
all labor charges.
All parts, including repaired and replaced parts, are
covered only for the original warranty period. When
the warranty on the product expires, the warranty
on all replaced and repaired parts also expires. 

WHAT IS EXCLUDED?
Your warranty does not cover:
• labor charges for installation or setup of the prod-

uct, adjustment of customer controls on the
product, and installation or repair of antenna sys-
tems outside of the product.

• product repair and/or part replacement because

of misuse, accident, unauthorized repair or other
cause not within the control of Philips Consumer
Electronics Company.

• reception problems caused by signal conditions or

cable or antenna systems outside the unit.

• a product that requires modification or adaptation

to enable it to operate in any country other than
the country for which it was designed, manufac-
tured, approved and/or authorized, or repair of
products damaged by these modifications.

• incidental or consequential damages resulting from

the product. (Some states do not allow the exclu-
sion of incidental or consequential damages, so
the above exclusion may not apply to you. This
includes, but is not limited to, prerecorded mater-
ial, whether copyrighted or not copyrighted.)

• damage caused by the use of non-VHS tapes or

tapes that have not been tested and labeled for
use in two, four, six, and eight hour VHS
recorders.

• a product that is used for commercial or institu-

tional purposes (including but not limited to rental
purposes).

WHERE IS SERVICE AVAILABLE?
Warranty service is available in all countries where
the product is officially distributed by Philips
Consumer Electronics Company. In countries where
Philips Consumer Electronics Company does not dis-
tribute the product, the local Philips service organiza-

tion will attempt to provide service (although there
may be a delay if the appropriate spare parts and
technical manual(s) are not readily available).

MAKE SURE YOU KEEP...
Please keep your sales receipt or other document
showing proof of purchase. Attach it to this owner’s
manual and keep both nearby. Also keep the original
box and packing material in case you need to return
your product.

BEFORE REQUESTING SERVICE...
Please check your owner’s manual before requesting
service. Adjustments of the controls discussed there
may save you a service call.

TO GET WARRANTY SERVICE IN U.S.A., 
PUERTO RICO OR U.S. VIRGIN ISLANDS...
Take the product to a Philips factory service center
(see enclosed list) or authorized service center for
repair. When the product has been repaired, you
must pick up the unit at the center. Centers may
keep defective parts.
(In U.S.A., Puerto Rico and U.S. Virgin Islands, all
implied warranties, including implied warranties of
merchantability and fitness for a particular purpose,
are limited in duration to the duration of this
express warranty. Because some states do not allow
limitations on how long an implied warranty may last,
this limitation may not apply to you.)

TO GET WARRANTY SERVICE IN CANADA...

Please contact Philips at:

1-800-661-6162 (French Speaking)
1-800-363-7278 (English Speaking)

(In Canada, this warranty is given in lieu of all other
warranties. No other warranties are expressed or
implied, including any implied warranties of mer-
chantability or fitness for a particular purpose. Philips
is not liable under any circumstances for any direct,
indirect, special, incidental, or consequential damages,
howsoever incurred, even if notified of the possibility
of such damages.)

REMEMBER...
Please record below the model and serial numbers
found on the product. Also, please fill out and mail
your warranty registration card promptly. It will be
easier for us to notify you if necessary.

MODEL # __________________________________

SERIAL # __________________________________

This warranty gives you specific legal rights. You may
have other rights which vary from state to state.

Philips Service Solutions Group,  P.O. Box 2976,  Longview, Texas 75606,    (903) 242-4800

EL4946E009 / MAC 6108/ 12-98

46  Limited Warranty

Summary of Contents for VRA611AT

Page 1: ...Owner s Manual Important Return your Warranty Registration Card within 10 days See why inside Video Cassette Recorder VRA611AT ...

Page 2: ...icer P S Remember to get the most from your PHILIPS MAGNAVOX product you must return your Warranty Registration Card within 10 days So please mail it to us right now Know these safetysymbols This bolt of lightning indi cates uninsulated material within your unit may cause an electrical shock For the safety of everyone in your household please do not remove product covering The exclamation point ca...

Page 3: ...ro vided to call the Cable TV system installer s attention to Article 820 40 of the National Electrical Code which provides guidelines for proper grounding in particular specifying that the cable ground shall be connected to the grounding system of the building as close to the point of cable entry as possible As an ENERGY STAR Partner Philips Consumer Electronics Company has determined that this p...

Page 4: ... Screen Status Displays 20 VCR Display Panel 21 Front Panel 22 Rear Panel 23 Basic Operations Playing 24 Recording 25 Recording Recording One Channel Watching Another 26 One Touch Recording 27 Timer Recording 28 31 Rerecording Tape Duplication 32 Playing Repeat Play 33 Real Time Counter Memory 34 Time Search 35 Special Effects Playback 36 Automatic Operation Features 37 Stereo Features Multi Chann...

Page 5: ... as indicated 3 Replace the battery compartment lid Using the Remote Control Point the remote control at the VCR then press the VCR but ton when using the remote control to operate the VCR If you have a Magnavox Philips or Philips Magnavox television point the remote control at the TV then press the TV button when using the remote control to operate the TV VCR maintenance Video cassette tapes have...

Page 6: ... is shown below If you have a Cable Box or a Direct Broadcast System please see pages eight nine If you have a Stereo TV please see page 10 After you hook up the VCR go to page 11 to turn on the VCR ANTENNA IN Jack on back of TV Cable 75 ohm Back of VCR Antenna Indoor Outdoor 300 ohm 1 Disconnect the antenna or cable from your TV 2 Connect the antenna or cable to the ANT enna IN Jack of your VCR C...

Page 7: ...NTENNA IN Jack on the TV You may use either a snap on type supplied or screw on type of coaxial cable whichever you prefer 5 Set the CH3 CH4 switch on the back of the VCR to CH3 or CH4 whichever channel is not used or least used in your area Set the TV to the same channel For example when playing a tape if the CH3 CH4 switch is set to CH3 the TV should be on channel 03 Hookups Without a Cable Box ...

Page 8: ...hannel This is step 5 on page 29 Leave the Cable Box DBS on for a timer recording AUDIO R L VIDEO OUT IN IN OUT CH3 CH4 OUT IN ANT OUT IN 75V ANT CABLE TV s ANTENNA IN Jack Cable Box DBS VCR Recording Viewing Any Channel Connections 1 With the VCR on and in VCR position the VCR light will appear on the display panel use the CH annel o p button to set the VCR to the Cable Box DBS output channel cha...

Page 9: ... to record at the VCR Start the recording 2 Press the VCR TV button once to put the VCR in TV position The VCR light will disappear 3 Select the channel you want to watch at the Cable Box DBS TV s ANTENNA IN Jack Cable Box DBS VCR When you play a tape make sure the Cable Box DBS is set to the same channel as the CH3 CH4 switch on the VCR Set the TV to the Cable Box DBS output channel 03 or 04 Help...

Page 10: ...DEO OUT Jack on the back of the VCR Then connect the other end of the video cable to the VIDEO IN Jack on your TV 3 Connect an audio cable to the red and white AUDIO OUT Jacks on the back of the VCR Then connect the other end of the audio cable to the AUDIO IN Jacks on your TV 4 Turn on your TV making sure it is in Line Input mode Please refer to your TV owner s manual for details A stereo audio c...

Page 11: ... only scan through channels that you receive To skip this feature and play a tape immediately insert a tape with its record tab removed Or to skip step 3 press the MENU button All on screen displays will be in English To skip step 5 press the STOP p but ton Channels will not be pro grammed and CHANNELS NOT SET will appear on the screen If you try to program channels when there is no antenna or cab...

Page 12: ... TUNER SET UP then press the F FWD B button SELECT op CHOOSE B AUTO PROGRAMMING ADD DELETE CH CH MEMORY REVIEW TV STEREO ON 2ND AUDIO TO END PUSH EXIT 4 Press the PLAY o button or the STOP p button to select AUTO PROGRAMMING then press the F FWD B but ton The VCR distinguishes between TV channels and cable chan nels and the VCR will place all the channels you receive into its memory 5 Wait for a f...

Page 13: ...tton 1 VOL CH 3 2 1 6 5 4 9 8 7 0 POWER STATUS EXIT MEMORY REC OTR SLOW SPEED TIME SEARCH ALT CH PAUSE STILL MUTE TV VCR F FWD REW PLAY STOP VCR TV EJECT MENU CLEAR If you want the TV screen to be solid blue when a weak signal is received set BLUE BACKGROUND to ON The screen will be blue and the sound will be muted Or if you want to receive the weak signal set BLUE BACK GROUND to OFF When you sele...

Page 14: ...seconds you will either go to the next screen of channels or you will return to the previ ous menu 5 Press the STATUS EXIT button once or twice to exit 2 Press the MENU button SELECT op CHOOSE B PROGRAM VCR SET UP TUNER SET UP SET CLOCK TO END PUSH EXIT 3 Press the PLAY o button or the STOP p button to select TUNER SET UP then press the F FWD B button SELECT op CHOOSE B AUTO PROGRAMMING ADD DELETE...

Page 15: ... To make corrections press the CLEAR button until the space for the number you want to correct is flashing Then enter the correct number The current time will appear on the VCR display panel when the clock is set The current time also will appear on the screen if you press the STA TUS EXIT button See page 20 for details Power failures that last for more than one minute can cause you to lose your c...

Page 16: ...lly move forward one hour in April and turn back one hour in October Daylight Savings Time is set to ON when you receive your VCR Turn Daylight Savings Time ON or OFF by following the steps below Before you begin Make sure the clock is set 4 Press the PLAY o button or the STOP p button to select DAYLIGHT SVG TIME Then press the F FWD B button so that OFF or ON appears beside DAYLIGHT SVG TIME 2 3 ...

Page 17: ...REPEAT PLAY OFF ON SCREEN MODE AUDIO OUT LANGUAGE BLUE BACKGROUND ON TO END PUSH EXIT If you accidentally select Spanish and need English 1 Press the VCR button 2 Press the MENU button 3 Press the PLAY o button or the STOP p button to select PREPARE EL VCR then press the F FWD B button 4 Press the PLAY o button or the STOP p button to select LENGUA JE then press the F FWD B button 5 Press the PLAY...

Page 18: ...fter a brief delay There also may be a brief delay when you select channels 10 11 and 12 If you want to select chan nels 100 and above enter channel numbers as a three digit number For example to select channel 117 press 1 1 7 Antenna Users Enter channel numbers as a two digit number for the quickest results For example to select channel 5 press 0 5 If you only press the Number 5 button channel 5 ...

Page 19: ...exit on screen menus Or if you have a Magnavox Philips or Philips Magnavox TV press the TV button then press the STATUS EXIT button to see a TV status display or to remove the TV menu STOP p Button Press to stop the tape Press to select an item in the VCR menu Or if you have a Magnavox Philips or Philips Magnavox TV press when in TV mode to select an item in the TV menu CH annel o p Button Press t...

Page 20: ...een You must press the STATUS EXIT button to remove it Portions of the status display also may appear when you press other function buttons If you select STATUS ON then select COUNTER ONLY OFF Whenever you press the STOP p button or the PLAY o button the status display will appear for five seconds Portions of the sta tus display also may appear when you press other function but tons If you select ...

Page 21: ...pe in the VCR PWR power Light This light appears when the power is on POWER VCR TV CHANNEL PLAY STOP EJECT REW F FWD REC OTR PAUSE Timer Light This light glows when the VCR is turned off to set a timer recording or during a One Touch Recording It flashes if the power is off for a timer recording but there is no tape in the VCR It flashes when all timer recordings are finished Clock Display The cur...

Page 22: ... to start a One Touch Recording Details are on page 27 CHANNEL p o Buttons Press to change channels at the VCR Or press to adjust the tracking of a tape during normal playback or slow motion play back Also press to remove ver tical jitter in a Still picture PLAY Button Press to play a tape Press to release Slow Search or Still mode and return to play back Details are on page 36 REW ind Button When...

Page 23: ...etails are on pages six nine OUT Jack Use the supplied RF coaxi al cable to connect this jack to the ANTENNA IN Jack on your TV Cable Box or Direct Broadcast System Details are on pages six nine VIDEO OUT Jack Connect a cable going to the VIDEO IN Jack of a camcorder another VCR or an audio visual system monitor laser disc player video disc player etc here Details are on pages 32 and 38 AC Power C...

Page 24: ...H4 switch on the back of the VCR is set to 2 Insert a tape in the VCR The PWR VCR and Cassette Inside lights will appear on the display panel If the tape s record tab has been removed playback will start automatically 6 Press the EJECT button to remove the tape 3 If playback does not start automatically press the VCR button then press the PLAY o button 4 Press the STOP p button to stop playback 5 ...

Page 25: ...tape speed during a recording but some distor tion will appear on the tape The VCR will record in a preset vol ume Helpful Hints 5 Press the SPEED button until the desired tape speed appears briefly on the screen Details about tape speed are on page 30 6 Use the CH annel o p button or the Number buttons to select the channel to be recorded 7 Press the REC ord OTR button once to start recording The...

Page 26: ...e TV 5 To return to the channel being recorded use the TV remote control to select channel 03 or 04 at the TV whichever channel the CH3 CH4 switch on the back of the VCR is set to 7 Press the VCR TV button to put the VCR in VCR posi tion The VCR light will appear on the display panel The channel being recorded will appear on the screen 8 Press the STOP p button to stop the recording 3 7 2 8 1 Pres...

Page 27: ...ontinue recording press the REC ord OTR button repeatedly until REC appears in the upper left corner of the TV screen STATUS must be set to ON See page 20 for details The REC ord light will remain on the display panel of the VCR but the Timer light will disappear To check the time remaining for an OTR after the OTR has been set press the STATUS EXIT button To change the recording length while an O...

Page 28: ...OP p button to select PROGRAM then press the F FWD B button SELECT op CHOOSE B ONCE DAILY WEEKLY PROGRAM REVIEW TO END PUSH EXIT 3 Press the PLAY o button or the STOP p button to select a ONCE DAILY or WEEKLY recording Then press the F FWD B button ONCE The VCR will record a TV program on any day you choose up to 12 months away DAILY The VCR will record the same channel every day from Monday to Fr...

Page 29: ...ress 0 6 If you only press the Number 6 button channel 6 will be selected after a brief delay There also may be a brief delay when you select channels 10 11 and 12 If you want to select channels 100 and above enter channel numbers as a three digit number For example to select channel 117 press 1 1 7 Antenna Users enter channel numbers as a two digit number for the quickest results For example to s...

Page 30: ...to turn off the VCR power The Timer light will appear on the display panel If the timer recording will take place several hours or days from now you may use the VCR until time for the recording Turn off the VCR a few minutes before the recording starts If you forget to turn off the VCR PLEASE TURN OFF VCR FOR TIMER RECORDING flashes on your TV screen two minutes before a timer recording starts Pre...

Page 31: ...osition the VCR light will appear on the display panel press the VCR button then press the MENU button Checking or Cancelling Timer Recordings 2 Press the PLAY o button or the STOP p button to select PROGRAM then press the F FWD B button 3 Press the PLAY o button or the STOP p button to select PROGRAM REVIEW then press the F FWD B button The timer recording information for the program in the lowes...

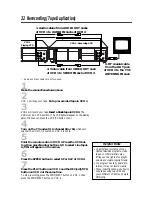
Page 32: ...EJECT button on VCR 1 then press the STOP EJECT button on VCR 2 CH3 CH4 OUT IN ANT CH3 CH4 OUT IN ANT R L VIDEO IN OUT IN OUT AUDIO R L VIDEO IN OUT IN OUT AUDIO VCR 1 Playing VCR VCR 2 Recording VCR 2 VCR 1 will play your tape Put a prerecorded tape in VCR 1 1 Audio cables from AUDIO OUT Jacks of VCR 1 to AUDIO IN Jacks of VCR 2 2 Video cable from VIDEO OUT Jack of VCR 1 to VIDEO IN Jack of VCR 2...

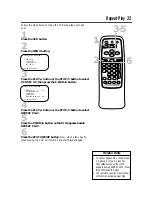
Page 33: ...ve At step 5 press the F FWD B button so that OFF appears beside REPEAT PLAY Press the STATUS EXIT button The real time counter memory does not function during Repeat Play Helpful Hints 4 Press the PLAY o button or the STOP p button to select REPEAT PLAY 3 5 2 6 1 Press the VCR button 1 VOL CH 3 2 1 6 5 4 9 8 7 0 POWER STATUS EXIT MEMORY REC OTR SLOW SPEED TIME SEARCH ALT CH PAUSE STILL MUTE TV VC...

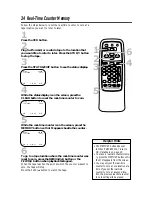
Page 34: ...stop the tape 1 Press the VCR button 3 Press the STATUS EXIT button to see the status display 4 While the status display is on the screen press the CLEAR button to reset the real time counter to zero STOP 1 08 PM TV STEREO CH10 SLP 0 00 00 HIFI 5 While the real time counter is on the screen press the MEMORY button so that M appears beside the counter STOP 1 08 PM TV STEREO CH10 SLP M 0 00 00 HIFI ...

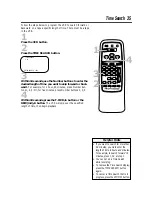
Page 35: ... ind button The VCR will skip over the specified length of time then begin playback If you want to search for more than 59 minutes you must enter the length of time in hours and minutes For example to search forward 70 minutes press 1 1 0 at step 3 You can not do a Time Search while recording To remove the Time Search display press the TIME SEARCH button again To cancel a Time Search that is in pr...

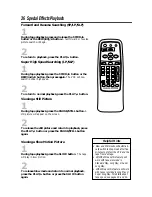
Page 36: ...n to playback press the PLAY o button or press the PAUSE STILL button again Viewing a Slow Motion Picture 1 During tape playback press the SLOW button The tape will play in slow motion 2 To release Slow mode and return to normal playback press the PLAY o button or press the SLOW button again Slow and Still modes will automati cally switch to Stop mode after five minutes to protect the VCR and the ...

Page 37: ...shut itself off Tape Eject A tape can be ejected with the VCR power on or off but the VCR must be plugged in If a timer recording is set a tape can only be ejected with the power on Make sure you insert a tape and turn off the VCR power for the timer recording Automatic Tracking Adjustment The VCR adjusts tracking automatically to give you the best possi ble picture quality With some recordings ho...

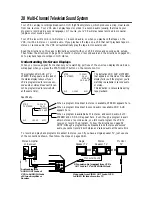
Page 38: ...n you press the STATUS EXIT button on the remote control Specifically When a program broadcast in stereo is available STEREO appears here When a program broadcast in second audio is available 2ND AUD appears here When a program is available both in stereo and second audio both STEREO and 2ND AUD appear here Even though a program is avail able in stereo or second audio you still must program the VC...

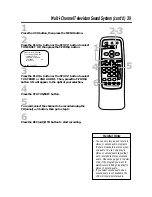
Page 39: ... recording SELECT op CHOOSE B AUTO PROGRAMMING ADD DELETE CH CH MEMORY REVIEW TV STEREO ON 2ND AUDIO TO END PUSH EXIT You can only receive and record in stereo or second audio programs that are broadcast in stereo or sec ond audio You can only play in stereo or second audio tapes that were recorded in stereo or second audio Please see page 38 to deter mine if the program you want to watch record i...

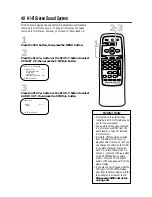
Page 40: ...oth Hi Fi stereo sound and in monaural sound The audio level of a tape recorded in Hi Fi stereo will differ from the audio level of a tape not recorded in Hi Fi stereo Normally HIFI should be selected from the AUDIO OUT menu for playback with Hi Fi sound But you can change the selection to MONO if you want monaural audio play back To do this follow steps 1 3 At step 4 press the PLAY o button or th...

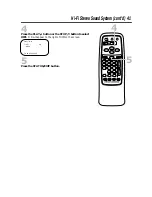
Page 41: ...RY REC OTR SLOW SPEED TIME SEARCH ALT CH PAUSE STILL MUTE TV VCR F FWD REW PLAY STOP VCR TV EJECT MENU CLEAR 4 Press the PLAY o button or the STOP p button to select HIFI ON will appear to the right of HIFI on the screen 5 Press the STATUS EXIT button SELECT op HIFI ON MONO TO END PUSH EXIT ...

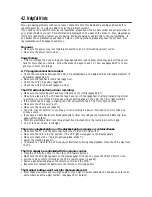
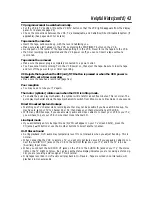
Page 42: ...mer recording you turn off the VCR power without putting a tape in the VCR the Timer light will blink If the record tab on a tape is missing the VCR will eject the tape The Timer light will blink Make sure the VCR power is off Make sure the clock is set page 15 The VCR may not perform or continue a timer recording if a power interruption of more than one minute occurs If you have a Cable Box Direc...

Page 43: ...rotate for about five minutes This is normal The quick play mechanism allows the tape mechanism to switch from Stop mode to Play mode in one second Direct Broadcast System Hookups Watching one TV channel while recording another may not be possible if you have a DBS hookup You may have to set your TV to channel 03 or 04 then make your channel selections at the DBS With many DBS hookups if you use a...

Page 44: ...on or use the Number buttons to select another channel OTR One Touch Recording a timed recording that starts imme diately and records for 30 minutes to eight hours Remote Control the small electronic unit that came with your VCR allows you to operate your VCR from a distance RF coaxial cable The cable supplied with your VCR Use it to connect your VCR to your TV or Cable Box or DBS The sup plied ca...

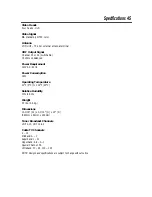
Page 45: ...ent 120V AC 60Hz Power Consumption 16W Operating Temperature 41 F 5 C to 104 F 40 C Relative Humidity 10 to 80 Weight 5 7 lbs 2 6 kg Dimensions 14 3 16 W x 3 1 16 H x 10 D 360mm x 92mm x 230mm Tuner Broadcast Channels VHF 2 13 UHF 14 69 Cable TV Channels 2 13 Midband A 1 Superband J W Hyperband A 5 A 1 Special Channel 5A Ultraband 37 94 100 125 NOTE Designs and specifications are subject to change...

Page 46: ...ies where the product is officially distributed by Philips Consumer Electronics Company In countries where Philips Consumer Electronics Company does not dis tribute the product the local Philips service organiza tion will attempt to provide service although there may be a delay if the appropriate spare parts and technical manual s are not readily available MAKE SURE YOU KEEP Please keep your sales...

Page 47: ...e button 22 pause still button 18 25 36 play K button 18 22 24 36 playing 24 power button 18 22 cord 23 pwr power light 21 real time counter 34 rear panel 23 rec otr button 18 22 25 27 rec ord light 21 recording basic 25 one channel watching another 26 timer 28 31 remote control buttons 18 19 sensor 22 using 5 repeat play 33 rerecording 32 rew ind s button 19 22 36 rf coaxial cable 6 9 32 44 safet...

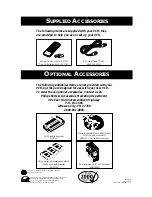
Page 48: ...Storage Cases plastic Fits VHS and Beta cassettes M61104 Six High grade VHS T 120 Cassettes MHG1206 Stereo Audio and Video Cables 6 feet M61106 gold connectors M61105 color coded connectors RF Coaxial Cable 75 ohm 4835 323 27011 VO L CH 3 2 1 6 5 4 9 8 7 0 POW ER STA TUS EX IT MEM ORY REC OT R ALT CH PAU SE S TILL MU TE TV VCR VCR TV EJE CT ME NU CLE AR SLO W ST OP PL AY F F WD RE W SPE ED TIM E S...

Reviews: