Installation & User’s Manual
PL1 LED Luminaires
3 2
CLEANING AND CARE
Step 3. Before opening luminaire head cover, note position of lens focus/zoom knob position (to reset focus/zoom
position after completion of procedure).
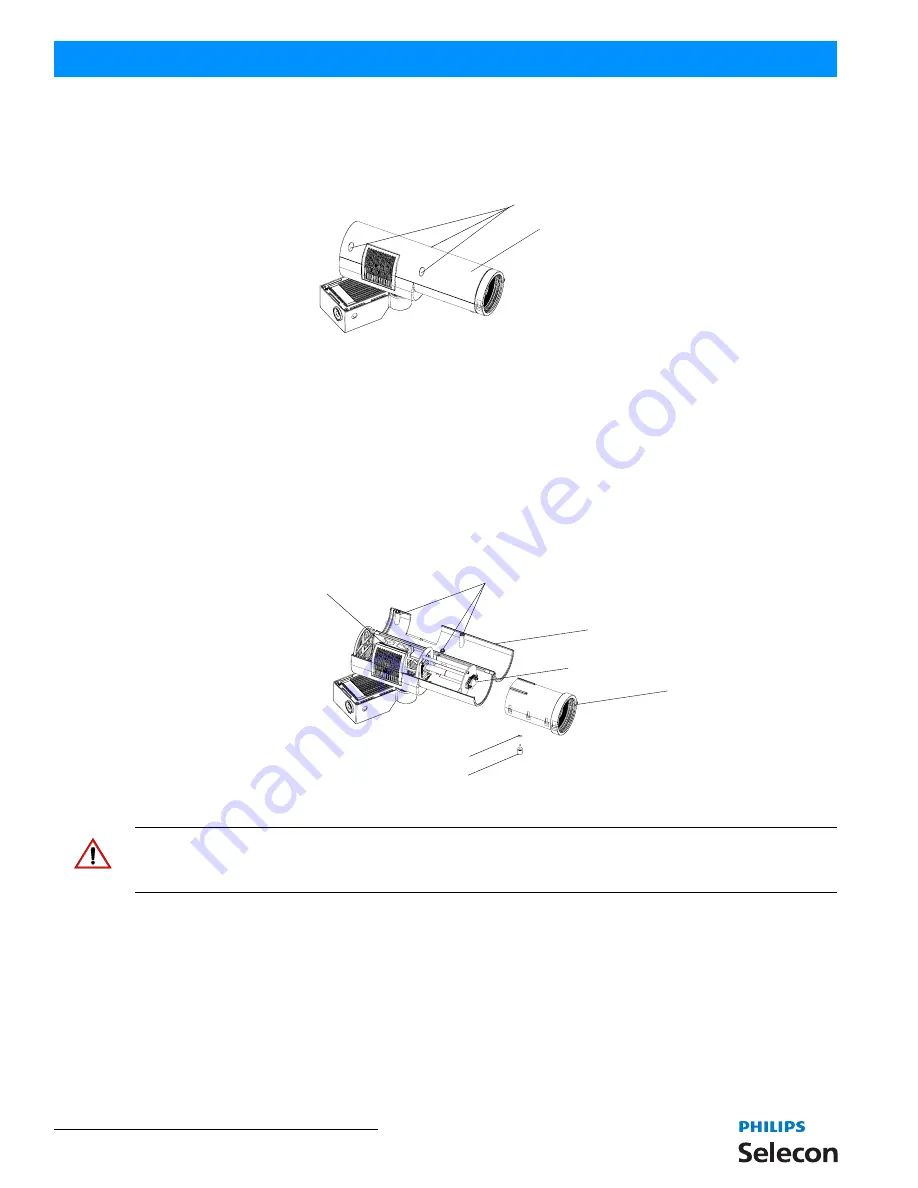
Step 4. At luminaire head cover (as shown in
Figure 5
), using 3 mm Allen hex key, completely loosen three captive
screws securing cover.
Figure 5: PL1 LED Luminaire Head Cover
Step 5. Swing open luminaire head cover.
Step 6. As illustrated in
Figure 6
, unscrew locking focus/zoom knob by hand and remove. Be sure not to lose
washer or spring (that resides inside of knob).
Step 7. Noting orientation of lens tube, remove lens tube assembly from luminaire head.
Step 8. Clean interior side of front lens by applying a small amount of reagent grade isopropyl alcohol to lint-free
lens tissue.
Step 9. Wipe all debris, dirt, fingerprints, etc. from lens.
Step 10. Using a second lint-free lens tissue, wipe off any alcohol residue.
Step 11. Clean Aspheric LED Lens as described in Steps 8 through 10.
Figure 6: PL1 LED Luminaire Lens Tube Assembly
Note:
Remove any dust or debris that may be present in rear of luminaire head (next to LED Cooling Assembly). If
required, use moisture and oil-free, compressed air duster. DO NOT blow compressed air directly into fan or debris
may become lodged in LED cooling unit fins.
Step 12. Reinstall lens tube by perform Steps 3 to 6 in reverse order.
3. Service and Maintenance
For all other service and maintenance issues, please contact your local Philips Selecon office or an Authorized
Service Center.
Captive Screws
Luminaire Head Cover
Captive Screws
Luminaire Head Cover
Lens Tube Assembly
Plastic Washer
Focus / Zoom Knob
Aspheric LED Lens
LED Cooling Assembly


