background image

  Settings 

27

Front Ceiling

 – the device is hanging from 

the ceiling in an upside-down position; the 
image is rotated by 180 degrees.

Rear ceiling

 – the device is located behind 

the projection surface, hanging from the ceil-
ing in an upside-down position; the image is 
rotated by 180 degrees and reflected hori-
zontally.

Sleep mode

Adjusts the time until the projector should go 
into sleep mode and powers off after ten 
seconds if user doesn’t stop it. The following 
options are available: 

Off, 30 min., 45 min., 

60 min., 120 min

.

Screen saver

Adjusts the time until the system should 
power down the lamp if no source is con-
nected to system. The followings options are 
available: 

Off, 1 min., 2 min., 5 min., 10 min., 

30 min

.

Auto power down (APD)

Switches the auto power down 

On

 and 

Off

.

When the function is switched on, the pro-
jector should go into off mode after three 
hours.

If a video is displayed, the APD should take 
place three hours after last user action, 
meaning that a pop-up will appear after 
2:58 hours for two minutes, indicating that 
the device will go into off mode.

Reset lamp timer

Resets the lamp timer of the system.

Language/language

Selects the desired language.

Shop Mode

Switches the shop mode 

On

 and 

Off

In this mode, the Screeneo logo is continu-
ously displayed on the screen and system 
powers on after power is available. System is 

set to shop mode conditions and settings are 
set back to default settings after a certain 
period of time.

Firmware update

Updates firmware  (see Update firmware 
with USB storage medium, page 19).

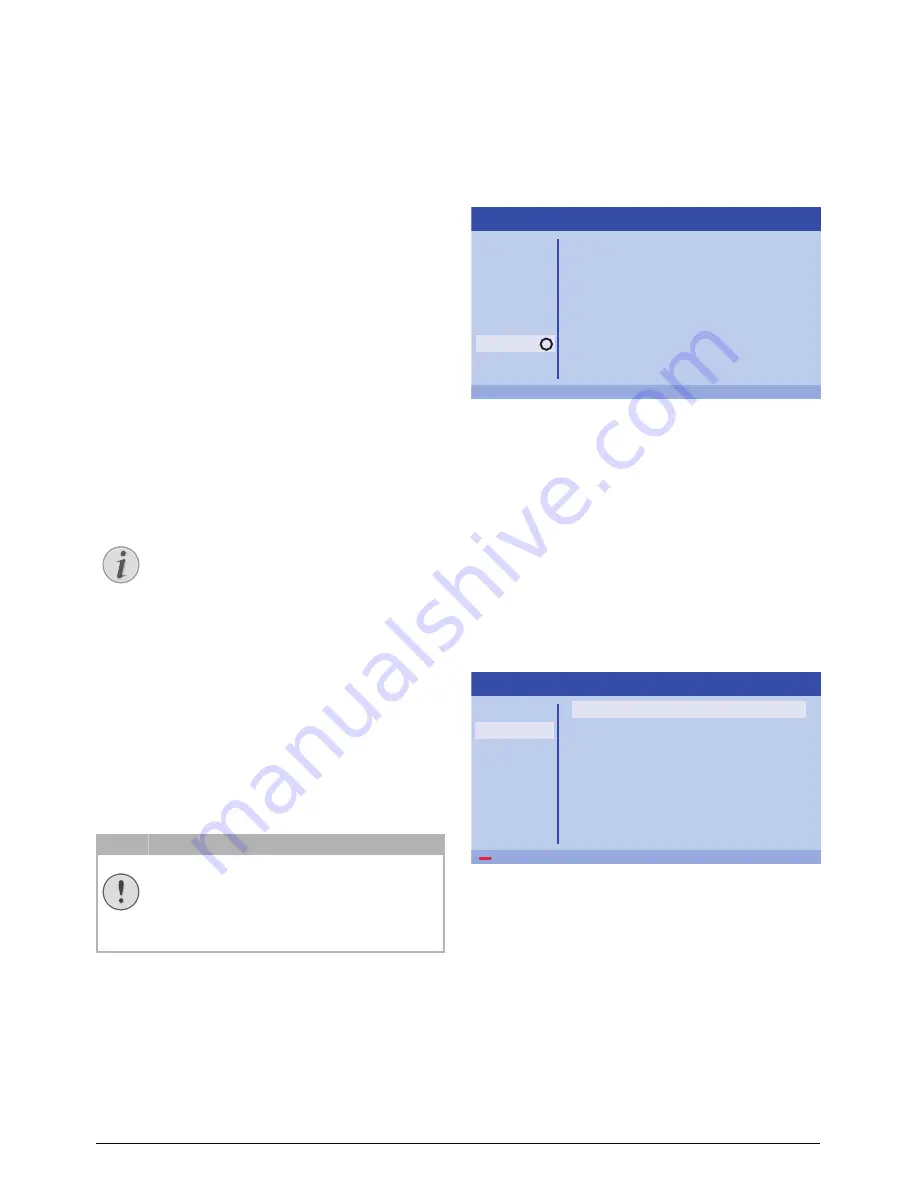
Information

Information

Displays an overview of the status and ver-
sion of the device.

Reset functions

You can select between two different reset 
functions:

Reset image settings

This function resets the current chosen 

Smart 

settings

 back to default mode.

1

Press the 

OPTION

/

Ă

 button and use 

¡/¢


to select 

Image

.

2

Confirm with 

OK

.

3

Use 

¡/¢

 to select 

Smart settings

.

4

In the status bar appears 

Reset current 

image settings

.

5

Use 

À/Á

 to select 

Standard*

.

6

Confirm with the 

RED 

key. 

Notice

The default setting is depending on the 
choice of 

Shop mode 

or 

Home mode


(see Initial installation, page 14).

CAUTION!

Do not reset the lamp timer if the lamp 
has not been replaced as this could 
cause damage  (see Resetting the lamp 
timer, page 30).

OK

Source

Image

3D

Sound

System

Information

Source
Smart settings
3D settings
Equivalent lamp hour
Resolution
Firmware version
Engine version
MCU version
Model

HDMI1
Standard
2D
0 h
1920 x 1080
V1.0
V1.111
V1.11111
HDP2510

Information

        Reset current image settings

Source

Image

3D

Sound

System

Information

Smart settings
Format
Brightness
Contrast
Saturation
Sharpness
Lamp power mode
Flow motion
Wall colour correction
Advanced colour settings

Standard
Original
50
50
50
16
Standard
On
OFF

Image settings

Summary of Contents for Screeneo HDP2510

Page 1: ...User Manual Register your product and get support at www philips com welcome Full HD projector HDP2510 Screeneo 2 0 ...

Page 2: ...l 12 Initial installation 14 4 Connect to the playback device 16 Connecting to devices with HDMI output 16 Connecting to a computer VGA 16 Connecting a screen using the automatic Trigger input 17 Connecting using an audio video CVBS adapter cable 17 Connecting to external devices via analogue cable 17 Connecting to a home cinema amplifier 18 Connecting to headphones 18 5 Bluetooth speaker 20 Activ...

Page 3: ...Symbols used What s in the box 1 Projector 2 Remote control with two AAA batteries 3 A C power cable 4 Quick start guide 5 Warranty card 6 Transport bag depending on model Customer service centre You can find the support hotline in the warranty card or online Web www philips com support Mail support service xgem com International Phone 43 1 66155 5129 please ask your provider for international cal...

Page 4: ...f the device and disconnect it from the main supply if liquids or foreign substances end up inside the device Have the device inspected by a technical service centre Always handle the device with care Avoid touching the lens Never place heavy or sharp objects on the device or the power cable If the device gets too hot or emits smoke shut it down immediately and unplug the power cable Arrange for y...

Page 5: ...ildren due to risk of small parts being ingested 3D glasses are not intended for use by children under the age of six children between age six and adulthood should not use the glasses for longer than the duration of one film the same time limit is also recommended for adults 3D glasses are intended strictly for watch ing 3D content only undertake a thorough and regular clean ing and disinfection i...

Page 6: ...e sharpness POWER B Short press Turns on the projector Double press Turns off the projector Long press three seconds Starts Pairing mode Long press ten seconds Resets the pro jector ƒ Lens Side view 1 Handle retractable 2 HDMI HDMI port for a playback device 3 Ï Audio output Headphone connection or connection for external speakers CAUTION Always use the B button to turn off the projector This is e...

Page 7: ...on for external speakers AUDIO IN Connection for external audio devices only with VGA input 4 SPDIF OPTICAL Digital audio connector 5 HDMI 1 and 2 HDMI port for a playback device 6 VGA Personal computer input 7 AV IN RCA plug for composite video 8 AUDIO Analogue audio connector 9 Power supply socket a d c g h i f e b ...

Page 8: ...À Á Navigate in menu modify settings con firms selection 6 BACK Goes one level back in menu cancels a function 7 HOME Î Opens the Option menu 8 FOCUS Adjusts the focus for image sharpness 9 VOLUME Adjusts the volume level decreases increas es and mutes the sound FORMAT Changes the aspect ratio ƒ SMART Displays the Smart settings menu 3D Displays the 3D menu Colour keys Changes on screen options a ...

Page 9: ...he desired setting with À Á and con firm with OK Shortcut menus For quick selection the following Shortcut menus can be used Source Smart Settings Format and 3D The shortcut window always opens in the right corner 1 Select the desired Shortcut menu using the related button for example the SOURCE ÿ button Notice Below the navigation with the infrared remote control IR is described Keys Action or Sc...

Page 10: ... available sources Image Displays the image setting related functions 3D Displays all settable 3D functions Sound Displays the sound functions System Displays the content of all system related functions Information Displays an overview of the status and ver sion of the device ...

Page 11: ...e distance between the projector and the screen determines the actual size of the image To change the size of the screen just move the projector towards or away from the wall The size of the screen b is comprised between 0 1 and 0 42 metres depending on the projec tion distance a as described in the following table Connecting power supply 1 Connect the power cable into the socket on the rear side ...

Page 12: ...rns red do a new charge 1 Take a USB mini cable connect the USB mini plug to the 3D glasses and the other end of the cable to a USB port DANGER Risk of explosion with incorrect type of batteries Only use the AAA type battery Notice Normally the batteries will last for around one year If the remote control stops working replace the batteries If the device is not used for a long time take out the ba...

Page 13: ...op of the glasses 2 On the remote control press the 3D key 3 The 3D menu appears select your choice and press OK 4 Press the ON OFF button on the top of the glasses for one and a half seconds The LED flashes green three times and then stays on Your glasses are ready 1 5 SEC 3x ...

Page 14: ...with OK 5 Use to select the location and confirm with OK Home For normal use Shop When you choose this option the pro jector starts in shop mode In this mode default settings are made and can t be changed Notice The turning on and off of the projector requires some time as the UHP lamp must reach the operational tempera ture After a few minutes the brightness reaches its full capacity Notice Durin...

Page 15: ... with any other key Setting up the language The device has already been installed In order to change the menu language proceed as fol lows 1 Press the OPTION Ă button and use to select System 2 Confirm with OK 3 Use to select Language Language 4 Confirm with OK 5 Use to select your desired language 6 Confirm with OK 7 Exit with the BACK button For shutting down the system please click again the Po...

Page 16: ...jector s VGA socket 2 Connect the VGA plug to the VGA socket of the computer 3 Adjust the computer s resolution to the cor rect setting and switch the VGA signal to an external monitor The following resolutions are supported Notice If no input source is detected the fol lowing message appears NO SIGNAL Notice Use any of the HDMI sockets to connect the projector to a playback device when a 3D signa...

Page 17: ... red audio right and white audio left 1 Connect the A V adapter to the projector s AV IN socket 2 Connect the video device s audio video sockets to the A V cable using a conventional composite video RCA cable 3 In the Option menu select AV IN Connecting to external devices via analogue cable Use a analogue cable to connect the projector to external audio devices 1 Connect the analogue cable to the...

Page 18: ...nect the headphones to the headphone slot on the side of the device The device speakers deactivate automatically when the headphones are connected 2 After connecting the headphones increase the volume to a comfortable level using the VOLUME buttons N O DANGER Danger of hearing damage Do not use the device over a longer time at high volume especially when using headphones This could lead to the ris...

Page 19: ...e to select Firmware update 7 Confirm with OK A message displays asking if you want to update the new firmware Confirm with OK YES If no firmware was found on the USB stick or if no USB stick is plugged in a message appears If you do not wish to update the firmware at this point you can exit the menu by pressing À Á to select NO and confirming with OK or exit with the BACK button 8 A message displ...

Page 20: ...unts down from 60 seconds 2 Select on your external device the Screeneo projector Navigation by colour keys Notice In this mode it is not possible to do any thing else than playing music The projector can only connect to and play audio from one device at a time Notice Shortcut menu 1 Press the SOURCE ÿ button and use to select Bluetooth speaker 2 Confirm with OK 3 Press the RED key to start the co...

Page 21: ... the directory Additionally you can also use the BACK button on the screen Î Exits to media player main screen Keys Action RED key Music and movie player Allows to set the repeat mode off song direc tory all Play mode deacti vated greyed Plays only the selected song or movie in loop Plays all songs or movies in the selected directory in loop Plays all songs or movies in the media in loop Photo vie...

Page 22: ...mp4 mkv flv ts m2ts 3gp 1 To display the movies content select Movie using the keys À Á 1 Use À Á or to select the movie file that you wish to play 2 Press OK or Á to start playback The status bar is shown If no key is pressed it disap pears after three seconds 3 Press the BACK button to end the play back and return to the overview 4 When you press the BACK button again or the HOME Î button you wi...

Page 23: ...elect the image that you want to start the slide show with The image is shown as a preview in the left win dow 4 Press OK to start the slide show Notice Fast forward rewind 2x 4x 8x with each click using Press OK or Á to return to normal speed Press OK or Á to continue play back Keys Action RED key Allows to set the repeat mode off song direc tory all Play mode deacti vated greyed Plays only the s...

Page 24: ...our keys During playback you can adjust the volume using the VOLUME buttons N O Press or N repeatedly to shut off the volume com pletely Keys Action RED key Allows to set the slide speed off 3 sec 5 sec 10 sec Notice Only those songs that are compati ble with the projector will be dis played Media Player Photo Movie Music Music USB Music2 1 1 Music Music Music i M i i M i Notice The playback can b...

Page 25: ...onment Primetime for semi darkness Cinema for very dark rooms and smaller screen sizes Flow motion Switches the MEMC Motion estimation mo tion compensation for motion interpolation On and Off Notice Select the Shortcut menu using the related button for example the SMART or FORMAT button see Option menu and Shortcut menus page 9 Notice Depending on which Source you have selected the settings in the...

Page 26: ...ightness 3D settings 3D Sets the picture modes with 2D 3D options L R Swap Changes the side of the screen display Sound settings Volume Adjusts the volume 0 20 Deep bass Switches the deep bass On and Off Wide sound Switches the wide sound On and Off Equalizer Selects the equalizer mode Normal Pop Rock Jazz Classic Voice Speaker Switches the speaker On and Off System settings Keystone Minimizes the...

Page 27: ...and system powers on after power is available System is set to shop mode conditions and settings are set back to default settings after a certain period of time Firmware update Updates firmware see Update firmware with USB storage medium page 19 Information Information Displays an overview of the status and ver sion of the device Reset functions You can select between two different reset functions...

Page 28: ... 4 In the status bar appears Reset all settings 5 Confirm with the RED key 6 A message displays asking if you want to reset all settings to default Confirm with OK YES If resetting of the settings is not desired at this point exit the menu by pressing À Á to select NO and confirming with OK 7 The device turns off and on again After a short time the Language selection screen appears The resetting p...

Page 29: ...evice with any cleaning flu ids Wipe over the surfaces gently Be care ful that you do not scratch the surfaces DANGER Do not use any liquid cleaning agents Do not use any liquid cleaning agents for cleaning the lens to avoid damaging the coating film on the lens CAUTION Do not operate the lamp beyond the rated lamp life Excessive operation of lamps could cause a lamp to break on rare occasions DAN...

Page 30: ...if you want to reset the lamp timer Confirm with OK The lamp time will be reset to 0 CAUTION Do not turn the power on while the lamp cover is removed Do not insert your fingers between the lamp and the projector The sharp edges inside the projec tor may cause injuries CAUTION Pulling it too quickly may cause the lamp to break and scatter broken glass in the projector Do not place the lamp in locat...

Page 31: ...bles from the device man ufacturer may function No sound from external HDMI output device Set the audio setting to Multichannel Raw data Stereo PCM No sound when you connect your computer via HDMI cable Check that the sound is activated on the computer Video display problem when the source is a 3D signal from a Blu ray player Check that the 3D mode is activated on the projector see 3D settings pag...

Page 32: ...d cor rectly Check the sleep mode status in the setting menu When the sleep mode is activated the device turns off after the programmed dura tion The device cannot read the USB stick The device does not support the exFAT file system Format the USB key in FAT format then use it The projector does not react to remote control commands Check the batteries of the remote control Problems Solutions ...

Page 33: ...igital 2 1 Connection Bluetooth stream music from smart phone or tablet to Screeneo via Bluetooth aptX Standard operated frequency band 2400 2483 5 MHz max transmitted power 100 mW Connectivity 2x back HDMI 1 side HDMI VGA composite 1x back standard USB headphone out side Audio in out AV in S PDIF optical trigger out Power source Power consumption operating 190 to 300 W power off 0 5 W Power suppl...

Page 34: ... be determined by turning the equipment off and on the user is encouraged to try to correct the interference by one or more of the follow ing measures Reorient or relocate the receiving antenna Increase the separation between the equipment and receiver Connect the equipment into an outlet on a circuit different from that to which the receiver is connected Consult the dealer or an experienced radio...

Page 35: ...oduct names used herein are for identifica tion purposes only and may be trademarks of their respective owners X GEM SAS disclaims any and all rights in those marks Neither X GEM SAS nor its affiliates shall be lia ble to the purchaser of this product or third parties for damages losses costs or expenses incurred by the purchaser or third parties as a result of accident misuse or abuse of this pro...

Page 36: ...lips N V used under license This product was brought to the market by X GEM SAS further referred to in this document as X GEM SAS and is the manufacturer of the product 2016 È X GEM SAS All rights reserved Headquarters X GEM SAS 9 rue de la Négresse 64200 Biarritz FRANCE Tel 33 0 5 59 41 53 10 www xgem com ...

Reviews: