background image

当您使用工具打开本产品时以及在您弃置
充电电池时,请采取必要的安全保护措
施。

1 断开产品电源并让产品继续运行,直到

马达停止。

2 去除产品的上顶盖部分。
3 使用螺丝刀打开产品内部主体。

4 使用螺丝刀从产品取下充电电池。
5 使用家用剪刀剪断电线。

мȞġĈҴˀΙĀǩ؆Ӎߒʔ

ˌɫǩ؆

ĈҴˀΙ

(Pb)

(Hg)

(Cd)

ԣ͍Ჱ

(Cr   (VI)  )

Ġ⅑ԓ᧠

(PBB)

Ġ⅑ȕ᧠⓭

(PBDE)

PCB’s

מŪǗɢذ

X

O

O

O

O

O

Electrical

contact pins

ǗˈਝǦ

X

O

O

O

O

O

Power plug

Ǘ۷૝Ǽ

X

O

O

O

O

O

X

O

O

O

O

O

ǕȪϜ֪֙

SJ/T 11364

Āܪǭৠ̑뺯

O

ȪФ˽ĈҴˀΙć˽ˌɫǨĈߴΙࠒնġĀߒʔߴć

GB/T 26572

ܪǭĀՄʔđ̂ŘĪ뺯

X

ȪФ˽ĈҴˀΙψɺć˽ˌɫĀԚĂߴΙࠒնġĀߒʔɸŜ

GB/T 26572

ܪǭĀՄʔđ̂뺯

Internal

metal parts

ʭˌ̇͒ɫ

- 该表格中所显示的“有害物质”在产品

正常使用情况下不会对人身和环境产生
任何伤害。

- 该表格中所显示的“有害物质”及其存

在的部件向消费者和回收处理从业者提
供相关物质的存在信息,有助于产品废
弃时的妥善处理。

32

简体中文

Summary of Contents for QC5570

Page 1: ...QC5570 ...

Page 2: ......

Page 3: ...1 2 3 4 5 6 11 13 10 12 7 9 8 ...

Page 4: ...empty page before TOC ...

Page 5: ...English 6 简体中文 20 ...

Page 6: ...gh your hair To enjoy using the hair clipper we advise you to read the following information General description Fig 1 1 Cutting element 2 Swivel head 3 Length setting adjustment ring 4 On off button 5 Socket for small plug 6 Battery charge indicator 7 Precision comb attachment 8 Length setting indicator 9 Regular comb attachment 10 Supply unit 11 Small plug 12 Cleaning brush 13 Oil Important safe...

Page 7: ... knowledge if they have been given supervision or instruction concerning use of the appliance in a safe way and understand the hazards involved Children shall not play with the appliance Cleaning and user maintenance shall not be made by children without supervision Always unplug the appliance before you clean it under the tap Always check the appliance before you use it Do not use the appliance i...

Page 8: ...ply unit Never use compressed air scouring pads abrasive cleaning agents or aggressive liquids such as petrol or acetone to clean the appliance Electromagnetic fields EMF This Philips appliance complies with all applicable standards and regulations regarding exposure to electromagnetic fields General This appliance can be safely cleaned under the tap The supply unit is suitable for mains voltages ...

Page 9: ...icator lights up white continuously Note When the battery is full the battery charge indicator switches off automatically after approx 30 minutes Charging with the supply unit 1 Put the small plug in the appliance and put the supply unit in the wall socket The battery charge indicator indicates that the appliance is charging see Battery charge indicator 2 After charging remove the supply unit from...

Page 10: ...plied Using the appliance This appliance can be used cordless or directly from the wall socket Preparing for use Make sure your hair is clean and dry 1 Comb your hair with a styling comb in the direction of hair growth Hairclipping tips We advise you to start clipping at the highest setting of the regular comb attachment and to reduce the setting gradually To clip most effectively move the applian...

Page 11: ...position of 0 pointing forwards you can turn the swivel head 45 or 90 to the left or right This enables you to adjust the position of the cutting element to the part of your head that you are clipping This makes it much easier to clip your own hair 1 To set the cutting element to the desired position turn the swivel head click Note Always adjust the position of the cutting element by turning the s...

Page 12: ...you have selected 7 5 2 1 Tip Use different settings to create a natural and smooth transition between the various hair lengths from your neckline to the top of your head Do not turn the length setting adjustment ring beyond the highest setting 3 Turn the swivel head to the position that is most comfortable for your arm when you clip the different parts of your head see Using the swivel head 4 Pre...

Page 13: ... 0 5mm or to contour the neckline and the area around the ears Be careful when you clip without comb attachment because the cutting element removes every hair it touches 1 Pull the comb attachment off the swivel head Never pull at the flexible top of the comb attachment Always pull at the bottom part 2 Comb the hair ends over the ears before you start to contour the hairline 3 Press the on off but...

Page 14: ...vent burning your hands Never dry cutting units or shaving foils with a towel or tissue as this may cause damage Never use compressed air scouring pads abrasive cleaning agents or aggressive liquids such as petrol or acetone to clean the appliance Clean the appliance every time you have used it by rinsing it under the tap or with the cleaning brush supplied Always unplug the appliance before you c...

Page 15: ...cleaning brush supplied 6 Rinse the inside of the appliance under the tap or clean it with the cleaning brush supplied 1 2 7 Insert the lug of the cutting element into the slot and push the cutting element back onto the swivel head Lubricate the cutting element Lubricate the cutting element every 3 months with oil form the bottle supplied with the appliance 1 2 1 Pull the front of the cutting elem...

Page 16: ...s Consumer Care Center in your country see the international warranty leaflet for contact details Recycling Do not throw away the product with the normal household waste at the end of its life but hand it in at an official collection point for recycling By doing this you help to preserve the environment This product contains a built in rechargeable battery which shall not be disposed of with norma...

Page 17: ...attery is completely empty Take any necessary safety precautions when you handle tools to open the product and when you dispose of the rechargeable battery 1 Disconnect the appliance from the mains and let the appliance run until the motor stops 2 Remove the upper housing part of the appliance 3 Open the inner body with a screwdriver 4 Use a screwdriver to remove the rechargeable battery from the ...

Page 18: ...s upwards downwards and across The setting of the comb has changed during trimming Check the setting of the comb If you push the appliance too hard onto the scalp you may accidentally change the setting of the comb The comb is not assembled correctly Detach the comb and reattach it The cutting performance decreases when the cutting unit and the comb are dirty Clean the cutting unit and the comb Th...

Page 19: ...b attachments is damaged or worn Do not use the comb attachment anymore Replace it with an attachment or comb of the original type You can obtain a replacement comb attachment from your local Philips dealer or you can visit www philips com shop For more information you can contact the Consumer Care Warranty and support If you need information or support please visit www philips com support or read...

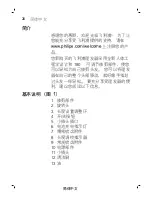
Page 20: ...ips com welcome 上注册您的产 品 您新购买的飞利浦理发器采用全新人体工 程学设计和 180 可调节修剪部件 使您 可以轻松为自己修剪头发 您可以将理发 器在自己的整个头部移动 就好像手指划 过头发一样轻松 要充分享受理发器的便 利 建议您阅读以下信息 基本说明 图 1 1 修剪部件 2 旋转头 3 长度设置调整环 4 开 关按钮 5 小插头插口 6 电池充电指示灯 7 精密梳齿附件 8 长度调校指示器 9 常规梳齿附件 10 电源部件 11 小插头 12 清洁刷 13 油 20 简体中文 ...

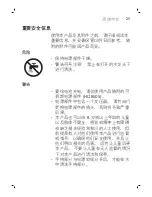
Page 21: ...警告符号注释 禁止在打开的水龙头下 进行清洗 警告 要给电池充电 请仅使用产品随附的可 拆卸电源部件 HQ8505 电源部件中包含一个变压器 请勿自行 更换电源部件的插头 否则将导致严重 后果 本产品也可以由 8 岁或以上年龄的儿童 以及肢体不健全 感觉或精神上有障碍 或缺乏相关经验和知识的人士使用 但 前提是有人对他们使用本产品进行监督 或指导 以确保他们安全使用 并且让 他们明白相关的危害 切勿让儿童玩弄 本产品 不要让儿童在无人监督的情况 下对本产品进行清洁和保养 手持部分与电源软线分开后 才能在水 中清洗手持部分 21 简体中文 ...

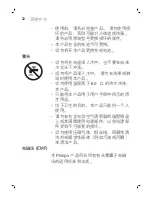
Page 22: ...开本产品更换充电电池 警告 切勿将充电座浸入水中 也不要在自来 水龙头下冲洗 切勿将产品浸入水中 请勿在洗澡或淋 浴时使用本产品 切勿使用温度高于 60 C 的热水冲洗 本产品 只能将本产品用于用户手册中所示的原 定用途 出于卫生的目的 本产品只能供一个人 使用 请勿在包含电动空气清新器的墙壁插座 上或其周围使用电源部件 以免电源部 件受到不可修复的损坏 切勿使用压缩气体 钢丝绒 研磨性清 洁剂或腐蚀性液体 例如汽油或丙酮 来清洁产品 电磁场 EMF 本 Philips 产品符合所有有关暴露于电磁 场的适用标准和法规 22 简体中文 ...

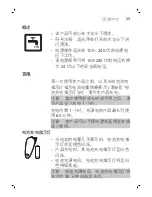
Page 23: ...电压转换 为 24 伏以下的安全低电压 充电 第一次使用本产品之前 以及当电池状态 指示灯指示电池电量快要耗尽 请参见 电 池充电指示灯 时 请为本产品充电 注意 首次使用前或长时间不用之后 请 为产品至少充电 1 小时 充电约需 1 小时 充满电的产品最长可使 用 60 分钟 注意 本产品可以不接电源或直接连在插 座上使用 电池充电指示灯 当电池的电量几乎耗尽时 电池充电指 示灯会呈橙色闪烁 产品充电时 其电池充电指示灯呈白色 闪烁 电池充满电后 电池充电指示灯将呈白 色持续亮起 注意 电池充满电后 电池充电指示灯将 在大约 30 分钟后自动关闭 23 简体中文 ...

Page 24: ...入电源插座 电池充电指示灯指示产品正在充电 请 参见 电池充电指示灯 2 充电之后 从电源插座上拔下电源部 件 并从本产品上拔下小插头 注意 电池充满电后 电池充电指示灯将 在大约 30 分钟后自动关闭 优化充电电池寿命 每年将充电电池彻底放电两次 方法是让马达一直转动 直到不再转为 止 然后 将电池再次完全充电 首次使用之前 1 2 1 将修剪部件前端向上拉 然后从产品上 取下修剪部件 2 转动修剪部件 用随附油瓶中的油润滑 所示的三个位置 24 简体中文 ...

Page 25: ...理头 发 头发修剪提示 建议您从常规梳齿附件的最高设置开始 修剪 然后逐渐缩短设置 要获得最大修剪效率 请沿头发生长的 反方向移动本产品 因为头发不会全部以相同的方向生长 您需要以不同的方向移动产品 向上 向下或交叉 确保梳齿附件的扁平部分完全接触到头 皮 以获得均匀的修剪效果 记下您使用的设置 用作以后剪发过程 中打造某种发型的参考 使用旋转头 45 180 90 0 45 90 您可以将旋转头从开始位置 0 指向前 方 向左或向右旋转 45 或 90 您可 以通过这种方法调整修剪部件 以贴合待 25 简体中文 ...

Page 26: ...廓 这使您可以更 轻松地为自己理发 1 要将修剪部件设置到所需位置 请转动 旋转头 可听到 咔哒 一声 注意 始终通过转动旋转头调整修剪部 件的位置 请勿转动修剪部件或梳齿附 件 注意 请勿向左或向右转动旋转头超过 90 您可以像握持定型梳一样握住旋转头来 使用本产品 使用修剪梳修剪头发 1 将梳齿附件的边缘插入旋转头 确保梳齿附件正确锁定到位 3 mm 5 mm 7 mm 注意 梳齿附件上指示长度设置 26 简体中文 ...

Page 27: ...现自然顺利的过 渡 切勿将长度设置调整环转到最高设置之 外 3 在修剪不同位置的头发 请参见 使用旋 转头 时 可以将旋转头转动到您的手 臂感觉最舒服的位置 4 按开 关按钮启动产品 QC5570 短暂地按下按钮 QC5580 按住按钮 2 秒钟 5 将理发器在头发上缓慢移动 6 定期清除梳齿附件中剪下的头发 如果梳齿附件中积聚了许多头发 请先 取下梳齿附件 吹去和 或抖掉梳齿附件 上的头发 取出梳齿附件时 所选的设 置不会改变 不用梳齿的情况下修剪轮廓 即使没有梳齿附件 您也可以使用理发器 以非常贴近头皮的距离 0 5 毫米 或紧 27 简体中文 ...

Page 28: ...附件修剪头发时要小 心 1 将梳齿附件从旋转头拉出 切勿拔扯梳齿附件容易变形的顶部 请 务必拉拔底部 2 在开始紧贴双耳附近的发线修剪头发之 前 请梳理耳朵上方的发梢 3 按开 关按钮启动产品 4 修整耳朵周围的轮廓时 倾斜产品 使 修剪部件只有一边接触发梢 5 要紧贴颈部周围和鬓角轮廓 请转动产 品并向下修剪 注意 缓慢 流畅地移动产品 只需 顺着自然生长的发际线 6 调整旋转头的位置 使修剪轮廓更容易 请参见 使用旋转头 清洁和保养 为保证更好的修剪效果 请定期清洗剃 毛刀 28 简体中文 ...

Page 29: ...用毛巾或纸巾擦干修剪部件或剃 毛刀网 因为有可能造成损坏 切勿使用压缩气体 钢丝绒 研磨性清 洁剂或腐蚀性液体 例如汽油或丙酮 清洁本产品 每次用完产品后 请在水龙头下冲洗产品 或用随附的清洁刷进行清洁 在自来水龙头下清洗剃须刀之前 务必拔 掉其电源插头 小心不要让修剪部件掉落在地板上 1 关闭产品并断开电源 2 取下发梳 3 在水龙头下冲洗梳齿附件或用随附的清 洁刷进行清洁 1 2 4 将拇指放在修剪部件的圆边中心 食指 放在修剪部件的齿上 使用食指从旋转 头提起修剪部件 29 简体中文 ...

Page 30: ...5 在水龙头下冲洗修剪部件或用随附的清 洁刷进行清洁 6 在水龙头下冲洗产品的内部或用随附的 清洁刷进行清洁 1 2 7 将修剪部件的凸缘插入槽内 然后将修 剪部件推回旋转头 润滑修剪部件 每 3 个月用产品随附的油瓶中的油润滑一 次修剪部件 1 2 1 将修剪部件前端向上拉 然后从产品上 取下修剪部件 2 转动修剪部件并润滑所示的三个位置 30 简体中文 ...

Page 31: ...系您的飞利浦经销商 您还可以联系 所在国家 地区的飞利浦客户服务中心 请 参阅国际保修卡了解详细联系信息 回收 弃置本产品时 请不要将其与一般生活 垃圾放在一起 应将其交给政府指定的 回收中心 这样做将有利于环保 此产品包含内置充电电池 请勿将充电 电池与一般生活垃圾一起弃置 请您将 产品送到官方收集中心或飞利浦服务中 心 请专业人士移除充电电池 遵循您的国家 地区有关分类回收电子电 气产品和充电电池的规定 正确弃置产 品有助于避免对环境和人类健康造成不 良后果 卸下充电电池 必须在丢弃本产品前拆下充电电池 卸下 电池之前 请确保本产品与电源断开连接 并且电池电量已耗尽 31 简体中文 ...

Page 32: ... Ġ ȕ PBDE PCB s מ ŪǗɢ ذ X O O O O O Electrical contact pins ǗˈਝǦ X O O O O O Power plug Ǘ۷ Ǽ X O O O O O X O O O O O ǕȪϜ SJ T 11364Ā ܪ ǭৠ 뺯 O ȪФ ĈҴˀΙć ˌɫǨĈߴΙࠒնġĀߒʔߴćGB T 26572 ܪ ǭĀՄʔđ ŘĪ뺯 X ȪФ ĈҴˀΙψɺć ˌɫĀԚĂߴΙࠒնġĀߒʔɸŜGB T 26572 ܪ ǭĀՄʔđ 뺯 Internal metal parts ʭˌ ɫ 该表格中所显示的 有害物质 在产品 正常使用情况下不会对人身和环境产生 任何伤害 该表格中所显示的 有害物质 及其存 在的部件向消费者和回收处理从业者提 供相关物质的存在信息 有助于产品废 弃时的妥善处理 32 简体中文 ...

Page 33: ...com support 查阅常 见问题列表 或联系您所在国家 地区的客 户服务中心 问题 可能的原因 解决方法 产品的修剪效 果不均匀 产品在头发上推 动时没有触碰头 皮 修剪梳在头发上推动 时 请确保修剪梳可 始终与皮肤完全接 触 您只向一个方向 移动产品 由于并非所有头发都 向一个方向生长 请 朝不同方向移动产品 向上 向下以及交 叉 修剪过程中修剪 梳的设置有所更 改 检查修剪梳的设置 如果您将产品过于用 力地按在头皮上 您 可能会意外更改修剪 梳的设置 修剪梳组装不正 确 卸下修剪梳 重新安 装 33 简体中文 ...

Page 34: ...品 然后将电源部件 插入电源插座 我不知道如何 将梳齿附件连 接至产品 要连接梳齿附件 只 需将其滑入产品的插 槽中即可 我不知道如何 更改梳齿附件 的头发长度设 置 您可使用产品上的长 度设置调整环 更改梳齿附件的头发 长度设置 旋转调整 环 将梳齿附件设为 所需设置 请参 阅 使用产品 一章 的 使用修剪梳修剪 头发 部分 其中一个梳齿 附件损坏 或磨损 切勿再使用梳齿附 件 请使用原装型号 的附件或梳齿更换 您可以从当地的飞利 浦经销商获得替换梳 齿附件 或访问 www philips com shop 有关更多 信息 您可以联系飞 利浦客户服务 34 简体中文 ...

Page 35: ...保修和支持 如需信息或支持 请访问 www philips com support 或阅读国际保修 卡 保修条款 修剪部件不在国际保修条款的涵盖范围之 内 因为修剪部件属于易磨损物品 35 简体中文 ...

Page 36: ...保留备用 发行日期 11 9 2018 36 简体中文 ...

Page 37: ......

Page 38: ......

Page 39: ...Empty page before back cover ...

Page 40: ... 2018 Koninklijke Philips N V All rights reserved 保留所有权利 4222 002 8362 5 11 9 2018 75 循环再造纸 保留备用 75 recycled paper 75 papier recyclé ...

Reviews: