10
Philips · NeoPix Easy+
4 Connect to
playback devices
Notice
Make sure all devices are disconnected
from the power outlet before establishing
or changing any connections.
Connecting to devices
through HDMI
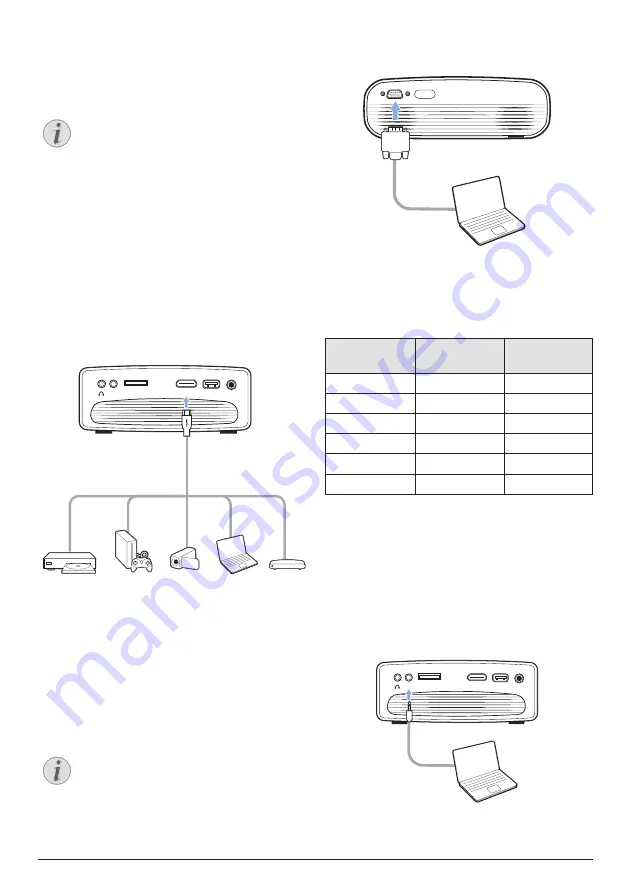
Connect a playback device (e.g. a Blu-ray
player, gaming console, camcorder, digital
camera or PC) to the projector through HDMI
connection. With this connection, images are
shown on the projection screen, and audio is
played on the projector.
1
Using an HDMI cable, connect the
HDMI
connector on the projector to the HDMI
output on the playback device.
MICRO SD
HDMI
USB
DC
AUX
2 Access the home menu and select HDMI
input source.
Connecting to a computer
through VGA
Connect a computer (e.g. a desktop or laptop)
to the projector. With this connection, images
are shown on the projection screen.
Notice
Many laptops do not activate the
external video output automatically
when you connect a second display such
as a projector. Check your laptop user
manual to find out how to activate the
external video output.
1
Using a VGA cable, connect the
VGA
connector on the projector to the
VGA
output on a computer.
VGA
2 On your computer, adjust the screen
resolution of the computer to the correct
setting and switch the VGA signal to an
external monitor. The following resolutions
are supported:
Resolution
Image refresh
rate
VGA
640 x 480
60 Hz
SVGA
800 x 600
60 Hz
XGA
1024 x 768
60 Hz
WXGA
1280 x 768
60 Hz
HD
1280 x 720
60 Hz
FULL HD
1920 x 1080
60 Hz
3 Access the home menu and select VGA
input source. Images are shown on the
projection screen.
4 You can output audio from the computer
to the projector after the VGA connection is
made.
•
Using a 3.5 mm audio cable, connect the
AUX
connector (3.5 mm) on the projector to
the analogue audio output (3.5 mm jack, or
red and white jacks) on the computer.
MICRO SD
HDMI
USB
DC
AUX


