background image

13

EN

6 Phonebook

This phone has a phonebook that stores up to 

20 records. You can access the phonebook from 

the handset. Each record can have a name up 

to 14 characters long and a number up to 24 

digits long.

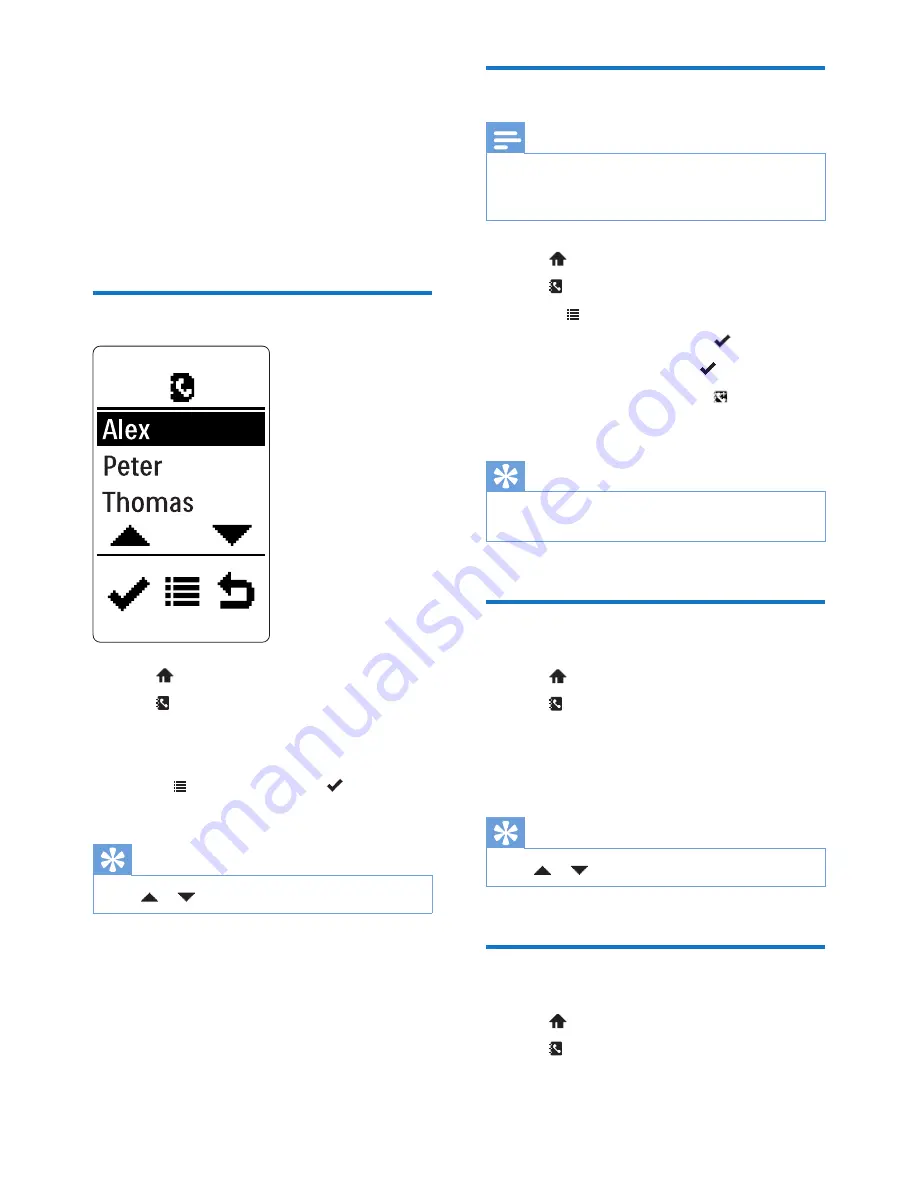
View the phonebook


Tap 

 to access the main menu screen.

Tap 

 to access the phonebook list.

Tap on a phonebook entry.


»

The phonebook entry is highlighted.

Select   > 

[View]

, then tap 

 to display 

the information. 

Tip


Tap   or 

 to scroll up or down.

Add a record

Note


If your phonebook memory is full, the phone displays 

a notification message. Delete some records to add 

new ones.

Tap 

 to access the main menu screen.

Tap 

 to access the phonebook list.

Select 

 to access the option menu.

Select 

[Add new]

, then tap   to confirm.

Enter the name, then tap   to confirm.

Enter the number, then tap   to save.


»

Your new record is saved.

Tip


Press and hold # to insert a pause if you need to store 

the access number or country code.

Call from the phonebook

Tap 

 to access the main menu screen.

Tap 

 to access the phonebook list.

Tap on a phonebook entry to highlight it.

Tap on the phonebook entry again to 

make the call.

Tip


Tap   or 

 to scroll up or down.

Edit a record

Tap 

 to access the main menu screen.

Tap 

 to access the phonebook list.

Tap on a phonebook entry. 

Summary of Contents for MT3120

Page 1: ...www philips com welcome User manual Always there to help you Register your product and get support at MT3120 Question Contact Philips ...

Page 2: ......

Page 3: ... 12 Switch between the upper case and lower case 12 6 Phonebook 13 View the phonebook 13 Add a record 13 Call from the phonebook 13 Edit a record 13 Delete a record 14 Delete all records 14 7 Call log 15 Save a missed call number to the phonebook 15 Return a call 15 Delete a call record 16 Delete all call records 16 8 Settings 17 Phone 17 Set the handset s ringtone volume 17 Set the handset s ring...

Page 4: ...2 EN 12 Appendix 25 Text and number input tables 25 ...

Page 5: ...outlet shall be installed near the equipment and shall be easily accessible This is a handsfree product with high speaker volume Make sure the product is not too close to your ear This equipment is not designed to make emergency calls when the power fails An alternative has to be made available to allow emergency calls Do not allow the product to come into contact with liquids Do not expose the ph...

Page 6: ... from the support that Philips offers register your product at www philips com welcome What is in the box Phone with clip Lanyard Adapter for battery charging Guarantee Quick start guide Overview of the phone a Loud speaker b Touch sensitive LCD screen c Microphone d Charging jack Headphone jack Headsets with mic are not supported e Clip f On and off switch g Scroll through a list Increase or decr...

Page 7: ...con Descriptions Indicates the battery level from full to low When the handset is charging the bars keep scrolling until the battery is fully charged or you unplug the adapter from the phone The empty battery icon flashes and you hear an alert tone The battery is low and needs recharging Displays the link status between the handset and base station The more bars are shown the better the signal str...

Page 8: ...rks with any base station compliant to the GAP standard For information on the GAP standard see the chapter Notice This product is a DECT phone accessory that requires a GAP compliant DECT base station for access to the landline Fix the lanyard to the phone Attach the lanyard as shown below You can lengthen or shorten the lanyard by adjusting the distance between two knots Wear the phone Clip the ...

Page 9: ... Services Register then tap to confirm 3 Press the paging button on your original cordless phone s base station for approximately 10 seconds to set the base station of your phone to registration mode Note Check in the user manual of your base station on how to enter the registration mode For most base stations this can be achieved by pressing the paging button for 5 10 seconds until you hear a con...

Page 10: ...te time Set time then tap to confirm 3 Tap once or several times to enter the date then tap to confirm Set the date format 1 Tap to access the main menu screen 2 Select Phone Date time Date format then tap to confirm 3 Tap to select a date format then tap to confirm Set the time format 1 Tap to access the main menu screen 2 Select Phone Date time Time format then tap to confirm 3 Tap to select a t...

Page 11: ...s in standby mode when it is idle In standby mode the phone s charge lasts about a week If the auto lock has been set you see a key icon on the idle screen You need to press the icon to activate the phone The auto lock feature is automatically disabled during an incoming call Check the signal strength Indicates the link status between the handset and base station The more bars are shown the better...

Page 12: ...er displays the talk time of your current call Note If you hear warning tones the phone is almost out of battery or out of range Charge the battery or move the phone close to the base station End a call Tap Note The phone will ask for confirmation to hang up to avoid accidental call termination This confirmation can be deactivated in the phone settings menu Answer a call When the phone rings tap t...

Page 13: ...sted and the phone is back to the call screen Mute the microphone 1 Tap during a call The handset displays Mute on The caller cannot hear you but you can still hear his voice 2 Tap again to unmute the microphone You can now communicate with the caller Headphones mode You can plug in any standard headphones e g Philips SHE7000 into the phone to listen in greater privacy The headphone jack is the sa...

Page 14: ...ap on the keypad to enter the character and numbers 2 Select to delete the character 3 Press to add a space Switch between the upper case and lower case By default the first letter of each word in a sentence is upper case and the rest is lower case Tap Aa to switch between the upper case and lower case letters during editing ...

Page 15: ...ication message Delete some records to add new ones 1 Tap to access the main menu screen 2 Tap to access the phonebook list 3 Select to access the option menu 4 Select Add new then tap to confirm 5 Enter the name then tap to confirm 6 Enter the number then tap to save Your new record is saved Tip Press and hold to insert a pause if you need to store the access number or country code Call from the ...

Page 16: ...ok list 3 Tap on a phonebook entry The phonebook entry is highlighted 4 Select Delete then tap to confirm The record is deleted Tip Tap or to scroll up or down Delete all records 1 Tap to access the main menu screen 2 Tap to access the phonebook list 3 Select Delete all then tap to confirm The handset displays a confirmation request 4 Tap to confirm All records are deleted Tip Tap or to scroll up ...

Page 17: ...missed calls Indicates an incoming call in the call log Indicates an outgoing call in the call log Indicates the unread missed call in the call log Indicates the read missed call in the call log Note If you pick up a call on your original phone but not the handsfree phone it will appear as a missed call on the handsfree phone Save a missed call number to the phonebook 1 Tap from the idle screen or...

Page 18: ...p to confirm The handset displays a confirmation requests 4 Tap to confirm The record is deleted Tip Tap or to scroll up or down Delete all call records 1 Tap from the idle screen or main menu The call log is displayed 2 Tap to access the option menu 3 Select Delete all then tap to confirm The handset displays a confirmation requests 4 Tap to confirm All record are deleted ...

Page 19: ...ated 1 Tap to access the main menu screen 2 Select Phone Sounds Silent mode On off On or Off then tap to confirm The setting is saved Note If you select On your handsfree phone does not ring for incoming calls during a specified period If you select Off your handsfree phone rings for any incoming call at any time 3 Select Start end then tap to confirm 4 Set the start and end times then tap to conf...

Page 20: ...ically lock the screen on your phone 1 Tap to access the main menu screen 2 Select Phone Auto lock then tap to confirm 3 You can choose between Off and auto lock timeouts of 20 40 and 60 seconds 4 Tap to confirm The setting is saved Set the display language Note This feature only applies to models with multiple language support Languages available for selection vary with different countries 1 Tap ...

Page 21: ...calls from the call log Set the call list type 1 Tap to access the main menu screen 2 Select Services Call list type then tap to confirm 3 Select an option then tap to confirm ECO mode The handsfree phone supports Eco mode to minimize transmission power and radiation 1 Tap to access the main menu screen 2 Select Services Eco mode then tap to confirm You can choose between two modes Off No reductio...

Page 22: ...ch consumes very little power in standby mode Register your phone Register your phone manually to the base station before use see Register your phone on page 7 Restore default settings You can reset your phone settings to the original factory settings 1 Tap to access the main menu screen 2 Select Services Reset then tap to confirm The handset displays a confirmation request 3 Tap to confirm All se...

Page 23: ...rated battery Li Polymer Adapter Charger Philips SSW 1920EU 2 Input 100 240V 50 60Hz 0 2A Output 6V 500mA Philips SSW 1920UK 2 Input 100 240V50 60Hz 0 2A Output 6V 500mA Power consumption Eco power supply with minimal power consumption 0 01W Weight and dimensions 62 grams 90 x 43 5 x 29 5 mm H x W x D Eco mode Yes Range Indoor 50m Outdoor 300m Phonebook list and Call log Phonebook list with 20 ent...

Page 24: ...es for our products to comply with all applicable legal requirements and to stay well within the EMF standards applicable at the time of producing the products Philips is committed to develop produce and market products that cause no adverse health effects Philips confirms that if its products are handled properly for their intended use they are safe to use according to scientific evidence availab...

Page 25: ...ncial contribution has been paid to the associated national recovery and recycling system Environmental information All unnecessary packaging has been omitted We have tried to make the packaging easy to separate into three materials cardboard box and polyethylene bags protective foam sheet Your system consists of materials which can be recycled and reused if disassembled by a specialized company P...

Page 26: ... switch on the phone No display Make sure the batteries are charged Make sure there is power and the phone is connected to the charger Bad audio crackles echo etc The handset is nearly out of range Move it closer to the base station The phone receives interference from the nearby electrical appliances Move the base station away from them The phone is at a location with thick walls Move the base aw...

Page 27: ...j k l 5 Λ 6 m n o 6 ñ ó ô õ ö ò 7 p q r s 7 β ş š Π Θ Σ 8 t u v 8 ù ú ü ū ų μ 9 w x y z 9 ø Ω Ξ Ψ ž Key Upper case characters for Greek 0 Space 0 1 1 _ 2 A B Г 2 A B C Æ Ä Å Ç 3 Δ Ε Ζ 3 D E F É 4 Η Θ Ι 4 G H I 5 Κ Λ Μ 5 J K L 6 Ν Ξ Ο 6 M N O Ñ Ö 7 Π Ρ Σ 7 P Q R S 8 Τ Υ Φ 8T UV Ü 9 Χ Ψ Ω 9 W XY Z Ø Key Lower case characters for Greek 0 Space 0 1 1 _ 2 α β γ 2 a b c à æ ä å 3 δ ε ζ 3 d e f è é 4 η θ...

Page 28: ...E F É Δ Φ 4 И Й К Л 4 І Ї G H I Γ 5 М Н О П 5 J K L Λ 6 Р С Т У 6 M N O Ñ Ö 7 Ф Х Ц Ч 7 P Q R S Π Θ Σ ß 8 Ш Щ Ъ Ы 8T UV Ü 9 Ь Э Ю Я 9 W XY Z Ø Ω Ξ Ψ Key Lower case characters for Russian and Ukrainian 0 Space 0 1 1 _ 2 а б в г 2 ґ a b c à æ ä å 3 д е ё ж з 3 є d e f è é Δ Φ 4 и й к л 4 і ї g h i ì Γ 5 м н о п 5 j k l Λ 6 р с т у 6 m n o ñ ö ò 7 ф х ц ч 7 p q r s Π Θ Σ ß 8 ш щ ъ ы 8 t u v ù ü 9 ь э...

Page 29: ......

Page 30: ...Specifications are subject to change without notice 2012 Koninklijke Philips Electronics N V All rights reserved 0979 ...

Reviews: