background image

16

English

Tape Operation / Recording

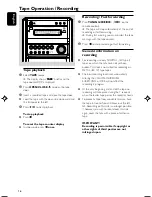
Tape playback

1

Select 

TAPE

 source.

The display shows “

TAPE

TAPE

TAPE

TAPE

TAPE

” briefly, and the

tape counter 

000

 is displayed.

2

Press 

OPEN/CLOSE


ç

 to open the tape

door.

3

Insert a recorded tape and close the tape door.

Load the tape with the open side downward and
the full spool to the left.

4

Press 

ÉÅ

  to start playback.

To stop playback

Press 

Ç

.

To reset the tape counter display

In stop mode, press 

Ç


once

.

Rewinding / Fast forwarding

1

Press 

TUNING 

S

/

(

à

/

á

on the

remote control).

The tape will stop automatically at the end of

rewinding or fast forwarding.

During fast winding, you can monitor the tape

message with the tape counter.

2

Press 

Ç

 to stop rewinding or fast forwarding.

General information on
recording

For recording, use only NORMAL (IEC type I)
tapes on which the tabs have not yet been
broken. This deck is not suited for recording on
METAL (IEC IV) type tapes.

The best recording level is set automatically.
Altering the VOLUME, INCREDIBLE
SURROUND or DBB will not affect the
recording in progress.

At the very beginning and end of the tape, no
recording will take place during the 7 seconds
when the leader tape passes the recorder heads.

To protect a tape from accidental erasure, have
the tape in front of you and break out the left
tab. Recording on this side is no longer possible.
If, however, you wish to record over this side
again, cover the tabs with a piece of adhesive
tape.

IMPORTANT!
Recording is permissible if copyright or
other rights of third parties are not
infringed upon.

VOLUME

INCREDIBLE 
SURROUND

PROGRAM

TUNING

ALBUM  PRESET

SOURCE

TIMER SET

DBB

DSC

OPEN/
CLOSE

RDS

CLOCK SET

BAND

STANDBY-ON

ECO POWER

RECORD

DISPLAY

M C M 5 1 0   M I C R O   S Y S T E M

iR

 /

pg001-020_MCM510_22_Eng

2005.7.12, 17:11

16

Summary of Contents for MCM510

Page 1: ...MCM510 Micro Hi Fi System ...

Page 2: ... N or coloured black Connect the brown wire to the terminal marked L or coloured red Do not connect either wire to the earth terminal in the plug marked E or e or coloured green or green and yellow Before replacing the plug cover make certain that the cord grip is clamped over the sheath of the lead not simply over the two wires Copyright in the U K Recording and playback of material may require c...

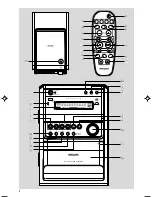
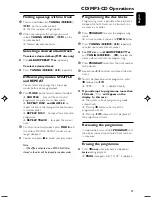
Page 3: ...RW COMPATIBLE INCREDIBLE SURROUND PROGRAM TUNING ALBUM PRESET SOURCE TIMER SET DBB DSC OPEN CLOSE RDS CLOCK SET BAND STANDBY ON ECO POWER RECORD DISPLAY M C M 5 1 0 M I C R O S Y S T E M iR 5 9 8 0 3 1 2 4 7 6 OPEN CLOSE 8 6 7 9 ...

Page 4: ...ider gränsen för laserklass 1 Observera Stömbrytaren är sekundärt kopplad och bryter inte strömmen från nätet Den inbyggda nätdelen är därför ansluten till elnätet så länge stickproppen sitter i vägguttaget SF Luokan 1 laserlaite Varoitus Laitteen käyttäminen muulla kuin tässä käyttöohjeessa mainitulla tavalla saattaa altistaa käyttäjän turvallisuusluokan 1 ylittävälle näkymättömälle lasersäteilyl...

Page 5: ...glish Français Português Español Deutsch Nederlands Italiano Svenska Dansk Suomi Index English 6 Français 22 Español 38 Deutsch 54 Nederlands 70 Italiano 86 Svenska 102 Dansk 118 Suomi 134 Português 150 166 ...

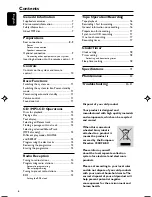
Page 6: ...io stations 14 Automatic programming Manual programming Tuning to preset radio stations 15 RDS 15 Setting the RDS clock Tape Operation Recording Tape playback 16 Rewinding Fast forwarding 16 General information on recording 16 Preparation for recording 17 Synchro start CD recording 17 One touch recording 17 Recording timer 17 Clock Timer Clock setting 18 Timer setting 18 Activating and deactivatin...

Page 7: ...urtains etc Do not expose the system batteries or discs to excessive moisture rain sand or heat sources caused by heating equipment or direct sunlight No naked flame sources such as lighted candles should be placed on the apparatus No objects filled with liquids such as vases shall be placed on the apparatus If the system is brought directly from a cold to a warm location or is placed in a very da...

Page 8: ...tions with the power switched on To avoid overheating of the system a safety circuit has been built in Therefore your system may switch to Standby mode automatically under extreme conditions If this happens let the system cool down before reusing it not available for all versions B Antennas Connection Connect the supplied MW loop antenna and FM antenna to the respective terminals Adjust the positi...

Page 9: ...necting cords are not supplied Refer to the operating instructions of the connected equipment for details Connecting other equipment to your system Connect the audio left and right OUT terminals of aTV VCR Laser Disc player DVD player or CD Recorder to the AUX IN terminals Note If you are connecting equipment with a monaural output a single audio out terminal connect it to the AUX IN left terminal...

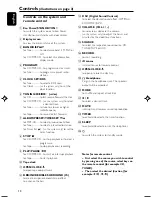
Page 10: ...e forTape to stop playback or recording 9 PLAY PAUSE É Å for CD MP3 CD to start or interrupt playback forTape to start playback 0 Tape deck OPEN CLOSE ç to open tape compartment DBB INCREDIBLE SURROUND IS to create a super enhanced stereo effect to enhance the bass DSC Digital Sound Control to select the desired sound effect OPTIMAL ROCK POP JAZZ VOLUME VOL to increase or decrease the volume on th...

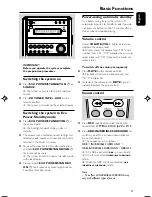
Page 11: ...y buttons within 15 minutes after a disc or tape has stopped playing Volume control Adjust VOLUME VOL to increase or decrease the volume level Display shows the volume level VOL and a number from 1 31 MIN denotes the minimum volume level and MAX denotes the maximum volume level To switch off the volume temporarily Press MUTE on the remote control Playback will continue without sound and MUTE is di...

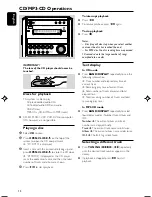
Page 12: ...disc has reached the end For MP3 disc the disc reading time may exceed 10 seconds due to the large number of songs compiled into one disc Text display In CD mode Press BAND DISPLAY repeatedly to see the following information Track number and elapsed play time of current track Remaining play time of current track Total number of tracks played and total elapsed time Total remaining number of tracks ...

Page 13: ... is activated on a MP3 CD all titles stored in the disc will be played in random order Programming the disc tracks Programming tracks is possible when playback is stopped Up to 20 tracks can be stored in the memory in any order 1 Press PROGRAM to enter the programming mode A track number is shown and PROG flashes 2 Press TUNING S T repeatedly to select your desired track number For MP3 disc press ...

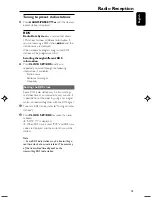
Page 14: ...ormer programmed radio stations will be overridden 1 Press ALBUM PRESET 4 3 to select the preset number where programming should start Note If no preset number is selected default is preset 1 and all your presets will be overridden 2 Press PROGRAM for more than two seconds to activate programming All available stations are programmed Manual programming 1 Tune to your desired station refer to Tunin...

Page 15: ...f available Station name Radio text messages Frequency Setting the RDS clock Some RDS radio station may be transmitting a real clock time at an interval of every minute It is possible to set the clock by using a time signal which is broadcast together with the RDS signal 1 Tune to a RDS station refer to Tuning to radio stations 2 Press CLOCK SET RDS for more than two seconds SEAR TM is displayed W...

Page 16: ...ecording use only NORMAL IEC type I tapes on which the tabs have not yet been broken This deck is not suited for recording on METAL IEC IV type tapes The best recording level is set automatically Altering theVOLUME INCREDIBLE SURROUND or DBB will not affect the recording in progress At the very beginning and end of the tape no recording will take place during the 7 seconds when the leader tape pas...

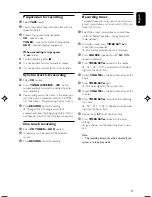
Page 17: ...X source 2 If necessary start playback of the selected source 3 Press RECORD to start recording Recording timer To record from the radio you will need to use a preset radio station and to set a start ON and finish OFF time 1 Select the preset radio station to record from refer to Radio Reception Tuning to preset radio stations 2 In standby mode press TIMER SET 3 for more than two seconds The curre...

Page 18: ...ELECT SOURCE are displayed 3 Press TIMER SET 3 to confirm your desired mode SET ON TIME is displayed and the clock digits for the hours flash 4 Adjust VOLUME to set the hours 5 Press TIMER SET 3 again The clock digits for the minutes flash 6 Adjust VOLUME to set the minutes 7 Press TIMER SET 3 to confirm the time The timer is now set and activated Activating and deactivating timer In standby or du...

Page 19: ...7 5 108 MHz LW wave range 153 279 kHz MW wave range 531 1602 kHz Sensitivity at 75 Ω mono 26 dB signal to noise ratio 2 8 µV stereo 46 dB signal to noise ratio 61 4 µV Selectivity 28 dB Total harmonic distortion 5 Frequency response 63 12500 Hz 3 dB Signal to noise ratio 50 dBA TAPE DECK Frequency response Normal tape type I 80 12500 Hz 8 dB Signal to noise ratio Normal tape type I 50 dBA Wow and ...

Page 20: ...tate the heads during cleaning Use a cotton swab slightly moistened with cleaning fluid or alcohol You can also clean the heads by playing a cleaning tape once A A B C Demagnetizing the heads Use a demagnetizing tape available at your dealer Maintenance NO DISC is displayed Radio reception is poor Insert a disc Check if the disc is inserted upside down Wait until the moisture condensation at the l...

Page 21: ...the headphones Check that the speakers are connected correctly Check if the stripped speaker wire is clamped Make sure the MP3 CD was recorded within 32 256 kbps bit rate with sampling frequencies at 48 kHz 44 1 kHz or 32 kHz Check the speaker connections and location Select the source CD orTUNER for example before pressing the function button É Å í ë Reduce the distance between the remote control...

Reviews: