background image

9

English

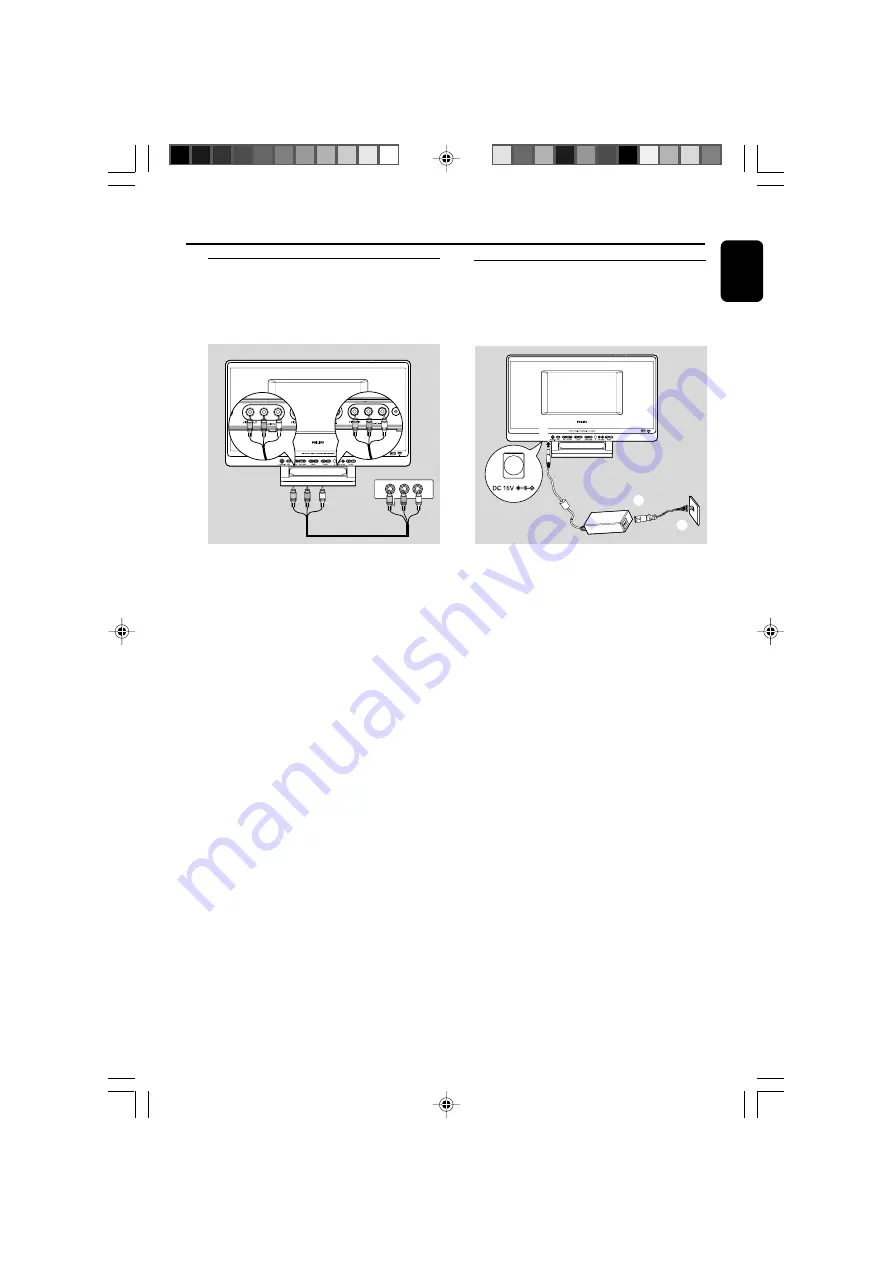
Connecting an additional
appliance

It is possible to use an additional appliance, e.g.
VCR, DVD recorder, video game player, with the
set.


AV OUT

AV IN

Viewing and listening to the playback of
other equipment on MCL888

Using AV cables (red/white/yellow, not supplied),
connect VIDEO IN and AUDIO IN L/R on the
bottom panel to video/audio OUT jacks on
other equipment (such as VCR, DVD/game
player) by matching colors of AV plugs and AV
jacks.

Viewing and listening to the playback of
MCL888 on other equipment

Using AV cables (red/white/yellow, not supplied),
connect VIDEO OUT and AUDIO OUT L/R on
the bottom panel to video/audio IN jacks on
other equipment (such as VCR, TV) by matching

colors of AV plugs and AV jacks.

Installation

Connecting the power cord

–  The type plate is located on the bottom
panel.
–  Never make or change connections with
the power supply switched on.

1

  Plug the plug of the supplied power adapter to

the DC 15V socket on the bottom panel.

2

Plug the power adapter to the wall outlet with
the supplied AC power cord.

Helpful hints:
When the set is switched to standby, it is
still consuming some power. To disconnect
the set from the power supply completely,
remove the power plug from the wall
socket.

1

2

3

pg001-030-mcl888_MexicoA

30/3/06, 16:14

9

Summary of Contents for MCL 888

Page 1: ...MCL 888 DVD Micro Theatre with LCD Screen pg001 030 mcl888_MexicoA 30 3 06 16 14 1 ...

Page 2: ...__________________ LEA CUIDADOSAMENTE ESTE INSTRUCTIVO ANTES DE USAR SU APARATO CAUTION Use of controls or adjustments or performance of procedures other than herein may result in hazardous radiation exposure or other unsafe operation AVISO IMPORTANTE Philips Mexicana S A de C V no se hace responsable por daños o desperfectos causados por Maltrato descuido o mal uso presencia de insectos o roedore...

Page 3: ...3 1 2 34 5 6 8 0 9 7 Front view Top view Bottom view pg001 030 mcl888_MexicoA 30 3 06 16 14 3 ...

Page 4: ...pción de radio o television que se puede identificar encendiendo y apagando el aparato recomendamos al usuario que intente solucionar las interferencias siguiendo una o más de las siguientes medidas Cambie la posición de la antena receptora Aumente la separación entre el aparato y el receptor Conecte el aparato a una toma de un circuito diferente al que está conectado el receptor Consulte con el d...

Page 5: ...ormance of procedures other than herein may result in hazardous radiation exposure or other unsafe operation ATENCIÓN El uso de mando o ajustes o la ejecucción de métodos que no sean los aquí descritos puede ocasionar peligro de exposición a radiación pg001 030 mcl888_MexicoA 30 3 06 16 14 5 ...

Page 6: ... Autostore Automatic programming To listen to a preset station Disc Operations Playable discs 20 Region codes Playing discs 20 Selecting and searching 21 Selecting a different track chapter Fast reversing forwarding GOTO Different play modes REPEAT SHUFFLE and REPEAT A B 22 REPEAT SHUFFLE REPEAT A B INTRO 23 Programming tracks chapters 23 DVD VCD Features Playing in slow motion 24 ZOOM 24 AUDIO 24...

Page 7: ... a disc becomes dirty clean it with a cleaning cloth Wipe the disc from the center out Do not use solvents such as benzene thinner commercially available cleaners or antistatic spray intended for analog records Cleaning the disc lens After prolonged use dirt or dust may accumulate at the disc lens To ensure good playback quality clean the disc lens with any commercially available cleaner Follow th...

Page 8: ... antenna jack marked TV and the antenna cord marked FM to the antenna jack marked FM Pull out and orient theTV FM antenna rods to maximize reception efficiency Position the antenna as far away as possible from the AC adapter VCR or other radiation source To detach the antenna holder As shown below push on A and simultanesouly take the antenna holder off the set Connecting CATV additionalTV antenna...

Page 9: ... white yellow not supplied connectVIDEO OUT and AUDIO OUT L R on the bottom panel to video audio IN jacks on other equipment such asVCR TV by matching colors of AV plugs and AV jacks Installation Connecting the power cord The type plate is located on the bottom panel Never make or change connections with the power supply switched on 1 Plug the plug of the supplied power adapter to the DC 15V socke...

Page 10: ...owing the indications inside the compartment 3 Close the cover CAUTION Remove batteries if they are exhausted or will not be used for a long time Do not use old and new or different types of batteries in combination Batteries contain chemical substances so they should be disposed of properly 1 3 2 pg001 030 mcl888_MexicoA 30 3 06 16 14 10 ...

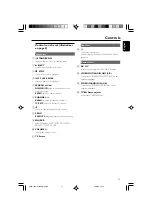
Page 11: ... channel 7 iR sensor for the infra red remote control 8 PROG RADIO TV programs preset stations channels 9 SOURCE selects functions DVD VCD CD or MP3 RADIO TV CATV or AV 0 VOLUME adjusts the volume level TV Screen Controls TopView n connects a headphone Connecting the headphones will switch off the speakers BottomView DC 15V socket for the supplied 15V AC DC adapter VIDEO OUT AUDIO OUT L R connects...

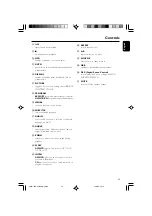
Page 12: ... AV selects the input from an external connected appliance 4 Numeric Keypad 0 9 DVD VCD CD MP3 selects a track title chapter number TV CATV selects aTV channel number 5 1 2 3 4 navigation controls left right up down to scroll through disc menu options 3 4 TV CATV selects a TV channel up down MP3 CD selects different albums 6 OK confirms selection CATV selects HRC IRC STD or AUTO mode 7 SYSTEM MENU...

Page 13: ...lects audio channels or selects a sound track language in a DVD ANGLE views picture from different recorded camera angles if available on your disc ZOOM enlarges or reduces the video image during playback SLOW DVD VCD plays in slow motion 1 2 1 3 1 4 1 5 1 6 or 1 7 INTRO DVD VCD gives you an overview of your disc contents in thumbnail CD plays first 15 seconds of each track in disc program in sequ...

Page 14: ...uted To switch off the volume temporarily Press MUTE on the remote control Playback will continue without sound and MUTE displays To activate sound reproduction you may press MUTE again adjust the volume controls Sound Control DBB Dynamic Bass Boost DBB enhances the bass responses Press DBB on the remote control to enable disable DBB feature Some discs might be recorded in high modulation which ca...

Page 15: ...ress DISPLAY repeatedly to select variable time options to be display as follows elapsed playback time of current chapter remaining time of current chapter elapsed playback time of current title remaining time of current title VCDs CD MP3 JPEG VCD TRK 1 1 00 23 09 TRK track 1 1 current track number total track number For MP3 It displays the total track number in the current folder 00 23 09 selecta...

Page 16: ...unning The displayed TV or CATV and running channel number turn to blue from green indicating auto search and store in progress Available channels are programmed After all channels are stored displayed TV or CATV and channel number turn to green from blue The first auto stored channel will then automatically play 4 Press CHANNEL to select your desired channel on the remote control CH Or Use the Nu...

Page 17: ...hold SEARCH until the frequency in the display starts running The displayed waveband radio station number and frequency turn to yellow from green indicating that tuning is executable The radio automatically tunes to a station of sufficient reception 3 Repeat step 2 if necessary until you find the desired radio station To tune to a weak station press SEARCH briefly and repeatedly until optimal rece...

Page 18: ...be labelled for ALL regions or Region 1 You cannot play discs that are labeled for other regions Note If you are having trouble playing a certain disc remove the disc and try a different one Improperly formatted discs will not play on this DVD Player Playing discs 1 Press STANDBY ON to on then press SOURCE once or more to select DVD mode or on the remote control B B B B B and DISC 2 Insert a disc ...

Page 19: ...directly e g Track chapter 2 Press 0 and then 2 Track chapter10 Press 1 and then 0 For DVD On how to enter a chapter number of 10 or above refer to steps 2 3 in GOTO section For MP3 JPEG Use the navigation controls 1 2 3 4 and OK to select the desired file or file folder Fast reversing fowarding 1 During playback press à á on the remote control repeatedly to select fast search speed x2 x4 x8 or x2...

Page 20: ...SHUFFLE You can play the contents in a disc in a random order During playback press SHUFFLE once or more to select or cancel SHUFFLE mode Display shows SHUFFLE ON or SHUFFLE OFF You can also press 9 to cancel your play modes Repeat A B You can play a certain scene or passage repeatedly 1 During playback press A B on the remote control to mark the start point of the chosen scene or passage REPEAT A...

Page 21: ... Press PROGRAM again or Use the navigation controls to highlight CLEAR then press OK on the remote The program pop up disappears INTRO This feature gives you an overview of the disc contents allowing you to select to playback the desired title chapter track desired chapter track DVDs 1 During playback press INTRO on the remote control 2 Thumbnail pictures appear for each chapter of the first title...

Page 22: ...ears ZOOM Zooming allows you to enlarge or reduce the video JPEG image during playback Press ZOOM repeatedly to zoom in and out on the playback video image Image size enlarges or reduced at different rates To return to normal playback press ZOOM repeatedly until the numbers disappear AUDIO DVDs On the remote control press AUDIO repeatedly to select the desired language for sound track VCDs CDs Pre...

Page 23: ...This setting allows you to select the TV type to match the color system of the television to be connected so that the disc played on this DVD player can be viewed on the connectedTV which supports certainTV type Refer to owner manual of yourTV forTV type information NTSC or PAL Select NTSC if the connected TV supports NTSC only Select PAL if the connected TV supports PAL only Either selection is O...

Page 24: ...arental control can be unlocked by either the default password or the currently set password OSD LANGUAGE default English Select different on screen display OSD languages ANGLE MARK default OFF Views picture from different recorded camera angles if available on your disc Select ON or OFF SCREEN SAVER default ON The screen saver appears after 3 minutes in the pause stop mode or with no disc in the ...

Page 25: ...ot unlock it see PASSWORD 2 In PREFERENCE SETUP press 3 4 to highlight RATING 3 Press 2 to enter the options 1 KID SAFE 2 G 3 PG 4 PG 13 5 PG R 6 R 7 NC 17 8 ADULT 4 Press 3 4 to select your options 5 Press OK to confirm The selected option is highlighted 6 Use 1 2 3 4 to exit RATING 7 Enter PASSWORD setting to lock the parental control by input of your password see PASSWORD DEFAULT You can use th...

Page 26: ...necting an additional appliance 2 Press POWER to on then press SOURCE to select AV source or on the remote control B and AV External AV Source 3 To avoid noise distortion turn down the volume on your external device 4 Press the PLAY key on the connected appliance to start playback 5 To adjust the sound and volume use the sound controls on your external equipment and or your system GENERAL Power AC...

Page 27: ... leave the player power on until the moisture evaporates Check whether the set is connected securely Make sure the set is not in the MUTE mode If it is press MUTE to turn on the speaker Check whether the volume on the set has been set to the lowest level If it has turn up the volume Check whether the set is connected securely First select the source you wish to control by pressing a source button ...

Page 28: ...o should to avoid unexpected damage learn about the piping wiring and other relevant information inside your walls according to your walls materials decide what type of screws you need to fix the mounting brackets and hold the weight of the MCL888 according to the drilling requirements choose suitable drilling tools take other precautions necessary for the wall mounting work Appendix What parts yo...

Page 29: ... screws available from unscrewing the stand see How to mount your MCL888 onto the wall the stand can be re fixed to your MCL888 as desk mount use As shown below use a suitable screwdriver to screw the stand to the MCL888 Appendix pg001 030 mcl888_MexicoA 30 3 06 16 14 29 ...

Page 30: ...e of its high compression ratio MP3 A file format with a sound data compression system MPE is the abbreviation of Motion Picture Experts Group 1 or MPEG 1 Audio Layer 3 Through the MP3 format one CD R or CD RW can contain about 10 times as much data volume as a regular CD can Parental control Rating A function of the DVD to limit playback of the disc by the age of the users according to the limita...

Reviews: