background image

21

[Night Mode]

Make loud sound level softer and soft sound 
level louder so that you can watch the DVD 
movies at a low volume, without disturbing 
others.

‡

[On]

 – enjoy quiet viewing at night 

(DVDs only).

‡

[Off]

 – enjoy surround sound with 

its full dynamic range.

Video setup

On the 

[Video Setup]

 page, you can set the 

following options:

[TV System]

Change this setting if the video does not 
appear correctly. By default, this setting 
matches the most common setting for TVs in 
your country.

‡

[NTSC]

 - For TV with NTSC color 

system. 

‡

[PAL]

 - For TV with PAL color 

system.

‡

[Multi]

 - For TV that is compatible 

with both PAL and NTSC.

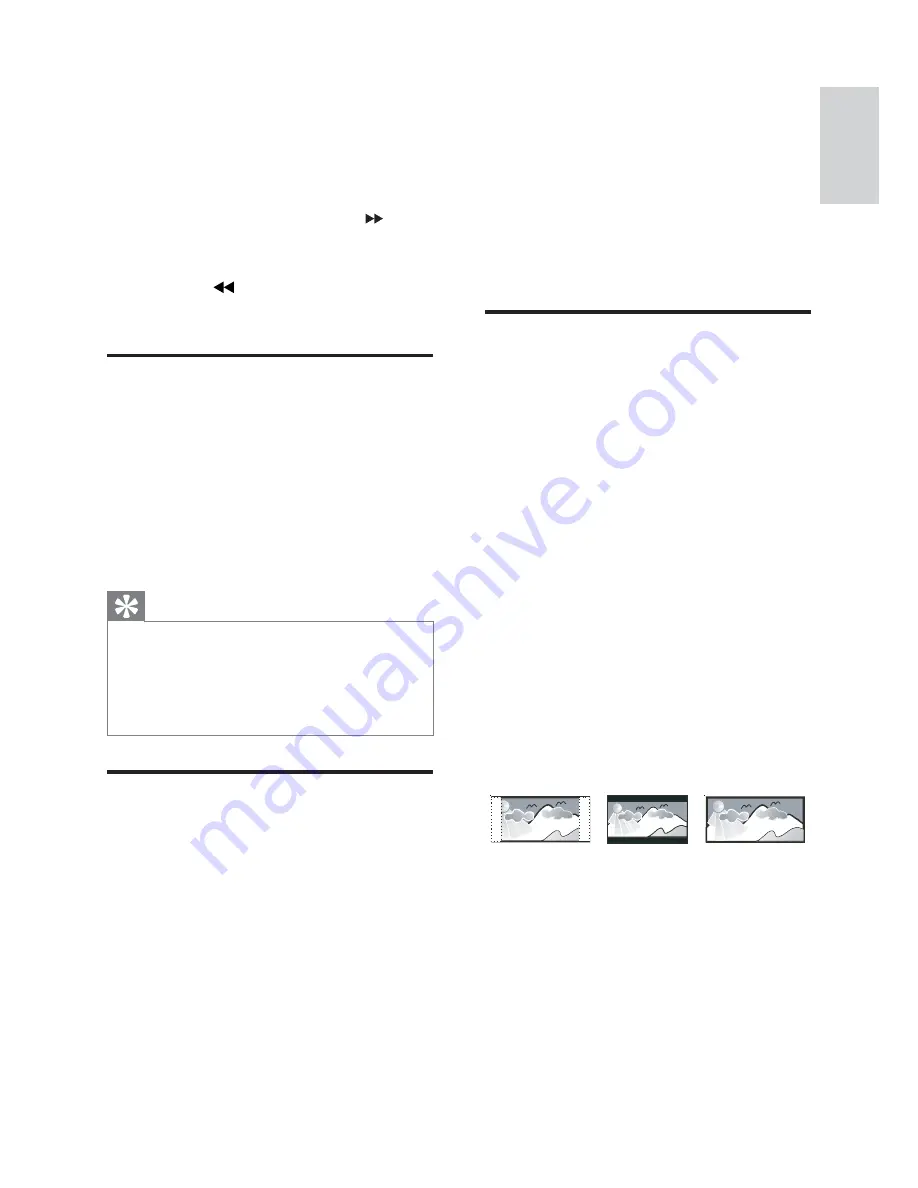
[TV Display]

The TV format determines the aspect ratio of 
display according to the type of TV you have 
connected.

‡

[4:3 Pan Scan]

 – For 4:3 screen TV: 

full-height display with the trimmed 
sides.

‡

[4:3 Letter Box]

 – For 4:3 screen TV: 

wide-screen display with black bars 
on the top and bottom of the screen.

‡

[Wide Screen]

 – For wide-screen 

TV: display ratio 16:9.

4:3 Letter Box (LB)

4:3 Pan Scan (PS)

16:9 (Wide Screen)

6 Adjust settings

1

Press 

SYSTEM MENU

.

2

Select a setup page.

3

Select an option and then press 

.

4

Select a setting and then press 

OK

.

To return to the previous menu, 

‡

press 

.

To exit the menu, press 

‡

SYSTEM MENU

.

General setup

On the 

[General Setup]

 page, you can set the 

following options:

[OSD language]

Select the preferred language for on-screen 
display.

[DivX® VOD Code]

Display the DivX® registration code.

Tip

Enter this DivX registration code when you 

‡

rent or purchase video from http://vod.divx.
com/. The DivX videos rented or purchased 
through the DivX® VOD (Video On 
Demand) service can be played only on the 
device to which it is registered.

Audio setup

On the 

[Audio Setup]

 page, you can set the 

following options:

[Digital Output]

Select audio formats supported by the 
connected device.

‡

[Off]

 – Turn off the digital output.

‡

[PCM]

 – If the connected device 

cannot decode multichannel audio, 
select this option.

‡

[All]

 – If the connected device 

supports multi-channel audio 
formats, select this option.

English

EN

Summary of Contents for MCD113

Page 1: ...Register your product and get support at www philips com welcome MCD113 93 EN User manual ZH CN Ⴌ߀ Ҭ ...

Page 2: ...Select an audio language 17 Select a subtitle language 17 Play from USB 17 Play DivX video 18 3OD 03 0 SLFWXUH ÀOHV 18 Play control 18 6HOHFW UHSHDW VKXIÁH SOD RSWLRQV 18 Repeat A B DVD VCD CD MP3 WMA 19 Search forward backward 19 Search by time or chapter track number 19 Resume video play from last stopped point 19 Play options 19 Display play information 19 Zoom in out image 19 Slow motion play ...

Page 3: ...m timer 25 Set the sleep timer 25 Connect other devices 25 Listen to an audio player 25 Record to a digital recorder 26 10 Product information 27 6SHFLÀFDWLRQV 27 PSOLÀHU 27 Disc 27 Tuner FM 27 Speakers 27 General information 28 Supported disc formats 28 USB playability information 28 11 Troubleshooting 30 ...

Page 4: ...n to avoid injury from tip over m Unplug this apparatus during lightning storms or when unused for long periods of time n 5HIHU DOO VHUYLFLQJ WR TXDOLÀHG VHUYLFH personnel Servicing is required when the apparatus has been damaged in any way such as power supply cord or plug is damaged liquid has been spilled or 1 Important Safety Know these safety symbols This bolt of lightning indicates uninsulat...

Page 5: ... volume so high that you can t hear what s around you objects have fallen into the apparatus the apparatus has been exposed to rain or moisture does not operate normally or has been dropped o Battery usage CAUTION To prevent battery leakage which may result in bodily injury property damage or damage to the apparatus Install all batteries correctly and as marked on the apparatus Do not mix batterie...

Page 6: ...rate the equipment Environmental information All unnecessary packaging has been omitted We have tried to make the packaging easy to separate into three materials cardboard box polystyrene foam buffer and polyethylene bags protective foam sheet Your system consists of materials which can be recycled and reused if disassembled by a specialized company Please observe the local regulations regarding t...

Page 7: ...ongratulations on your purchase and ZHOFRPH WR 3KLOLSV 7R IXOO EHQHÀW IURP WKH support that Philips offers register your product at www Philips com welcome Introduction With this unit you can watch video from DVD VCD SVCD or USB devices enjoy audio from discs or USB devices view pictures from discs or USB devices Listen to FM radio You can enrich sound output with these sound effects Digital Sound...

Page 8: ...B DIRECT USB socket o Disc compartment Overview of the main unit a Turn on the apparatus switch to standby mode b VOLUME Adjust volume Adjust time During timer setting select a source c SOURCE Select a source d Display panel Display current status e Open or close the disc compartment f Remote control sensor g Skip to the previous next track Skip to the previous next title or chapter Select a prese...

Page 9: ... Rotate or invert pictures g SLOW ZOOM For menus navigate up down Rotate or invert pictures SLOW For video select a slow play mode ZOOM For video zoom in out h LOUD DBB Turn on or off automatic loudness adjustment Turn on or off dynamic bass enhancement i VOL Adjust volume Adjust time During timer setting select a source j MUTE Mute or restore volume k CLOCK Set the clock l SLEEP TIMER Set the sle...

Page 10: ...the previous next track Skip to the previous next title or chapter Select a preset radio station s Start or pause play t DSC Select a preset sound setting u OK RQÀUP D VHOHFWLRQ v A B 5HSHDW D VSHFLÀF VHFWLRQ ZLWKLQ D track disc w SYSTEM MENU Access or exit the system setup menu x MODE DIM Select repeat play modes 6HOHFW VKXIÁH SOD PRGHV Select a brightness level for the display screen Eng l ish E...

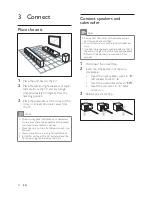
Page 11: ...Insert the red wires to black wires to 3 5HOHDVH WKH VRFNHW ÁDS a b c 3 Connect Place the unit 1 Place the unit near to the TV 2 Place the left and right speakers at equal distance from the TV and at an angle of approximately 45 degrees from the listening position 3 Place the subwoofer at the corner of the room or at least one meter away from the TV Note To avoid magnetic interference or unwanted ...

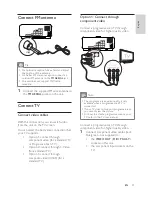
Page 12: ...unit the component input sockets on the TV TV Pr Cr Pb Cb Y COMPONENTVIDEO IN PUT Connect FM antenna Tip For optimal reception fully extend and adjust the position of the antenna For better FM stereo reception connect an outdoor FM antenna to the FM AERIAL jack The unit does not support MW radio reception 1 Connect the supplied FM wire antenna to the FM AERIAL socket on the unit Connect TV Connect...

Page 13: ...on the back or the underside of the unit Before connecting the AC power cord ensure you have completed all other connections 1 Connect the AC power cord to the wall socket TV L L I N E I N R Option 2 Connect through S Video 1 Connect an S video cable not supplied to the S Video socket on this unit the S Video socket on the TV Option 3 Connect through composite video 1 Connect the supplied composit...

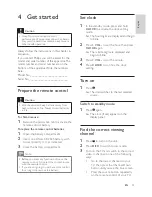
Page 14: ...s or adjustments or performance of procedures other than herein may result in hazardous radiation exposure or other unsafe operation Always follow the instructions in this chapter in sequence If you contact Philips you will be asked for the model and serial number of this apparatus The model number and serial number are on the bottom of the apparatus Write the numbers here Model No _______________...

Page 15: ...ss 8 Select P Scan then press OK The progressive setup is complete Tip The video in channel is between the lowest and highest channels and may be called FRONT A V IN VIDEO etc See the TV user manual on how to select the correct input on the TV Select the correct TV system Change this setting if the video does not appear correctly By default this setting matches the most common setting forTVs in yo...

Page 16: ...ISC MENU to access the menu Play from USB Note Ensure that the USB device contains playable music pictures or video 5 Play Note LWK VRPH GLVF ÀOH W SHV SOD PD GLIIHU Play a disc Caution Never look at the laser beam inside the unit Risk of product damage Never play discs with accessories such as disc stabilizer rings or disc treatment sheets Never put any objects other than discs into the disc comp...

Page 17: ...e or resume play press 7R VNLS WR WKH SUHYLRXV QH W ÀOH press Play control 6HOHFW UHSHDW VKXIÁH SOD RSWLRQV 1 During play press MODE DIM repeatedly WR VHOHFW D UHSHDW RSWLRQ RU WKH VKXIÁH play mode To resume normal play press MODE DIM repeatedly until no option is displayed 1 Insert the USB device 2 Press USB to select the USB source 3 Press DISC MENU until the folder is displayed 4 Press to selec...

Page 18: ...ht Stereo Repeat A B DVD VCD CD MP3 0 1 During music or video play press A B at the start point 2 Press A B at the end point The selected section starts to play repeatedly To cancel repeat play press A B again Note The section A and B can be set only within the same track title Search forward backward 1 During play press repeatedly to select a search speed To resume play at normal speed press Sear...

Page 19: ...ra angle Picture view options Preview pictures 1 During play press The pictures in the current folder are displayed 2 Press to select a picture from the folder A thumbnail of the selected picture is displayed in the right pane 3 Press OK to start slideshow from the selected picture Rotate picture 1 During play press to rotate the picture anti clockwise clockwise EN ...

Page 20: ...en Wide Screen For wide screen TV display ratio 16 9 4 3 Letter Box LB 4 3 Pan Scan PS 16 9 Wide Screen 6 Adjust settings 1 Press SYSTEM MENU 2 Select a setup page 3 Select an option and then press 4 Select a setting and then press OK To return to the previous menu press To exit the menu press SYSTEM MENU General setup On the General Setup page you can set the following options OSD language Select...

Page 21: ... Default Resets all the settings of this unit to factory default except for the password and parental settings Picture Setting Customize picture color settings Component Video Set the video output according to the video connection If the composite connection is used this setting is not required S VIDEO If the S Video connection is used select this option Interlaced For ordinary TV turn on the inte...

Page 22: ...directly 7 Tune to FM radio stations 1 Ensure that you have connected and fully extended the supplied FM antenna 2 Press TUNER 3 Press and hold 4 When the frequency indication starts to change release the button The FM tuner tunes to a station with strong reception automatically 5 Repeat steps 3 4 to tune to more stations To tune to a weak station Press UHSHDWHGO XQWLO RX ÀQG RSWLPDO reception Pro...

Page 23: ...OL to increase decrease the volume level Select a sound effect Note You cannot use different sound effects at the same time Select a preset sound effect 1 During play press DSC repeatedly to select Classic Rock Jazz Pop FLAT ÁDW Enhance bass 1 To turn on bass enhancement press LOUD DBB repeatedly during play until the DBB logo is displayed To turn off bass enhancement press LOUD DBB repeatedly unt...

Page 24: ...n mode You can see an overview of all features 1 In standby mode press on the main unit to activate the demonstration mode A demonstration of major available features starts To deactivate the demonstration mode 1 Press on the main unit again Adjust brightness of display panel 1 In standby mode press MODE DIM repeatedly to select different levels of brightness for the display panel Set the alarm ti...

Page 25: ...he MP3 Link AUX source 3 Start play on the audio player Record to a digital recorder You can record audio from this unit to a digital recorder 1 Connect a coaxial cable not supplied to the COAXIAL socket the digital input socket on the digital recorder 2 Play audio to be recorded 3 Begin to record on the digital recorder see the digital recorder user manual EN ...

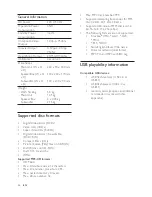
Page 26: ...rmation Note Product information is subject to change without prior notice 6SHFLÀFDWLRQV PSOLÀHU Rated Output Power 2X8 25W RMS Frequency Response 50 20000 Hz 3dB Signal to Noise Ratio 67dB Aux Input 1 V RMS 20kohm Disc Laser Type Semiconductor Disc Diameter 12cm 8cm Video Decoding MPEG 1 MPEG 2 DivX Video DAC 12Bits Signal System PAL NTSC Video Format 4 3 16 9 Video S N 48dB Audio DAC 24Bits 96kH...

Page 27: ...Power Consumption 45W Standby Power Consumption 6W Composite Video Output 1 0Vp p 75ohm Coaxial Output 0 5Vpp 0 1Vpp 75ohm Headphone Output 2X15mW 32ohm USB Direct Version 2 0 Dimensions Main Unit W x H x D Speaker Box W x H x D Subwoofer W x H x D 220 x 90 x 240 mm 170 x 240 x 170 mm 100 x 230 x 90 mm Weight With Packing Main Unit Speaker Box Subwoofer 5 8 kg 1 45 kg 2 x 0 45 kg 2 15 kg Supported...

Page 28: ...f tracks titles maximum 999 ID3 tag v2 0 or later File name in Unicode UTF8 maximum length 128 bytes Unsupported formats Empty albums an empty album is an album that does not contain MP3 0 ÀOHV DQG LV QRW EH VKRZQ LQ the display 8QVXSSRUWHG ÀOH IRUPDWV DUH skipped For example Word GRFXPHQWV GRF RU 03 ÀOHV ZLWK extension dlf are ignored and not played 9 3 0 DXGLR ÀOHV 50 SURWHFWHG 0 ÀOHV ZDY m4a m4...

Page 29: ... an hour Disconnect and reconnect the AC power plug and then turn on the system again As a power saving feature the system turns off automatically 15 minutes after 11 Troubleshooting Caution Never remove the casing of this unit To keep the warranty valid never try to repair the system yourself If you encounter problems when using this unit check the following points before requesting service If th...

Page 30: ...MCD113_93_UM_V1 0 Printed in China 2009 Koninklijke Philips Electronics N V All rights reserved ...

Reviews: