Service Modes, Error Codes, and Fault Finding
EN 18
LC4.41A AA
5.
5.5.3
Error Codes
In case of non-intermittent faults, write down the errors present
in the error buffer and clear the error buffer before you begin
the repair. This ensures that old error codes are no longer
present.
If possible, check the entire contents of the error buffer. In
some situations, an error code is only the result of another error
and not the actual cause of the problem (for example, a fault in
the protection detection circuitry can also lead to a protection).
Table 5-2 Error code overview
5.6
The Blinking LED Procedure
Using this procedure, you can make the contents of the error
buffer visible via the front LED. This is especially useful when
there is no picture.
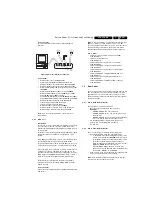
When the SDM is entered, the front LED will blink the contents
of the error-buffer:
•
The LED blinks with as many pulses as the error code
number, followed by a time period of 1.5 seconds, in which
the LED is off.
•
Then this sequence is repeated.
Any RC5 command terminates this sequence.
Example
of error buffer:
12 9 6 0 0
After entering SDM, the following occurs:
•
1 long blink of 5 seconds to start the sequence,
•
12 short blinks followed by a pause of 1.5 seconds,
•
9 short blinks followed by a pause of 1.5 seconds,
•
6 short blinks followed by a pause of 1.5 seconds,
•
1 long blink of 1.5 seconds to finish the sequence,
•
The sequence starts again with 12 short blinks.
5.7
Fault Finding and Repair Tips
Notes:
•
It is assumed that the components are mounted correctly
with correct values and no bad solder joints.
•
Before any fault finding actions, check if the correct options
are set.
5.7.1
NVM Editor
In some cases, it can be handy if one directly can change the
NVM contents. This can be done with the “NVM Editor” in SAM
mode. With this option, single bytes can be changed.
Caution:
•
Do not change the NVM settings without
understanding the function of each setting, because
incorrect NVM settings may seriously hamper the
correct functioning of the TV set!
•
Do not change the Scaler NVM settings, as this will
hamper the DVI / HDMI functionality of the TV set!
•
Always note down the existing NVM settings, before
changing the settings. This will enable you to return to the
original settings, if the new settings turn out to be incorrect.
Table 5-3 NVM editor overview
Error Error Description
Check Item
Diagram
0
No Error
1
Mis-match of TV (Hercules)
SW and Scaler SW
Software
versions
N.A.
2
+12V from PSU error
PSU
A
3
Plasma I
2
C error (only for
plasma sets)
N.A.
N.A.
4
I
2
C error while
communicating with the
Genesis Scaler
7801
B7 + B8
5
+5V protection
7752
B6
6
General I
2
C error;
communication between
ADC, analogue tuner, and/or
Columbus I
2
C failed
1102, 7L01,
7M00
B1 + B18
+ B19
7
I
2
C error while
communicating with ADC
7L01
B18
8
I
2
C error while
communicating with the
Scaler EEPROM
7C01
B11
9
I
2
C error while
communicating with the
Hercules EEPROM (NVM for
TV).
Remark:
when the Hercules
EEPROM is defective, the
Hercules should operate with
its default values.
7207
B2
10
I
2
C error while
communicating with the PLL
tuner
1102
B1
11
I
2
C error while
communicating with the 3D
combfilter IC-7M00
(Columbus)
7M00
B19
12
I
2
C error while
communicating with iBoard
uP (only iTV sets)
N.A.
N.A.
13
I
2
C error while
communicating with the
HDMI decoder IC-7D03 (only
for NAFTA and AP)
N.A.
N.A.
14
Read-write error with the
Scaler SDRAM
7B01
B10
15
I
2
C error while
communicating with the OTC
7001
T
16
I
2
C error while
communicating with EPLD or
Pacific III
7N00
B20
17
I
2
C error while
communicating with the
Digital Module (only for digital
sets)
N.A.
N.A.
Hex
Dec
Description
.ADR
0x000A
10
Existing value
.VAL
0x0000
0
New value
.Store
Store?


