background image

3

8239 300 30551

1.

Read these instructions.

2.

Keep these instructions.

3.

Heed all warnings.

4.

Follow all instructions.

5.

Do not use this apparatus near
water.

6.

Clean only with dry cloth.

7.

Do not block any ventilation
openings. Install in accordance with
the manufacturer´s instructions.

8.

Do not install near any heat sources

such as radiators, heat registers, stoves, or
other apparatus (including amplifiers) that
produce heat.

9.

Do not defeat the 
safety purpose

of the

polarized or 
grounding-type plug.
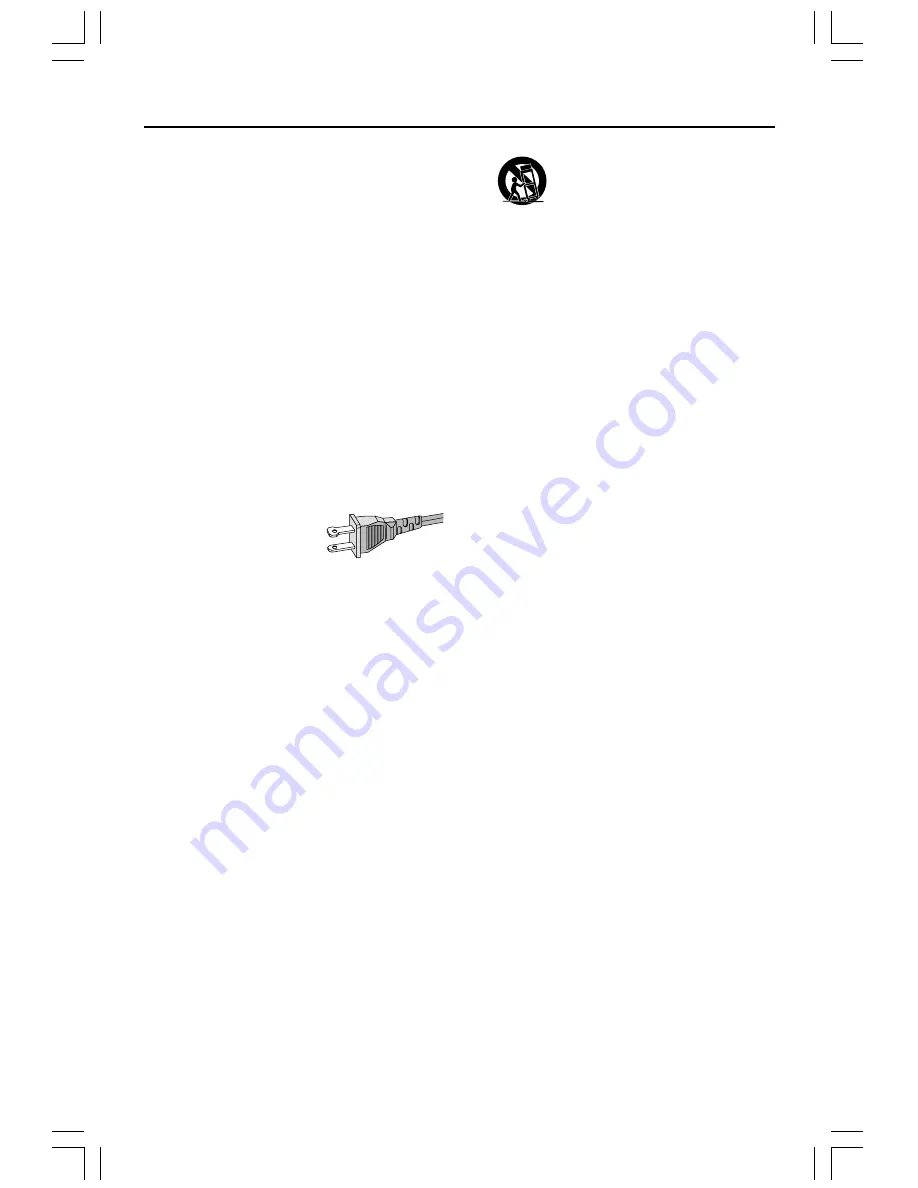
A polarized plug has two blades with one
wider than the other. A grounding type plug
has two blades and a third grounding prong.
The wide blade or the third prong are
provided for your safety. If the provided plug
does not fit into your outlet, consult an
electrician for replacement of the obsolete
outlet.

10.

Protect the power cord

from being

walked on or pinched, particularly at plugs,
convenience receptacles, and the point
where they exit from the apparatus.

11.

Only use attachments/accessories

specified by the manufacturer.

12.

Use only with the cart,

stand,

tripod, bracket, or table specified
by the manufacturer or sold with
the apparatus. When a cart is
used, use caution when moving
the cart/apparatus combination
to avoid injury from tip-over.

13.

Unplug this apparatus

during lightning

storms or when unused for long periods of
time.

14.

Refer all servicing

to qualified service

personnel. Servicing is required when the
apparatus has been damaged in any way,
such as power-supply cord or plug is
damaged, liquid has been spilled or objects
have fallen into the apparatus, the apparatus
has been exposed to rain or moisture, does
not operate normally, or has been dropped.

15.

Battery usage 

CAUTION

– To

prevent battery leakage which may result in
bodily injury, property damage, or damage
to the unit:

Install 

all

batteries correctly,

+

and 

-

as

marked on the unit.

Do not mix batteries (

old

and 

new

or

carbon

and 

alkaline

, etc.).

Remove batteries when the unit is not used
for a long time.

IMPORTANT SAFETY INSTRUCTIONS

AC Polarized

Plug

16. 

Apparatus shall not be exposed to 


dripping or splashing. 

17. 

Do not place any sources of danger 


on the apparatus

 (e.g. liquid filled 


objects, lighted candles). 

18. 

This product may contain lead and mercury.  


Disposal of these materials may be regulated 


due to environmental considerations.  


For disposal or recycling information, 


please contact your local authorities 


or the Electronic Industries Alliance : 

 www.eiae.org.

EL 6475-E005: 04/01

Summary of Contents for HTS3410D

Page 1: ...eur regorgent d astuces destinées à simplifier l utilisation de votre produit Philips Toutefois si vous ne parvenez pas à résoudre votre probléme vous pouvez accéder à notre aide en ligne à l adresse www philips com support ou formez le 1 800 661 6162 Francophone 1 888 PHILIPS 744 5477 English speaking Veillez à avoir votre produit à portÈe de main Gracias por escoger Philips Necesita ayuda inmedi...

Page 2: ...s and outstanding service networks in the industry What s more your purchase guarantees you ll receive all the information and special offers for which you qualify plus easy access to accessories from our convenient home shopping network Most importantly you can count on our uncompro mising commitment to your total satisfaction All of this is our way of saying welcome and thanks for investing in a...

Page 3: ...the apparatus When a cart is used use caution when moving the cart apparatus combination to avoid injury from tip over 13 Unplug this apparatus during lightning storms or when unused for long periods of time 14 Refer all servicing to qualified service personnel Servicing is required when the apparatus has been damaged in any way such as power supply cord or plug is damaged liquid has been spilled ...

Page 4: ...ON OUTPUT IF THERE ARE QUESTIONS REGARDING OUR TV SET COMPATIBILITY WITH THIS MODEL 525p AND 625p DVD PLAYER PLEASE CONTACT OUR CUSTOMER SERVICE CENTER CAUTION INVISIBLE LASER RADIATION WHEN OPEN DO NOT STARE INTO BEAM DANGER INVISIBLE LASER RADIATIONWHEN OPEN AVOID DIRECT EXPOSURE TO BEAM VARO AVATTAESSA JA SUOJALUKITUS OHITETTAESSA OLE ALTTIINANAKYMATTOMAALLE LASERSATEILYLLE AL KATSO SATEESEEN V...

Page 5: ...E n g l i s h Français 5 8239 300 30551 E s p añ o l Index English 8 Français 41 Español 77 ...

Page 6: ...s product incorporates copyright protection technology that is protected by method claims of certain U S patents and other intellectual property rights owned by Macrovision Corporation and other rights owners Use of this copyright protection technology must be authorized by Macrovision Corporation and is intended for home and other limited viewing uses only unless otherwise authorized by Macrovisi...

Page 7: ... Disc Menu language 20 Progressive Scan 21 Disc Operations Playable discs 22 Playing discs 22 Using the Disc Menu 23 Basic playback controls 23 Resuming playback from the last stopped point DVD VCD CD 23 Selecting various repeat functions 23 Repeat play mode 23 Repeating a section within a title track 24 Program favorite tracks audio CDs andVCDs 24 Clearing the program 24 Using the menu bar to pro...

Page 8: ...arm environment until the moisture evaporates Do not block the vents Do not operate the DVD system in an enclosed cabinet and allow about 10 cm 4 inches of free space all around the player for adequate ventilation 10 cm 4 inches 10 cm 4 inches 10 cm 4 inches DVD Home Cinema System PHILIPS Care of disc To clean a CD wipe it in a straight line from the center toward the edge using a soft lint free c...

Page 9: ...front left and right speakers at equal distances from the TV and at an angle of approximately 45 degrees from the listening position 2 Place the center speaker above the TV or the DVD system so that the center channel s sound is localized 3 Place the rear speakers at normal listening ear level facing each other or hang on the wall 4 Place the subwoofer on the floor near the TV Helpful Hints To avo...

Page 10: ...ont Speaker Left Rear Speaker Right Rear Speaker Left Passive Subwoofer Center Speaker Connect the supplied speaker systems using the fixed speaker cables by matching the colors of the jacks and speaker cables Helpful Hint Ensure that the speaker cables are correctly connected Improper connections may damage the system due to short circuit ...

Page 11: ...ingY Pb Pr and a progressive scanTV is required Using ComponentVideo jacks Y Pb Pr 1 Use a component video cables red blue green not supplied to connect the DVD system s Y Pb Pr jacks to the corresponding Component video input jacks or labeled as Y Pb Cb Pr Cr orYUV on theTV 2 To hear the TV channels through this DVD system use the supplied audio cables white red to connect AUDIO IN TV jacks to th...

Page 12: ...only has a singleAntenna In jack labeled as 75 ohm or RF In you will need an RF modulator in order to view DVD playback on theTV See your electronics retailer or contact Philips for details on RF modulator availability and operations Using an accessory RF modulator 1 Use the supplied composite video cable yellow to connect the DVD system s VIDEO OUT jack to the video input jack on the RF modulator...

Page 13: ... antenna and fix its ends to the wall For better FM stereo reception connect an external FM antenna not supplied Helpful Hints Adjust the position of the antennas for optimal reception Position the antennas as far as possible from yourTV VCR or other radiation source to prevent unwanted interference After everything is connected properly 1 Plug the AC power cord into the power outlet 2 Never make ...

Page 14: ...k 3 Connect the DVD system s VIDEO OUT jack to theVIDEO IN jack on theVCR 4 Connect the DVD system s LINE OUT jacks to theAUDIO IN jacks on theVCR This will allow you to make analog stereo two channel right and left recordings To view DVD playback while recording you must connect the DVD system to your TV using S VIDEO as shown above or Component Y Pb Pr connection Digital Recording Connect the DV...

Page 15: ...STANDBY ON Switches to standby mode or turns on the system 2 Disc tray 3 OPEN CLOSE 0 DISC mode only Opens Closes the disc tray 4 System display panel 5 ÉÅ PLAY PAUSE DISC starts pauses playback 6 S PREV T NEXT DISC searches backward forward or selects a track TUNER tunes the radio frequency up down TV selects previous next channel on Philips TV on remote only 7 Ç STOP Exits an operation DISC stop...

Page 16: ... Adjusts subwoofer s sound level REAR Adjusts rear speakers sound level CENTER Adjusts center speaker s sound level TVVOL AdjustsTV volume Philips TV only SLEEP Sets the sleep timer function DIM Selects different levels of brightness for display panel NIGHT DVD mode only Toggles between night mode on and off Selects night mode on to level out the volume output MUTE Mutes or restores the volume RES...

Page 17: ... or different types of batteries in combination Batteries contain chemical substances so they should be disposed of properly Step 2 Setting theTV IMPORTANT Make sure you have completed all the necessary connections See pages 11 12 ConnectingTV 1 Press SOURCE control until DISC appears on the display panel or press DISC on the remote 2 Turn on the TV and set to the correct video in channel You shou...

Page 18: ...l change the video signal of an NTSC disc and output it to PAL format 3 Press 34 to select a setting and press OK to confirm Follow the instructions shown on the TV to confirm the selection if any If a blank distortedTV screen appears wait for 15 seconds for auto recovery Setting theTV shape Set the aspect ratio of the DVD Player according to the TV you have connected The format you select must be...

Page 19: ... TEST TONE CENTER DELAY SET TO 1 MS CNTR DELAY Select this to set the delay time in relation to the listening position distance from the center speaker 5ms 3ms 2ms 1ms or OFF REAR DELAY Select this to set the delay time in relation to the listening position distance from the rear speakers 15ms 12ms 9ms 6ms 3ms or OFF 5 Press 1 2 to adjust the settings that best suit your surround sound needs 6 Pre...

Page 20: ... and press 2 Move to MENU LANG and press 2 ENGLISH FRENCH SPANISH PARENTAL PASSWORD MENU LANG DEFAULTS OSD LANGUAGE SET TO ENGLISH 3 Press 34 to select a language and press OK to confirm Audio Subtitle and Disc menu language 1 In disc stop mode stop playback and press SYSTEM MENU Use the 1 2 3 4 keys on the remote to navigate in the menu 2 Highlight icon and press 4 Move to and press 2 Move to hig...

Page 21: ...an refer to Progressive Scan on page 28 Deactivate Progressive Scan manually When the progressive scan function is activated the TV screen may be blank because of the following reasons Your TV supports progressive scan but it is not activated To activate it please refer to your TV user manual The cables are not connected accordingly Refer to page 11 for proper connections Your TV does not support ...

Page 22: ...You cannot play discs that are labeled for other regions Helpful Hints It may not be possible to play CD R RW in all cases due to the type of disc or condition of the recording If you are having trouble playing a certain disc remove the disc and try a different one Improperly formatted discs will not play on this DVD system Playing discs 1 Press SOURCE control until DISC appears on the display pan...

Page 23: ...Press and hold S T then press ÉÅto resume normal playback While searching pressing and holding S T again will increase the search speed Stopping playback Press Ç Resuming playback from the last stopped point DVD VCD CD When play is stopped and the disc has not been ejected press RESUME To cancel the resume mode When play is stopped press Ç again Helpful Hint Opening the disc tray or disconnecting ...

Page 24: ... select other tracks 5 Press ÉÅto start program playback TIPS The operating features described here might not be possible for certain discs Always refer to the instructions supplied with the discs Clearing the program Stop playback then press the Ç again PROG CLR appears Helpful Hints If the DVD system is disconnected from the power supply it will erase the program ForVCD the program option is onl...

Page 25: ... To stop playback press Ç 9 thumbnail pictures will appear on the TV Use S T keys to view the previous next page if available 4 Use 1 2 3 4 keys to navigate within the menu and press OK to start playback During playback you can Press S T to select another title picture in the current folder Use 1 2 3 4 keys to rotate flip the picture files Select ZOOM ON then press and hold the S T or select Q R o...

Page 26: ...VD MP3 FR x2 FR x4 FR x6 FR x8 PLAY VCD CD FR x1 FR x2 FR x3 FR x4 PLAY FAST FORWARD FF DVD MP3 FF x2 FF x4 FF x6 FF x8 PLAY VCD CD FF x1 FF x2 FF x3 FF x4 PLAY Select a search speed FR backward FF forward The volume will be muted To resume normal playback press ÉÅ STATUS Allows viewing of the current status of the disc The information will vary depending on the disc format Available on DVD only T...

Page 27: ...ribed in Getting Started Setting the video output Choose the type of video output that matches the video connection between the DVD system and your TV Stop playback then follow the steps of Using the Setup Menu and select VIDEO OUT S VIDEO YPRPB S VIDEO TV SHAPE TV SYSTEM VIDEO OUT PROGRESSIVE SCR SAVER SMART POWER S VIDEO Select this if you have connected the DVD system to yourTV using the S Vide...

Page 28: ...wait for 15 seconds for auto recovery To deactivate the progressive function refer to the hint menu displayed on theTV screen or see page 11 and 21 Screen Saver turning on off The screen saver will help to prevent your TV display device from getting damaged Follow the steps of Using the Setup Menu and select SCR SAVER OFF ON SCREEN SAVER NOW OFF TV SHAPE TV SYSTEM VIDEO OUT PROGRESSIVE SCR SAVER S...

Page 29: ...d for 15 minutes the smart power will be activated Night mode turning on off When the night mode is activated the high volume outputs will be softened and low volume outputs will be brought upward to an audible level It is useful for watching your favorite action movie without disturbing others at night This function can also be accessed via the NIGHT button on the remote Follow the steps of Using...

Page 30: ...ave certain discs played with alternative scenes 1 In disc mode press SYSTEM MENU Use the 1 2 3 4 keys on the remote to navigate in the menu 2 Select icon and press 4 Move to and press 2 Move to PARENTAL and press 2 __ __ __ __ Enter code PLEASE ENTER PASSWORD PARENTAL PASSWORD MENU LANG DEFAULTS 3 Use the numeric keypad 0 9 to enter 1234 default password when you are asked to enter the four digit...

Page 31: ...cover The rating level feature does not prohibit playback of such Discs Changing the password You can change the four digit password used for Parental Control Enter your four digit password to play a prohibited disc or if prompted for a password The default password is 1234 1 In disc mode press SYSTEM MENU Use the 1 2 3 4 keys on the remote to navigate in the menu 2 Select icon and press 4 Move to...

Page 32: ...c preset will begin from preset 1 and all your former presets will be overridden If it reaches 40 presets PROG FULL appears Once complete PROG END appears Manual presetting You can choose to store only your favourite radio stations 1 Tune to your desired radio station see Tuning to a radio station 2 Press PROG PROGRAM icon appears 3 Use the numeric keypad 0 9 to select a preset number If PROGRAM i...

Page 33: ...P repeatedly until OFF appears or press the STANDBY ON button Sound Control IMPORTANT For proper surround sound make sure the speakers and subwoofer are connected see page 10 Selecting surround sound Press SURROUND to select surround or stereo mode The availability of the various surround sound modes depends on the number of speakers used and the sound available on the disc The center and surround...

Page 34: ...denotes the volume level To listen through the headphones Plug in the headphones plug to the PHONES socket at the front of the DVD system The speakers will be muted To turn off the volume temporarily Press MUTE Playback will continue without sound and MUTE appears To restore the volume press MUTE again or increase the volume level Other Functions Dimming system s display screen In any active mode ...

Page 35: ...eo S N 56 dB minimum CompositeVideo Output 1 0Vp p 75 Ω S Video Output Y 1 0Vp p 75 Ω C 0 286Vp p 75 Ω Audio DAC 24 Bits 96 kHz Frequency Response 4 Hz 20 kHz 44 1 kHz 4 Hz 22 kHz 48 kHz 4 Hz 44 kHz 96 kHz Digital Output SPDIF Sony Philips digital interface Coaxial PCM IEC 60958 Dolby Digital IEC 60958 IEC 61937 MAIN UNIT Power Supply Rating 120V 60 Hz Power Consumption 180 W Dimensions w x h x d ...

Page 36: ...nnel selection Change theTV channel until you see the DVD screen Press DISC on the remote Refer to description Progressive Scan in next page If this happens when you changing the setting of the TV SYSTEM wait for 15 seconds for auto recovery Check the video connection Sometimes a small amount of picture distortion may appear This is not a malfunction Clean the disc The aspect ratio is fixed on the...

Page 37: ...ource you are playing is recorded or broadcast in surround sound DPL II Dolby Digital etc If the signal is too weak adjust the antenna or connect an external antenna for better reception Increase the distance between the system and yourTV or VCR Tune in to the correct frequency Place the antenna farther away from any equipment that may be causing the noise Select the source DISC or TUNER for examp...

Page 38: ... Logic II It creates five full bandwidth output channels from two channel sources Decode only systems that derive 5 1 channels instead of the conventional 4 channels of Dolby Pro Logic surround sound JPEG A very common digital still picture format A still picture data compression system proposed by the Joint Photographic Expert Group which features small decrease in image quality in spite of its h...

Page 39: ...ing frequency numerically represents how many time the original analog signal is sampled per second Surround A system for creating realistic three dimensional sound fields full of realism by arranging multiple speakers around the listener Title The longest section of a movie or music feature on DVD Each title is assigned a title number enabling you to locate the title you want VIDEO OUT jack Yello...

Page 40: ...ly packaged or cost associated with packaging Product lost in shipment and no signature verification of receipt can be provided A product used for commercial or institutional purposes including but not limited to rental purposes Products sold AS IS or RENEWED CARRY IN SHIP IN WARRANTY For Carry In warranty repair take the product to a Philips authorized service center for repair When the product h...

Reviews: