EN 10
3139 785 31871
3.
Directions for Use
2
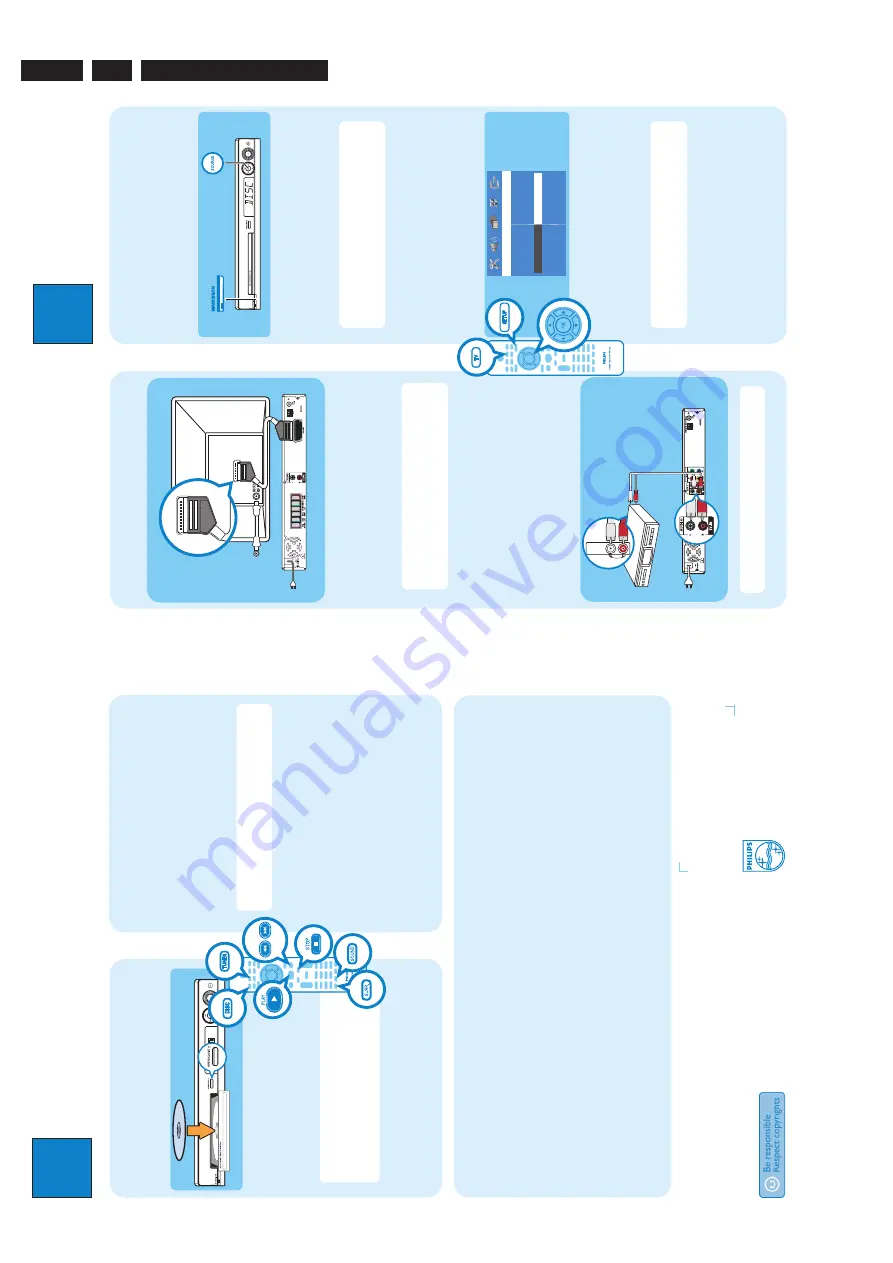
Set up
A
Finding the viewing channel
A
Press
STANDBY ON
on the DVD system.
B
Press
SOURCE
on the DVD system until “DISC”
appears on the display panel.
C
Turn on the TV. Use the TV’s remote control to
select the correct viewing channel for the DVD
system.
You should see the blue DVD background on the
TV.
Note
To search for the correct viewing channel,
press the Channel Down button on the TV’s remote
control repeatedly (or AV, SELECT,
°
button) until
you see the blue DVD background.
B
Select the display language on the
screen
A
Press
SETUP
.
The { General Setup Page } appears.
Gener
al Set
up P
ag
e
Disc Lock
Display Dim
Program
OSD Language
Screen Saver
DivX(R) VOD Code
English
Dansk
Deutsch
Espanõl
B
Press
to select { OSD Language } and press
.
C
Use
keys to select a language option in the
menu and press
OK
to confirm.
D
Press
SETUP
to exit.
Note
The language set here is only for the menus
that are shown on the TV while operating this DVD
system, not for the DVD disc menu.
There are various setup options (Audio Setup, Video
Setup, Preference Setup) available on this DVD system.
Refer to the user manual for more information.
D
Connect the DVD system to TV
SCART IN
SCART IN
A
B
A
Use the supplied scart cable to connect the SCART
socket on this DVD system to the SCART IN socket
on your TV.
B
Plug in the power cable from the DVD system to an
AC power outlet.
Note
It is important to connect the DVD system
directly to your TV. When watching the TV
programmes, you can press
TV
on the remote control
to get the sound output from the speakers system.
DVD System (rear)
Television ( rear)
E
Connect the audio from other
device to DVD system (optional)
Use the red and white audio cables (not supplied) to
connect the AUX IN (R/L) sockets on this DVD system
to the AUDIO output sockets on your Audio/Video
device (for example, DVD recorder, VCR).
b
AUDIO OU
T
AUDIO OUT
Note
Press
AUX/DI
on the remote control to get
the sound output from the speakers system.
DVD System (rear)
To off-air
antenna or
set-top box
3
Enjo
y
Need help?
User Manual
See the user manual that cames with your Philips DVD System
Online
Go to www.philips.com/support
2005
C
Koninklijke Philips N.V.
All rights reserved.
12 NC 3139 245 22291
www.philips.com
Start disc playback
A
Press
OPEN CLOSE
to open the disc tray.
Load a disc and close the disc tray.
B
Playback will start automatically.
C
If the disc menu appears, use
keys
to select an option in the menu and
press
PLAY
to start playback.
D
Press
STOP
x
to stop playback.
Note
When you press PLAY button again, the
playback will resume from its last stopped point.
To start playback from the beginning, you have
to press STOP button two times to cancel the
resume mode, then press PLAY button.
Listen to radio
A
Press
TUNER
.
The display panel will show “AUTO INSTALL
PRESS PLAY”.
B
Press
PLAY
until “START ...” appears on the
display panel.
All the available radio stations with strong reception
signal will be stored automatically.
Note
This feature is only available for the
rst time
setup. If you wish to reinstall all the radio stations, hold
down the PROGRAM button on the remote control.
C
Once complete, use
.
>
keys to select a
preset radio station.
D
To delete a preset radio station, hold down
STOP
x
until “FM/MW X DELETED” appears.
Experience surround sound
A
Press
SURR
to switch between stereo and multi-
channel.
B
Press
SOUND
to select either CONCERT,
DRAMA, ACTION or SCI-FI preset digital sound
effects.
Troubleshooting
For more troubleshooting tips, see the user manual.
No picture.
•
Press DISC button on the remote control.
•
Check the connection to the TV and ensure the plugs are
rmly in place.
No sound.
•
Adjust the volume.
•
Check the speaker connections and settings.
•
Check the audio connections and press SOURCE button to select the correct input source.
•
The centre and rear speakers operate only in multi-channel surround mode. Press SURR button to select
multi-channel surround output.
The DVD system does not work.
•
Disconnect the power cord from the power outlet for a few minutes. Reconnect the power cord and try again.

