2 - 1
2 - 1
5) Upgrading new software
a) Check for the latest software version on
www.philips.com/support.
Search for your model and click on ‘software&drivers’.
b) Copy the latest upgrading software onto a CD-R or USB storage
device.
c) Insert the CD-R program disc or connect the USB storage device
to the home theater.
d) Press <USB> button on R/C.
e) TV will show message as follow:
Upgrade fi le detected
Upgrade?
Press PLAY to start
f) Press <PLAY> “
u
” button on R/C.
g) TV will show message as follow:
Upgrade fi le detected
Upgrade?
Press PLAY to start
Upgrading
h) When the updated is complete ,the home theater automatically
switch to standby.
Note: when upgrade in progress, please do not unplug or switch off
the device.
6) How to replace the defective DVD Loader
a) Remove the defective DVD Loader (see chapter 3).
b) Accordingly connect DVD Loader and “CN201”, “CN203” on the
top of main b
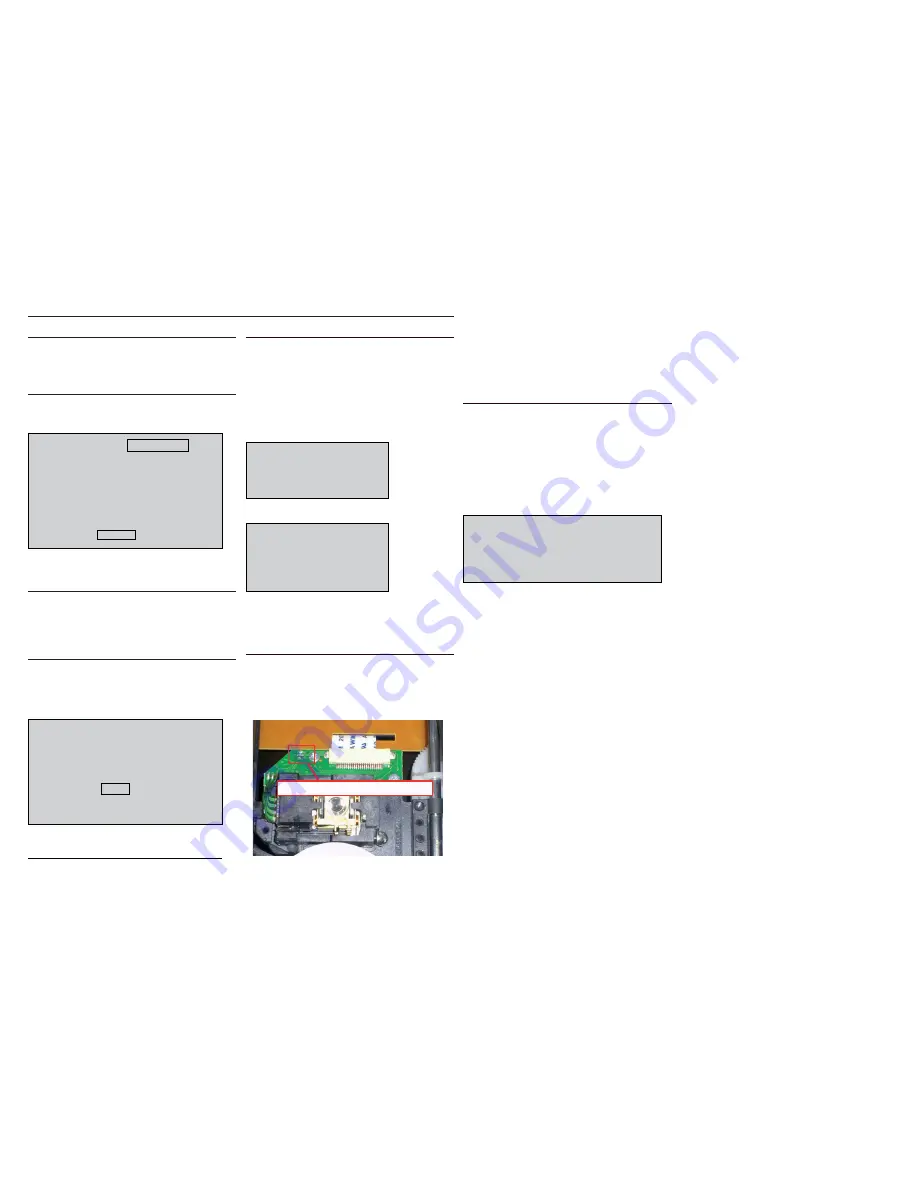
c) Remove solder joint on the ESD protection point.
System , Region Code , etc. Setting Produre
CAUTION!
This information is confi dential and may not be
distributed.Only a qualifi ed service person should
reprogram the Region Code.
Note: The ESD protection point on t
he Top side view of OPU
must
be soldered if
- the DVD Loader is OK and needs to be disconnected from
connector “CN201” and “CN203” of the main board.
- the defective DVD Loader is needed to be send back to supplier
for failure analysis and to support back charging evidence.
7) Produce to change Tuner grid (only for /98 version)
In some countries, you can switch the FM tuning grid between 50
kHz and 100 kHz. Changing the tuning grid erases all preset radio
stations.
a) Press<radio> button on R/C
b) Press <Stop> button on R/C.
c) Press and hold <Play/Pause>
until Grid 9(50 kHz) or Grid (100
kHz) is
displayed.
Note: repeating the same action will toggle back to it previous
tuning grid setting.
1) Restore factory setting
a) Press <SETUP> button on R/C.
b) Select <preference setup> ,then press < OK >.
c) Select <default>,then press <OK> to confirm.
2) Version control change
a) Open the Door,then,press “1” “5” “9” on RC.
b) Press <OK> button on RC.
c) TV will show message as follow:
d) If current model doesnot match your set, use down arrow key on
the remote to change.
3) Password change
a) Press <SETUP> button on R/C.
b) Select <preference setup> ,then press <OK>.
c) Select <password> <change>,then press <OK> to confirm
“0000” is default password supplied.
4) Check on software version
a) Press <SETUP> button on R/C.
b) Select <preference setup> ,then press < OK>.
c) Select <version info>,then press <OK>.
d) TV will show message as follow:
Current model: FWD410/77/98
Version:00.07.02_0 Release:2010.06.10
Region:0 Servo:62.10.00.07
8032: 0F.01.00.09 Risc:01.00.00.04
MCU(41): 13.00 CH
OK
Press SETUP to exit menu
Current model: FWD410/77/98
Version:00.07.02_0 Release:2010.06.10
Region:0 Servo:62.10.00.07
8032: 0F.01.00.09 Risc:01.00.00.04
MCU(41): 13.00 CH
if current model doesnot match your set,
use down arrow key on the remote to change
OK
The ESD Protection point on the top side view of OPU
The Top side view of OPU
Summary of Contents for FWD410/51
Page 14: ...4 2 4 2 WIRING DIAGRAM MAIN PCB VFD PCB POWER PCB KEY PCB V1 ...
Page 16: ...5 2 5 2 SOURCE TV MP3 Link ...
Page 17: ...5 3 5 3 ...
Page 22: ...6 5 6 5 1 2 3 4 1 2 3 4 A B C A B C PCB LAYOUT TOP VIEW ...
Page 23: ...6 6 6 6 4 3 2 1 4 3 2 1 A B C A B C PCB LAYOUT BOTTOM VIEW ...
Page 26: ...7 3 7 3 PCB LAYOUT TOP VIEW 1 2 3 1 2 3 A B C A B C ...
Page 27: ...7 4 7 4 PCB LAYOUT BOTTOM VIEW 3 2 1 3 2 1 A B C A B C ...
Page 30: ...8 3 8 3 1 2 3 1 2 3 A B C A B C PCB LAYOUT TOP VIEW ...
Page 31: ...8 4 8 4 PCB LAYOUT BOTTOM VIEW 3 2 1 3 2 1 A B C A B C ...
Page 32: ...9 1 9 1 EXPLODED VIEW Note A1 23 24 39 40 B1 3 4 5 8 9 10 Video RC 48 FM ...
Page 33: ...10 1 REVISION LIST Version 1 0 Initial release ...


