background image

19

English

Getting Started 

(continued)

E

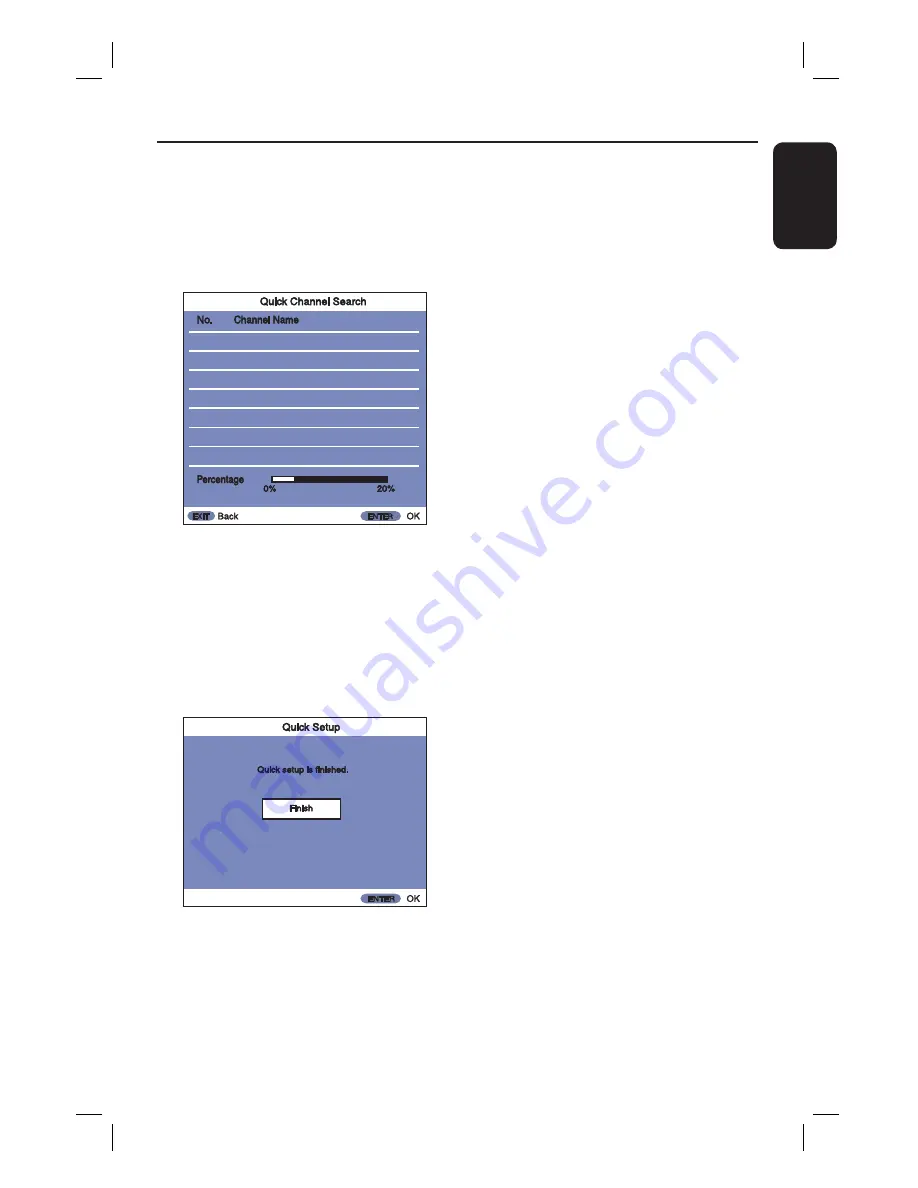
 Select the tuning method, and press 

OK

If you select { 

Quick Channel Search

 }, 

select your city and press 

OK


The recorder automatically starts  

searching for all of the receivable    
channels and presets them.

 Other 

option: 

 { 

Auto Channel Search

 } 

Presets all receivable channels. For 
details, see page 34.

F

 Press 

OK

 when { 

Finish

 } appears. 


Quick Setup

 } is completed. 

To return to the previous step 

Press 

BACK

.

To select the picture size according 
to your TV 

Set { 

TV Shape

 } in { 

Video/Audio

 } 

menu (page 36).  

To select the type of video signals 
output from the HDMI OUT or 
COMPONENT VIDEO OUT 
sockets 

Set {

 Video Format

 } in  { 

Video/

Audio

 } menu (page 36).  

To select the audio output method 
from the DIGITAL AUDIO OUT 
socket 

Set { 

Digital Audio Output

 } in  { 

Video/

Audio

 } menu (page 37).   

Helpful Hint: 
− If you want to run { 

Quick Setup

 } again, 

press 

MENU

, then select { 

Quick Setup

 } 

and press 

OK

.  

Note about the clock setting: 

This recorder automatically adjusts its 
clock according to the time signals from 
the broadcaster in the area selected in 
step 4 above, or { 

Time Zone

 } in the 

Installation

 } menu. You do not need 

to, (and cannot manually) adjust the clock 
for Day Light Savings Time, and these are 
the ONLY settings that affect the clock. 
Since the clock entirely depends on the 
broadcaster sending the correct time 
signals, if { 

Time Zone

 } in 

Installation

 } menu Setup is correct 

and yet the clock is wrong, it is not a 
malfunction.

Summary of Contents for DVR5100

Page 1: ...English HIGHDEFINITIONDIGITALVIDEORECORDER DVR5100 DVR7100 User Manual ...

Page 2: ...deo Recorder LCD Projector Wireless Audio System Audio System Home Theatre System Digital Photo Display Photo Frame Digital Set Top Box U 1 1 Y Ye ea ar r Free Replacement at your Retailer Portable Audio MP3 players DVD Players DVD VCR Combo Players DVD Recorders without HDD Portable DVD LCD players UConditions of Repair Warranty 1 All claims for warranty service should be made to your nearest Phi...

Page 3: ...7 Warranty valid for all new products purchased after 1st January 2007 2 A Au ut th ho or ri is se ed d S Se er rv vi ic ce e C Ce en nt tr re e N Ne et tw wo or rk k Customer support is provided in Australia by our trained call centre staff For assistance with product features and specifications please call T Te ec ch hn no ol lo og gy y C Ca ar re e C Ce en nt tr re e Please record the following...

Page 4: ...E STANDARD DEFINITION OUTPUT IF THERE ARE QUESTIONS REGARDING OUR TV SET COMPATIBILITY WITH THIS MODEL 525p AND 625p DVD PLAYER PLEASE CONTACT OUR CUSTOMER SERVICE CENTER HDMI and HDMI logo and High Definition Multimedia Interface are trademarks or registered trademarks of HDMI licensing LLC Manufactured under license from Dolby Laboratories Dolby and the double D symbol are trademarks of Dolby La...

Page 5: ...5 English ...

Page 6: ...Guide to Displays 17 Main menu 17 Sub menu 17 Initial Setup 18 Quick Setup 18 Operations Watching TV 20 24 Selecting a channel from the Channel List 20 Selecting a channel from the Favourite List 20 Making your own Favourite List 20 View your Favourite List 20 Additional Viewing Methods 21 Checking programme information 21 Watching digital text programme TELETEXT 21 Pausing a TV broadcast Pause Li...

Page 7: ...abelling a Title Entering Characters 31 Protecting a Title 31 Freeing up space on the HDD 31 Erasing a title 31 Erasing all titles Format Hard Disk 32 Setup Options Setting and Adjustment 33 38 Accessing the setup menu 33 Operation Setting Installation 34 Digital TV settings Channel 34 35 Video Audio Setting Video Audio 36 37 HDD Setting 37 System Setting General 37 38 Others Troubleshooting 39 40...

Page 8: ... shall remain readily operable The appliance coupler is used as the disconnect device the disconnect device shall remain readily operable Space for ventilation Place this unit in a location with adequate ventilation to prevent internal heat build up Allow at least 10 cm 4 clearance from the rear and the top of this unit and 5 cm 2 from the left and right to prevent overheating Avoid high temperatu...

Page 9: ... d RECORD Starts recording the current TV programme e MENU Enters or exits the recorder s system menu f bB Cursor keys for moving to the left right in the menu skips to the previous next 10 seconds during playback moves the sub picture position in PIP mode vV Cursor keys for moving up down in the menu selects previous next TV channel for the sub picture in PIP mode g OK Confirms an entry or select...

Page 10: ...menu selects previous next TV channel for the sub picture in PIP mode f OK Confirms an entry or selection in the menu g DISPLAY Displays the playback recording time bar on first press and 1 Plate on second press While in Live TV mode displays the I Plate h PAUSE LIVE TV u While in HDD List starts playback of currently active title from resume point Pause live TV and resume playback i STOP x Stops ...

Page 11: ...EW m FFW M Fast reverse forward search During paused playback slow reverse forward search t PREV NEXT Jumps to previous next chapter marker u REC z Starts recording the current TV programme v TV VOL Adjusts the volume of the TV for Philips TV with RC5 code only w MUTE Mutes or restores the volume for Philips TV with RC5 code only x Alphanumeric keypad Enters numbers in appropriate entry fields Sel...

Page 12: ... the desired function for example Using the alphanumeric keypad to enter the characters Press a number button repeatedly until the required character or the number appears To enter a space press button 0 CAUTION Remove batteries if they are exhausted or if the remote control is not to be used for a long time Never mix batteries old and new or carbon and alkaline etc Batteries contain chemical subs...

Page 13: ...ord TV programmes using this recorder A Unplug the antenna cable that is currently connected to your TV B Plug in the antenna cable into the DIGITAL ANTENNA INPUT socket on the recorder C Use the supplied RF antenna cable to connect the TO TV ANTENNA socket on this recorder to the Antenna In socket on the TV Helpful Hints Use the best quality AV connectors CVBS S Video Component Video HDMI not the...

Page 14: ...te video cable yellow to connect the VIDEO OUTPUT CVBS socket on the recorder to the video input socket or labelled as A V In Video In Composite or Baseband on the TV Audio connection is required in order to hear the sound see page 15 Option 2 Using the S Video socket Use an S video cable not supplied to connect the S VIDEO socket on the recorder to the S Video input socket or labelled as Y C or S...

Page 15: ...s not required if this recorder is connected to the TV using the HDMI connectors Option 1 Using the analogue audio sockets You can connect the recorder to a two channel stereo system mini system TV or receiver in order to enjoy the stereo sound system Use an audio cable red white to connect the AUDIO OUTPUT L R 1 or 2 sockets to the audio input sockets of the connected device Option 4 Connecting t...

Page 16: ...f the connected device an A V receiver or amplifier with a digital multi channel sound decoder a receiver with two channel digital stereo PCM OR Use an optical fibre optic cable not supplied to connect the OPTICAL socket to the optical input socket of the connected device Make sure that both plugs are fully inserted until a click is heard Step 4 Connecting the mains lead Connect the supplied mains...

Page 17: ...b menu displays options applicable only to the selected item The displayed options differ depending on the situation Select an option by pressing cursor v V keys and press OK HDD List Displays the list of the recorded titles including the recording information which allows you to select a title to play Guide Displays Electronic Program Guide which allows you to watch or record a programme Timer Li...

Page 18: ... Setup Quick Setup allows you to set the time zone and preset the channels automatically A Press 1 to turn on the recorder B Turn on the TV and switch the input selector so that the signal from the recorder appears on the TV screen Quick Setup menu appears If Quick Setup does not appear press MENU then select Quick Setup and press OK to enter the setup screen C Select YES and press OK The setup di...

Page 19: ...T sockets Set Video Format in Video Audio menu page 36 To select the audio output method from the DIGITAL AUDIO OUT socket Set Digital Audio Output in Video Audio menu page 37 Helpful Hint If you want to run Quick Setup again press MENU then select Quick Setup and press OK Note about the clock setting This recorder automatically adjusts its clock according to the time signals from the broadcaster ...

Page 20: ...el from a scrollable list of all available TV channels A Press CH LIST The scrollable channel list appears B Press cursor v V keys to select the channel you want to watch and press OK Selecting a channel from the Favourite List You can list your favourite TV channel and select the channel from the list display Making your own Favourite List You can create one Favourite List A Press MENU Main Menu ...

Page 21: ...me and resume playback at the scene it was interrupted at a later time A While watching a TV programme by using this recorder press PAUSE LIVE TV u You can pause the picture for up to available HDD capacity B Press PAUSE LIVE TV u again to resume watching the paused programme C Press STOP x during Pause Live TV A confirmation message appears to save time shift Notes Paused titles are not saved to ...

Page 22: ...porary HDD storage Time Shift Buffer As soon as you switch on this recorder the currently selected TV program will be storaged in a temporary hard disk storage called TSB Time Shift Buffer In tuner mode by pressing the DISPLAY key Time Shift video bar will appear on the screen it indicates the status and timing of the TV programs stored in the temporary HDD storage You can choose to options or rem...

Page 23: ...amme information is available If No Event Information is displayed it is not a malfunction of the recorder Digital services are not instantly available when the recorder is first turned on To turn off Electronic Program Guide display Press GUIDE or BACK C Press Blue button to view 24hr recording programme D Press Yellow button to view 24hr recording programme E Press cursor v V keys to select a pr...

Page 24: ... setting of the timer Simply select the programme you want to record in the Electronic Program Guide display Helpful Hint Timer recordings will be made regardless whether or not the recorder is turned on You can turn off the recorder without affecting the recording even after recording starts You can record or set the timer for two TV programmes at the same time Note that a third timer setting ove...

Page 25: ...recording information Press DISPLAY during recording Each time you press the button the display changes as follows Recording Time Bar 1 Plate Display off The display differs depending on the recording status Extending the current recording QuickTimer You can extend the current recording in 30 minute increments Press REC z repeatedly to set the duration Each press advances the time in 30 minute inc...

Page 26: ... scroll the list D Select the timer setting you want to change or cancel and press OK E Select one of the options and press OK Edit Changes the timer setting Select an item using cursor b B keys and change the setting using cursor v V keys Delete Erases the timer setting Stop Timer Setting To cancel the timer setting C Press cursor v V keys to select the Repeat mode and press OK The Repeat mode ch...

Page 27: ...perform Timer Recording while doing two recording The function will start as soon as possible when recording stops You cannot tuning other than recorded channels when two tuners are occupied in recording When three recordings overlap The recording that starts earlier has priority When the start time is the same manual recording has priority over a timer recording RecordingTime Recording time diffe...

Page 28: ... from the beginning of the title Repeat Play Plays the selected title repeatedly Protect To protects a title Delete To delete the title from HDD List During playback you can use the following buttons to perform additional playback features Goes to the beginning of the previous next chapter point Chapter points are marked in about five minute intervals m M Fast reverse fast forward the disk when pr...

Page 29: ...he displayed options differ depending on the situation To check playback information Press Display Each time you press the button the display changes as follows Playback information 1 Plate Display off The displays differ depending on the playing status Helpful Hint You can also check playback information on the front panel display To watch TV in the sub picture Picture in Picture You can view a c...

Page 30: ...pauses when you fast forward to the point that you are recording Notes FlexTime does not start immediately after recording starts Even if you fast forward the recorded programme there will always be a time difference of about ten seconds or more between the recorded programme and the current TV broadcast Playing a previous recording while making another Simultaneous Rec and Play Simultaneous Rec a...

Page 31: ...t to insert the character select the character and press OK Erasing all of the characters Select Clear All and press OK E Select Finish and press OK To cancel the setting select Cancel Protecting aTitle You can protect titles from accidentally erase A Press HDD on the remote control HDD List appears B Press the cursor v V keys to select title and press OK The sub menu appears C Select Protect and ...

Page 32: ...nd press OK The display for entering the password appears E Enter your four digit password using the alphanumeric keypad If you have not yet set a password enter 0000 default To set or change the password see page 35 The display asks for confirmation F Select YES and press OK All titles in the HDD are erased The recorder automatically turns off Notes Any protected title including the timer setting...

Page 33: ...ion Installation Channel Video Audio HDD Setting or General D Press cursor B key to select a sub menu and press OK to access E Select the setting you wish to change and press OK to confirm Instructions and explanations of the options are provided in the following pages If the option in the menu is greyed out that means the setting is not available or cannot be changed in the current state F To exi...

Page 34: ...W ACT VIC QLD SA WA TAS NT Selects the time zone of your area for clock setting DigitalTV settings Channel Channel Edit Enter your four digit password using the alphanumeric keypad and press OK If you have not yet set a password enter 0000 default To set or change the password see page 35 Lock To lock certain unsuitable channels for children Select the TV channel you want to lock then press the Gr...

Page 35: ...mes Block M and above Locks Mature and above programmes Block MA and above Locks Mature Adult and above programmes Block AV and above Locks Adult Violence and above programmes Block R and above Locks Restricted and above programmes No Block No restriction Password This feature enables you to set or change the password for certain operations A Enter your current password using the alphanumeric keyp...

Page 36: ...n connecting to a 4 3 screen TV Displays a wide picture with bands on the upper and lower portions of the screen Video Format Select the type of video signals output from the HDMI OUT or COMPONENT VIDEO OUT sockets If the picture is not clear try another option that suits your TV projector etc For details refer also to the instruction manual supplied with the TV projector etc PAL Sends 720x576i vi...

Page 37: ...n audio component without a built in Dolby Digital decoder HDD Setting HDD Space Displays the remaining HDD space Delete HDD Erases all the recorded titles in the HDD at once Note that protected titles are also erased Press OK to confirm and press BACK to exit System Setting General shadow options are the factory default settings Display Brightness Select the brightness of the recorder display pan...

Page 38: ...y refined for greater stability and compatibility of the recorder Caution Power supply must not be interrupted during upgrade Visit Philips website at www philips com support to check for the availability of the latest firmware upgrade Note When checking for the latest firmware upgrade please also check for any accompanying instructions on installing the firmware Product Version Information Displa...

Page 39: ... a malfunction Adjust the volume Check the speaker connections and settings Make sure that the audio cables are correctly connected Reduce the distance between the remote control and this unit Batteries are weak replace the batteries Problem General Solution The unit does not start playback The aspect ratio of the screen cannot be changed even though you have set the TV display TV reception is poo...

Page 40: ...signal does not come through the DIGITAL AUDIO OUT OPTICAL or COAXIAL jacks you have to check the setting See Digital Audio Output for details Problem Recording Solution Cannot recording even though timer setting was correct Recording does not stop immediately after press STOP x Power failure during recording There is not enough hard disk space The programmes you are trying to record contains copy...

Page 41: ...ackward compatible with DVI As required by the HDMI standard connecting to HDMI or DVI products without HDCP High bandwidth Digital Content Protection will result in no Video or Audio output HDD Hard disk drive This is a mass data storage device used in computers etc Disks are flat circular rigid plates coated with a thin magnetic media Magnetic heads record data on the rapidly spinning disks This...

Page 42: ...35 I i Plate 28 L Lock Channels 33 M Mains Lead 15 Main Menu 16 Main Unit 8 Manual Channel Serach 33 O On screen display Sub menu 16 Main Menu 16 P Parental Setting 34 Password 34 Picture in Picture 21 28 Play Beginning 27 Playback 27 28 29 fast forward 27 fast reverse 27 instant advance 27 instant replay 27 resume play 27 slow motion play 27 ProductVersion Setup 37 Protect 27 Q Quick Timer 24 Qui...

Page 43: ... jacks 2 each 2 Vrms 10 kilo ohms VIDEO OUT RCA jack 1 0 Vp p 75 ohms S VIDEO OUT 4 pin mini DIN Y 1 0 Vp p C 0 3 Vp p PAL 75 ohms DIGITAL AUDIO OUT OPTICAL Optical output jack 18 dBm wave length 660 nm DIGITAL AUDIO OUT COAXIAL RCA jack 0 5 Vp p 75 ohms COMPONENT VIDEO OUT Y PB CB PR CR RCA jack Y 1 0 Vp p PB CB 0 7 Vp p PR CR 0 7 Vp p 75 ohms HDMI OUT Type A 19 pin General Power requirements 220...

Reviews: