background image

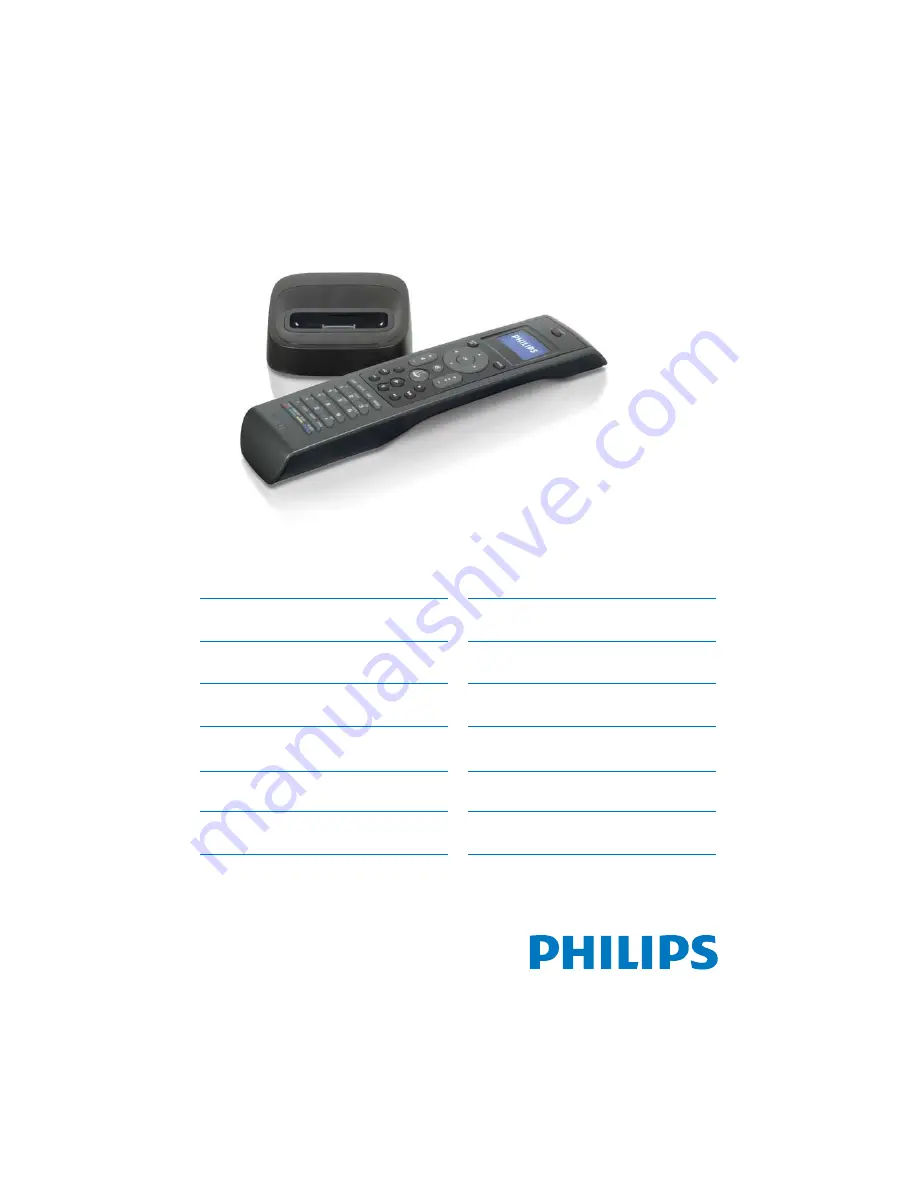
SJM3152
DSS1005/01

EN  

Universal remote and 


 docking cradle for iPod™

3

DE

Universalfernbedienung und 


 Dockingstation für iPod™

26

FR  

Télécommande universelle et 
station d’accueil pour iPod™

49

NL  

Universele afstandsbediening 
en basisstation voor de iPod™

72

ES

Mando a distancia universal 
y estación base para iPod™

95

IT

Telecomando universal e base
de suporte para iPod™

118

PT

Universal remote and 
docking cradle for iPod™

141

www.philips.com/welcome

SV

Universalfjärrkontroll och 
dockningsstation för iPod™

164

EL

ƔƧƫƥƷƥƩƱƩƳƴƞƱƩƯƣƥƭƩƪƞƲƷƱƞƳƧƲ
ƪơƩƢƜƳƧƳƽƭƤƥƳƧƲƣƩơL3RGŒ

187

PL

Pilot uniwersalny i podstawka 

GRNXMĀFD

do odtwarzacza iPod™

210

ǠǺǵǯDzǽǾǭǸȉǺȈǶǼȀǸȉǿ

RU

 DZǵǾǿǭǺȃǵǻǺǺǻǰǻȀǼǽǭǯǸDzǺǵȌ

ǵDZǻǷȀǾǿǽǻǶǾǿǯǻDZǸȌL3RGŒ

233

8QLYHU]iOQtGiONRYîRYODGDĈD

CS

 GRNRYDFtNROpENDSUR]Dŏt]HQt

iPod™

256

HU

   Univerzális távirányító és dokkoló 

az iPod™ használatához   

279

TR

iPod™ için evrensel uzaktan 

NXPDQGDYHEDĚODQW×FLKD]×

302

Summary of Contents for DSS1005/01

Page 1: ...e para iPod 118 PT Universal remote and docking cradle for iPod 141 www philips com welcome SV Universalfjärrkontroll och dockningsstation för iPod 164 EL ƔƧƫƥƷƥƩƱƩƳƴƞƱƩƯ ƣƥƭƩƪƞƲ ƷƱƞƳƧƲ ƪơƩ ƢƜƳƧ ƳƽƭƤƥƳƧƲ ƣƩơ L3RG 187 PL Pilot uniwersalny i podstawka GRNXMĀFD do odtwarzacza iPod 210 ǠǺǵǯDzǽǾǭǸȉǺȈǶ ǼȀǸȉǿ RU DZǵǾǿǭǺȃǵǻǺǺǻǰǻ ȀǼǽǭǯǸDzǺǵȌ ǵ DZǻǷ ȀǾǿǽǻǶǾǿǯǻ DZǸȌ L3RG 233 8QLYHU iOQt GiONRYî RYODGDĈ D CS GRNRY...

Page 2: ......

Page 3: ...4 2 Browsing and playing music from your iPod 12 4 3 Using your universal remote for iPod as a universal remote control 14 4 4 Starting up an activity 15 4 5 Replacing the batteries 15 5 Use more of your universal remote and docking cradle for iPod 16 5 1 Adding a device 16 5 2 Deleting a device 17 5 3 Fixing a key 17 5 4 Adding a function 18 5 5 Adding an activity 18 5 6 Deleting an activity 19 5...

Page 4: ...ned to provide reasonable protection against harmful interference in a residential installation This equipment generates uses and can radiate radio frequency energy and if not installed and used in accordance with the instructions may cause harmful interference to radio communications However there is no guarantee that interference will not occur in a particular installation If this equipment does...

Page 5: ...ential negative consequences for the environment and human health B Warnings s O NOT EXPOSE THE PRODUCT TO RAIN or water s EEP AWAY FROM SUNLIGHT TO PREVENT HEAT build up s O NOT DISASSEMBLE OR REPAIR s EEP AWAY FROM HIGH VOLTAGE DEVICES s 7HEN YOU REPLACE THE BATTERIES DO NOT mix different brands of batteries or place zinc carbon batteries in the remote This can trigger unpredictable behavior Tak...

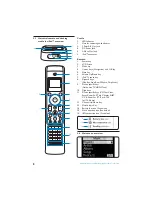
Page 6: ...ht operation Distance for controlling these devices is limited to 30 feet and the remote must be in the line of sight of the IR port on your AV equipment Only devices with an IR sensor can be controlled by the remote This section gives you an overview of the controls and functions of this universal remote with docking cradle for iPod Product highlights s ONTROLS I0OD 466 2 6 PLAYER cable and satel...

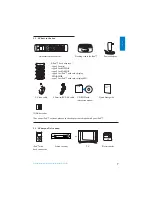
Page 7: ...ion manual 3 AA batteries For newer iPod versions please use the adapter that shipped with your iPod 2 2 What you ll also need or iPod with Stereo receiver TV Electric outlet dock connector Your universal remote and docking cradle for IPod 5 iPod dock adapters s TYPE FOR MINI s TYPE FOR s TYPE FOR s TYPE FOR I0OD WITH COLOR DISPLAY s TYPE FOR I0OD WITH COLOR DISPLAY AC ...

Page 8: ...k keys Play Rec Stop Rew FF Pause Skip Next 9 Device specific keys UIDE IVE 46 ENU 10 Digit keys 11 Device specific keys CC Text Clear Enter Zoom 16 9 Title Chapter SUBT CC Zoom for 27 Text 16 9 for 10 Audio 12 Channel Up Down key 13 MainVolume Key 14 Battery low icon See below 15 No connection icon See below 16 IR Transmission icon See below 2 4 Main menu overview 1 6 2 3 4 5 1 2 3 4 5 6 7 8 9 0 OK...

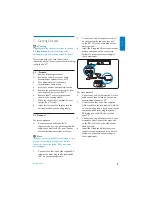
Page 9: ...ote If you are not using the device with video or you plan on connecting to video via the S Video connection leave the yellow RCA connector end unplugged 2 Connect the other end of the supplied AV cable with 3 5mm plug to the jack labeled AV on your docking cradle 3 Connect one end of the power cord to an electrical outlet and the other end to the DC 12V jack on the back of your docking cradle 4 I...

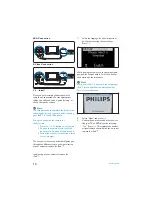
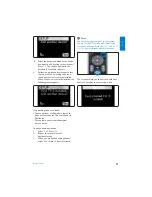
Page 10: ...zard screen prompts The easy on screen set up wizard will guide you through the different steps on the initial set up of your universal remote for iPod Initial set up of your universal remote for iPod 1 Select the language for your instructions on the remote using the cursor keys Press OK While pairing the remote to the docking cradle position the remote within 1m of the dock for the duration of t...

Page 11: ...ERFORM A FULL DATA BASE SEARCH TO find a correct code set This can take up to 25 minutes s 9OU CAN LEARN CODES FROM THE ORIGINAL remote device To add an additional device 1 Select Yes Press OK 2 Repeat this process for each additional device 3 When you are finished adding devices select No Press OK Exit the wizard D Note You can adjust the settings of your universal remote for iPod anytime after ini...

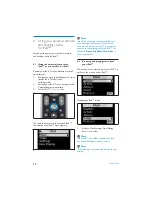
Page 12: ... to your docked iPod and displays your iPod menu playlists D Note If the No Connection icon begins blinking in the upper right hand corner of the screen the universal remote for iPod is not able to connect to the docking cradle for iPod See Section 8 Frequently Asked Questions to solve the problem 4 2 Browsing and playing music from your iPod The menu on the universal remote for iPod is similar to...

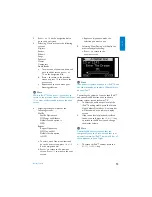
Page 13: ...OK on the navigation dial b Press to return to the previous screen Press OK to move to the next screen c Repeat until you have made the selection you want to use 5 Selecting Now Playing will display the most recently played song a Press to return to the previous screen D Note Your universal remote and dock for iPod does NOT ALLOW BROWSING OR CONTROL OF 0HOTO IBRARY on your iPod Controlling the vol...

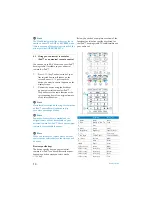
Page 14: ...universal remote for iPod Check your original remote for the available functions D Note When you awaken the remote after a time out the last device selected before the time out will be active Device specific keys The device specific keys on your universal remote for iPod can have different functions depending on the device you select via the MODE key Below you can find a complete overview of the func...

Page 15: ...an activity Selecting extra functions Devices may have extra functions that are not covered by the hard keys on your universal remote for iPod You can select these extra functions in the display 1 While in any device mode Press MAIN VOL key Extra functions for the selected device appear in the display screen 2 To scroll through all the extra functions press the cursor up or cursor down key 3 When ...

Page 16: ... list of devices includes TV 2 or VCR 2 for use when you want to program a second TV or secondVCR To add a device 1 Select the option Add a Device in the Set up menu by using the cursor keys Press OK D Note If you have already added 6 devices on the remote besides your iPod docking cradle you will be asked to delete a device 2 Select the device and brand you want to add Press OK The remote will se...

Page 17: ...d except the MODE key the MAINVOL key and IPOD LAUNCH key To fix a key 1 Select the option Fix a Key in the Set up menu by using the cursor keys Press OK 2 Select the device for which you want to fix a key Press OK 3 Confirm you have a working original remote control available to learn from by selecting Yes Press OK D Note If your universal remote for iPod has already learned 200 keys a screen will a...

Page 18: ...aximum of 25 steps By default your universal remote for iPod inserts a delay of 0 6 sec between every key press to make sure your devices are responding correctly to the signals You can overwrite this default delay s F ONE OF YOUR DEVICES NEEDS A LONGER DELAY before receiving the next IR signal you can insert a delay of 1 or 3 seconds Replacing the default delay counts as a step in the activity s ...

Page 19: ...s OK 2 Select the activity you want to delete Press OK 3 Confirm you want to delete the activity by selecting Yes Press OK The activity is deleted and becomes available again in the list of activities you can add 4 To return to the Set up menu select Exit and press OK 5 7 About RF Settings Show details You can check the status of the connection between the docking cradle and remote 1 Select the opt...

Page 20: ...ffer the following languages s NGLISH s RANCÉIS s SPANOL Models purchased in Europe offer the following languages s NGLISH s SPANOL s RANCÉIS s EUTSCH s EDERLANDS s TALIANO To change the language 1 Select the option Change language in the Set up menu by using the cursor keys Press OK 2 Select your preferred language Press OK The Set up menu appears on the screen in your preferred language 5 9 Copy...

Page 21: ...n the Set up menu by using the cursor keys Press OK 2 Select your preferred display time out Press OK The time out is changed for your universal remote for iPod The Set up menu appears on the screen D Note The display time out has an impact on the life of the batteries The longer the backlight stays on the faster the batteries will be drained 5 11 Performing a full reset You can reset your univers...

Page 22: ... provide proof of purchase in the form of an original sales receipt that shows the product name and the date of purchase For customer support or to obtain warranty service please call 919 573 7863 THERE 2 4 2 802 33 2 0 WARRANTIES Philips liability is limited to repair or at its sole option replacement of the product Incidental special and consequential damages are disclaimed where permitted by la...

Page 23: ...NE ATTERIES s PPROXIMATE ATTERY IFE MONTHS Screen s 4YPE OT ATRIX s 3IZE PIXELS BY PIXELS s IGHTING ACKLIGHTING s OLOUR BLACK WHITE Connectors s 0OD ONNECTOR s 36IDEO ACK s UDIO IN JACK s 0OWER ACK Communication and Interface Transmission Medium IR AND RF Carrier Frequency s 2 K Z s 2 Z General Operating Voltage s MIN TYPICAL 6 TO 6 Ambient Operating Temperature Range s TO Certifications s s s 5 5...

Page 24: ...ONTAINS THE HOME THEATER SYSTEMS s 062 CONTAIN PERSONAL VIDEO RECORDERS and hard disc recorders s 2 CONTAINS IGITAL EDIA RECEIVERS s 46 6 2 46 6 6 6 2 6 contain combination devices s CONTAINS THE 6 PLAYBACK functions of the game consoles e g Xbox and Play Station Not all brands are available in the database If your brand is not in the list select Not in list and perform a full database search The ...

Page 25: ...source device for your device is not installed After adding devices the SJM3152 automatically copies theVolume keys and Mute key as follows s 6IDEO DEVICES LIKE 6 6 2 6 2 and Satellite box use theVolume keys of the TV s UDIO DEVICES LIKE 2 AND Tuner use theVolume keys of the Amplifier or Receiver If you did not install the source device theVolume keys and the Mute key will not work You can choose t...

Page 26: ...chen und Wiedergeben von Musik von Ihrem iPod 35 4 3 Verwenden der Universalfernbedienung für iPod als Universalfernbedienung 37 4 4 Starten einer Aktivität 38 4 5 Wechseln der Batterien 38 5 WeitereVerwendungen der Universalfernbedienung und Dockingstation für iPod 39 INZUFàGEN VON ERËTEN ÚSCHEN VON ERËTEN ERNEN VON 4ASTENCODES 5 4 Hinzufügen von Funktionen 41 5 5 Hinzufügen von Aktivitäten 41 ÚS...

Page 27: ...schriften Diese Bestimmungen sehen einen angemessenen Schutz vor Störungen und Interferenzen bei der NSTALLATION IN 7OHNANLAGEN VOR IESES ERËT erzeugt und nutzt Hochfrequenzenergie und kann solche abstrahlen Wenn es nicht vorschriftsmäßig installiert und verwendet wird kann es Störungen des Radio und Fernsehempfangs verursachen Es kann jedoch nicht ausgeschlossen werden dass bei einer bestimmten I...

Page 28: ...O UND LEKTRONIK LTGERËTEN IN HREM AND Richten Sie sich bitte nach den geltenden Bestimmungen in Ihrem Land und entsorgen Sie Altgeräte nicht über Ihren Haushaltsabfall Durch die korrekte Entsorgung Ihrer Altgeräte werden Umwelt und Menschen vor möglichen negativen Folgen geschützt B Warnungen s 3ETZEN 3IE DAS ERËT WEDER 2EGEN NOCH Wasser aus s 3ETZEN 3IE DAS ERËT KEINEM DIREKTEM Sonnenlicht aus um...

Page 29: ... DIESER ERËTE IST AUF M BEGRENZT UND DIE Fernbedienung muss eine Sichtverbindung ZUM 2 NSCHLUSS DER 6 ERËTE HABEN IE ERNBEDIENUNG KANN NUR ERËTE STEUERN DIE über einen IR Sensor verfügen In diesem Abschnitt finden Sie eine Übersicht der Bedienelemente und Funktionen der Universalfernbedienung und Dockingstation für iPod Wichtige Produktinfos s 3TEUERUNG VON I0OD ERNSEHGERËT Videorecorder DVD Player...

Page 30: ...ung 3 AA Batterien Verwenden Sie für neuere iPod Modelle den mit dem iPod mitgelieferten Adapter 2 2 Zusätzlich benötigt oder iPod mit Stereo Receiver Fernsehgerät Netzsteckdose Dock Anschluss Universalfernbedienung und Dockingstation für iPod 5 iPod Dock Adapter s 4YP FàR MINI s 4YP FàR s 4YP FàR s 4YP FàR I0OD MIT ARBDISPLAY s 4YP FàR I0OD MIT ARBDISPLAY AC ...

Page 31: ... Wiedergabetasten Wiedergabe Aufnahme Stopp Rücklauf Schnellvorlauf Pause Überspringen Weiter ERËTESPEZIlSCHE 4ASTEN 0ROGRAMMàBERSICHT IVE 46 ENà 10 Zifferntasten ERËTESPEZIlSCHE 4ASTEN 4EXT ÚSCHEN INGABE OOMEN 4ITEL Kapitel Untertitel CC Zoomen für 27 Text 16 9 für 10 Audio ANAL AUTSTËRKETASTE 14 Symbol für schwache Batterie siehe unten 15 Symbol für keineVerbindung siehe unten 16 IR Übertragungs...

Page 32: ...eis 7ENN 3IE DAS ERËT NICHT MIT EINEM6IDEOGERËT verbinden oder es über den S Video Anschluss mit einemVideogerät verbinden möchten lassen Sie den gelben Cinch Stecker am Kabelende frei 2 Verbinden Sie den 3 5 mm Klinkenstecker des mitgelieferten AV Kabels mit der mit AV beschrifteten Buchse der Dockingstation 3 Verbinden Sie ein Ende des Stromversorgungskabels mit einer Netzsteckdose und das ander...

Page 33: ...gsassistent führt Sie durch die einzelnen Schritte der Ersteinrichtung der Universalfernbedienung für iPod Ersteinrichtung der Universalfernbedienung für iPod 1 Wählen Sie mit den Cursortasten die Sprache für die Anweisungen auf der Fernbedienung aus Drücken Sie auf OK Während der Paarung der Fernbedienung mit der Dockingstation muss sich die Fernbedienung in einem Abstand von 1 m zur Dockingstati...

Page 34: ...r Vorgang kann bis zu 25 Minuten dauern s 3IE KÚNNEN ODES VON DER RIGINALFERNBEDIENUNG lernen 3O FàGEN 3IE EIN ZUSËTZLICHES ERËT HINZU 1 Wählen Sie die Option Yes Ja aus und drücken Sie auf OK 2 Wiederholen Sie diesenVorgang für jedes ZUSËTZLICHE ERËT 7ENN 3IE DAS INZUFàGEN VON ERËTEN abgeschlossen haben wählen Sie die Option No Nein aus Drücken Sie auf OK Beenden Sie den Assistenten D Hinweis Anp...

Page 35: ...es iPod Menüs an D Hinweis Wenn in der oberen rechten Ecke des Bildschirms das Symbol für keineVerbindung zu blinken beginnt kann die Universalfernbedienung für iPod keineVerbindung zur Dockingstation für iPod herstellen Zur Problembehebung siehe Abschnitt 8 Häufig gestellte Fragen FAQ 4 2 Suchen und Wiedergeben von Musik von Ihrem iPod Das Menü der Universalfernbedienung für iPod ist dem Menü des ...

Reviews:

Related manuals for DSS1005/01