background image

4

Protect the power cord from being 

• 

walked on or pinched, particularly at 
plugs, convenience receptacles, and the 
point where they exit from the device.

Only use attachments/accessories 

• 

specified by the manufacturer.

Unplug this device during lightning storms 

• 

or when unused for long periods of time. 

Refer all servicing to qualified service 

• 

personnel. Servicing is required when the 
device has been damaged in any way, such 
as power-supply cord or plug is damaged, 
liquid has been spilled or objects have 
fallen into the device, the device has been 
exposed to rain or moisture, does not 
operate normally, or has been dropped.

Battery usage CAUTION – To prevent 

• 

battery leakage which may result in bodily 
injury, property damage, or damage to 
the unit: 

Install all batteries correctly, + and - 

• 

as marked on the unit. 
Do not mix batteries (old and new 

• 

or carbon and alkaline, etc.).
Remove batteries when the unit is 

• 

not used for a long time.
Batteries (battery pack or batteries 

• 

installed) shall not be exposed to 
excessive heat such as sunshine, fire 
or the like.

Devices shall not be exposed to dripping 

• 

or splashing. 

Do not place any sources of danger on 

• 

the device (e.g. liquid filled objects, lighted 
candles). 

Where the MAINS plug or an appliance 

• 

coupler is used as the disconnect device, 
the disconnect device shall remain readily 
operable.

1 Important

Safety


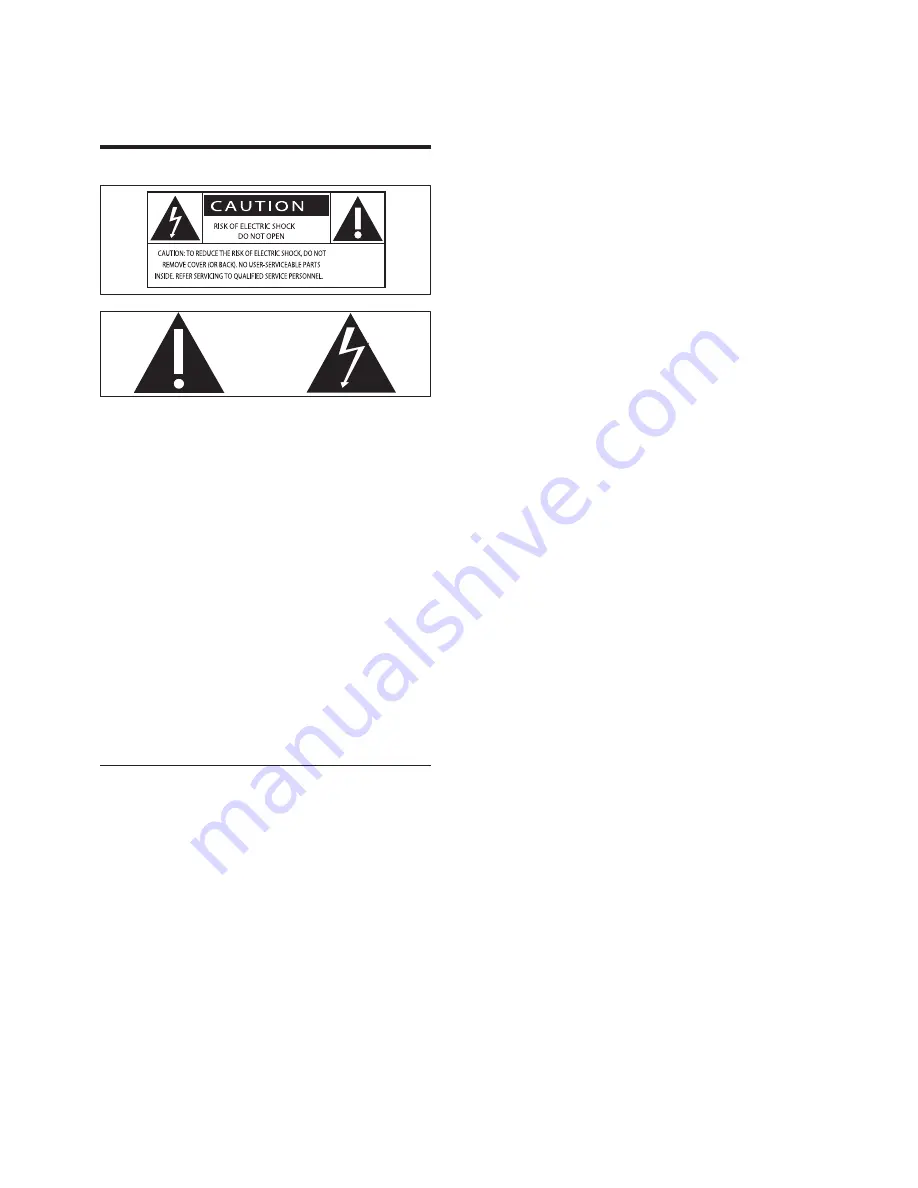
This ‘bolt of lightning’ indicates uninsulated 
material within your unit may cause an 
electrical shock. For the safety of everyone 
in your household, please do not remove 
product covering. 

The ‘exclamation mark’ draws attention 
to features for which you should read 
the enclosed literature closely to prevent 
operational and maintenance problems. 

WARNING: To reduce the risk of fire or 
electric shock, this device should not be 
exposed to rain or humidity and objects filled 
with liquids, such as vases, should not be 
placed on this device. 

CAUTION: To prevent electric shock, match 
wide blade of plug to wide slot, fully insert. 

Important Safety Instructions

Read these instructions.

• 

Heed all warnings.

• 

Follow all instructions.

• 

Do not use this device near water.

• 

Clean only with dry cloth.

• 

Do not block any ventilation openings. 

• 

Install in accordance with the 
manufacturer’s instructions.

Do not install near any heat sources such 

• 

as radiators, heat registers, stoves, or 
other devices (including amplifiers) that 
produce heat. 

EN

Summary of Contents for DC5070

Page 1: ... and get support at www philips com welcome DC5070 EN User manual 3 DA Brugervejledning 19 DE Benutzerhandbuch 35 EL Εγχειρίδιο χρήσης 53 FI Käyttöopas 73 FR Mode d emploi 89 IT Manuale utente 107 NL Gebruiksaanwijzing 125 ...

Page 2: ......

Page 3: ...it 7 Overview of the remote control 8 3 Get started 9 Connect FM antenna 9 Connect power 10 Prepare the remote control 10 Set clock 10 Turn on 11 4 Play 11 Play iPod iPhone iPad 11 Play from USB 13 5 Play options 13 Pause resume play 13 Stop play 13 Skip to a track 13 Search within a track 13 Repeat play 13 Shuffle play 14 Program tracks 14 6 Listen to the radio 14 Tune to a radio station 14 Progra...

Page 4: ... dripping or splashing Do not place any sources of danger on the device e g liquid filled objects lighted candles Where the MAINS plug or an appliance coupler is used as the disconnect device the disconnect device shall remain readily operable 1 Important Safety This bolt of lightning indicates uninsulated material within your unit may cause an electrical shock For the safety of everyone in your ho...

Page 5: ...batteries and old equipment The making of unauthorized copies of copy protected material including computer programs files broadcasts and sound recordings may be an infringement of copyrights and constitute a criminal offence This equipment should not be used for such purposes Warning Never remove the casing of this device Never lubricate any part of this device Never place this device on other ele...

Page 6: ...ration in the United States and or other countries Made for iPod Made for iPhone and Made for iPad mean that an electronic accessory has been designed to connect specifically to iPod iPhone or iPad respectively and has been certified by the developer to meet Apple performance standards Apple is not responsible for the operation of this device or its compliance with safety and regulatory standards Pl...

Page 7: ...e or Eco power standby mode Overview of the main unit a Skip to the previous next track Search within a track Tune to a radio station Set clock and timer b PRESET Select a preset radio station Skip to the previous next album VOLUME DBB DSC PROG SRC PRESET DOCK for iPod iPhone iPad DOCKING SYSTEM DC5070 AUX b a l k h g f i j e c d EN ...

Page 8: ... USB TUNER AUX DBB DSC REPEAT SHUFFLE PROG SLEEP TIMER CLOCK VOL OK MENU c f h g e d a b s r q p o n i k l m j d Display panel Show current status e PROG Program tracks Program radio stations Set the clock f SRC Select a source FM TUNER iPod iPhone iPad USB or AUX g Start or pause play h Stop play or erase a program i VOL Adjust volume j DOCK Dock for iPod iPhone iPad k AUX Connect an external aud...

Page 9: ...nnect the supplied FM antenna to the FM AERIAL jack on the back of the main unit e Skip to the previous next track Search within a track Tune to a radio station Set clock and timer f Mute or restore sound g Menu Access the iPod iPhone iPad menu Stop play or erase a program h DSC Select a preset sound setting i VOL Adjust volume j Numeric keypad Select a track Select a preset radio station k CLOCK ...

Page 10: ...24 hour format is displayed 2 Press to select 12 hour or 24 hour format and then press CLOCK The hour digits are displayed and begin to blink a b c Connect power Caution Risk of product damage Ensure that the power supply voltage corresponds to the voltage printed on the back or the underside of the unit Risk of electric shock When you unplug the AC power cord always pull the plug from the socket ...

Page 11: ...ress CLOCK The minute digits are displayed and begin to blink 4 Press to set the minute 5 Press CLOCK to confirm Turn on Press The unit switches to the last selected source Switch to standby Press again to switch the unit to standby mode The backlight on the display panel is reduced The clock if set appears on the display panel To switch to Eco power standby mode Press and hold for more than two se...

Page 12: ...hone iPad source 2 Play audio on your iPod iPhone iPad The audio in connected iPod iPhone iPad streams from this docking system automatically If not press To navigate the menu press MENU and press to select and then press OK to confirm Charge the iPod iPhone iPad When the unit is connected to power the docked iPod iPhone iPad begins to charge automatically Note iPod with color display iPod classic ...

Page 13: ...ing play press REPEAT repeatedly to select r1 repeat one The current track is played repeatedly rA repeat all All tracks are played repeatedly repeat is displayed 2 To return to normal play press REPEAT repeatedly until repeat mode is no longer displayed Play from USB Note Ensure that the USB device contains playable audio content 1 Press USB on the remote control or press SRC repeatedly on the ma...

Page 14: ...O SRCH auto search is displayed All available stations are programmed in the order of waveband reception strength The first programmed radio station is broadcast automatically Shuffle play 1 During play press SHUFFLE shuffle is displayed All tracks are played in a random sequence 2 To return to normal play press SHUFFLE again Note The repeat and shuffle play cannot be activated at the same time Shuffle...

Page 15: ...estore sound Program radio stations manually 1 Tune to a radio station 2 Press PROG to activate program mode PROG program blinks on the display 3 Press to allocate a number 1 to 20 to this radio station and then press PROG to confirm The preset number and the frequency of the preset station are displayed 4 Repeat the above steps to program other stations Note To overwrite a programmed station store...

Page 16: ...y automatically after a set period of time 1 When the unit is turned on press SLEEP TIMER repeatedly to select a set period of time in minutes When sleep timer is activated is displayed To deactivate sleep timer 1 Press SLEEP TIMER repeatedly until SLEEP OFF sleep off is displayed When sleep timer is deactivated disappears Set the alarm timer This docking system can be used as an alarm clock You c...

Page 17: ...orted formats Empty albums an empty album is an album that does not contain MP3 WMA files and will not be shown in the display Unsupported file formats are skipped For example Word documents doc or MP3 files with extension dlf are ignored and not played AAC WAV PCM audio files DRM protected WMA files wav m4a m4p mp4 aac WMA files in Lossless format 9 Product information Note Product information is subje...

Page 18: ...ing this device check the following points before requesting service If the problem remains unsolved go to the Philips web site www philips com welcome When you contact Philips ensure that the device is nearby and the model number and serial number are available No power Ensure that the AC power plug of the unit is connected properly Ensure that there is power at the AC outlet To save power the sy...

Page 19: ... 2011 Koninklijke Philips Electronics N V All rights reserved DC5070_UM_10_Book 1_V1 0 ...

Reviews: