7
EN
3 Get started
Caution
•
Make sure that you have read the safety instructions in
the 'Important safety instructions' section before you
connect and install your handset.
Connect the base station
Warning
•
5LVNRISURGXFWGDPDJH(QVXUHWKDWWKHSRZHUVXSSO\
YROWDJHFRUUHVSRQGVWRWKHYROWDJHSULQWHGRQWKHEDFN
or the underside of the phone.
•
8VHRQO\WKHVXSSOLHGSRZHUDGDSWHUWRFKDUJHWKH
batteries.
Note
•
,I\RXVXEVFULEHWRWKHGLJLWDOVXEVFULEHUOLQH'6/KLJK
VSHHGLQWHUQHWVHUYLFHWKURXJK\RXUWHOHSKRQHOLQH
HQVXUH\RXLQVWDOOD'6/ÀOWHUEHWZHHQWKHWHOHSKRQH
OLQHFRUGDQGWKHSRZHUVRFNHW7KHÀOWHUSUHYHQWV
noise and caller ID problems caused by the DSL
LQWHUIHUHQFH)RUPRUHLQIRUPDWLRQRQWKH'6/ÀOWHUV
contact your DSL service provider.
•
The type plate is located on the bottom of the base
station.
1
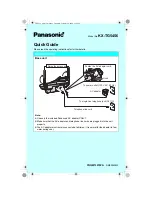
Connect each end of the power adapter
WR
• the DC input jack at the bottom of the
base station;
• the power socket on the wall.
2
&RQQHFWHDFKHQGRIWKHOLQHFRUGWR
• the telephone socket at the bottom of
the base station;
• the telephone socket on the wall.
3
Connect each end of the power adapter
WRIRUPXOWLKDQGVHWYHUVLRQRQO\
• the DC input jack at the bottom of the
H[WUDKDQGVHWFKDUJHU
• the power socket on the wall.


