background image

45

11. Troubleshooting & FAQs

11. Troubleshooting & FAQs

11.1 Troubleshooting

This page deals with problems that can be 

corrected by a user. If the problem still persists 

after you have tried these solutions, contact 

Philips customer service representative.

  Common Problems

No Picture (Power LED not lit)

•  Make sure the power cord is plugged into 

the power outlet and into the back of the 

monitor. 

•  First, ensure that the power button on the 

front of the monitor is in the OFF position, 

then press it to the ON position.

No Picture (Power LED is White)

•  Make sure the computer is turned on. 
•  Make sure the signal cable is properly 

connected to your computer. 

•  Make sure the monitor cable has no bent 

pins on the connect side. If yes, repair or 

replace the cable. 

•  The Energy Saving feature may be activated

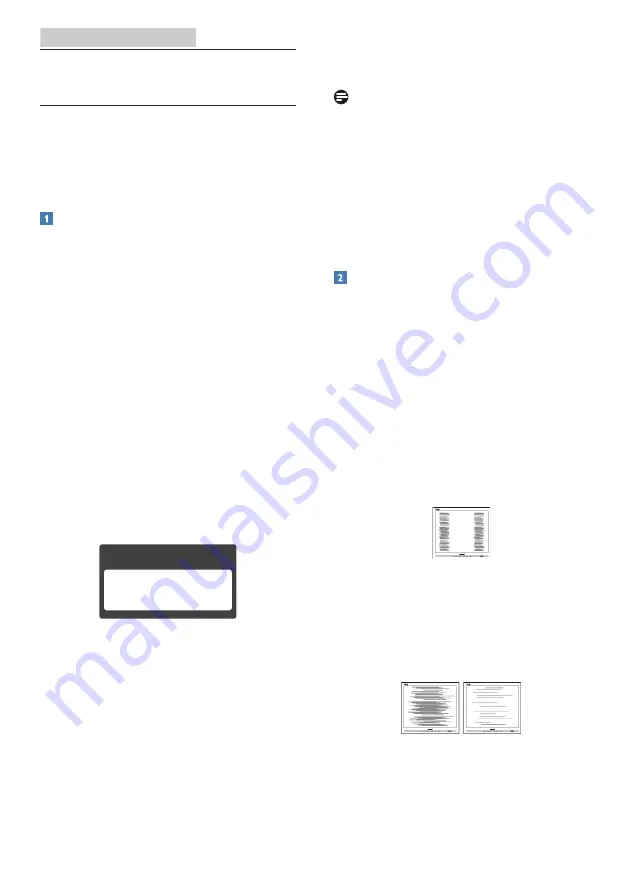
Screen says

Attention

Check cable connection

•  Make sure the monitor cable is properly 

connected to your computer. (Also refer to 

the Quick Start Guide). 

•  Check to see if the monitor cable has bent 

pins. 

•  Make sure the computer is turned on. 

AUTO button doesn't function

•  The auto function is applicable only in 

VGA-Analog mode. If the result is not 

satisfactory, you can do manual adjustments 

via the OSD menu.


Note

The Auto Function is not applicable in DVI-

Digital mode as it is not necessary. 

Visible signs of smoke or sparks

•  Do not perform any troubleshooting steps
•  Disconnect the monitor from mains power 

source immediately for safety

•  Contact with Philips customer service 

representative immediately.

  Imaging Problems

Image is not centered

•  Adjust the image position using the “Auto” 

function in OSD Main Controls. 

•  Adjust the image position using the Phase/

Clock of Setup in OSD Main Controls. It is 

valid only in VGA mode. 

Image vibrates on the screen

•  Check that the signal cable is properly 

securely connected to the graphics board 

or PC. 

Vertical flicker appears

•  Adjust the image using the “Auto” function 

in OSD Main Controls.

•  Eliminate the vertical bars using the Phase/

Clock of Setup in OSD Main Controls. It is 

valid only in VGA mode.

Horizontal flicker appears

•  Adjust the image using the “Auto” function 

in OSD Main Controls. 

Summary of Contents for Brilliance 221B6

Page 1: ...www philips com welcome 221P6 221B6 EN User manual 1 Customer care and warranty 40 Troubleshooting FAQs 45 ...

Page 2: ...martImage 11 3 2 SmartContrast 12 3 3 Philips SmartControl Premium 12 3 4 SmartDesktop Guide 19 4 PowerSensor 24 5 LightSensor 25 6 Built in Webcam with Microphone 26 7 Technical Specifications 27 7 1 Resolution Preset Modes 31 8 Power Management 32 9 Regulatory Information 33 10 Customer care and warranty 40 10 1 Philips Flat Panel Monitors Pixel Defect Policy 40 10 2 Customer Care Warranty 42 11...

Page 3: ...cable or DC power cord for normal operation Please use approved power cord provided by Philips all the time If your power cord is missing please contact with your local service center Please refer to Customer Care Consumer Information Center Do not subject the monitor to severe vibration or high impact conditions during operation Do not knock or drop the monitor during operation or transportation ...

Page 4: ...r or integration please contact with your local service center please refer to the chapter of Consumer Information Center For transportation information please refer to Technical Specifications Do not leave your monitor in a car trunk under direct sun light Note Consult a service technician if the monitor does not operate normally or you are not sure what procedure to take when the operating instr...

Page 5: ...r utmost to make the packaging easily separable into mono materials Please find out about the local regulations on how to dispose of your old monitor and packing from your sales representative Taking back Recycling Information for Customers Philips establishes technically and economically viable objectives to optimize the environmental performance of the organization s product service and activiti...

Page 6: ...nd are used under license from Koninklijke Philips N V Monitor drivers SmartControl software User s Manual 使用 前请阅读使用说明 保留备用 Audio Power DP DVI USB Depends on the country Install the base 1 Place the monitor face down on a smooth surface Pay attention not to scratch or damage the screen 2 Hold the stand with both hands 1 Gently attach the stand to theVESA mount area until the latch locks the stand ...

Page 7: ...splayPort input 5 DVI input 6 VGA input 7 AC power input 8 Power Switch 9 USB upstream 10 USB downstream 11 USB fast charger 221P6QPYKE 2 3 6 1 7 8 4 5 11 10 9 1 Kensington anti theft lock 2 Audio input 3 Earphone jack 4 DisplayPort input 5 DVI input 6 VGA input 7 AC power input 8 Power Switch 9 USB upstream 10 USB downstream 11 USB fast charger ...

Page 8: ... cable to the video connector on the back of your computer 4 Plug the power cord of your computer and your monitor into a nearby outlet 5 Turn on your computer and monitor If the monitor displays an image installation is complete 2 2 Operating the monitor Description of the control buttons 221P6QPYE 8 7 6 2 5 4 3 1 Switch monitor s power ON and OFF Access the OSD menu Confirm the OSD adjustment Ad...

Page 9: ...martImage hot key There are 6 modes to select Office Photo Movie Game Economy Off 8 Webcam activity light 9 2 0 Megapixel Webcam 10 Microphone 11 LightSensor 221B6QPYE 7 6 2 5 4 3 1 Switch monitor s power ON and OFF Access the OSD menu Confirm the OSD adjustment Adjust the OSD menu PowerSensor Adjust the speaker volume Return to previous OSD level SmartImage hot key There are 6 modes to select Off...

Page 10: ...ments later on Main menu Sub menu Picture Input OSD Settings Setup Language Color Audio Audio In DisplayPort LightSensor PowerSensor Picture Format Brightness Contrast Horizontal Vertical Transparency Power LED OSD Time Out Auto V Position Phase Clock Resolution Notification Reset Information English Deutsch Español Ελληνική Français Italiano Maryar Nederlands Português Português do Brazil Polski ...

Page 11: ...n 1920 1080 60 Hz When the monitor is powered on at a different resolution an alert is displayed on screen Use 1920 1080 60 Hz for best results Display of the native resolution alert can be switched off from Setup in the OSD On Screen Display menu Physical Function Tilt 20 5 Swivel 175 175 Height adjustment 130mm Pivot 90 0 ...

Page 12: ... the monitor base to its maximum height 2 Place the monitor face down on a smooth surface Pay attention not to scratch or damage the screen Then lift the monitor stand 3 While keeping the release button pressed tilt the base and slide it out Note This monitor accepts a 100mm x 100mm VESA Compliant mounting interface VESA Mounting Screw M4 Always contact manufacturer for wall mount installation 100...

Page 13: ...eep pressing to toggle among Office Photo Movie Game Economy and Off 3 The SmartImage on screen display will remain on screen for 5 seconds or you can also press OK to make confirmation There are six modes to select Office Photo Movie Game Economy and Off Photo Movie Game Economy ff Office SmartImage Office Enhances text and dampens brightness to increase readability and reduce eye strain This mod...

Page 14: ...lors and control backlight intensity This function will dynamically enhance contrast for a great entertainment experience when viewing videos or playing games 3 3 Philips SmartControl Premium The new SmartControl Premium software by Philips allows you to control your monitor via an easy to use on screen graphic interface Complicated adjustments are a thing of the past as this user friendly softwar...

Page 15: ...nstruction and do the adjustment Cancel prompts user if you want to cancel installation Color menu Color Menu allows you to adjust RGB Black Level White Point Display Gamma Calibration SmartImage and SmartKolor You can follow the instruction and do the adjustment Refer to below table for sub menu item base on your input Example for Color Calibration ...

Page 16: ...ibration sequence 3 Quick View loads the before after images 4 To return to Color home pane click the Cancel button 5 Enable color calibration by default is on If unchecked does not allow for color calibration to happen dimes out start and quick view buttons 6 Must have patent info in calibration screen ...

Page 17: ...is set SmartContrast and SmartResponse are enabled Eco Power menu Options menu Options Preferences Will only be active when selecting Preferences from the drop down Options menu On a non supported display capable of DDC CI only the Help and Options tabs are available Displays current preference settings A checked box enables the feature The check box is a toggle Enable Context Menu on desktop is c...

Page 18: ...file Any preset set to run at startup will not load when this box is unchecked Disabled Enable transparency mode Windows 7 Windows 8 Vista XP Default is 0 Opaque Options Audio Will only be active when selectingVolume from the drop down Options menu On a non supported display capable of DDC CI only the Help and Options tabs are available Option Auto Pivot Options Input Will only be active when sele...

Page 19: ...rrence Enabled is displayed Disable Theft Deterrence Mode opens pane screen on next page PIN Options button only available after user creates PIN button opens secure PIN web site Help menu Help User Manual Will only be active when selecting User Manual from the drop down Help menu On a non supported display capable of DDC CI only the Help and Options tabs are available Help Version Will only be ac...

Page 20: ...chnical Support Displays the tech support page Check for Update Takes the user to PDI Landing and checks the user s version against the most current available About Displays detailed reference information product version release information and product name Exit Close SmartControl Premium To run SmartControl Premium again either select SmartControl Premium from Program menu double click the deskto...

Page 21: ...ible when dragging the window Show windows contents while dragging is disabled To enable 1 In Control Panel click System 2 Click Advanced system settings ForVista Win7 Win8 OS this is located on the left sidebar 3 In Performance section click Settings 4 In the box check Show window contents while dragging and click OK Other alternative path Vista Control Panel Personalization Window Color and Appe...

Page 22: ...nd allows the user to quickly change to any of the partitions shown in the drop down Note If more than one display is attached the user can select the targeted display to change the partition The highlighted icon represents the current active partition 3 Identify Partition Displays the outline grid on the desktop for the current partition 4 Align On Align Off Enables disables the drag and drop aut...

Page 23: ... multiple windows to the same partition Find Window will show all open windows and move the selected window to the forefront Desktop Partition Desktop Partition shows the current selected partition and allows the user to quickly change to any of the partitions shown in the drop down Identify Partition Displays the outline grid on the desktop for the current partition Align On Align Off Enables dis...

Page 24: ...horizontal top Partition 2 horizontal center Partition 3 horizontal bottom For 270 Partition 3 horizontal top Partition 2 horizontal center Partition 1 horizontal bottom Vertical Split Left Assesses the screen resolution and divides the display into two vertical regions the left hand side is a single region the right hand side is split into two evenly sized regions For 90 Partition 1 on top Partit...

Page 25: ...r 270 Partition 1 on left sideVertical Partition 2 3 on right sideVertical Horizontal Split Bottom Assesses the screen resolution and divides the display into two evenly sized horizontal regions the bottom region is single the top region is spilt into two evenly sized regionsFor 90 Partition 1 2 on right sideVertical Partition 3 on left sideVertical For 270 Partition 1 2 on left sideVertical Parti...

Page 26: ...r 40 inches from the monitor use the maximum detection signal for distances up to 120 cm or 47 inches Setting 4 Since some dark colored clothing tends to absorb infrared signals even when the user is within 100 cm or 40 inches of the display step up signal strength when wearing black or other dark clothes Hot key Sensor distance 3 Landscape Portrait mode ATTENTION PowerSensor off ATTENTION PowerSe...

Page 27: ...ng the incoming signal to automatically adjust picture quality settings Light Sensor uses a sensor to adjust the picture brightness depending on the room light conditions How to enable LightSensor 1 Press button on the front bezel to enter OSD menu screen 2 Press or button to select main menu LightSensor then press button OK 3 Press or button to turn on or off the LightSensor ...

Page 28: ...USB 2 0 or above UVC UAC support 6 2 Using the device Philips monitor with webcam device transmits video and sound data through USB port It can be enabled by simply connecting your USB cable from your PC to the USB upstream of USB hub on the side IO of monitor Connect your USB cable to upstream of USB hub on the side IO of monitor from PC side Turn on your PC and make sure your internet connection...

Page 29: ...nalog DisplayPort USB 221P6QPYE USB 3 0 4 includes 1 fast charger 221P6QPYKE USB 3 0 3 includes 1 fast charger 221B6QPYE USB 2 0 4 Input Signal Separate Sync Sync on Green Audio In Out PC audio in headphone out Convenience Built in speaker 2 W x 2 User Convenience OSD Languages English German Spanish Greek French Italian Hungarian Dutch Portuguese Brazil Portuguese Polish Russian Swedish Finnish T...

Page 30: ...de White Standby Sleep mode White blinking PowerSensor 4 3W typ Power Supply Built in 100 240V AC 50 60Hz Power 221P6QPYKE On Mode 21 5W typ 50W max Sleep Standby 0 3W Off 0 2W Off AC switch 0W On Mode ECO mode 13 4W typ Power EnergyStar test method Energy Consumption AC InputVoltage at 100VAC 50Hz AC InputVoltage at 115VAC 60Hz AC InputVoltage at 230VAC 50Hz Normal Operation 15 04W typ 15 45W typ...

Page 31: ...50Hz Normal Operation 51 88 BTU hr typ 50 48 BTU hr typ 45 26 BTU hr typ Sleep Standby 0 65 BTU hr 0 65 BTU hr 0 85 BTU hr Off 0 38 BTU hr 0 41 BTU hr 0 61 BTU hr Off AC switch 0 BTU hr 0 BTU hr 0 BTU hr Power LED indicator On mode White Standby Sleep mode White blinking PowerSensor 4 3W typ Power Supply Built in 100 240V AC 50 60Hz Dimensions Product with stand WxHxD 511 x 488 x 257 mm Product wi...

Page 32: ...NIAN CCC CECP PSE KC ICES 003 E standby J MOSS Cabinet Color Silver Black Finish Texture Note 1 EPEAT Gold or Silver is valid only where Philips registers the product Please visit www epeat net for registration status in your country 2 This data is subject to change without notice Go to www philips com support to download the latest version of leaflet 3 Smart response time is the optimum value fro...

Page 33: ...480 66 67 37 86 640 x 480 72 81 37 50 640 x 480 75 00 37 88 800 x 600 60 32 46 88 800 x 600 75 00 48 36 1024 x 768 60 00 60 02 1024 x 768 75 03 44 77 1280 x 720 59 86 60 1280 x 960 60 63 89 1280 x 1024 60 02 79 98 1280 x 1024 75 03 55 94 1440 x 900 59 89 70 64 1440 x 900 74 98 65 29 1680 x 1050 59 95 67 50 1920 x 1080 60 00 Note Please notice that your display works best at native resolution of 19...

Page 34: ...0W max White Sleep Standby OFF No No 0 3W typ White blink Switch Off OFF 0W typ OFF 221P6QPYKE Power Management Definition VESA Mode Video H sync V sync Power Used LED Color Active ON Yes Yes 21 5W typ 50W max White Sleep Standby OFF No No 0 3W typ White blink Switch Off OFF 0W typ OFF 221B6QPYE Power Management Definition VESA Mode Video H sync V sync Power Used LED Color Active ON Yes Yes 21 5W ...

Page 35: ...of different plastics used Product Lifetime Product Take Back Minimum one year product warranty Minimum three year availability of spare parts Product takeback Packaging Limits on hazardous substances in product packaging Packaging prepared for recycling Ergonomic User centered design Visual ergonomics in products with a display Adjustability for user comfort displays headsets Acoustic performance...

Page 36: ...ployees for TCO versions Lead free Product Lead free display promotes environmentally sound recovery and disposal of waste from electrical and electronic equipment Toxic substances like Lead has been eliminated and compliance with European community s stringent RoHs directive mandating restrictions on hazardous substances in electrical and electronic equipment have been adhered to in order to make...

Page 37: ...ettre des hyperfréquences qui si l appareil n est pas installé et utilisé selon les consignes données peuvent causer des interférences Energy Star Declaration www energystar gov As an ENERGY STAR Partner we have determined that this product meets the ENERGY STAR guidelines for energy efficiency Note We recommend you switch off the monitor when it is not in use for a long time Federal Communication...

Page 38: ...x communications radio Cependant rien ne peut garantir l absence d interférences dans le cadre d une installation particulière Si cet appareil est la cause d interférences nuisibles pour la réception des signaux de radio ou de télévision ce qui peut être décelé en fermant l équipement puis en le remettant en fonction l utilisateur pourrait essayer de corriger la situation en prenant les mesures su...

Page 39: ...n Vorschriften Auf der Rückwand des Gerätes befindet sich ein Aufkleber der auf die Unbedenklichkeit der Inbetriebnahme hinweist da dieVorschriften über die Bauart von Störstrahlern nach Anlage III 5 Abs 4 der Röntgenverordnung erfüllt sind Damit Ihr Monitor immer den in der Zulassung geforderten Werten entspricht ist darauf zu achten daß 1 Reparaturen nur durch Fachpersonal durchgeführt werden 2 ...

Page 40: ... ethers in concentrations exceeding 0 1 weight and 0 01 weight for cadmium except for the exemptions set in Schedule 2 of the Rule E Waste Declaration for India This symbol on the product or on its packaging indicates that this product must not be disposed of with your other household waste Instead it is your responsibility to dispose of your waste equipment by handing it over to a designated coll...

Page 41: ...d should not be greater than 5A NOTE The severed plug must be destroyed to avoid a possible shock hazard should it be inserted into a 13A socket elsewhere A B How to connect a plug The wires in the mains lead are coloured in accordance with the following code BLUE NEUTRAL N BROWN LIVE L GREEN YELLOW EARTH E 1 The GREEN YELLOW wire must be connected to the terminal in the plug which is marked with ...

Page 42: ...ds for certain types or combinations of pixel defects that are more noticeable than others This policy is valid worldwide subpixel pixel Pixels and Sub pixels A pixel or picture element is composed of three sub pixels in the primary colors of red green and blue Many pixels together form an image When all sub pixels of a pixel are lit the three colored sub pixels together appear as a single white p...

Page 43: ...pixels 2 or fewer 3 adjacent dark subpixels 0 Distance between two black dot defects 15mm Total black dot defects of all types 5 or fewer TOTAL DOT DEFECTS ACCEPTABLE LEVEL Total bright or black dot defects of all types 5 or fewer Note 1 1 or 2 adjacent sub pixel defects 1 dot defect 2 This monitor is ISO9241 307 compliant ISO9241 307 Ergonomic requirement analysis and compliance test methods for ...

Page 44: ...3122 1223 Free of charge Mon to Fri 9am 6pm Ireland Celestica 353 01 601 1161 Local call tariff Mon to Fri 8am 5pm Italy Anovo Italy 39 840 320 041 0 08 Mon to Fri 9am 6pm Luxembourg Ecare 352 26 84 30 00 Local call tariff Mon to Fri 9am 6pm Netherlands Ecare 31 0900 0400 063 0 10 Mon to Fri 9am 6pm Norway Infocare 47 2270 8250 Local call tariff Mon to Fri 9am 6pm Poland MSI 48 0223491505 Local ca...

Page 45: ...ssic Service I I c 7 727 3097515 Latvia NA ServiceNet LV 371 67460399 371 27260399 Lithuania NA UAB Servicenet 370 37 400160 general 370 7400088 for Philips Macedonia NA AMC 389 2 3125097 Moldova NA Comel 37322224035 Romania NA Skin 40 21 2101969 Russia NA CPS 7 495 645 6746 Serbia Montenegro NA KimTec d o o 381 11 20 70 684 Slovakia NA Datalan Service 421 2 49207155 Slovenia NA PC H and 386 1 530...

Page 46: ... 6030100 Sun Thu 10 00am 6 00pm Singapore Philips Electronics Singapore Pte Ltd Philips Consumer Care Center 65 6882 3966 Mon Fri 9 00am 6 00pm Sat 9 00am 1 00pm Taiwan FETEC CO 0800 231 099 Mon Fri 09 00 18 00 Thailand Axis Computer System Co Ltd 662 934 5498 Mon Fri 8 30am 05 30pm South Africa Computer RepairTechnologies 011 262 3586 Mon Fri 8 00am 05 00pm Israel Eastronics LTD 1 800 567000 Sun ...

Page 47: ...the monitor cable has bent pins Make sure the computer is turned on AUTO button doesn t function The auto function is applicable only in VGA Analog mode If the result is not satisfactory you can do manual adjustments via the OSD menu Note The Auto Function is not applicable in DVI Digital mode as it is not necessary Visible signs of smoke or sparks Do not perform any troubleshooting steps Disconne...

Page 48: ... as monitor s recommended screen native resolution Green red blue dark and white dots appears on the screen The remaining dots are normal characteristic of the liquid crystal used in today s technology Please refer the pixel policy for more detail The power on light is too strong and is disturbing You can adjust power on light using the power LED Setup in OSD main Controls For further assistance r...

Page 49: ...to establish ownership of the monitor 11 3General FAQs Q1 When I install my monitor what should I do if the screen shows Cannot display this video mode Ans Recommended resolution for this monitor 1920 x 1080 60 Hz Unplug all cables then connect your PC to the monitor that you used previously In the Windows Start Menu select Settings Control Panel In the Control Panel Window select the Display icon...

Page 50: ...OK to enter color setting there are three settings as below 1 ColorTemperature The six settings are 5000K 6500K 7500K 8200K 9300K and 11500K With settings in the 5000K range the panel appears warm with a red white color tone while a 11500K temperature yields cool bluewhite toning 2 sRGB This is a standard setting for ensuring correct exchange of colors between different device e g digital cameras ...

Page 51: ...e a screen saver or a periodic screen refresh application may result in severe burn in or after image or ghost image symptoms that will not disappear and cannot be repaired The damage mentioned above is not covered under your warranty Q12 Why is my Display not showing sharp text and is displaying jagged characters Ans Your LCD monitor works best at its native resolution of 1920 x 1080 60 Hz For be...

Page 52: ... rights reserved Philips and the Philips Shield Emblem are registered trademarks of Koninklijke Philips N V and are used under license from Koninklijke Philips N V Specifications are subject to change without notice Version M6221PBE1L ...

Reviews: