background image

User Manual BDL4230ET

RETURN TO THE CONTENTS

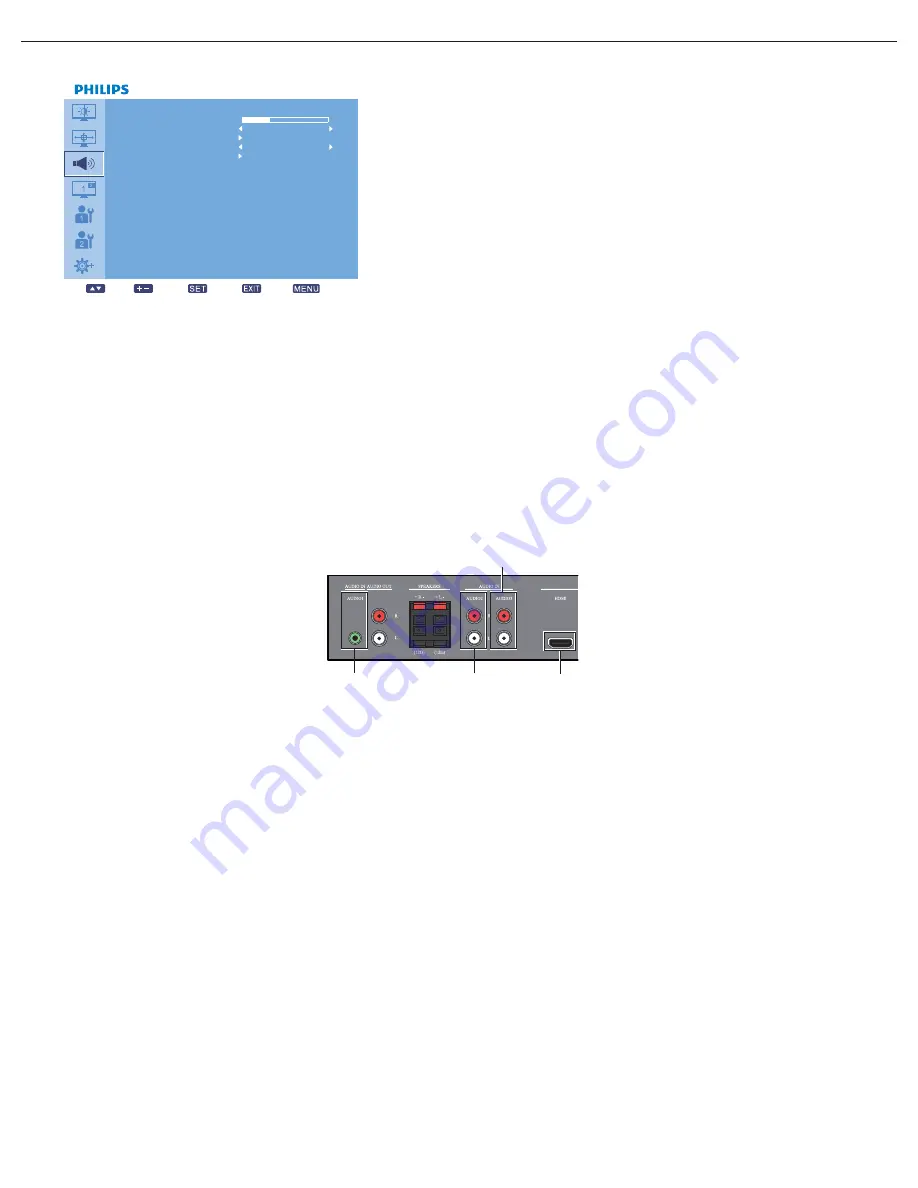
5.2.3.    AUDIO MENU

VOLUME

Adjust to increase or decrease the audio output level.
Use the 

PLUS

/

MINUS

 button to adjust.

MUTE

To turn the mute function on/off.
Use the 

PLUS

/

MINUS

 button to make selection.

AUDIO SOURCE

To select the audio input source according to the source connected to the audio input and HDMI sockets on 
the display.

Press the 

SET/PLUS

 button to open the submenu, and then press the 

UP

/

DOWN

 button to toggle 

between

SPEAKER

Set the display to play audio using the built-in (internal) speaker, external speakers or external audio devices 
(if connected).
Use the 

PLUS

/

MINUS

 button to toggle between

AUDIO RESET

Reset all settings in the 

AUDIO

 menu.

Press the 

SET/PLUS

 button to open the submenu, and then press the 

UP

/

DOWN

 button to make 

selection. Select 

YES

 and press the 

SET

 button to restore settings to factory preset values. Press the 

EXIT


button to cancel and return to the previous menu.

• 

AUDIO 1

• 

AUDIO 2

• 

AUDIO 3

• 

HDMI

• 

INTERNAL

• 

EXTERNAL

• 

LINE-OUT

AU DI O
VOLUME
M UTE
AU DI O SOUR CE
SPEA KER
AU DI O RESET

 30

Sel

A djus t

Enter

Ba ck

Qui t

OFF

IN TERNA L

AUDIO 1

AUDIO 2

AUDIO 3

HDMI

Summary of Contents for BDL4230ET -

Page 1: ...BDL4230ET www philips com welcome EN User manual Cleaning and troubleshooting ...

Page 2: ...an your display To avoid the risk of shock or permanent damage to the set do not expose the display to dust rain water or an excessively moist environment If your display becomes wet wipe it with dry cloth as soon as possible If a foreign substance or water gets in your display turn the power off immediately and disconnect the power cord Then remove the foreign substance or water and send the unit...

Page 3: ...from stoves or any other heat sources Remove any object that could fall into the vents or prevent proper cooling of the display s electronics Do not block the ventilation holes on the cabinet Keep the display dry To avoid electric shock do not expose it to rain or excessive moisture When turning off the display by detaching the power cable or DC power cord wait for 6 seconds before re attaching th...

Page 4: ...f not installed and used in accordance with the instructions may cause harmful interference to radio communications However there is no guarantee that interference will not occur in a particular installation If this equipment does cause harmful interference to radio or television reception which can be determined by turning the equipment off and on the user is encouraged to try to correct the inte...

Page 5: ...dards PN 93 T 42107 and PN 89 E 06251 ELECTRIC MAGNETIC AND ELECTRONMAGNETIC FIELDS EMF 1 MMD manufactures and sells many products targeted at consumers which like any electronic apparatus in general have the ability to emit and receive electromagnetic signals 2 One of MMD s leading Business Principles is to take all necessary health and safety measures for our products to comply with all applicab...

Page 6: ...hould not be greater than 5A Note Any severed plug must be destroyed to avoid a possible shock hazard should it be inserted into a 13A socket elsewhere How to connect a plug The wires in the mains lead are colored in accordance with the following code BLUE NEUTRAL N BROWN LIVE L GREEN YELLOW EARTH E 1 The GREEN AND YELLOW wire must be connected to the terminal in the plug which is marked with the ...

Page 7: ... T11363 2006 ޚ 㾘ᅮⱘ䰤䞣㽕 DŽ ֱՓ ᳳ䰤 ℸ 䆚ᣛᳳ䰤 कᑈ ˈ ᄤֵᙃѻકЁ ⱘ ᆇ 䋼 ܗ ℷᐌՓ ⱘᴵӊϟϡӮথ さবˈ ᄤֵᙃѻક Փ 䆹 ᄤֵᙃѻકϡӮᇍ ๗䗴៤Ϲ䞡 ᶧ ᇍ Ҏ䑿ǃ䋶ѻ䗴៤Ϲ䞡ᤳᆇⱘᳳ䰤DŽ ljᑳᓗ ᄤѻકಲᬊ໘ ㅵ ᴵ NJᦤ ᗻ䇈ᯢ Ўњ དഄ ঞֱᡸഄ ˈᔧ ϡ ݡ 䳔㽕ℸѻક ѻકᇓੑ㒜ℶᯊˈ䇋䙉ᅜ ᆊᑳᓗ ᄤѻકಲᬊ໘ Ⳍ ᕟ 㾘ˈᇚ Ѹ㒭ᔧഄ ᆊ䅸ৃⱘಲᬊ໘ 䌘䋼ⱘॖଚ䖯㸠ಲᬊ໘ DŽ 䚼ӊৡ ᆇ 䋼 ܗ 䪙 Pb Hg 䬝 Cd Ӌ䫀 Cr 6 㘨㣃 PBB Ѡ㣃䝮 PBDE O O O O O O 䴶ᵓ X X O O O O 䏃ᵓ㒘ӊ X O O O O O 䰘ӊ 䘹 ˈ 㒓ˈ䖲 㒓 X O O O O O 䘹 X O O O O O ...

Page 8: ...ct www eia org Consumer Education Initiative WASTE ELECTRICAL AND ELECTRONIC EQUIPMENT WEEE Attention users in the European Union private households This marking on the product or on its packaging illustrates under European Directive 2002 96 EG governing used electrical and electronic appliances that this product may not be disposed of with normal household waste You are responsible for the dispos...

Page 9: ...IDEO INPUT 3 2 4 USING HDMI INPUT 3 3 CONNECTING A PC 3 3 1 USING VGA INPUT 3 3 2 USING DVI INPUT 3 3 3 USING HDMI INPUT 3 4 EXTERNAL AUDIO CONNECTION 3 4 1 CONNECTING EXTERNAL SPEAKERS 3 4 2 CONNECTING EXTERNAL AUDIO DEVICE 3 5 CONNECTING ANOTHER BDL4230ET DISPLAY 3 6 CONNECTING THE TOUCH MODULE 4 USING THE TOUCH SCREEN 4 1 CALIBRATING THE TOUCH SCREEN 4 2 IMPORTANT INSTRUCTIONS FOR USING THE TOU...

Page 10: ...LS AND SUB PIXELS 7 2 TYPES OF PIXEL DEFECTS DOT DEFINITION 7 3 BRIGHT DOT DEFECTS 7 4 DARK DOT DEFECTS 7 5 PROXIMITY OF PIXEL DEFECTS 7 6 PIXEL DEFECT TOLERANCES 8 CLEANING AND TROUBLESHOOTING 8 1 CLEANING 8 2 TROUBLESHOOTING 9 TECHNICAL SPECIFICATIONS ...

Page 11: ...e box and material can be saved for any event where the unit needs to be shipped to another location External speakers and table stands are offered as optional extras and are not included with your display 1 3 INSTALLATION NOTES Due to the high power consumption always use the plug exclusively designed for this product If an extended line is required please consult your service agent The product s...

Page 12: ... for wall mounting not included Tighten the screws securely recommended torque 470 635N cm The mounting interface should comply with the UL1678 standard in North America The mounting means should be strong enough to bear the weight of the display approx 28 kg 61 7 lb without stands Warning Not for use in portrait mode Warranty will be void if installed in any orientation other than landscape ...

Page 13: ...ls from the remote control Detects the ambient lighting conditions around the display Indicates the operating status of the unit lights green when the display is turned on lights red when the display is in standby mode blinks green when remote control signal is received blinks red when the display enters DPMS mode off when the main power of the display is turned off 1 ...

Page 14: ...n Display menu is active use these as the PLUS MINUS menu buttons 5 POWER button Use this button to turn the display on or into standby mode 6 Power indicator Indicates the operating status of the unit lights green when the display is turned on lights red when the display is in standby mode blinks red when the display enters DPMS mode off when the main power of the display is turned off 7 Smart In...

Page 15: ... 7 VGA OUT Outputs the VGA signal from the VGA IN jack 8 VGA IN Connects to the VGA output of a computer 9 RS232C OUT IN RS232C network connection input output for the use of loop through function 10 VIDEO IN COMPONENT Component video input YPbPr for connecting to the component output of an AV device 11 VIDEO IN S VIDEO S Video input for connecting to the S Video output of an AV device 12 VIDEO OU...

Page 16: ...I D VGA COMPONENT S VIDEO and VIDEO AUDIO SOURCE button To activate the audio source selection menu Press repeatedly to select the video input source from HDMI AUDIO 1 AUDIO 2 and AUDIO 3 Picture format button To switch screen aspect ratio between FULL NORMAL DYNAMIC CUSTOM REAL and 21 9 Note This button cannot function when TOUCH FEATURE is turned on PIP Picture In Picture buttons ON OFF button T...

Page 17: ...utton To move the highlight bar down to adjust the selected item when OSD menu is on To move the sub picture down in PIP mode PLUS button To increase the adjustment with OSD menu To move the sub picture right in PIP mode MINUS button To decrease the adjustment with OSD menu To move the sub picture left in PIP mode SET button To activate the changed settings inside OSD menu AUTO ADJUST button Note ...

Page 18: ...e 2 4 3 OPERATING RANGE OF THE REMOTE CONTROL When pressing a remote control button point the top of the remote control towards the remote control sensor Use the remote control within a distance of about 10m 32ft from the display s remote control sensor and within a horizontal and vertical angle of 45 degrees Note The remote control may not function properly if the remote control sensor on the dis...

Page 19: ... colored labeled as Y jack of the device to the green colored Y jack of the display 2 Connect the blue colored labeled as Pb jack of the device to the blue colored Pb jack of the display 3 Connect the red colored labeled as Pr jack of the device to the red colored Pr jack of the display 4 Connect the red R and white L audio jacks of the device to the AUDIO IN AUDIO2 or AUDIO3 jacks of the display ...

Page 20: ... 2 Connect the red R and white L audio jacks of the device to the AUDIO IN AUDIO2 or AUDIO3 jacks of the display 3 2 3 USING VIDEO INPUT 1 Connect the Video connector of the external device to the VIDEO IN input of the display 2 Connect the red R and white L audio jacks of the device to the AUDIO IN AUDIO2 or AUDIO3 jacks of the display DVD VCR VCD DVD VCR VCD ...

Page 21: ...HDMI connector of the external device to the HDMI input of the display 3 3 CONNECTING A PC 3 3 1 USING VGA INPUT 1 Connect the 15 pin VGA connector of the PC to the VGA IN connector of the display 2 Connect the audio cable to the AUDIO IN AUDIO1 input of the display DVD VCR VCD PC ...

Page 22: ... to the DVI D connector of the display 2 Connect the audio cable to the AUDIO IN AUDIO1 input of the display 3 3 3 USING HDMI INPUT 1 Connect the DVI D connector of the PC to the HDMI connector of the display using a DVI HDMI cable 2 Connect the audio cable to the AUDIO IN AUDIO1 input of the display PC PC ...

Page 23: ...o the external speaker SPEAKERS output of the display 2 Turn on the unit Note Make sure your display is turned off before connecting the speaker wires 3 4 2 CONNECTING EXTERNAL AUDIO DEVICE Connect the red R and white L audio jacks of the external audio device to the AUDIO OUT R L jacks of the display External speaker External audio device ...

Page 24: ...gnal being used Connect the VGA OUT connector of the display to the VGA IN connector of additional BDL4230ET unit Connect the RS232C OUT connector of the display to the RS232C IN connector of additional BDL4230ET unit Connect the VIDEO OUT connector of the display to the VIDEO IN connector of additional BDL4230ET unit Connect the AC OUT connector of the display to the AC IN connector of an externa...

Page 25: ...ou have installed the USB cable on the display to a PC Multi touch functions are only supported by Windows 7 Home Premium Professional Enterprise and Ultimate versions For Windows XP Windows Vista and Windows 7 Starter and Home Basic versions multi touch is not supported OS functions Gesture actions For Windows XP Windows Vista and Windows 7 Click Tap the screen once Double click Tap the screen tw...

Page 26: ...ack Forward Quickly drag your finger Flick in a desired direction Multi touch functions For Windows 7 Home Premium Professional Enterprise and Ultimate versions Right click 1 Press on the target 2 Tap the screen with another finger 3 Release the second finger Scrolling Drag one or two fingers up or down OS functions Gesture actions or ...

Page 27: ...ove two fingers in opposing directions Use one finger to pivot around another Supported by specific applications Tap two fingers simultaneously The target should be the midpoint between the fingers For Windows XP Windows Vista and Windows 7 Wakeup from Windows sleep mode S3 Press and hold for 4 seconds OS functions Gesture actions ...

Page 28: ...e the password or provide confirmation 3 Follow the instructions on the screen and tap Yes to save your calibration settings 4 2 IMPORTANT INSTRUCTIONS FOR USING THE TOUCH SCREEN You can calibrate the touch screen using the Windows 7 calibration routine Do not bend the retro reflective bars The touch screen cannot function normally if the bars are bent Keep the touch screen out of direct sunlight ...

Page 29: ...L 1 Press the MENU button on the remote control to display the OSD menu 2 Press the UP DOWN button to choose the item you want to adjust 3 Press the PLUS SET button to enter the submenu 4 In the submenu press the UP DOWN button to toggle between items or press PLUS MINUS button to adjust settings If there is a submenu press the SET button to enter it 5 Press the EXIT button on the remote control t...

Page 30: ...se the item you want to adjust 3 Press the ENTER VIDEO SOURCE button to enter the submenu 4 In the submenu press the button to toggle between items or press button to adjust settings If there is a submenu press the ENTER VIDEO SOURCE button to enter it 5 Press the MENU button on the remote control to return to the previous menu or press the MENU button repeatedly to exit the OSD menu ...

Page 31: ...o remove the noise in the image You can select a suitable noise reduction level Use the PLUS MINUS button to make selection TINT Note For VIDEO S VIDEO COMPONENT and HDMI inputs with YUV color space only YUV is a color space typically used as part of a color image pipeline Adjust to change the color tint of the image Use the PLUS MINUS button to adjust Press the PLUS button and the flesh tone colo...

Page 32: ...the OSD menu Choose to enable or disable the ambient light sensor Once enabled the image brightness will adjust automatically as the ambient lighting conditions change Use the PLUS MINUS button to make selection SMART CONTRAST Note This function is not available when LIGHT SENSOR or BRIGHTNESS under PANEL SAVING is turned on Disable these functions to make SMART CONTRAST accessible from the OSD me...

Page 33: ...n to move the image down CLOCK Notes For VGA input only This function is not available when TOUCH FEATURE is turned on Disable TOUCH FEATURE to make this function accessible from the OSD menu Adjust the width of the image Press the PLUS button to expand the width of the image or press the MINUS button to shrink it CLOCK PHASE Notes For VGA input only This function is not available when TOUCH FEATU...

Page 34: ...ancel and return to the previous menu FULL This mode restores the correct proportions of pictures transmitted in 16 9 using the full screen display NORMAL The picture is reproduced in 4 3 format and a black band is displayed on either side of the picture DYNAMIC Fill the entire screen by stretching 4 3 pictures non proportionally CUSTOM Choose to apply the custom zoom settings in the CUSTOM ZOOM s...

Page 35: ...ggle between SPEAKER Set the display to play audio using the built in internal speaker external speakers or external audio devices if connected Use the PLUS MINUS button to toggle between AUDIO RESET Reset all settings in the AUDIO menu Press the SET PLUS button to open the submenu and then press the UP DOWN button to make selection Select YES and press the SET button to restore settings to factor...

Page 36: ...en MAIN Select audio from the main picture PIP Select audio from the sub picture PIP RESET Reset all settings in the PIP menu Press the SET PLUS button to open the submenu and then press the UP DOWN button to make selection Select YES and press the SET button to restore settings to factory preset values Press the EXIT button to cancel and return to the previous menu Notes The PIP function is only ...

Page 37: ...s the UP DOWN button to toggle between BRIGHTNESS Select ON and the brightness of the image will be reduced to an appropriate level and the BRIGHTNESS setting in the PICTURE menu will become unavailable Use the PLUS MINUS button to make selection PIXEL SHIFT Select the time interval for the display to slightly expand the image size and shift the position of pixels in four directions up down left a...

Page 38: ...lect YES and press the SET button to restore settings to factory preset values Press the EXIT button to cancel and return to the previous menu FACTORY RESET Reset all settings in the PICTURE SCREEN AUDIO PIP CONFIGURATION 1 CONFIGURATION 2 and ADVANCED OPTION menus Press the SET PLUS button to open the submenu and then press the UP DOWN button to make selection Select YES and press the SET button ...

Page 39: ...e OFF 24 hours from current time Use the PLUS MINUS button to adjust Note When the SLEEP TIMER is activated SCHEDULE settings will be disabled OSD H POSITION Adjust the horizontal position of the OSD menu Use the PLUS MINUS button to adjust OSD V POSITION Adjust the vertical position of the OSD menu Use the PLUS MINUS button to adjust MONITOR INFORMATION Shows the information about your display in...

Page 40: ...g the gamma properly can have a huge influence on the overall picture quality of your display Select a display gamma value to best suit the image and optimize image brightness and contrast Use the PLUS MINUS button to toggle between SCAN MODE Notes For VIDEO S VIDEO COMPONENT and HDMI video mode inputs only SCAN MODE will be set to UNDERSCAN and disabled when TOUCH FEATURE is turned on Change the ...

Page 41: ...DL4230ET units are connected via RS232C cables Press the SET PLUS button to open the submenu and then press the UP DOWN button to toggle between NORMAL All units can be operated normally by the remote control PRIMARY Designate this display as the primary unit for remote control operation Only this display will be operated by the remote control SECONDARY Designate this display as the secondary unit...

Page 42: ...nabled HEAT STATUS This function allows you to check the thermal status of the display at any time The accuracy of the temperature indicated is 5 degrees Celsius Press the SET button to view the heat status Press the EXIT button to return to the previous menu DATE AND TIME Adjusts current date and time for the display s internal clock Press the PLUS button to open the submenu Press the UP DOWN but...

Page 43: ... button to move to the minute slot Press the UP DOWN button to set the power off minute to 30 then press the EXIT button 7 Press the PLUS button to highlight the INPUT item and then press the UP DOWN button to select HDMI 8 Press the PLUS button to select TUE and then press the SET button A check mark will appear in the box indicating that it has been selected 9 Press the PLUS button to select WED...

Page 44: ...play will power on at 10 00 AM and off at 9 00 PM If there are multiple schedule items programmed for the same time period then the highest numbered schedule item has priority For example if schedule items 1 and 2 both set the display to power on at 7 00 AM and off at 5 00 PM then only schedule item 1 will take effect MONITOR ID Set the ID number for controlling the unit via the RS232C connection ...

Page 45: ...ray 75 Hz 78 75 MHz WXGA 1280 768 60 Hz 79 5 MHz 5 3 Wide XGA WXGA 1280 800 60 Hz 79 5 MHz 16 10 Wide XGA SXGA 1280 960 60 Hz 108 MHz 4 3 Super XGA SXGA 1280 1024 60 Hz 108 MHz 5 4 Super XGA WXGA 1360 768 60 Hz 85 5 MHz 16 9 Wide XGA WXGA 1366 768 60 Hz 85 5 MHz 16 9 Wide XGA UXGA 1600 1200 60 Hz 162 MHz 4 3 Ultra XGA HD1080 1920 1080 60 Hz 148 5 MHz 16 9 HD1080 Standard Resolution Active Resoluti...

Page 46: ...ipes might appear on the screen when the PC power is turned off or if the PC is disconnected If this happens press the INPUT button to enter the video mode Also make sure that the PC is connected If horizontal synchronous signals seem irregular in RGB mode check PC power saving mode or cable connections The display settings table complies with IBM VESA standards and based on analog input ...

Page 47: ...pes or combinations of pixel defects are more noticeable than others Philips sets even higher quality standards for those 7 1 PIXELS AND SUB PIXELS A pixel or picture element is composed of three sub pixels in the primary colors of red green and blue Many pixels together form an image When all sub pixels of a pixel are lit the three colored sub pixels together appear as a single white pixel When a...

Page 48: ...rk dots 1 pair of dark dots Minimum distance between dark dots Total no of all defective dots 7 6 PIXEL DEFECT TOLERANCES In order to qualify for repair due to pixel defects during the warranty period a PDP TFT panel in a Philips LCD display must have pixel or sub pixel defects exceeding the tolerances listed in the following table One lit red green or blue sub pixel Two adjacent lit sub pixels Re...

Page 49: ...ft lint free cloth If the surface becomes dirty soak a soft lint free cloth in a mild detergent solution Wring the cloth to remove excess liquid Wipe the surface of the display to remove dirt Then use a dry cloth of the same type to dry Do not scratch or hit the surface of the panel with fingers or hard objects of any kind Do not use volatile substances such as sprays solvents and thinners Cabinet...

Page 50: ... zoom mode is not correctly set Use the ZOOM MODE or CUSTOM ZOOM function in the SCREEN menu to fine tune display geometry and time frequency parameter Can hear sound but no picture Improperly connected source signal cable Make sure that both video inputs and sound inputs are correctly connected Can see picture but no sound is heard 1 Improperly connected source signal cable 2 Volume is turned all...

Page 51: ...pe A Digital RGB TMDS Video Audio MAX Video 720p 1080p 1920 x 1080 60 Hz WUXGA Audio 48 KHz 2 Channel L R DVI D Input DVI D Jack x 1 Digital RGB TMDS Video RGB Input D Sub Jack x 1 15 pin Analog RGB 0 7V p p 75 H CS V TTL 2 2k SOG 1V p p 75 MAX 720p 1080p 1920 x 1080 60 Hz WUXGA 3 5mm Mini jack x 1 Audio 0 5V rms Normal 2 Channel L R RGB Output D Sub Jack x 1 15 pin Analog RGB 0 7V p p 75 H CS V T...

Page 52: ...20 80 RH No condensation 5 95 RH No condensation Pressure Operational Storage Shipment 800 1100 hPa Altitude 0 4 000 m 700 1100 hPa Altitude 0 15 000 m Item Specifications Type 1 Way 1 Speaker Input 12 W RMS Impedance 8 Output Sound Pressure 82 dB W M Frequency Response 160 Hz 13 KHz Item Specifications Technology Optical Resolution Points Area Function 32767 x 32767 Capability 2 simultaneous touc...

Page 53: ...User Manual BDL4230ET RETURN TO THE CONTENTS ...

Reviews: